Table of Contents
Advertisement
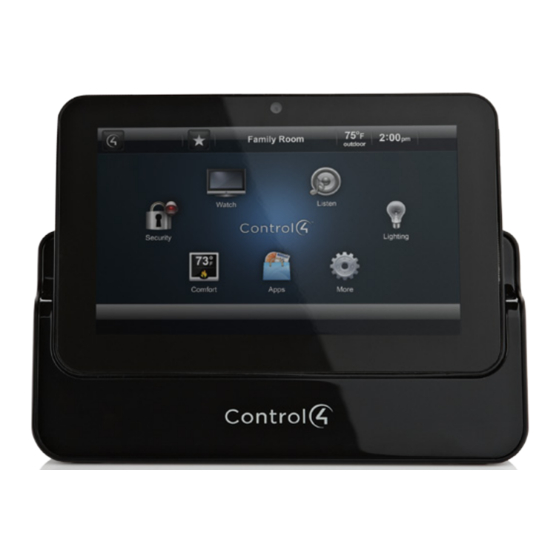
7" Portable Touch Screen
with Camera
Setup Guide
Supported Models
• C4-TSMC7-EN-BL - 7" Portable Touch Screen
with Camera, Black
• C4-TSMC7-INT - 7" Portable Touch Screen with
Camera, International Version
Box Contents
Carefully unpack the Control4® 7" Portable Touch
Screen with Camera and ensure the following items
are included in the box.
CAUTION!
Do not apply excessive pressure
to the Touch Screen display during handling.
Doing so can crack the screen and damage
the Touch Screen.
• Control4 7" Portable Touch Screen with Camera
• Control4 7" Portable Touch Screen with Camera
Dock
• DC Power Adapter (only use the power supply
provided)
• (Optional) Two (2) screws for securing the dock
to the Touch Screen
• Warranty Card
Requirements
• Phillips head screwdriver
™
• Two (2) screws (included) to secure the Touch
Screen to the dock
Accessories
• Control4 Power over Ethernet Injector
(AC-POE1-B), sold separately
• International Power Supply (C4-TSIPS, for UK, EU,
and AU)
Specifications
Screen
7" 16:9 WXGA Color LCD Module
Resolution: 800 x 480
Brightness: 400 nits (without Touch
Screen)
Wireless
-Built In IEEE802.11 b/g/n Wireless LAN
-Integral Antenna (b/g/n supported)
-Authentication: WEP, WPA, WPA2
Dimensions
7.5" (190.5 mm) x 5" (127 mm) x .075"
(W x H x D)
(19.05 mm) (without charging dock)
Weight
1.75 lbs. (.793 kg)
Network
-WiFi (802.11 b/g/n) wireless access
point (WAP) already configured to
communicate with a Control4 Controller
(e.g., HC-300).
-Wireless-N is recommended for video.
Note: Intercom usage. 802.11b is not
recommended or supported for video
intercom.
Front and Rear Panel Descriptions
Figure 1. Front View
9
3
10
10
2
7
1
Camera. Used for video Intercom with another
compatible Control4 device in another room.
2
Programmable Buttons (4). Used to program
5
1
8
2
6
4
1
Advertisement
Table of Contents

Subscribe to Our Youtube Channel
Related Manuals for Control 4 C4-TSMC7-EN-BL


Summary of Contents for Control 4 C4-TSMC7-EN-BL
-
Page 1: Specifications
Resolution: 800 x 480 Brightness: 400 nits (without Touch Screen) Wireless -Built In IEEE802.11 b/g/n Wireless LAN -Integral Antenna (b/g/n supported) -Authentication: WEP, WPA, WPA2 Dimensions 7.5” (190.5 mm) x 5” (127 mm) x .075” (W x H x D) (19.05 mm) (without charging dock) Supported Models Weight 1.75 lbs. (.793 kg) Network -WiFi (802.11 b/g/n) wireless access • C4-TSMC7-EN-BL - 7” Portable Touch Screen point (WAP) already configured to communicate with a Control4 Controller with Camera, Black (e.g., HC-300). • C4-TSMC7-INT - 7” Portable Touch Screen with -Wireless-N is recommended for video. Camera, International Version Note: Intercom usage. 802.11b is not Box Contents recommended or supported for video intercom. Carefully unpack the Control4® 7” Portable Touch Front and Rear Panel Descriptions Screen with Camera and ensure the following items are included in the box. -
Page 2: Power And Network Connections
™ LED Color Touch Screen Status - Not charging - Screensaver mode, blank - Screensaver mode, charging - Off, charging 7” Portable Green - On, not charging - Suspend/asleep, not charging Touch Screen Green (blinking) - Booting, not charging Green (fast blinks) - Restoring, not charging with Camera Orange - On, charging - Suspend/asleep, charging Setup Guide Orange (blinking) - Booting while charging Orange (fast - Restoring while charging blinks) various home automation activities in Composer programming. NOTES: (1) If the device is OFF, press Power. Power Button. Used to power the Touch Screen If the device is asleep, press any button or tap on or off. See “Touch Screen Modes.” the screen. (2) The device must be connected Touch Screen. The front face of the Touch Screen. to a power supply for at least six (6) hours so Reset/Restore Pinhole. Used to reset or restore the battery can fully charge. (3) If the battery the factory defaults. - Page 3 Figure 4. Right View Using the Touch Screen as a Portabie Device Use the 7” Portable Touch Screen dock as the Programmable Buttons docking station for the Touch Screen (see Figure 6). (on right and left sides) NOTE: You must set up for WiFi if the Touch Screen will be used as a portable device. See “Configure the Network Settings.” Speaker Place the 7” Portable Touch Screen dock on a flat surface. Power. This device can be powered using either an Ethernet connector or a PoE connector. Insert the power cable into the power jack slot on the back of the device (see Figure 6). Plug the power cord into a wall outlet. To use Ethernet, plug the RJ-45 connector Figure 5. Back View with Dock and Connectors into the PoE connector and then into the Ethernet jack on the back of the Touch Screen dock (see Figure 6). NOTE: If you use Ethernet and undock the Touch Screen, you will lose connectivity. Figure 6. Back View with Power Connections Touch Screen Dock Touch Screen Portable or Tabletop Installation Options...
-
Page 4: Configure The Network Settings
Remove the two (2) rubber protectors from the • Wake. The screen displays anything other than a screw holes on the bottom of the Touch Screen’s screen saver. To force the device into Sleep mode, dock. press and release the Power button. Insert the Touch Screen into its dock. Configure the Network Settings Turn the Touch Screen and dock upside down and insert the two (2) screws (included). Screw the dock to the Touch Screen (Figure 7). You must configure the network settings on this Touch Screen so it can communicate with the other devices in the Control4 system. Figure 7. Bottom View: Dock and Screw Holes Screw Holes to attach To configure the network settings for this device: Touch Screen Touch Screen to Dock If using a wireless network, ensure that the WiFi WAP is on the same network as the Control4 Controller in the system. Gather the following wireless network information from your WAP: • SSID (Service Set Identifier). • WEP/WPA/WPA2 security key, if enabled. • IP Addressing Requirements: The default is DHCP (with dynamic addresses). If you need to use a... - Page 5 Select each box one at a time, and type the Verify that the Name, IP Address, and default address: IP Address, Subnet Mask, Default location (room) display on the Touch Screen to Gateway, Preferred DNS, and Alternate DNS. ensure all of the correct connections. When the keyboard appears, type the address, and then tap Done. Configure in Composer Tap OK to return to the Network page. Using Composer Pro, add the driver for the 7” You can now connect to a Control4 Director running Portable Touch Screen with Camera to your project. on a Control4 device on the network. See Composer Pro Getting Started on the Control4 Connect to Director from the Touch Dealer website for details. Screen Start Composer and connect to a Director. NOTES: (1) The Touch Screen’s controls are Add the Touch Screen object to the project: auto-populated by a project on the Controller In the System Design View (default view) to which it connects. If the subsystem buttons project tree (left pane), highlight the room are not lit, and no default room displays on where the Touch Screen resides. the Touch Screen, you are not connected to...
-
Page 6: Power Off
- If ‘Turn Backlight Off’ is set to 3 mins and To power off the Touch Screen, press and hold the ‘Suspend’ is set to Never, the battery will last half Power button for at least five (5) seconds, and then as long as the default settings due to increased wait a few more seconds for the device to turn off. battery use. Battery Instructions - If ‘Turn Backlight Off’ is off and ‘Suspend’ is off, the battery will last about a quarter as long as the default settings due to increased battery use. Battery Charging For more information about Power Management and • For safety reasons, the battery is shipped only Intercom use, see the Control4 System User Guide on partially charged. When you are ready to use the the Control4 website. Touch Screen, fully charge the battery in its the dock for at least four (4) hours. Cleaning the Touch Screen and Dock • If you remove the Touch Screen from the dock for long periods of time, the Touch Screen turns off. Unplug the power jack from the dock. In this case, insert the Touch Screen into the dock Use a soft, damp cloth to wipe off the surface. again to recharge the Touch Screen. A Red or Orange LED indicates that it’s charging. See “LED Troubleshooting Indicators” for more details about the LEDs. - Page 7 - Entrez en contact avec toujours un paperclip into these pinholes will permanently fournisseur des services Control4® autorisé damage the microphones. See Figure 2. pour l’aide si n’importe quelle réparation ou ajustement est exigée. • Unplug the dock and plug it back in. • If pressing the Reset/Restore pinhole button Warnung! Um Körperverletzung zu does not solve the problem, as a last resort, vermeiden, verstehen Sie und folgen Sie perform a factory restore. Press and hold the diese Sicherheitsanweisungen bevor Sie den Reset/Restore pinhole button (see Figure 2 for drahtlosen Control4® Touch Screen betreiben: the location) until the Power LED begins to blink rapidly. This will reset all configurations. The - Unter Verwendung abgedroschenen factory restore process may take 3-5 minutes to oder beschädigt kann Netzanschlusskabel complete. Elektroschock oder Feuer ergeben. - Treten Sie immer mit einem autorisierten If the Touch Screen is damaged... Control4® Diensterbringer für Unterstützung • Contact the Control4 Dealer or Reseller from in Verbindung, wenn irgendeine Reparatur whom you purchased the Touch Screen. oder Justage angefordert wird. If you have network connection problems... CAUTION! To avoid data loss or equipment • View the system’s wireless status by checking the damage, understand and follow these safety WiFi indicator on the Touch Screen’s Navigator. precautions before operating this Touch...
- Page 8 Screen: Important! N’employez pas les stylos ou les objets pointus pour diriger ou pour faire des - Do not use or place the Touch Screen near choix sur l’écran. Pour choisir un article ou un sources of heat or expose it to direct sunlight rouleau par une liste, employez votre bout du for an extended period of time. Store it in a doigt. cool and dry place. - Do not use pens or sharp objects to write on Wichtig! Benutzen Sie nicht Federn oder the screen. scharfe Gegenstände, um oder Vorwähleren auf dem Schirm zu bilden zu steuern. Um Attention! Pour éviter la perte de données ou ein Einzelteil oder eine Rolle durch eine Liste les dommages aux équipments, comprenez vorzuwählen, benutzen Sie Ihre Fingerspitze. et suivez ces mesures de sécurité avant d’actionner le Control4® 7” ; Écran tactile tenu IMPORTANT! Improper use or installation can dans la main : cause LOSS/DAMAGE OF PROPERTY. - Ne laissez pas le paquet de batterie entrer Important! L’utilisation ou l’installation inexacte en contact avec d’autres objets en métal. peut causer LOSS/DAMAGE DE PROPRIÉTÉ. - N’utilisez pas ou ne placez pas l’écran tactile près des sources de chaleur ou ne l’exposez Wichtig! Unsachgemäßer Gebrauch oder pas à la lumière du soleil directe pendant une Installation können LOSS/DAMAGE DER période prolongée. EIGENSCHAFT verursachen. - Stockez-le dans un endroit frais et sec. N’employez pas les stylos ou les objets IMPORTANT! Using this product in a manner pointus pour écrire sur l’écran. other than outlined in this document voids your warranty. Further, Control4 is NOT liable...
-
Page 9: Regulatory/Safety Information
©2012 Control4. All rights reserved. Control4, the Control4 logo, the Control4 iQ logo and the Control4 certified logo are registered trademarks or trademarks of Control4 Corporation in the United States and/or other countries. All other names and brands may be claimed as the property of their respective owners.
Need help?
Do you have a question about the C4-TSMC7-EN-BL and is the answer not in the manual?
Questions and answers