Table of Contents
Advertisement
Advertisement
Chapters
Table of Contents

Related Manuals for LG-Ericsson LDP-7008 D


Summary of Contents for LG-Ericsson LDP-7008 D
- Page 1 Important Safety Information...
- Page 2 Important Safety Information...
- Page 3 Important Safety Information...
- Page 4 LDP-7000 Series Model LDP-7008D LDP-7004D LDP-7004N...
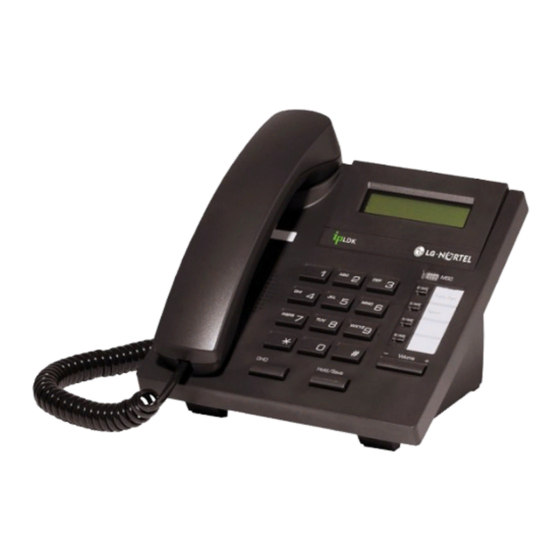
- Page 5 Input/Output Devices and Button LDP-7008D LCD Display Handset Headphone Socket (Ear/Mic Mode) Speaker Speaker Button Hold/Save Button Volume Button Loop Button Message Waiting LED Dnd/Fwd Button Call Back Button Flexible Button Speed Button Trans/Pgm Button Handsfree Microphone...
- Page 6 Input/Output Devices and Button LDP-7004D LCD Display (LDP-7004D only) Handset Speaker OHD Button Hold/Save Button Message Waiting LED Trans/Pgm Button Speed Button Flexible Button(Loop Button) Volume Button...
- Page 7 Input/Output Devices and Button Item Description Handset Used for handset call. Earphone-Jack The optional earphone into the handset to provide a hands- free phone conversation. Speaker Outputs tones and voice. Speed Button Used to access speed dialing, speed programming, saved number redial.
- Page 8 Input/Output Devices and Button Item Description LCD Display Shows dialed and incoming numbers (where applicable) and on the 7008D it will display other information about call status, dialing directories and message information. Trans/PGM This button is used to initiate a Button call transfer (TRS) or to enter programming mode (PGM).
-
Page 9: Cable Connection
Cable Connection Cable connection Connect the telephone cord (curly cord) to the handset and the other end to the handset jack at the bottom of the telephone. Connect the line cable to the port at the bottom of telephone and the other end to the wall socket. -
Page 10: Basic Function
Basic Function Placing an Outside Call Lift handset, press OHD/Speaker or dial from live keypad. ● Dial 9. ● Dial the desired number. ● Placing an Intercom Call Lift handset, press OHD/Speaker or dial from active keypad. ● Dial the station number. ●... -
Page 11: Last Number Redial
● Dial speed bin number. Range (XXX-ZZZ) ● Dial speed dial number you wish to store. ● (iPECS-MG : Dial number with CO Access code) Press the [HOLD/SAVE] button. ● Enter the name associated to the number. ● Press the [HOLD/SAVE] button. -
Page 12: Code For Flexible Button Programming
Code for Flexible Button Programming Register of Flexible Button Trans/Pgm Press the [Trans/Pgm] button. Press the [Flexible] button. Dial 1 for Number, Dial 2 for Fixed Button Enter code number . Or, Select desirable Fixed Button Hold/Save Press the [Hold/Save] button. - Page 13 Code for Flexible Button Programming Button Assignment for LDP- 4N/4D, 8D FUNCTION FUNCTION Answer mode (H/T/P) Mobile-Ext. Number Station Name Program Mobile-Ext. CLI PGM Set Wake Up Create Conference Room Reset Wake Up Delete Conference Room Language Program Speaker/Headset LCD Date Mode Headset Ring Change Program...
- Page 14 Important Safety Information...
- Page 15 Important Safety Information...
- Page 16 Important Safety Information...
-
Page 17: Getting Started
Getting Started LDP-7000 Series, Model 7016D & 7024D LDP-7016D/7024D are advanced, user-friendly digital keysets, offering the convenience of 3 soft buttons and a navigation key. • Features -.Trendy and Stylish LDP Family design -.Multi Level 3 Line LCD (3 x 24) -.16 or 24 Flexible buttons with dual-color LED’s -.Additional Device Port (ADP) for SLT or FAX -.Call Log Feature... - Page 18 Getting Started Input / Output Devices and Buttons Handset Visual Ringing LED Earphone-Jack Socket Trans/Pgm Button (Ear/Mic Mode) Speaker Flexible Button (Loop Button) Speed Button Call back Button Dnd/Fwd Button Volume Button Speaker Button Hands-free Microphone Hold/Save Button Menu Button 3 Soft Button Phonebook Button (Same operate as ‘Speed’)
- Page 19 Getting Started Handset Used for handset call. Earphone-Jack Socket Used to connect optional headset to the phone. Speaker Outputs tones and voice. Speed Button Used to access speed dialing, speed programming, save number redial, and last number redial. DND/Fwd Button The DND (Do Not Disturb) feature blocks all incoming calls.
- Page 20 Getting Started Cable Connection Cable connections A - Connect the telephone cord (curly cord) to the handset and the other end to the handset jack at the bottom of the telephone. B - Connect the line cable to the port at the bottom of telephone and the other end to the wall socket.
- Page 21 Getting Started ADP (Additional Device Port)
- Page 22 Getting Started ADP (Additional Device Port)
- Page 23 Getting Started 1. Placing a Call ICM Line ▶ ▶ talk Lift handset Enter the extension number CO Line Dial 9 or select ▶ ▶ ▶ CO line flexible talk button. Lift handset Enter the desired phone number 2. Answering an Outside Call ICM Line ▶...
-
Page 24: Navigation Button
3 Soft Buttons & Navigation Button 3 Soft Button The 3 Soft Buttons are located on the bottom of the LCD display. The function of each button changes, subject to call status and progress. The current functions are displayed on the LCD screen, directly above each button. - Page 25 DND : press the [DND] to set Do Not Disturb. 1.1 Pickup A station can pickup a call ringing to an unattended station within the same pickup group by using the pickup procedure. * Refer to iPECS-MG system programming manual. Press [PICKUP] button. STATION 100 (T) 12 OCT 09 12:00 pm PICKUP...
- Page 26 Basic Function 1.2 Conference Dial the desired station number. CALL TO 100 (e.g.100) 12 OCT 09 12:00 pm Station 100 answers the call. FLASH Press [CONF] button. CONNECT TO 100 FEB 01 04 05:34 pm TRANS CONF MUTE Dial the phone number of the next desired station. CALL TO 104 (e.g.104) 12 OCT 09...
- Page 27 Basic Function 1.3 Redial The last number dialed on an external call is automatically saved in the LAST Number& Redial (LNR) buffer Or Call Log Buffer. Press the [REDIAL] button. STATION 100 (T) 12 OCT 09 12:00 pm REDIAL 123456789 Press [SEND] button to make call.
- Page 28 Basic Function 4. Intercom Ring Back MSG : Press to leave a your station number or STATION 100 (T) message. 12 OCT 09 12:00 pm FLASH : Press to disconnect the line and re-seize. FLASH 5. Intercom Busy C-BACK : Press to leave your station number or BUSY : 100 message.
- Page 29 Basic Function 9. Intercom Talk TRANS : Press to transfer an incoming call to another CALL FROM 104 station. 12 OCT 09 12:00 pm CONF : Press to initiate a conference call. TRANS CONF MUTE MUTE : Press to mute the handset, speakerphone, or headset microphone.
- Page 30 Basic Function 12. CO Talk TRANS : Press to transfer a call to another station. 123456789 CONF : Press to initiate a conference call. LINE 08 00:00:03 MUTE : Press to mute the handset, speakerphone, or TRANS CONF MUTE headset microphone. Press the [SPEAK] button to re- activate microphone.
- Page 31 Basic Function 15. FLEXIBLE BUTTON PROGRAM • Press the [TRANS/PGM] button • Press the flexible button to be programmed • Enter the desired feature code below table. • Press the [HOLD/SAVE] button to save. *) The following Numbering Plan code can be changed by Admin Programming PGM 113~115 depending on the user’s needs.
- Page 32 Basic Function 18. CALL BACK When a called station is in busy, call back can be requested. BUSY : 100 12 OCT 09 12:00 pm FLASH C-BACK 19. CAMP ON When a called station is in busy, camp-on can be requested. BUSY : 100 12 OCT 09 12:00 pm...
- Page 33 Call Log The call log feature enables the LDP phone user to view a log of the last(100) incoming and outgoing calls. The user can scroll through the list of numbers stored, select the number and activate a redial to that number. Call Log Button PGM : Call Log Feature code (685) Press the [Call Log] button.
- Page 34 Menu 1 > USER ORGANIZER RING / BGM EXIT Press [Menu] button. 3 > COS/PASSWORD MULTI MESSAGE EXIT Press [Navigation] button. 5 > MOBILE/CONFERENCE ROOM HEADSET/BLUETOOTH EXIT 7 > STATION ICLID KEYSET INFORMATION EXIT 9 > SYSTEM INFORMATION ATTENDANT PROGRAM EXIT * >...
- Page 35 Menu 1. USER ORGANIZER 1 > USER ORGANIZER RING / BGM EXIT Press [MENU] button. Press [OK] or button. 1 > ANSWER MODE(H/T/P) STATION NAME PROGRAM BACK EXIT Press [Navigation] button. 3 > SET WAKE UP RESET WAKE UP BACK EXIT 5 >...
- Page 36 Menu 1.1 ANSWER MODE(H/T/P) 1> ANSWER MODE(H/T/P) Press [OK] or button. 2 STATION NAME PROGRAM BACK EXIT Select ICM Mode. ENTER ICM ANS MODE (2) ※ There are three types as follows; H(1) T(2) P(3) H(1) HANDSFREE MODE BACK EXIT T(2) TONE MODE P(3) PRIVATE MODE NOTE...
- Page 37 Menu 1.3 SET WAKEUP Press [OK] or button. 3> SET WAKE UP 4 RESET WAKE UP BACK EXIT Enter the time and select once or repeat (#) ENTER WAKE UP TIME(RPT:#) HH:MM-ONCE 12:00 Press [OK] or button. BACK EXIT REGISTERED WAKE UP TIME 13:00-ONCE * 12:00 BACK...
- Page 38 Menu 1.5 LANGUAGE PROGRAM Press [OK] or button. 5> LANGUAGE PROGRAM 6 LCD DATE MODE CHANGE BACK EXIT Select language FOR LANGUAGE, DIAL 00-14 ENGLISH (00) Press [OK] or button. BACK EXIT 1.6 LCD DATE MODE CHANGE 5 LANGUAGE PROGRAM Press [OK] or button.
- Page 39 Menu 2. RING / BGM Press [OK] or button. 1 USER ORGANIZER 2> RING / BGM EXIT 1 > ICM RING TYPE PROGRAM CO RING TYPE PROGRAM BACK EXIT Press [Navigation] button. 3 > SET BGM BACK EXIT 2.1 ICM RING TYPE PROGRAM 1 >...
- Page 40 Menu 2.2 CO RING TYPE PROGRAM 1 ICM RING TYPE PROGRAM Press [OK] or button. 2 >CO RING TYPE PROGRAM BACK EXIT Select Keyset ring source 1>KEYSET RING SOURCE 2 MUSIC BELL RING SOURCE Press [OK] or button. BACK EXIT Select ring tone.
- Page 41 Menu 3. COS / PASSWORD Press [OK] or button. 3> COS / PASSWORD 4 MULTI MESSAGE EXIT 1 > TEMPORAL COS MODE RETRIEVE COS BACK EXIT Press [Navigation] button. 3 > WALKING COS REGISTER PASSWORD BACK EXIT 5 > CALL LOG PROTECT SMS MESSAGE PROTECT BACK EXIT...
-
Page 42: Walking Cos
Menu 3.2 RESTORE COS TEMPORAL COS MODE Press [OK] or button. 2 > RETRIEVE COS BACK EXIT ENTER CURRENT PASSWORD Press [OK] or button. BACK EXIT PRESS OK / SAVE KEY Press [OK] or button. ******* BACK EXIT ※ Password should be registered. 3.3 WALKING COS 3 >... -
Page 43: Register Password
Menu 3.4 REGISTER PASSWORD 3 WALKING COS Press [OK] or button. 4 >REGISTER PASSWORD BACK EXIT ENTER NEW PASSWORD Enter new password. Press [OK] or button. BACK EXIT PRESS OK / SAVE KEY Press [OK] or button. ******* BACK EXIT ※... - Page 44 Menu 4. MULTI MESSAGE Press [OK] or button. 3 COS / PASSWORD 4> MULTI MESSAGE EXIT 1 > PRESELECTED MSG PGM SET USER MESSAGE BACK EXIT Press [Navigation] button. 4.1 PRESELECTED MSG PGM 1 > PRESELECTED MSG PGM Press [OK] or button.
-
Page 45: Mobile-Ext. Enable
Menu 5. MOBILE/CONFERENCE ROOM Press [OK] or button. 5> MOBILE/CONFERENCE ROOM 6 HEADSET/BLUETOOTH EXIT 1 > MOBILE-EXT. ENABLE MOBILE-EXT. NUMBER PGM BACK EXIT Press [Navigation] button. 3 > MOBILE-EXT. CLI PGM CREATE CONFERENCE ROOM BACK EXIT 5 > DELETE CONFERENCE ROOM BACK EXIT 5.1 MOBILE-EXT. - Page 46 Menu 5.2 MOBILE-EXT. NUMBER PGM 1 MOBILE-EXT. ENABLE Press [OK] or button. 2> MOBILE-EXT. NUMBER PGM BACK EXIT Select Mobile Ext. index.(1 or 2) MOBILE-EXT. NUMBER PGM ENTER(1-2), TO CHOOSE BACK EXIT Enter Mobile Phone number with CO Access code. MOBILE-EXT.
- Page 47 Menu 5.4 CREAT CONFERENCE ROOM 3 MOBILE-EXT. CLI PGM Press [OK] or button. 4> CREATE CONFERENCE ROOM BACK EXIT Enter Conference Room Number DIAL ROOM NUMBER ※ Please refer to Feature Numbering Plan in System. BACK EXIT Enter Password for conference room. Or, ENTER NEW PASSWORD Press [OK] or button.
- Page 48 Menu 6. HEADSET/BLUETOOTH Press [OK] or button. 5 MOBILE/CONFERENCE ROOM 6> HEADSET/BLUETOOTH EXIT 1 > SPEAKER/HEADSET PGM HEADSET RING PROGRAM BACK EXIT Press [Navigation] button. 3 > REGISTER BLUETOOTH BACK EXIT 6.1 SPEAKER/HEADSET PGM 1 > SPEAKER/HEADSET PGM Press [OK] or button.
- Page 49 Menu 6.3 REGISTER BLUETOOTH 3 > REGISTER BLUETOOTH Press [OK] or button. BACK EXIT Select 1 for Pairing, 2 for Unpairing, 3 for Paired 1 > PAIRING Information UNPAIRING BACK EXIT 3> PAIRED INFORMATION BACK EXIT ※ BTU module should be installed.
- Page 50 Menu 7. STATION ICLID Press [OK] or button. 7> STATION ICLID 8 KEYSET INFORMATION EXIT 1 > REGISTER STATION ICLID VIEW STATION ICLID BACK EXIT Press [Navigation] button. 7.1 REGISTER STATION ICLD 1 > REGISTER STATION ICLID Press [OK] or button.
-
Page 51: View Station Iclid
Menu 7.2 VIEW STATION ICLID 1 REGISTER STATION ICLID Press [OK] or button. 2> VIEW STATION ICLID BACK EXIT Select the list. >01 1234567 Press [SELECT] or button. 02 EMPTY BACK SELECT EXIT Press [DELETE] button to delete LIST. ICLID : 1234567 ROUTE : 101 BACK DELETE... - Page 52 Menu 8. KEYSET INFORMATION ※ LDP 7016/7024 does not support this feature. 9. SYSTEM INFORMATION Press [OK] or button. 9> SYSTEM INFORMATION 0 ATTENDANT PROGRAM EXIT 1 > MPB VERSION DISPLAY VIEW IP ADDRESS BACK EXIT Press [Navigation] button. 9.1 MPB VERSION DISPLAY 1 >...
- Page 53 User Program Codes • Press the [TRANS/PGM] button ▶ Press the flexible button to be programmed • ▶ Press [Trans/Pgm] button again ▶ Enter the desired feature code below table • ▶ Press the [HOLD/SAVE] button to save. CODE FUNCTION CODE FUNCTION Answer mode (H/T/P)
-
Page 54: Entering Characters
Entering characters... -
Page 55: Glossary Of Terms
Glossary of Terms Intercom – describes internal calls within the telephone system CO Line Central Office Line – also known as a trunk line, exchange line or outside line Speed Dial A commonly used number stored in a speed bin for easy access Do Not Disturb –... - Page 56 Important Safety Information...
- Page 57 Important Safety Information...
- Page 58 Important Safety Information...
- Page 59 Putting into operation LDP-7024LD LDP-7024LD is a user-friendly digital keyset, which offer convenience to user with 3 soft key and navigation key. • Features -.Trendy and Stylish LDP Family design -.Multi Level Graphic LCD (9 * 32) -.Dual LED 24 Flexible buttons -.Additional Device Port for SLT and FAX -.Call Log Feature -.Call Recording Feature (USB Module, Option)
- Page 60 Putting into operation ICON description on LCD ICON Description 1. You have received message 2. Call forward 3. DND mode 4. Earphone mode 5. Full Duplex Speaker Phone Mode 6. Mute mode 7. Setting melody 8. Setting alarm 9. Schedule 10.
- Page 61 Putting into operation Input / Output Devices and Button Handset Message Waiting LED Earphone-Jack Socket 3 Soft Button (Ear/Mic Mode) Speaker Flexible Button Speed Button Trans/Pgm Button Dnd/Fwd Button Call back Button Speaker Button Volume Button Hold/Save Button Menu Button Phonebook Button Handsfree Microphone LCD Display...
- Page 62 Putting into operation Used for handset call. Handset The optional earphone into the handset to provide a Earphone- handsfree phone conversation. Jack Socket Outputs tones and voice at your extension. Speaker Used to access speed dialing, speed programming, Speed Button save number redial, and last number redial.
- Page 63 Putting into operation Cable Connection ④ ③ ① ② Cable connection ①, ② Connect the end of the telephone cord to the handset and the other end to the handset jack at the bottom of the telephone. ③, ④ Connect the end of the cable to the port at the bottom of telephone and the other end to the switch port.
- Page 64 Putting into operation ADP (Additional Device Port)
- Page 65 Putting into operation ADP (Additional Device Port)
- Page 66 Placing or answering an outside call 1. Placing an Outside Call ICM Line ▶ ▶ talk Lift handset Enter the extension number CO Line Dial 9,0 or select ▶ ▶ ▶ CO line flexible talk button Lift handset Enter the desired phone number 2.
- Page 67 3 Soft & Navigation Button 3 Soft Button The 3 Soft Buttons are located on the bottom of the LCD display. The function of each button changes, subject to call status and progress. The current functions are displayed on the LCD screen, directly above each button. For example, if the user calls a busy extension, busy tone will be heard and the busy status displayed.
- Page 68 Disturb. 1.1 Pickup A station can pickup a call ringing to an unattended station within the same pickup group by using the pickup procedure. * Refer to iPECS-MG system programming manual. Press [PICKUP] button. STATION 100 (T) 12 OCT 09 12:00 pm ◀PICKUP...
- Page 69 Basic Function 1.2 LOG The call log feature enables the LDP phone user to view a log of the last(100) incoming and outgoing calls. The user can scroll through the list of numbers stored, select the number and activate a redial to that number. Press the [LOG] button.
- Page 70 ENTER, (UP/DOWN/OK) EXIT Press [SEARCH] to search bin number. 000 LG : 94501234 Press ADD to add new speed bin number. 001 MG : 91234567 002 iPECS : 98450123 Press [HOLD] or button to make the call. SPEED NUMBER LAST(*) SAVE(#)
- Page 71 Basic Function 1.4 Redial The last number dialed on an external call is automatically saved in the LAST Number & Redial (LNR) buffer. Press the [REDIAL] button. STATION 100 (T) FEB 01 04 05:34 pm REDIAL▶ Select the desired one with Navigation Button. SUN MON TUE WED THU FRI SAT 2009 9 10 11 12 13 14 15...
-
Page 72: Intercom Ring Back
Basic Function 2. Intercom Ring Back MSG : Press to leave a your station number or message. STATION 100 (T) FLASH : Press to disconnect the line and re-seize. 12 OCT 09 12:00 pm FLASH 3. Intercom Busy C-BACK : Press to leave your station number or message. BUSY : 100 FLASH : Press to disconnect the line and re-seize. -
Page 73: Intercom Talk
Basic Function 7. Intercom Talk TRANS : Press to transfer an incoming call to another CALL FROM 104 station. 12 OCT 09 12:00 pm CONF : Press to initiate a conference call. MUTE ▶ TRANS CONF MUTE : Press to mute the handset, speakerphone, or headset microphone. - Page 74 Basic Function 10. CO Talk TRANS : Press to transfer a call to another 123456789 station. LINE 08 00:00:03 CONF : Press to initiate a conference call. TRANS CONF MUTE▶ MUTE : Press to mute the handset, speakerphone, or headset microphone. Press the [SPEAK] button to re- activate microphone.
- Page 75 Basic Function 13. FLEXIBLE BUTTON PROGRAM • Press the [TRANS/PGM] button • Press the flexible button to be programmed • Enter the desired feature code below table. • Press the [HOLD/SAVE] button to save. *) The following Numbering Plan code can be changed by Admin Programming PGM 113~115 depending on the user’s needs.
- Page 76 Basic Function 16. CALL BACK When a called station is in busy, call back can be requested. BUSY : 100 12 OCT 09 12:00 pm C-BACK FLASH▶ 17. CAMP ON When a called station is in busy, camp-on can be requested. BUSY : 100 12 OCT 09 12:00 pm...
-
Page 77: Phone Book
Phone Book 1 PHONE BOOK 2 SCHDULE Press the [PhoneBook] button. EXIT The [PHONE BOOK] is used for registering the new phone number and searching, correcting and deleting the stored phone number. PHONE BOOK PHONE BOOK 1. NEW ENTRY ▲ 6. - Page 78 Phone Book Enter the type, select the desired one among the NEW ENTRY cellular phone number or office number or home NAME : JANE number or fax number or e-mail or address or TYPE : ◀ MOBILE ▶ memo. CO CODE : NOT USE NUMBER : GROUP : NO GR.
-
Page 79: Search By Name
Phone Book 2. SEARCH BY NAME Press [FIND] and then the phone book entry will be displayed. Press the [2] button. PHONE BOOK 1. NEW ENTRY ▲ 2. SEARCH BY NAME 3. SEARCH BY NUMBER 4. SEARCH BY GROUP 5. EDIT CO ACCESS CODE ▼ EXIT PHONE BOOK When entering the name, enter the full name or... -
Page 80: Search By Number
Phone Book 3. SEARCH BY NUMBER Press the [3] button. PHONE BOOK 1. NEW ENTRY ▲ 2. SEARCH BY NAME 3. SEARCH BY NUMBER 4. SEARCH BY GROUP 5. EDIT CO ACCESS CODE ▼ EXIT When entering the phone number, enter the PHONE BOOK part of the phone number or the full number 1. -
Page 81: Search By Group
Phone Book 4. SEARCH BY GROUP Press the [4] button. PHONE BOOK 1. NEW ENTRY ▲ 2. SEARCH BY NAME 3. SEARCH BY NUMBER 4. SEARCH BY GROUP 5. EDIT CO ACCESS CODE ▼ EXIT to select the group and press [FIND]. PHONE BOOK SEARCH BY GROUP 1. -
Page 82: Delete All Entry
Phone Book 5. CO ACCESS CODE Press the [5] button. PHONE BOOK 1. NEW ENTRY ▲ 2. SEARCH BY NAME 3. SEARCH BY NUMBER 4. SEARCH BY GROUP 5. EDIT CO ACCESS CODE ▼ EXIT to select the code and enter the CO ACCESS CODE CODE-1 : 9 CO ACCESS CODE. - Page 83 SCHEDULE 1 PHONE BOOK 2 SCHEDULE Press the [PhoneBook] button. EXIT 1. SCHEDULE ADD/DEL/EDIT The number of the schedule is added up to 50. The calendar of schedule is from 1960 to 2040. to select the date and SCHEDULE 1. SCHEDULE/ADD/DEL/EDIT SUN MON TUE WED THU FRI SAT press the [OK] button to save it.
- Page 84 SCHEDULE SCHEDULE ADD Set the alarm. DATE : 01/JUL/04 (SAT) Press the [SET] button to inform the TIME : [PM ] 06 : 59 schedule and enter the time. REPE : NONE ALARM : NONE TEXT : BACK SAVE SCHEDULE ADD DATE : 01/JUL/04 (SAT) Press [SAVE] to save the schedule.
-
Page 85: Find Schedule
SCHEDULE 2. FIND SCHEDULE FIND SCHEDULE to select the year. SEARCH : SCHEDULE YEAR 2004 ◀ ▶ MONTH TEXT BACK FIND FIND SCHEDULE to select the month. SEARCH : SCHEDULE Press the [FIND] button and the result will be YEAR 2004 MONTH displayed. -
Page 86: Delete Past Schedule
SCHEDULE 3. DELETE PAST SCHEDULE The number of the past schedule is displayed. PAST SCHEDULE Press the [DEL] button. PAST SCHEDULE : 01 BACK to select [YES] or [NO]. PAST SCHEDULE ARE YOU SURE Press [DEL] to delete the past schedule. TO DELETE DATA? PAST SCH. - Page 87 SCHEDULE 5. DELETE ALL SCHEDULE to select [YES] or [NO]. PAST SCHEDULE ARE YOU SURE Press [OK] to delete the all schedule. TO DELETE DATA? PAST SCH. : 01 If selecting “YES”, delete it. If selecting “no”, don’t delete it. BACK...
- Page 88 User Program Codes • Press the [TRANS/PGM] button ▶ Press the flexible button to be programmed • ▶ Press [Trans/Pgm] button again ▶ Enter the desired feature code below table • ▶ Press the [HOLD/SAVE] button to save.ㅋ CODE FUNCTION CODE FUNCTION Answer mode (H/T/P)
- Page 89 Entering characters Enter the figure ▶ ▶ ▶ Dial Enter the symbol SYMBL ▶ ▶ ▶ ▶ Dial ▲▼ Norm 1 / 4 ◀▶ ※ Use the button and then select the symbol. ① ② ③ ④ ⑤ ⑥ ⑦ ⑧ ⑨ Enter the letters...
- Page 90 Glossary of Terms Intercom – describes internal calls within the telephone system CO Line Central Office Line – also known as a trunk line or outside line Speed Dial A commonly used number stored in a speed bin for easy access Do Not Disturb –...
- Page 91 LIP-7004N...
-
Page 92: Table Of Contents
................1 NTRODUCTION 1.1 General....................1 1.2 Feature Information ................1 1.3 Feature Groupings ................1 1.4 iPECS LIP-7004N Phone Description ..........2 2. R ..............3 ECEIVING CALLS 2.1 Answering a Call While Idle............... 3 2.2 Responding to a Call While Busy............4 2.3 Differential Ring Signals .............. - Page 93 LIP-7004N User Guide 4.4 Joining multiple people in a Conference ......... 22 4.4.1 Setting up a Conference Room..........23 4.5 Call Park: Placing a call on hold to Page ........24 5. L & R ......... 25 EAVING ESPONDING TO ESSAGES 5.1 Responding to a Station Message Waiting Indication.....
-
Page 94: Introduction
Employing state of the art Voice over Internet Protocol (VoIP) technology, voice and data converge on a single IP packet network. Because each iPECS Phone is an IP appliance, it can be moved easily throughout the office LAN and maintain normal operation. -
Page 95: Ipecs Lip-7004N Phone Description
LIP-7004N User Guide iPECS LIP-7004N Phone Description The iPECS LIP-7004N Phone incorporates the latest in VoIP technology and is intended for basic communications (ex., a lobby or limited use phone). Features are generally accessed using dial codes entered from the dial pad. -
Page 96: Receiving Calls
Otherwise, you must press the flashing Flex button. External calls to an iPECS Phone will appear under the CO/IP line button or a LOOP button. External calls are from CO lines or VoIP channels that are programmed to ring at your phone. -
Page 97: Responding To A Call While Busy
LIP-7004N User Guide Responding to a Call While Busy While you are busy on another call, you may receive Muted Ring, Camp- On tones, or Voice-Over announcements. Muted Ring is provided over the speaker of your Phone indicating a Call Waiting. You also may receive Camp On tones, a burst of tones on top of the existing call, as an indication of another call waiting. -
Page 98: Differential Ring Signals
When multiple phones in a small area ring, it can be difficult to tell which are ringing. The iPECS Phone has 14 Ring Tones available for differentiating ring from one phone to another. Four of the tones are stored in the phone’s permanent memory; the remaining ten tones are in the system’s memory. -
Page 99: Answering Calls To Other Stations
When an Executive activates DND, calls are forwarded to the paired Secretary automatically. The Attendants and Secretary may be able to activate DND Override and Intrude on the call. The Attendants may also cancel DND at other stations. OPERATION To toggle DND On and Off: Dial 553(iPECS-Lik)/516(iPECS-MG). -
Page 100: Forwarding Calls
Press or dial 554 (Call Forward code), Dial the type of forward code 1-4, Dial the destination number. Press (iPECS-MG) HOLD SAVE To deactivate Call Forward from your phone: Press or dial 554, Press the # key. -
Page 101: Forwarding Calls To An External Number
Code. In addition, from a remote location, you must access the system through a DISA enabled CO line. OPERATION In iPECS-Lik To activate Call Forward, Off Premise (forward to an external number) from your phone: Lift the handset, ... -
Page 102: Forwarding Callers To A Text Message
Replace the handset, return to idle. 2.7.3 Forwarding callers to a Text Message Using an iPECS Phone, the system can be setup to return a ‘Text Message’ to callers. When calling your Station, Internal callers will automatically receive the selected message or you can send a text message you select in response to an internal call, Silent Text Message. - Page 103 LIP-7004N User Guide In iPECS-LIK Message 01: LUNCH RETURN AT hh:mm Message 02: ON VACATION RETURN AT DATE mm:dd Message 03: OUT OF OFFICE RETURN AT TIME hh:mm Message 04: OUT OF OFFICE RETURN AT DATE mm:dd Message 05: OUT OF OFFICE...
- Page 104 Enter Message contents, up to 24 characters, see section 3.3.3 Press , message saved. HOLD SAVE In iPECS-MG To activate Custom or Pre-defined Message Forward: Press TRANS Dial User Program feature code 41, Dial the two-digit text Message code (0-9), ...
-
Page 105: Placing A Call
LIP-7004N User Guide 3. Placing a call Internal Calls 3.1.1 Placing Intercom calls You can place calls to other stations in the system over the Intercom. The call will ring, or for an ICM Voice Announce call, a splash tone will be heard. -
Page 106: To Leave A Message Wait
If the called user does not answer or is in DND mode, you may leave a Message Wait. The called user will receive a Message Wait indication; the MSG LED will flash. OPERATION To activate Message Waiting, Dial 556(iPECS-Lik)/557(iPECS-MG) and hang-up. -
Page 107: External Calls
3.2.1 Placing external CO/VoIP calls External calls are placed on CO/IP lines. These ‘lines’ are accessed either by a button on the iPECS Phone assigned as a CO/IP line or by dial codes. The CO/IP lines are grouped for different types of calls, local, long distance, etc. -
Page 108: Waiting For The Next Available Co/Ip Line
To activate a queue if the selected/dialed line is busy: Select/dial a busy CO/IP line, Dial 556(iPECS-Lik)/518(iPECS-MG), Return to an idle state by going on-hook; when the line becomes available, the Station will be notified with ringing. -
Page 109: To Disable Dialing From Your Phone
3.2.4 To disable dialing from your phone You can temporarily ‘Lock’ your phone by activating Temporary COS, which will deny all dialing from the phone. To deactivate Temporary COS you must enter the station’s Authorization code. OPERATION In iPECS-Lik To activate Temporary COS: Press TRANS ... - Page 110 LIP-7004N User Guide Place call as normal. In iPECS-MG To activate Walking COS: Press TRANS Dial User Program code 33, Dial your Authorization Code (Station number and password), Place call as normal.
-
Page 111: Using Automated Dialing
SPEED 3.3.3 Using System Speed Dial Numbers The iPECS-100 the system has memory allocated for 800 System Speed Dial numbers (bins 200-999). The iPECS-300 & 600 systems have memory allocated for 3000 System Speed Dial numbers (bins 2000-4999). You may, if allowed, use the System Speed Dial to dial frequently called numbers. -
Page 112: Using And Entering Station Speed Dial Numbers
3.3.4 Using and Entering Station Speed Dial Numbers Each station in the iPECS-100 is allocated memory for 20 Station Speed Dial numbers (bins 00-19) each up to 48 digits. The iPECS-300 & 600 each support 100 Station Speed Dial numbers (bins (000-099). - Page 113 LIP-7004N User Guide OPERATION To place a call using Station Speed Dial: Lift the handset, Press SPEED Dial the desired Station Speed Dial bin number (00-19 or 000-099). To enter a Station Speed Dial number with CO Line and Name: ...
-
Page 114: Transfer, Conference & Other Call Handling
You may override this Hold Preference by pressing the H button twice. The LEDs for buttons assigned CO/IP line flash at distinctive rates for the holding station and other iPECS Phone users. There are also user operations such as pressing a button that will place a call in Automatic Hold. -
Page 115: Broker Call: Switching Between Two Calls
You may switch between the active call and a call on Hold, placing the active call on Hold acting as a broker between two or more parties, Broker Call. iPECS Phone users may ‘broker’ for multiple calls up to the number of CO/IP line buttons. -
Page 116: Setting Up A Conference Room
24 parties when using a MCIM. When setting up a Conference Room, a password can be designated for invitees (internal and external parties) to use for accessing the established Conference Room. OPERATION In iPECS-Lik To set-up a Conference Room: Press the button, TRANS ... -
Page 117: Call Park: Placing A Call On Hold To Page
Return to idle. To retrieve a parked call: Lift the handset, Dial the Park Orbit code (601-610 for iPECS-100 or 601 for iPECS- 300 & 600). In iPECS-MG To park an active external call: Press T RANS ... -
Page 118: Leaving & Responding To Messages
LIP-7004N User Guide 5. Leaving & Responding to Messages Your iPECS Phone allows you to send and receive several types of messages. These include a Station Message Waiting, and Voice Mail Message Waiting. Each of the message types is described in the following paragraphs and is accessed by dial codes or using a Flex button as described in the section on each message type. - Page 119 Dial the Mail Box and password to receive the ‘Number of Messages’ prompt, Dial desired option codes, At completion of session, hang-up. In iPECS-MG To retrieve Voice Mail locally: Dial 558(Message Wait Answer) or 523(VMIB Access code), After the prompt enter your station number and password, ...
-
Page 120: Remote System Access
Calls to your iPECS Phone will ring your Mobile Phone and you can place calls using the resources of the iPECS. You may need to activate the Mobile Phone Extension feature and assign the Mobile Phone number. - Page 121 LIP-7004N User Guide To Transfer a call from the mobile extension using the iPECS: Dial * while on an iPECS call, Dial the desired extension, the call is transferred and the mobile phone returns to idle, NOTE—The mobile extension may reconnect to the transfer by pressing the # key.
-
Page 122: Miscellaneous Features
Background Music (BGM) and Music On Hold (MOH). In addition, a recorded message from the VMIM can be used. BGM is played over the speakers of the iPECS Phone when idle. MOH is played to callers placed on Hold. -
Page 123: Push-To-Talk (Ptt) Page
Dial the Meet-Me-Page code 544(iPECS-Lik)/546(iPECS-MG). Push-To-Talk (PTT) Page iPECS Phones can be assigned as a member of one or more of the system’s nine Push-To-Talk (PTT) page groups. Users separately log-in or log-out of any one or all PTT groups to which the phone is assigned. -
Page 124: Alarm/Door Bell
Lift the handset, Dial Door Open code #* and contact number 1 to 4. NOTE—Contacts 3 & 4 are only available in the iPECS -300 & 600. —Contacts 1 is available in the iPECS -MG. Power Fail Transfer When AC power to the system fails, back-up operation may be provided with back-up batteries or Power Fail Transfer (PFT). -
Page 125: System Voice Memo
& 600), Station Status Memo is heard. Hot Desk iPECS phones in the system may be assigned for Hot Desk operation. These Hot Desk phones let you log-on and use the Hot Desk phone as if it were your station. Once logged-on, the Hot Desk station will take on the attributes assigned to your station number and you can make calls as normal. - Page 126 Lift the handset, Dial “* 0”(iPECS-Lik)/”525”(iPECS-MG), Dial your Authorization Code (Station number and Password). To Log out of the Hot Desk station: Press the button. TRANS Press the * key twice(iPECS-Lik)/”525”(iPECS-MG),, Press the button. HOLD SAVE...
-
Page 127: Working With Pbx, Centrex And Isdn Features
When accessing a CO line, the phone will act as an extension of the host, allowing access to the host system features using the host dial codes. While on a call, use the iPECS Flash feature to transfer calls to other host extensions or access features of the host. The Flash feature may be used on other CO lines to regain a dial tone from the CO line without relinquishing control of the CO line to place another call. -
Page 128: Activating Isdn Caller Id Restriction
User Guide 8.2.2 Activating ISDN Caller Id restriction iPECS Phone users can restrict the transmission of Caller ID to the far- end. This may be a subscription service of your carrier. Separate Flex buttons are required to activate outgoing, Connected Line (COL), and incoming, Calling Line ID (CLI) restriction. -
Page 129: Setting Features & Flex Buttons
9. Setting Features & Flex buttons Entering Station Program Data A special code set is available for iPECS Phone users to assign certain attributes such as Authorization Codes (Passwords). After entering the User Program mode, you dial the codes to select the attribute and setting. -
Page 130: Appendixa Flexible Numbering Plan
LIP-7004N User Guide 10. Appendix A Flexible Numbering Plan Feature iPECS- iPECS- iPECS- Remark Intercom Call 100- 100- 1000- 1599 Internal Page Zone 501- 501- 501-535 Internal All Call Page Meet Me Page 545- 545- 545-546 External Page Zone 1~2... - Page 131 LIP-7004N User Guide Feature iPECS- iPECS- iPECS- Remark Group Call Pickup Universal Answer Account Code with bin Walking COS Code ACD Supervisor On/Off Duty ACD Supervisor Login ACD Supervisor Logout ACD Help Code ACD Calls In Queue Display ACD Supervisor Status Display...
- Page 132 Door Open (3rd Door ) & 600 Door Open (4th Door ) iPECS-300 & 600 MCID Request Unsupervised Conference extend code PTT Group Login/Logout In iPECS-MG 1) Basic Number Name Code Remark 100 ~ 4xx Station Number CO Group Access Code 801 ~ 872(MG-300)
- Page 133 LIP-7004N User Guide Feature Name Code Remark Xx: Page Group # Personal VM Page Announcement Page For Attendant Page Auto Answer Internal Page Answer (Meet-Me Page) External Page Internal-External Page All Call Forward Register 554 + Type + Destination Pilot Hunt Call Forward Register 514 + Type + Destination Pilot Hunt Call Forward Cancel...
- Page 134 LIP-7004N User Guide Feature Name Code Remark CO Line Access 88 + xxx Xxx: CO Line # 001 ~ 200: MG-300 01 ~ 80 : MG-100 VM MWI Enable VM MWI Cancel MCID Request Unsupervised Conf Extend PTT Group Access 524 + (0~9,*) 0 ~ 9: PTT Group # *: Log out...
- Page 135 LIP-7004N User Guide Feature Name Code Remark Mobile CLI Register Mobile Access CCR Access CCR Access And Drop System Hold Return Held CO Sys Memo DISA Tone Service All Feature Cancel Add Conf Member System Alarm Reset Fault Alarm Reset Door Open Keypad Facility T-Net Log-In/Out...
-
Page 136: Appendixb User Program Codes
LIP-7004N User Guide 11. Appendix B User Program Codes Code Function Remarks Enblock Mode Dialing iPECS LIP-7000 only 11 x Differential Ring, Intercom Select Ring Tone 1~8 12 x Differential Ring, CO/IP line Select Ring Tone 1~8 Select ICM Signal mode,... - Page 137 ATD I NTRUSION Assign Button Assign Button EYPAD ACILITY Assign Button OHVO Button Assignment iPECS LIP-7000 only PEED Button Assignment iPECS LIP-7000 only Button Assignment iPECS LIP-7000 only Button Assignment iPECS LIP-7000 only Button Assignment iPECS LIP-7000 only LASH Button Assignment...
- Page 138 LIP-7004N User Guide In iPECS-MG User Description Remark PGM Code 1:H, 2:T, 3:P Intercom Answer Mode 12 + Name User name creation 2 digit for each character HH/mm, 13 + Time Set wake-up alarm time 24-hour clock Cancel Wake-up Alarm...
- Page 139 LIP-7004N User Guide User Description Remark PGM Code View Station ICLID View IP Address IP Phone/ DTIM/SLTM View Mac Address IP Phone/ DTIM/SLTM View IP Phone version System Version System IP Address...
- Page 140 LIP-7008D...
- Page 141 TABLE OF CONTENTS 1. I ................... 1 NTRODUCTION 1.1 General......................1 1.2 Feature Information ..................1 1.3 Feature Groupings..................1 1.4 iPECS LIP-7008D Phone Description............2 PECS P LCD & S ............3 HONE PEAKERPHONE 2.1 LCD Operation....................3 2.2 Using the Speakerphone ................3 3.
- Page 142 LIP-7008D User Guide 5.1 Call Transfer: Sending a call to a different destination ....... 24 5.2 Call Hold: Placing a call in a waiting state ..........24 5.3 Broker Call: Switching between two calls ........... 25 5.4 Joining Multiple People in a Conference ............ 25 5.4.1 Setting up &...
-
Page 143: Introduction
Employing state of the art Voice over Internet Protocol (VoIP) technology, voice and data converge on a single IP packet network. Because each iPECS Phone is an IP appliance, it can be moved easily throughout the office LAN and maintain normal operation. -
Page 144: Ipecs Lip-7008D Phone Description
It includes a 2-line 24-character per line LCD. Features and functions of your iPECS are accessed either using the Fixed or Flexible buttons. In the remainder of this User Guide, the Fixed or Flexible buttons are shown with a box surrounding the... -
Page 145: Ipecs Phone Lcd & Speakerphone
2. iPECS Phone LCD & Speakerphone LCD Operation The Liquid Crystal Display (LCD) of the iPECS LIP-7008D Phone has two lines of 24 characters each. The LCD is used to convey information to you. It provides date, time and station number display while idle. It... -
Page 146: Receiving Calls
Otherwise, you must press the flashing Flex button. External calls to an iPECS Phone will appear under the CO/IP line button or a LOOP button. External calls are from CO lines or VoIP channels that are programmed to ring at your phone. -
Page 147: Using Answering Machine Emulation (Ame)
You may terminate screening, leaving the caller in voice mail to record a message, talk with the caller and record the conversation in the mailbox, or answer the call and disconnect the Voice Mail. The AME feature is only available when using the iPECS integrated Voice Mail; a MUTE button are required. -
Page 148: Differential Ring Signals
When multiple phones in a small area ring, it can be difficult to tell which are ringing. The iPECS Phone has 14 Ring Tones available for differentiating ring from one phone to another. Four of the tones are stored in the phone’s permanent memory; the remaining ten tones are in the system’s memory. -
Page 149: Answering Calls
Lift the handset, Dial the UA code 567 (iPECS-Lik)/587(iPECS-MG). Answering Calls to Other Stations When nearby stations are ringing, you may pick-up (answer) the call. You may select to answer a call ringing at a specific station (Directed Call Pick-Up) or you may choose to answer the oldest call ringing to your station group (Group Call Pick-Up). -
Page 150: Using Do-Not-Disturb (Dnd) To Block Incoming Calls
LIP-7008D User Guide Dial 566 (Group Call Pick-Up code), the call is connected. Using Do-Not-Disturb (DND) to Block Incoming Calls When you need quiet, you can activate Do-Not-Disturb and the phone will not receive calls. Internal callers will receive a fast busy tone and the display will show the DND status. -
Page 151: Forwarding Calls To An External Number
Press or dial 554 (Call Forward code), Dial the type of forward code 1-4, Dial the destination number. Press (iPECS-MG) HOLD SAVE To deactivate Call Forward from your phone: Press or dial 554, Press the # key. - Page 152 Code. In addition, from a remote Authorization location, you must access the system through a enabled CO line. DISA OPERATION In iPECS-Lik To activate Call Forward, Off Premise (forward to an external number) from your phone: Lift the handset, ...
-
Page 153: Forwarding Callers To A Text Message
Replace the handset, return to idle. 3.8.3 Forwarding callers to a Text Message Using an iPECS Phone, the system can be setup to return a ‘Text Message’ to internal callers. When calling your Station, Internal callers will automatically receive the selected message or you can send a text message you select in response to an internal call, Silent Text Message. - Page 154 LIP-7008D User Guide In iPECS-MG LUNCH RETURN AT hh:mm ON VACATION RETURN AT DATE mm:dd OUT OF OFFICE RETURN AT TIME hh:mm OUT OF OFFICE RETURN AT DATE mm:dd OUT OF OFFICE RETURN UNKNOWN CALL (enter up to 17 digits)
- Page 155 LIP-7008D User Guide Dial any auxiliary input for messages 1-4 and 6-8, Press , forward confirmed. HOLD SAVE To cancel activated Message: Press the flashing button or dial 554, Dial #. To program the Station Custom Message at your station: ...
-
Page 156: Placing A Call
LIP-7008D User Guide 4. Placing a call Internal Calls 4.1.1 Placing Intercom calls You can place calls to other stations in the system over the Intercom. The call will ring, or for an ICM Voice Announce call, a splash tone will be heard. -
Page 157: Leaving A Message Wait
LIP-7008D User Guide OPERATION To Camp-On (wait off-hook) for a busy station: Dial *, and wait for an answer. To Callback (wait on-hook) for a busy station: Press and hang-up. CALL BACK To make a Voice Over announcement to a busy station: ... -
Page 158: External Calls
4.2.1 Placing external CO/VoIP calls External calls are placed on CO/IP lines. These ‘lines’ are accessed either by a button on the iPECS Phone assigned as a CO/IP line or by dial codes. The CO/IP lines are grouped for different types of calls, local, long distance, etc. -
Page 159: Waiting For The Next Available Co/Ip Line
LIP-7008D User Guide You may need to enter an before placing calls, in Authorization code which case you will receive a second dial tone. Your external calls may be subject to Call Time Restrictions, you will receive a Call Warning Tone prior to disconnect. NOTE—In the event of an emergency, assigned Emergency numbers (ex., a 911 call) may be dialed from any station on the System, regardless of a Station’s dialing restrictions (COS). -
Page 160: Disabling Dialing From Your Phone
4.2.4 Disabling dialing from your phone You can temporarily ‘Lock’ your phone by activating Temporary COS, which will deny all dialing from the phone. To deactivate Temporary COS you must enter the station’s Authorization code. OPERATION In iPECS-Lik To activate Temporary COS: Press TRANS ... -
Page 161: Using Automated Dialing
4.3.1 Using Last Number Redial (LNR) The last number dialed on an external call is automatically saved in the Last Number Redial (LNR) buffer. For users of an iPECS Display Phone, the system will store the numbers dialed on the last ten calls. -
Page 162: Using System Speed Dial Numbers
4.3.4 Using and Entering Station Speed Dial Numbers Each station in the iPECS-100 is allocated memory for 20 Station Speed Dial numbers (bins 00-19) each up to 48 digits. The iPECS-300 & 600 support 100 Station Speed Dial numbers (bins 000-099). The iPECS-MG 100 &... - Page 163 LIP-7008D User Guide ‘*’ not as 1 digit, - Dial Pulse to Tone Switchover, the system will switch from pulse to DTMF dialing. When entering a Speed Dial, a 16-character name, may be associated with the number for Name. Characters are entered with two Dial by keystrokes as in the chart below.
-
Page 164: Using Dial By Name And Entering Your Name
Dial. To allow others to contact you via Speed Dial System Speed the Intercom directory, you must enter a name for your station, up to 12 characters. OPERATION In iPECS-Lik To place a call using Dial by Name: Press twice, SPEED ... -
Page 165: Acnr: To Retry A Busy External Number Until Answered
LIP-7008D User Guide To enter your station user name: Press TRANS Dial 12 (User Name Program code), Dial name, up to 12 characters (using the alpha-numeric entry chart Section 4.3.4), Press HOLD SAVE 4.3.6 ACNR: To retry a busy external number until answered When making an external call and a busy signal is received, the system can be set to retry the number until the call is connected, the feature is cancelled, or the maximum number of retries is attempted—this is... -
Page 166: Transfer, Conference & Other Call Handling
SAVE button twice. The LEDs for buttons assigned CO/IP line flash at distinctive rates for the holding station and other iPECS Phone users. There are also user operations such as pressing a button that will place a call in Automatic Hold. -
Page 167: Broker Call: Switching Between Two Calls
You may switch between the active call and a call on Hold, placing the active call on Hold acting as a broker between two or more parties, Broker Call. iPECS Phone users may ‘broker’ for multiple calls up to the number of CO/IP line buttons. -
Page 168: Setting Up & Joining A Conference Room
In addition to establishing a Conference, up to 9 Conference Rooms can be set up including up to 24 parties when using a MCIM and up to 13 parties(iPECS-MG). When setting up a Conference Room, a password can be designated for invitees (internal and external parties) to use for accessing the established Conference Room. -
Page 169: Call Park: Placing A Call On Hold To Page
Return to idle. To retrieve a parked call: Lift the handset, Dial the Park Orbit code (601-610 for iPECS-100 or 601 to 619 for iPECS-300 & 600). In iPECS-MG To park an active external call: Press RANS ... -
Page 170: Two-Way Record: Recording Calls
LIP-7008D User Guide Two-Way Record: Recording calls You may record an active external conversation in your Voice Mail Box. button is required to access this feature. RECORD OPERATION To activate Two-Way Record while on a CO/IP call: Press , record warning tone heard and recording starts. RECORD To stop Two-Way Record while on a CO/IP call: ... -
Page 171: Leaving & Responding To Messages
LIP-7008D User Guide 6. Leaving & Responding to Messages The iPECS Phone allows you to send and receive several types of messages. These are accessed via the Message Summary Display, and described in the following paragraphs: In iPECS-Lik 1: ST—Station Message Wait, 2: CL—CLI Message Wait... - Page 172 To delete all Message Waits: Press the button, SPEED Press the * key twice. In iPECS-MG To review your Station messages: Press , the LCD shows the Message Summary display, CALL BACK MWI (01) VMS (00) SMS(00)
- Page 173 When callers are forwarded or recall to your Voice Mail Box, they can leave a voice message. Your Voice Mail Box is part of the integrated Voice Mail module, the iPECS Feature Server or an external Voice Mail system. These Voice Mail systems allow access to and management of the received voice messages.
- Page 174 Dial the Mail Box and corresponding password to receive the ‘Number of Messages’ prompt, Dial desired option codes, then hang-up. In iPECS-MG To retrieve Voice Mail locally using a Flex button: Press the VM access button or dial 523(VMIB access code), ...
- Page 175 These messages will activate the button LED and are displayed on the iPECS CALL BACK Phone LCD. OPERATION In iPECS-Lik To send an SMS message to another iPECS display phone user: Press the button, TRANS Dial 36 (SMS send code), ...
- Page 176 Press #, Dial 1 to delete the message, 2 to cancel or 3 to delete all received Short text messages. In iPECS-MG To send an SMS message to another iPECS display phone user: Press the button, TRANS ...
- Page 177 Dial as needed for the desired system resource. Mobile Phone Extension When away from your desk or office you can place and receive iPECS calls on a registered mobile phone. You may need to activate the Mobile Phone Extension feature and assign the Mobile Phone number.
- Page 178 LIP-7008D User Guide To Transfer a call from the mobile extension using the iPECS: Press the * key while on an iPECS call, Dial the desired extension, the call is transferred and the mobile phone returns to idle.
- Page 179 Background Music (BGM) and Music On Hold (MOH). In addition, a recorded message from the VMIM can be used. BGM is played over the speakers of the iPECS Phone when the station is idle. MOH is played to callers placed on Hold.
- Page 180 LIP-7008D User Guide NOTE—BGM is not supported in iPECS-MG. Using Internal, External and Meet-Me Paging The User can broadcast announcements to other stations and/or external speakers. Stations are assigned to one or more of the Internal Page Zones. The system has two External Page Zones that can be connected to external speakers.
- Page 181 User Guide Push-To-Talk (PTT) Page iPECS Phones can be assigned as a member of one or more of the system’s nine Push-To-Talk (PTT) page groups. Users separately log-in or log-out of any one or all PTT groups to which the phone is assigned.
- Page 182 Dial Door Open code #* and contact number 1 to 4. NOTE—Contacts 3 & 4 are only available in the iPECS -300 & 600. —Contacts 1 is available in the iPECS -MG. Power Fail Transfer When AC power to the system fails, back-up operation may be provided with back-up batteries or Power Fail Transfer (PFT).
- Page 183 Hot Desk iPECS phones in the system may be assigned for Hot Desk operation. These Hot Desk phones let you log-on and use the Hot Desk phone as if it were your station. Once logged-on, the Hot Desk station will take on the attributes assigned to your station number and you can make calls as normal.
- Page 184 When accessing a CO line, the phone will act as an extension of the host, allowing access to the host system features using the host dial codes. While on a call, use the iPECS Flash feature to transfer calls to other host extensions or access features of the host. The Flash feature may be used on other CO lines to regain dial tone from the CO line without relinquishing control of the CO line to place another call.
- Page 185 9.2.3 Activating ISDN Caller ID Restriction iPECS Phone users can restrict the transmission of Caller ID to the far- end. This may be a subscription service of your carrier. Separate Flex buttons are required to activate outgoing, Connected Line (COL), and incoming, Calling Line ID (CLID) restriction.
- Page 186 10. Setting Features & Flex buttons 10.1 Entering Station Program Data A special code set is available for iPECS Phone users to assign certain attributes such as Authorization Codes (Passwords). After entering the User Program mode, you dial the codes to select the attribute and setting.
- Page 187 LIP-7008D User Guide 11. Appendix A Flexible Numbering Plan Feature iPECS iPECS iPECS Remark 100- 100- 1000- Intercom Call 1599 501- 501- 501-535 Internal Page Zone Internal All Call Page Meet Me Page 545- 545- 545-546 External Page Zone 1~2...
- Page 188 LIP-7008D User Guide Feature iPECS iPECS iPECS Remark Answering Machine Emulation Alarm Reset Group Call Pickup Universal Answer Account Code with bin Walking COS Code ACD Supervisor On/Off Duty ACD Supervisor Login ACD Supervisor Logout ACD Help Code ACD Calls In Queue Display...
- Page 189 Door Open (4 Door ) & 600 MCID Request AME Feature Unsupervised Conference Timer Extension code PTT Group Login/Logout In iPECS-MG 1) Basic Number Name Code Remark 100 ~ 4xx Station Number CO Group Access Code 801 ~ 872(MG-300)
- Page 190 LIP-7008D User Guide Feature Name Code Remark Conference Room 7 Conference Room 8 Conference Room 9 Internal Page 543 + 00, xx 00: All Call Page Xx: Page Group # Personal VM Page Announcement Page For Attendant Page Auto Answer Internal Page Answer (Meet-Me Page) External Page...
- Page 191 LIP-7008D User Guide Feature Name Code Remark Location (00 ~ 49) PGM Mode Access Two-Way Record VMIB Access AME Access CO Line Access 88 + xxx Xxx: CO Line # 001 ~ 200: MG-300 01 ~ 80 : MG-100 VM MWI Enable VM MWI Cancel MCID Request Unsupervised Conf Extend...
- Page 192 LIP-7008D User Guide Feature Name Code Remark Command Call Oneway Command Call Conf Intrude Register Camp On Register OHVO Register Mobile Num Register Mobile CLI Register Mobile Access CCR Access CCR Access And Drop System Hold Return Held CO Sys Memo DISA Tone Service All Feature Cancel Add Conf Member...
- Page 193 LIP-7008D User Guide 12. Appendix B User Program Codes Code Function Remarks Enblock Mode Dialing iPECS LIP-7000 only 11 x Differential Ring, Intercom Select Ring Tone 1-8 12 x Differential Ring, CO/IP line Select Ring Tone 1-8 Select ICM Signal mode,...
- Page 194 NTRUSION Assign Button CAMP Assign Button KEYPAD FACILITY Assign Button OHVO Button Assignment iPECS LIP-7000 only SPEED Button Assignment iPECS LIP-7000 only CONF Button Assignment iPECS LIP-7000 only CALL BACK Button Assignment iPECS LIP-7000 only Button Assignment iPECS LIP-7000 only...
- Page 195 LIP-7008D User Guide In iPECS-MG User Description Remark PGM Code 1:H, 2:T, 3:P Intercom Answer Mode 12 + Name User name creation 2 digit for each character HH/mm, 13 + Time Set wake-up alarm time 24-hour clock Cancel Wake-up Alarm...
- Page 196 LIP-7008D User Guide User Description Remark PGM Code Register Station ICLID View Station ICLID View IP Address IP Phone/ DTIM/SLTM View Mac Address IP Phone/ DTIM/SLTM View IP Phone version System Version System IP Address...
- Page 197 LIP-7016D/7024D User Guide LIP-7016D & 7024D User Guide...
- Page 198 User Guide TABLE OF CONTENTS 1. I ....................1 NTRODUCTION 1.1 General....................1 1.2 Feature Information ................1 1.3 Feature Groupings ................1 1.4 iPECS LIP-7016D & 7024D Phone Description........ 2 PECS P LCD, S & R ......5 HONE PEAKERPHONE ELATED EATURES 2.1 LCD Operation ..................
- Page 199 LIP-7016D/7024D User Guide 5. T & O .........26 RANSFER ONFERENCE THER ANDLING 5.1 Call Transfer: Sending a call to a different destination ....26 5.2 Call Hold: Placing a call in a waiting state ........26 5.3 Broker Call: Switching between two calls........27 5.4 Joining Multiple People in a Conference.........
- Page 200 Employing state-of-the-art Voice over Internet Protocol (VoIP) technology, voice and data converge on a single IP packet network. Because each iPECS Phone is an IP appliance, it can be moved easily throughout the office LAN and maintain normal operation.
- Page 201 The Navigation button in the lower center of the Phone allows you to move through the menu choices when more than three selections are available. Features and functions of your iPECS are accessed either using the Fixed or Flexible buttons or by selecting a menu item using the Soft buttons.
- Page 202 LIP-7016D/7024D User Guide Interactive 3 Soft buttons Handset Speaker Flex buttons Dial pad Fixed Feature buttons: Speaker Hold/Save Speed Navigation Microphone Trans/Pgm button Call Back Volume iPECS LIP-7016D/7024D Diagram...
- Page 203 LIP-7016D/7024D User Guide iPECS Phone headset jack iPECS Phone LAN connection iPECS Phone to PC connection iPECS Phone handset connection iPECS LIP-7016D/7024D Connections...
- Page 204 User Guide 2. iPECS Phone LCD, Speakerphone & Related Features LCD Operation The Liquid Crystal Display (LCD) of the iPECS LIP-7016D and LIP- 7024D has three lines of 24 characters each. The LCD is used to convey information to you.
- Page 205 Before using the headset, the headset must be “paired” with the BTU, and then the headset must be enabled for use. Operation of the iPECS LIP-7024D with the headset is the same as with the Speakerphone; merely use the Speaker button to go ON and OFF- hook.
- Page 206 Otherwise, you must press the flashing Flex button. External calls to an iPECS Phone will appear under the CO/IP line or a LOOP button External calls are from CO lines or VoIP channels that are programmed to ring at your phone.
- Page 207 Speaker mode—when the call is sent to the voice mailbox, the caller’s voice is automatically broadcast over the speaker of your iPECS Phone. You may terminate screening, leaving the caller in voice mail to record a message, talk with the caller and record the conversation in the mailbox,...
- Page 208 LIP-7016D/7024D User Guide only available when using the iPECS VMIM/VSF Voice Mail; a button are required. OPERATION In iPECS-Lik To assign an AME button: Ring Mode – + 564 + 0 + TRANS FLEX HOLD SAVE Speaker Mode –...
- Page 209 To answer a call ringing during night mode over an external bell: Lift the handset, Dial 567 (iPECS-Lik)/587(iPECS-MG) ( UA code) Answering Calls to Other Stations When nearby stations are ringing, you may pick-up (answer) the call. Select to answer a call ringing at a specific station (Directed Call Pick- Up) or you may choose to answer the oldest call ringing to your station group (Group Call Pick-Up).
- Page 210 LIP-7016D/7024D User Guide Using Do-Not-Disturb (DND) to Block Incoming Calls When you need quiet, activate Do-Not-Disturb and the phone will block incoming calls. Internal callers will receive a fast busy tone and the display will show the DND status. Activate Do-Not-Disturb while busy (One-Time DND);...
- Page 211 Dial the type of forward code 1-4, Dial the destination number. Press (iPECS-MG) HOLD SAVE To deactivate Call Forward from your phone: Press the Fwd Soft button. To activate Call Forward for your phone from a different phone (Call Forward, Remote): ...
- Page 212 LIP-7016D/7024D User Guide OPERATION In iPECS-Lik To activate Call Forward, Off Premise (forward to an external number) from your phone: Lift the handset, Press the Fwd Soft button, Dial the type of forward code 1-4, Press SPEED ...
- Page 213 Replace the handset, return to idle. 3.8.3 Forwarding callers to a Text Message Using an iPECS Phone, the system can be setup to return a ‘Text Message’ to internal callers. When calling your Station, internal callers will automatically receive the selected message or you can send a text message you select in response to an internal call, Silent Text Message.
- Page 214 IN OFFICE STA xxxx IN MEETING RETURN AT TIME hh:mm AT HOME AT BRANCH OFFICE User Custom Message Deactivate OPERATION In iPECS-LIK To activate Custom or Pre-Defined Message Forward: Press TRANS Dial User Program feature code 51, ...
- Page 215 LIP-7016D/7024D User Guide 4. Placing a call Internal Calls 4.1.1 Placing Intercom calls You can place calls to other stations in the system over the Intercom. The call will ring, or for an ICM Voice Announce call, a splash tone will be heard.
- Page 216 4.2.1 Placing external CO/VoIP calls External calls are placed on CO/IP lines. These ‘lines’ are accessed either by a button on the iPECS Phone assigned as a CO/IP line or by dial codes. The CO/IP lines are grouped for different types of calls, local, long distance, etc.
- Page 217 LIP-7016D/7024D User Guide Any CO/IP Line access— When dialing on a CO line, which uses pulse style signals, you may activate Dial Pulse to Tone Switchover changing to DTMF style dialing for banking services, etc. When placing an IP call, you must dial an IP address using ‘*’ in place of the dot.
- Page 218 4.2.4 Disable dialing from your phone You can temporarily ‘Lock’ your phone by activating Temporary COS, which will disable all dialing from the phone. To deactivate Temporary COS you must enter the station’s Authorization code. OPERATION In iPECS-Lik To activate Temporary COS: Press TRANS ...
- Page 219 4.3.1 Using Last Number Redial (LNR) The last number dialed on an external call is automatically saved in the Last Number Redial (LNR) buffer. For users of an iPECS Display Phone, the system will store the numbers dialed on the last ten calls. OPERATION To dial the Last Number for an external call: ...
- Page 220 MG100, 2000-4999 for iPECS-MG300). 4.3.4 Using and Entering Station Speed Dial Numbers Your iPECS Phone has access to 20 or 100 Station Speed Dial numbers. For users in an iPECS-100, 20 Station Speed Dial numbers (bins 00~19) are available. The iPECS-300 & 600 support 100 Station...
- Page 221 8 - 80 Z - 9# *3 - , 7 - 70 9 – 90 0-00 Character Entry OPERATION In iPECS-Lik To place a call using Station Speed Dial: Lift the handset, Press SPEED Dial the desired Station Speed Dial bin number (00-19 or 000-099).
- Page 222 Press HOLD Enter the associated name if desired, using the Character Entry chart, Press HOLD In iPECS-MG To place a call using Station Speed Dial: Lift the handset, Press SPEED Dial the desired Station Speed Dial bin number (00-49).
- Page 223 LIP-7016D/7024D User Guide To allow others to contact you via the Intercom directory, you must enter a name for your station, up to 12 characters. OPERATION In iPECS-Lik To place a call using Dial by Name: Press twice, SPEED ...
- Page 224 LIP-7016D/7024D User Guide For each retry, the system will activate your speaker then place the call with the microphone muted. When the remote end answers, you must select the Speak Soft button or lift the handset. Either of these actions will cancel the ACNR request as well as connect you to the remote party.
- Page 225 SAVE button twice. The LEDs for CO/IP line buttons flash at distinctive rates for the holding station and other iPECS Phone users. There are also user operations such as pressing a button that will place a call in Automatic Hold.
- Page 226 You may switch between the active call and a call on Hold, placing the active call on Hold acting as a broker between two or more parties, Broker Call. iPECS Phone users may ‘broker’ for multiple calls up to the number of CO/IP line buttons.
- Page 227 In addition to establishing a Conference, up to 9 Conference Rooms can be set up letting up to 24 parties converse when using a MCIM (iPECS-Lik) and up to 12 parties(iPECS-MG).. When setting up a Conference Room, a password can be designated for invited parties (internal and external parties) to use for accessing the established Conference Room.
- Page 228 OPERATION In iPECS-Lik To park an active external call: Press TRANS Dial the Park Orbit (601-610 for iPECS-100 or 601-619 for iPECS- 300 & 600), Return to idle. To retrieve a parked call: Lift the handset, ...
- Page 229 LIP-7016D/7024D User Guide Two-Way Record: Recording a call You may record an active external conversation in your Voice Mail Box. OPERATION To activate Two-Way Record while on a CO/IP call: Use the Navigation button to display the next Menu and select the Record Soft button, record warning tone is heard and recording starts.
- Page 230 LIP-7016D/7024D User Guide 6. Get Your Messages & Send SMS The iPECS Phone allows you to send and receive several types of messages. These are accessed via the Message Summary Display, and described in the following paragraphs: In iPECS-Lik 1: ST—Station Message Wait 2: CL—CLI Message Wait...
-
Page 231: Responding To A Cli Message Indication
LIP-7016D/7024D User Guide To delete all Station Message Waits: Dial ‘#’, and press 1. In iPECS-MG To review your Station messages: Press , the LCD shows the Message Summary display, CALL BACK MWI (01) VMS (00) SMS(00) ENTER(MWI:1,VMS:2,SMS :3) ... -
Page 232: Getting Voice Mail Messages
When callers are forwarded or recall to your Voice Mail Box, they can leave a voice message. Your Voice Mail Box is part of the integrated VMIM/VSF module, the iPECS Feature Server or an external Voice Mail system. These Voice Mail systems allow access to and management of the received voice messages. - Page 233 Messages’ prompt, Dial desired option codes, At completion of session, hang-up. In iPECS-MG To retrieve Voice Mail locally using a Flex button: Press the VM access button or dial 523(VMIB access code), Dial your Mail Box number and corresponding password to receive the ‘Number of Messages’...
-
Page 234: Sending And Receiving Short Text Messages
Press the # key, Dial 1 to delete the message, 2 to cancel or 3 to delete all received Short text messages. In iPECS-MG To send an SMS message to another iPECS display phone user: Press the button, TRANS ... - Page 235 LIP-7016D/7024D User Guide Dial the station number to receive the message Press HOLD SAVE Enter your message using 2 key strokes for each character, see section 4.3.4, Press to send your message. HOLD SAVE To view your received Short text messages: ...
-
Page 236: Remote System Access
Dial as needed for the desired system resource. Mobile Phone Extension When away from your desk or office you can place and receive iPECS calls on a registered mobile phone. You may need to activate the Mobile Phone Extension feature and assign the Mobile Phone number. - Page 237 LIP-7016D/7024D User Guide To Transfer a call from the mobile extension using the iPECS: Dial “*” while on an iPECS call, Dial the desired extension, the call is transferred and the mobile phone returns to idle, NOTE—The mobile may reconnect to the transfer by pressing the # key.
-
Page 238: Miscellaneous Features
User’s can view a log of incoming, outgoing and missed calls on the display. A Flex button assigned as a button provides simple CALL LOG access to incoming (Called), dialed (outgoing) and lost (missed) calls. PERATION iPECS Phone In iPECS-Lik To assign a CALL LOG button: ... -
Page 239: Background Music And Music On Hold
Background Music (BGM) and Music On Hold (MOH). In addition, a recorded message from the VMIM can be used. BGM is played over the speakers of the iPECS Phone when the station is idle. MOH is played to callers placed on Hold. -
Page 240: Push-To-Talk (Ptt) Page
(Meet-Me-Page code) Push-To-Talk (PTT) Page iPECS Phones can be assigned as a member of one or more of the system’s nine Push-To-Talk (PTT) page groups. Users separately log- in or log-out of any one or all PTT groups to which the phone is assigned. -
Page 241: Wake-Up Alarm
After confirmation tone, make page announcement. Wake-Up Alarm iPECS supports an Alarm clock for each station in the system. The alarm clock can be set to repeat daily or as a one-time alarm. When responding to the alarm by lifting the handset, BGM will be provided. -
Page 242: Power Fail Transfer
Lift the handset, Dial Door Open code, #* and contact number 1-4. NOTE—Contacts 3 & 4 are only available in the iPECS -300 & 600. —Contacts 1 is available in the iPECS -MG. Power Fail Transfer When AC power to the system fails, back-up operation may be provided with back-up batteries or Power Fail Transfer (PFT). -
Page 243: Hot Desk
To hear Date & Time memo: Dial Voice Memo feature code (661 for iPECS-100 or *661 for iPECS-300 & 600 , 675-1 for iPECS-MG), date and time memo is heard, “Date is May 2nd.Time is xx:xx pm”. To hear Station Number Prompt: ... -
Page 244: Working With Pbx, Centrex & Isdn Features
When accessing a CO line, the phone will act as an extension of the host, allowing access to the host system features using the host dial codes. While on a call, use the iPECS Flash feature to transfer calls to other host extensions or access features of the host. -
Page 245: Using Isdn Supplementary Services
9.2.3 Activating ISDN Caller ID Restriction iPECS Phone users can restrict the transmission of Caller ID to the far- end. This may be a subscription service of your carrier. Separate Flex buttons are required to activate outgoing, Connected Line (COL), and incoming, Calling Line ID (CLID) restriction. -
Page 246: Setting Features & Flex Buttons
10. Setting Features & Flex buttons 10.1 Entering Station Program Data A special code set is available for iPECS Phone users to assign certain attributes such as Authorization Codes (Passwords). After entering the User Program mode, you dial the codes to select the attribute and setting. -
Page 247: Appendixa Flexible Numbering Plan
LIP-7016D/7024D User Guide 11. Appendix A Flexible Numbering Plan In iPECS-Lik Feature iPECS- iPECS- iPECS- Remark 100- 100- 1000- Intercom Call 1599 501- 501- 501-535 Internal Page Zone Internal All Call Page Meet Me Page 545- 545- 545-546 External Page Zone 1~2... - Page 248 LIP-7016D/7024D User Guide Feature iPECS- iPECS- iPECS- Remark ACD Supervisor Login ACD Supervisor Logout ACD Help Code ACD Calls In Queue Display ACD Supervisor Status Display ACD Supervisor Monitor ACD Reroute Queued Call w/answer ACD Reroute Queued Call w/o answer...
- Page 249 LIP-7016D/7024D User Guide Feature iPECS- iPECS- iPECS- Remark PTT Group Login/Logout In iPECS-MG 1) Basic Number Code Name Remark 100 ~ 4xx Station Number CO Group Access Code 801 ~ 872(MG-300) 801 ~ 824(MG-100) 620 ~ 669(MG-300) Station Group Number...
- Page 250 LIP-7016D/7024D User Guide Code Feature Name Remark Destination Pilot Hunt Call Forward Register 514 + Type + Destination Pilot Hunt Call Forward Cancel DND Status Change DND Delete Account Code CO Flash Last Number Redial Station Speed PGM Speed Dial MWI Register MWI Answer MWI Cancel...
- Page 251 LIP-7016D/7024D User Guide Code Feature Name Remark *: Log out Hot Desk Log In/Log out Name Register Create Conf Room 527 + Conf. Room Delete Conf Room 528 + Conf. Room Wake Up Register 529 + HH:MM Wake Up Cancel Temporarily COS Down Cancel Temp COS Down Password Change...
- Page 252 LIP-7016D/7024D User Guide Code Feature Name Remark Add Conf Member System Alarm Reset Fault Alarm Reset Door Open Keypad Facility T-Net Log-In/Out Universal Answer USB Call Record Delete All VM Message VM Page Message Record Direct VM Transfer Loop Key Call Log...
-
Page 253: Appendixb User Program Codes
LIP-7016D/7024D User Guide 12. Appendix B User Program Codes In iPECS-Lik Code Function Remarks Enblock Mode Dialing iPECS LIP-7000 only 11 x Select Ring Tone 1-8 Differential Ring, Intercom 12 x Select Ring Tone 1-8 Differential Ring, CO/IP line Select ICM Signal mode,... - Page 254 ATD I NTRUSION Assign Button Assign Button EYPAD ACILITY Assign Button OHVO Button Assignment iPECS LIP-7000 only PEED Button Assignment iPECS LIP-7000 only Button Assignment iPECS LIP-7000 only Button Assignment iPECS LIP-7000 only Button Assignment iPECS LIP-7000 only LASH Button Assignment...
- Page 255 LIP-7016D/7024D User Guide User Description Remark PGM Code LCD Date Mode Change DD/MM/YY or MMDDYY LCD Time Mode Change 12 Hour/24 Hour Set Backlight ICM Ring Type TRK Ring Type Ring Download LIP-Series Only Back Ground Music Temporary COS Auth. Code required Retrieve COS Auth.
- Page 256 LIP-7024LD Users Guide...
- Page 257 User Guide TABLE OF CONTENTS 1 1. I ..................NTRODUCTION 1.1 General.................... 1 1.2 Feature Information ................. 1 1.3 Feature Groupings ................1 1.4 iPECS LIP-7024LD Phone Description ........... 2 5 PECS P LCD, S & R ....HONE PEAKERPHONE ELATED EATURES 2.1 LCD Operation ................
- Page 258 7.8 Phone Book (iPECS-MG)..............41 7.9 Ring/BGM (iPECS-MG)..............41 7.10 COS/Password (iPECS-MG)............41 7.11 Multi Message (iPECS-MG) ............41 7.12 Mobile Ext/Conference Room (iPECS-MG) ........42 7.13 Speaker/Headset (iPECS-MG) ............42 7.14 Station ICLID (iPECS-MG) .............. 42 7.15 Keyset Information (iPECS-MG) ............. 42 7.16 System Information (iPECS-MG) ............
- Page 259 LIP-7024LD User Guide 9.4 Wake-Up Alarm ................47 9.5 Alarm/Door Bell ................47 9.6 Power Fail Transfer ................. 48 9.7 System Voice Memo ............... 48 9.8 Hot Desk..................49 10. W PBX, C & ISDN ........50 ORKING WITH ENTREX FEATURES 10.1 Access PBX or Centrex features.............
-
Page 260: Introduction
Employing state-of-the-art Voice over Internet Protocol (VoIP) technology, voice and data converge on a single IP packet network. Because each iPECS Phone is an IP appliance, it can be moved easily throughout the office LAN and maintain normal operation. - Page 261 Navigation button in the lower center of the Phone allows you to move through the menu choices when more than three selections are available. Features and functions of your iPECS are accessed either using the Fixed or Flexible buttons or by selecting a menu item using the Soft buttons.
- Page 262 LIP-7024LD User Guide Interactive 3 Soft buttons Handset Speaker Flex buttons Fixed Dial pad Feature buttons: Microphone Speaker Navigation Hold/Save button Speed Trans/Pgm Call Back Volume iPECS LIP-7024LD Diagram 3...
- Page 263 LIP-7024LD User Guide iPECS Phone headset jack iPECS Phone LAN connection iPECS Phone iPECS Phone to PC Handset jack connection connection iPECS LIP-7024LD Connections 4...
-
Page 264: Ipecs Phone Lcd, Speakerphone & Related Features
2. iPECS Phone LCD, Speakerphone & Related Features LCD Operation The iPECS-7024LD has a large Liquid Crystal Display (LCD) which is divided into to three sections. The upper section, while idle, displays various icons and a monthly calendar. The middle section consists of 2 lines which are used to convey information to you. -
Page 265: Using The Speakerphone
LIP-7024LD User Guide Using the Speakerphone Activate the iPECS Speakerphone at any time (except for Paging) in place of lifting the handset to receive or place calls. Place calls using On-hook dialing with the Speakerphone. In addition, you may switch between the handset and Speakerphone during a call. -
Page 266: Using A Bluetooth Wireless Headset
Before using the headset, the headset must be “paired” with the BTU, and then the headset must be enabled for use. Operation of the iPECS LIP-7024LD with the headset is the same as with the Speakerphone; merely use the Speaker button to go ON and OFF-hook. -
Page 267: Receiving Calls
Otherwise, you must press the flashing Flex button. External calls to an iPECS Phone will appear under the CO/IP line or a LOOP button External calls are from CO lines or VoIP channels that are programmed to ring at your phone. -
Page 268: Using Answering Machine Emulation (Ame)
Speaker mode—when the call is sent to the voice mailbox, the caller’s voice is automatically broadcast over the speaker of your iPECS Phone. You may terminate screening, leaving the caller in voice mail to record a message, talk with the caller and record the conversation in the mailbox, or answer the call and disconnect the Voicemail. -
Page 269: Differential Ring Signals
When multiple phones in a small area ring, it can be difficult to tell which are ringing. The iPECS Phone has 14 Ring Tones available for differentiating ring from one phone to another. Four of the tones are stored in the phone’s permanent memory; the remaining ten tones are in the system’s memory. -
Page 270: Answering Calls
To answer a call ringing during night mode over an external bell: Lift the handset, Dial567 (iPECS-Lik)/587(iPECS-MG) ( UA code) Answering Calls to Other Stations When nearby stations are ringing, you may pick-up (answer) the call. Select to answer a call ringing at a specific station (Directed Call Pick- Up) or you may choose to answer the oldest call ringing to your station group (Group Call Pick-Up). -
Page 271: Forwarding Calls
LIP-7024LD User Guide display will show the DND status. Activate Do-Not-Disturb while busy (One-Time DND); DND will be active only for the duration of the present call and requires a button. When an Executive activates DND, calls are forwarded to the paired Secretary automatically. -
Page 272: Forwarding Calls To An External Number
Code. In addition, from a remote Authorization location, you must access the system through a enabled CO line. DISA OPERATION In iPECS-Lik To activate Call Forward, Off Premise (forward to an external number) from your phone: 13... - Page 273 Dial the type of forward code 6-9, Dial Speed Dial bin number, Replace the handset, return to idle. In iPECS-MG To activate Call Forward, Off Premise (forward to an external number) from your phone: Lift the handset, ...
-
Page 274: Forwarding Callers To A Text Message
Replace the handset, return to idle. 3.8.3 Forwarding callers to a Text Message Using an iPECS Phone, the system can be setup to return a ‘Text Message’ to internal callers. When calling your Station, internal callers will automatically receive the selected message or you can send a text message you select in response to an internal call, Silent Text Message. - Page 275 LIP-7024LD User Guide AT BRANCH OFFICE User Custom Message Deactivate OPERATION In iPECS-LIK To activate Custom or Pre-Defined Message Forward: Press TRANS Dial User Program feature code 51, Dial the two-digit text Message code (00-20), Dial any auxiliary input for messages 01-04 and 06-08, ...
-
Page 276: Placing A Call
LIP-7024LD User Guide 4. Placing a call Internal Calls 4.1.1 Placing Intercom calls You can place calls to other stations in the system over the Intercom. The call will ring, or for an ICM Voice Announce call, a splash tone will be heard. -
Page 277: Leaving A Message Wait
4.2.1 Placing external CO/VoIP calls External calls are placed on CO/IP lines. These ‘lines’ are accessed either by a button on the iPECS Phone assigned as a CO/IP line or by dial codes. The CO/IP lines are grouped for different types of calls, local, long distance, etc. -
Page 278: Waiting For The Next Available Co/Ip Line
LIP-7024LD User Guide 8001 – 8200 iPECS-1200 801 – 824 iPECS-MG100 801 - 872 iPECS-MG300 Any CO/IP Line access — When dialing on a CO line, which uses pulse style signals, you may activate Dial Pulse to Tone Switchover changing to DTMF style dialing for banking services, etc. -
Page 279: Account Codes: Tracking External Calls For Billing
4.2.4 Disable dialing from your phone You can temporarily ‘Lock’ your phone by activating Temporary COS, which will disable all dialing from the phone. To deactivate Temporary COS you must enter the station’s Authorization code. OPERATION In iPECS-Lik To activate Temporary COS: Press TRANS ... -
Page 280: Temporarily Override Dialing Restrictions At A Phone
4.3.1 Using Last Number Redial (LNR) The last number dialed on an external call is automatically saved in the Last Number Redial (LNR) buffer. For users of an iPECS Display Phone, the system will store the numbers dialed on the last ten calls. OPERATION To dial the Last Number for an external call: ... -
Page 281: Using And Entering Save Number Dial
To place a call using System Speed Dial: Lift the handset, Press the button, SPEED Dial the desired System Speed Dial bin number (200-999 for iPECS- 100, 2000-4999 for iPECS-300 & 600, 2000-2999 for iPECS-MG100, 2000-4999 for iPECS-MG300). 22... -
Page 282: Using And Entering Station Speed Dial Numbers
User Guide 4.3.4 Using and Entering Station Speed Dial Numbers Your iPECS Phone has access to 20 or 100 Station Speed Dial numbers. For users in an iPECS-100, 20 Station Speed Dial numbers (bins 00~19) are available. The iPECS-300 & 600 support 100 Station Speed Dial numbers (bins (000~099). - Page 283 LIP-7024LD User Guide OPERATION In iPECS-Lik To place a call using Station Speed Dial: Lift the handset, Press SPEED Dial the desired Station Speed Dial bin number (00-19 or 000-099). To enter a Station Speed Dial number with CO Line and Name: ...
-
Page 284: Using Dial By Name And Entering Your Name
System Speed Dial. To allow others to contact you via the Intercom directory, you must enter a name for your station, up to 12 characters. OPERATION In iPECS-Lik To place a call using Dial by Name: Press twice, SPEED ... -
Page 285: Acnr: To Retry A Busy External Number Until Answered
LIP-7024LD User Guide Press the button, TRANS Dial 12, Dial name, up to 12 characters (refer to the Character Entry chart in section 4.3.4, Press HOLD SAVE 4.3.6 ACNR: To retry a busy external number until answered When making an external call and a busy signal is received, the system can be set to retry the number until the call is connected, the feature is cancelled, or the maximum number of retries is attempted—this is... -
Page 286: Transfer, Conference & Other Call Handling
HOLD SAVE twice. The LEDs for CO/IP line buttons flash at distinctive rates for the holding station and other iPECS Phone users. There are also user operations such as pressing a button that will place a call in Automatic Hold. -
Page 287: Broker Call: Switching Between Two Calls
You may switch between the active call and a call on Hold, placing the active call on Hold acting as a broker between two or more parties, Broker Call. iPECS Phone users may ‘broker’ for multiple calls up to the number of CO/IP line buttons. -
Page 288: Setting Up A Conference Room
In addition to establishing a Conference, up to 9 Conference Rooms can be set up letting up to 24 parties converse when using a MCIM(iPECS-Lik) and up to 12 parties(iPECS-MG). When setting up a Conference Room, a password can be designated for invited parties (internal and external parties) to use for accessing the established Conference Room. -
Page 289: Call Park: Placing A Call On Hold To Page
OPERATION In iPECS-Lik To park an active external call: Press TRANS Dial the Park Orbit (601-610 for iPECS-100 or 601-619 for iPECS- 300 & 600), Return to idle. To retrieve a parked call: Lift the handset, ... -
Page 290: Two-Way Record: Recording A Call
LIP-7024LD User Guide Two-Way Record: Recording a call You may record an active external conversation in your Voice Mail Box. OPERATION To activate Two-Way Record while on a CO/IP call: Use the Navigation button to display the next Menu and select the Record Soft button, record warning tone is heard and recording starts. -
Page 291: Get Your Messages & Send Sms
LIP-7024LD User Guide 6. Get Your Messages & Send SMS The iPECS Phone allows you to send and receive several types of messages. These are accessed via the Message Summary Display, and described in the following paragraphs: In iPECS-Lik 1: ST—Station Message Wait 2: CL—CLI Message Wait... -
Page 292: Responding To A Cli Message Indication
LIP-7024LD User Guide To delete all Station Message Waits: Dial ‘#’, and press 1. In iPECS-MG To review your Station messages: Press , the LCD shows the Message Summary display, CALL BACK MWI (01) VMS (00) SMS(00) ENTER(MWI:1,VMS:2,SMS :3) ... -
Page 293: Getting Voice Mail Messages
When callers are forwarded or recall to your Voice Mail Box, they can leave a voice message. Your Voice Mail Box is part of the integrated VMIM/VSF(iPECS-Lik)/VMIB(iPECS-MG) module, the iPECS Feature Server or an external Voice Mail system. These Voice Mail systems allow access to and management of the received voice messages. -
Page 294: Sending And Receiving Short Text Messages
Dial desired option codes, then hang-up Sending and Receiving Short Text Messages You can exchange short text messages (max. 100 alphanumeric characters) with other iPECS display Phone users. These messages will activate the button LED and are displayed on the iPECS... - Page 295 Press the # key, Dial 1 to delete the message, 2 to cancel or 3 to delete all received Short text messages. In iPECS-MG To send an SMS message to another iPECS display phone user: Press the button, TRANS ...
- Page 296 LIP-7024LD User Guide 7. Using the Display Menu In iPECS-Lik, With the Display Menu, you can access the LIP-7024LD PhoneBook and Schedule as well as other phone features through simple menu trees. The Display Menu is activated using the Menu Navigation button.
- Page 297 LIP-7024LD User Guide Ez Menu(iPECS-Lik) You may access Speed Dial, including Dial-By-Name, Outgoing (Dialed) and Incoming Received Call Logs (10 calls each), Call Forward and other features without complex dial codes by selecting ‘Ez-Menu’. From the Ez-Menu and sub-menus, select an item dialing the associated digit or use the Navigation and OK button to select an item.
- Page 298 LIP-7024LD User Guide Schedule(iPECS-Lik) The LIP-7024LD will notify you of a schedule activation with a flashing icon and alarm ring. You may record, edit or delete scheduled events such as conferences and search scheduled records from the Schedule sub-menus. Use the associated digit or the Navigation and OK buttons...
- Page 299 Setting. Voice Mail(iPECS-Lik) You may access a list of messages left in your internal or external voice mail or in your unified message server if installed. You may then select a message from the list.
- Page 300 Navigation and OK button to select an item. Also, Soft buttons, such as Exit, OK, and Back, may be available. 7.11 Multi Message (iPECS-MG) You may access Preselected Message and SMS by selecting ‘Multi Message’...
- Page 301 LIP-7024LD User Guide 7.12 Mobile Ext/Conference Room (iPECS-MG) You may access Mobile Extension and Conference room menu by selecting ‘Mobile Ext/Conference room’ menu. From the Mobile Ext/Conference room Menu and sub-menus, select an item dialing the associated digit or use the Navigation and OK button to select an item.
-
Page 302: Remote System Access
Dial as needed for the desired system resource. Mobile Phone Extension When away from your desk or office you can place and receive iPECS calls on a registered mobile phone. You may need to activate the Mobile Phone Extension feature and assign the Mobile Phone number. - Page 303 HOLD SAVE To place a call from the mobile extension using the iPECS: Dial the ISDN DID number of the station, the system will check the Caller Id, answer the call and the user will receive intercom dial tone, Place internal or external iPECS call as normal.
-
Page 304: Miscellaneous Features
Background Music (BGM) and Music On Hold (MOH). In addition, a recorded message from the VMIM can be used. BGM is played over the speakers of the iPECS Phone when the station is idle. MOH is played to callers placed on Hold. -
Page 305: Push-To-Talk (Ptt) Page
(Meet-Me-Page code) Push-To-Talk (PTT) Page iPECS Phones can be assigned as a member of one or more of the system’s nine Push-To-Talk (PTT) page groups. Users separately log- in or log-out of any one or all PTT groups to which the phone is assigned. -
Page 306: Wake-Up Alarm
To activate the Door Open contacts: Lift the handset, Dial Door Open code, #* and contact number 1-4. NOTE—Contacts 3 & 4 are only available in the iPECS -300 & 600. —Contacts 1 is available in the iPECS -MG. -
Page 307: Power Fail Transfer
Station Users with general information such as station number, date, time, and feature status. Voice Memos are heard over the speaker of the iPECS Phone and over the handset for SLTs. For the Station Status Memo, the following items are reported: ICM Signaling Mode (Handsfree/Tone/Privacy) -
Page 308: Hot Desk
Hot Desk iPECS phones in the system may be assigned for Hot Desk operation. These Hot Desk phones let you log-on and use the Hot Desk phone as if it were your station. Once logged-on, the Hot Desk station will take on the attributes assigned to your station number and you can make calls as normal. -
Page 309: Working With Pbx, Centrex & Isdn Features
When accessing a CO line, the phone will act as an extension of the host, allowing access to the host system features using the host dial codes. While on a call, use the iPECS Flash feature to transfer calls to other host extensions or access features of the host. -
Page 310: Using Isdn Supplementary Services
10.2.3 Activating ISDN Caller ID Restriction iPECS Phone users can restrict the transmission of Caller ID to the far- end. This may be a subscription service of your carrier. Separate Flex buttons are required to activate outgoing, Connected Line (COL), and incoming, Calling Line ID (CLID) restriction. -
Page 311: Setting Features & Flex Buttons
11. Setting Features & Flex buttons 11.1 Entering Station Program Data A special code set is available for iPECS Phone users to assign certain attributes such as Authorization Codes (Passwords). After entering the User Program mode, you dial the codes to select the attribute and setting. -
Page 312: Appendixa Flexible Numbering Plan
LIP-7024LD User Guide 12. Appendix A Flexible Numbering Plan In iPECS-Lik Feature iPECS- iPECS- iPECS- Remark 100- 100- 1000- Intercom Call 1599 501- 501- 501-535 Internal Page Zone Internal All Call Page Meet Me Page 545- 545- 545-546 External Page Zone 1~2... - Page 313 LIP-7024LD User Guide Feature iPECS- iPECS- iPECS- Remark Account Code with bin Walking COS Code ACD Supervisor On/Off Duty ACD Supervisor Login ACD Supervisor Logout ACD Help Code ACD Calls In Queue Display ACD Supervisor Status Display ACD Supervisor Monitor...
- Page 314 Remark & 600 MCID Request AME Feature Unsupervised Conference Timer Extension code PTT Group Login/Logout In iPECS-MG 1) Basic Number Name Code Remark 100 ~ 4xx Station Number CO Group Access Code 801 ~ 872(MG-300) 801 ~ 824(MG-100)
- Page 315 LIP-7024LD User Guide Feature Name Code Remark (Meet-Me Page) External Page Internal-External Page All Call Forward Register 554 + Type + Destination Pilot Hunt Call Forward Register 514 + Type + Destination Pilot Hunt Call Forward Cancel DND Status Change DND Delete Account Code CO Flash...
- Page 316 LIP-7024LD User Guide Feature Name Code Remark VM MWI Cancel MCID Request Unsupervised Conf Extend PTT Group Access 524 + (0~9,*) 0 ~ 9: PTT Group # *: Log out Hot Desk Log In/Log out Name Register Create Conf Room 527 + Conf.
- Page 317 LIP-7024LD User Guide Feature Name Code Remark Return Held CO Sys Memo DISA Tone Service All Feature Cancel Add Conf Member System Alarm Reset Fault Alarm Reset Door Open Keypad Facility T-Net Log-In/Out Universal Answer USB Call Record Delete All VM Message VM Page Message Record Direct VM Transfer Loop Key...
-
Page 318: Appendixb User Program Codes
LIP-7024LD User Guide 13. Appendix B User Program Codes In iPECS-Lik Code Function Remarks Enblock Mode Dialing iPECS LIP-7000 only 11 x Differential Ring, Intercom Select Ring Tone 1-8 12 x Differential Ring, CO/IP line Select Ring Tone 1-8 Select ICM Signal mode,... - Page 319 ATD I NTRUSION Assign Button Assign Button EYPAD ACILITY Assign Button OHVO Button Assignment iPECS LIP-7000 only PEED Button Assignment iPECS LIP-7000 only Button Assignment iPECS LIP-7000 only Button Assignment iPECS LIP-7000 only Button Assignment iPECS LIP-7000 only LASH Button Assignment...
- Page 320 LIP-7024LD User Guide In iPECS-MG User Description Remark PGM Code 1:H, 2:T, 3:P Intercom Answer Mode 12 + Name User name creation 2 digit for each character HH/mm, 13 + Time Set wake-up alarm time 24-hour clock Cancel Wake-up Alarm...
- Page 321 LIP-7024LD User Guide User Description Remark PGM Code View Station ICLID View IP Address IP Phone/ DTIM/SLTM View Mac Address IP Phone/ DTIM/SLTM View IP Phone version System Version System IP Address...
- Page 322 LIP-8004D User Guide...
- Page 323 The information furnished by LG-Ericsson in this material is believed to be accurate and reliable, but is not warranted to be true in all cases. LG-Ericsson and iPECS are trademarks of LG-Ericsson Co., Ltd. All other brand and product names are trademarks or registered...
- Page 324 Important Safety Information To prevent unexpected danger or damage please read this information before installing or attempting to repair you phone. Warning and Caution information is provided to alert the consumer of known dangers: Warning: To reduce the possibility of electric shock, do not expose your phone to high humidity areas, such as a bathroom, swimming area, etc.
-
Page 325: Introduction
LIP-8004D User Guide TABLE OF CONTENTS ........................ EVISION ISTORY ................ISPOSAL OF YOUR OLD APPLIANCE ................MPORTANT AFETY NFORMATION TABLE OF CONTENTS....................NTRODUCTION ....................1 ....................................1 1.1 G ENERAL ...............................1 1.2 F EATURE NFORMATION ..............................1 1.3 F EATURE ROUPINGS .......................2 PECS LIP-8004 P HONE ESCRIPTION... - Page 326 LIP-8004D User Guide 3.2.4 To disable dialing from your phone ..............17 3.2.5 To temporarily override dialing restrictions at a phone ........18 ............................ 18 3.3 U SING UTOMATED IALING 3.3.1 Using Last Number Redial (LNR) ..............18 3.3.2 Using and Entering Saved Number Dial ............19 3.3.3 Using System Speed Dial Numbers..............
- Page 327 LIP-8004D User Guide ....................39 9.2 A SSIGNING EATURES TO UTTONS ............40 PPENDIX LEXIBLE UMBERING ..............46 PPENDIX ROGRAM ODES...
-
Page 328: Ntroduction
Employing state-of-the-art Voice over Internet Protocol (VoIP) technology, voice and data converge on a single IP packet network. Because each iPECS Phone is an IP appliance, it can be moved easily throughout the office LAN and maintain normal operation. -
Page 329: Ipecs Lip-8004 Phone Description
LIP-8004D User Guide 1.4 iPECS LIP-8004 Phone Description The iPECS LIP-8004D Phone incorporates the latest in VoIP technology intended basic communications (ex., a lobby or limited use phone). The following image shows the LIP-8004D. LIP-8004D Front and Back Features are generally accessed using programmed fixed, or flexible buttons, dial pad buttons, or dial codes entered from the dial pad. -
Page 330: Lip-8004D Phone Installation
(ex., POE8), LIP Phones and series consoles obtain power from the Ethernet port. When LAN power is not available, the AC/DC adaptor must be used. The following image shows how to connect the handset, power cord, and LAN cable to the phone. iPECS LIP-8004D Connections... -
Page 331: Wiring Connectors
LIP-8004D User Guide 1.5.1 Wiring Connectors The LIP-8004D has a single Ethernet port that is connected to the LAN using a RJ-45 plug terminated category 5 cable supplied with the Phone. A 2 meter (6 foot) cable is provided for desk mount installation. Using the cable, one RJ-45 plug is inserted into the "LAN"... -
Page 332: Receiving Calls
Otherwise, you must press the flashing Flex button. External calls to an iPECS Phone will appear under the CO/IP line button or a LOOP button. External calls are from CO lines or VoIP channels that are programmed to ring at your phone. -
Page 333: Differential Ring Signals
The LIP-8004D has 8 ring tones available for differentiating one phone’s ringing from another. The tones are stored in the phone permanent memory. In iPECS-LIK To select a Ring Tone from phone memory: Lift Handset ... - Page 334 To answer a call ringing during night mode: Lift the handset, Dial 567(iPECS-Lik)/587(iPECS-MG) (UNA code). 2.5 Answering Calls to Other Stations When nearby stations are ringing, you may pick-up (answer) the call. Select to answer a call ringing at a...
-
Page 335: Forwarding Calls
LIP-8004D User Guide 2.6 Using Do-Not-Disturb (DND) to Block Incoming Calls Activate Do-Not-Disturb (DND) when you wish to not be interrupted by pressing the DND button; the phone will block incoming calls. Internal callers will receive a fast busy tone and the display will show the DND status. Activate Do-Not-Disturb while ringing (One-Time DND);... -
Page 336: Forwarding Calls To An External Number
LIP-8004D User Guide Calls on a Private Line will not forward except to a station with an appearance of the Private Line or to Voice Mail. To activate Call Forward from your phone to another phone or internal system resource: ... - Page 337 Authorization Code. In addition, from a remote location, you must access the system through a DISA enabled CO line. In iPECS-LIK To activate Call Forward, Off Premise (forward to an external number) from your phone: Lift the handset, ...
-
Page 338: Forwarding Callers To A Text Message
Replace the handset, return to idle. 2.7.3 Forwarding callers to a Text Message Using an iPECS Phone, the system can be setup to return a ‘Text Message’ to callers. When calling your Station, Internal callers will automatically receive the... - Page 339 IN OFFICE STA xxxx Message 08: IN MEETING RETURN AT TIME hh:mm Message 09: AT HOME Message 10: AT BRANCH OFFICE In iPECS-MG Message 1: LUNCH RETURN AT hh:mm Message 2: ON VACATION RETURN AT DATE mm:dd Message 3: OUT OF OFFICE...
- Page 340 *2 - : *3 - , Character Entry Chart Press , message saved. HOLD SAVE In iPECS-MG To activate Custom or Pre-Defined Message Forward: Press TRANS Dial User Program feature code 41, Dial the one-digit text Message code (0-9), ...
-
Page 341: Internal Calls
LIP-8004D User Guide 2. Placing Calls 3. Placing Calls 3.1 Internal Calls You can place calls to other stations in the system over the Intercom. The call will ring, or for an ICM Voice Announce call, a splash tone will be heard. Ring or Voice Announce is normally determined by settings at the called station but you may change this by dialing ‘#’... -
Page 342: External Calls
3.2.1 Placing external CO/VoIP calls External calls are placed on CO/IP lines. These ‘lines’ are accessed either using a button on the iPECS Phone assigned as a CO/IP line or using dial codes. CO/IP lines are grouped for different types of calls, local, long distance, etc. - Page 343 LIP-8004D User Guide 88 + Line number (01-80 for iPECS-MG100, or 001-240 for iPECS-MG300). CO/IP Group access 801-820 for iPECS-100, 801-872 for iPECS-300 & 600 801-824 for iPECS-MG100, or 801-872 for iPECS- MG300 Any CO/IP Line access When dialing on a CO line, which uses pulse style...
-
Page 344: Waiting For The Next Available Co/Ip Line
LIP-8004D User Guide 3.2.2 Waiting for the next available CO/IP line If all the lines connected to your system are busy, you will receive an All Trunks Busy signal. You may request to be notified when a line becomes free. To activate a queue if the selected/dialed line is busy: ... -
Page 345: Temporarily Override Dialing Restrictions At A Phone
LIP-8004D User Guide To activate Temporary COS: Press TRANS Dial 21(iPECS-LIK)/31(iPECS-MG) (User Program code), Dial your Authorization code(iPECS-MG), Press HOLD SAVE To deactivate Temporary COS: Press TRANS Dial 22(iPECS-LIK)/32(iPECS-MG) (User Program code), Dial your Authorization code, ... -
Page 346: Using And Entering Save Number Dial
While on an outgoing external call, press twice. SPEED 3.3.3 Using System Speed Dial Numbers The iPECS-100 system has memory allocated for 800 System Speed Dial numbers (bins 200-999). iPECS-300 & 600 systems each have memory allocated for 3000 System Speed Dial numbers (bins 2000-4999). -
Page 347: Using And Entering Station Speed Dial Numbers
Each station in the iPECS-100 System is allocated memory for 20 Station Speed Dial numbers (bins 00- 19) each up to 48 digits. The iPECS-300 & 600 each support 100 Station Speed Dial numbers (bins (000- 099). The iPECS-MG 100 & 300 each support 50 Station Speed Dial numbers (bins 000-049). - Page 348 Lift the handset, Press SPEED Dial the desired Station Speed Dial bin number (00-19 or 000- 099). To enter a Station Speed Dial number with CO Line and Name(iPECS-LIK): Press TRANS Press SPEED Dial the desired Station Speed Dial bin number, ...
-
Page 349: Using Dial By Name And Entering Your Name
LIP-8004D User Guide 3.3.4 Using Dial by Name and Entering Your Name (iPECS- Dial by Name employs three different Directories: Private directory (Station Speed dial), Public Directory (System Speed dial), or Intercom directory. NOTE—To allow others to contact you via the... -
Page 350: Handling
HOLD SAVE The LEDs for CO/IP line buttons flash at distinctive rates for the holding station and other iPECS Phone users. There are also user operations such as pressing a button that will place a call in Automatic Hold. Calls will remain in the held state for a period and then recall the user. -
Page 351: Broker Call: Switching Between Two Calls
To switch between two calls, Broker Call: Press the desired CO/IP line button. 4.4 Joining multiple people in a Conference You can establish a Conference with up to 3 parties(iPECS-LIK)/13 parties(iPECS-MG), or 24 parties when using a Multi-Party Conference Interface Module (MCIM)(iPECS-LIK). other parties Conference may be internal or external. -
Page 352: Setting Up A Conference Room
MCIM. When setting up a Conference Room, a password can be designated for invited parties (internal and external parties) to use for accessing the established Conference Room. In iPECS-LIK To set-up a Conference Room: Press the... - Page 353 Dial the Park Orbit code (601-610 for iPECS-100, or 601-619 for iPECS-300 & 600), Return to idle. To retrieve a parked call: Lift the handset, Dial the Park Orbit code (601-610 for iPECS-100, or 601 for iPECS-300 & 600).
- Page 354 LIP-8004D User Guide In iPECS-MG To park an active external call: Press TRANS Dial the Park Orbit (541), Dial the Park number (00-49) Return to idle. To retrieve a parked call: Lift the handset, ...
-
Page 355: Messages
Another station can leave a Station Message Waiting Messages indication when you do not answer or your phone is in A flashing MSG LED on the iPECS Phone DND. indicates a Message Waiting. As a further notification, a Message Wait Reminder Tone can be provided. You may respond with a call back. -
Page 356: Direct Inward System Access (Disa)
When away from your desk or office you can place and receive calls on a registered mobile phone. Calls to your iPECS Phone will ring your Mobile Phone and you can place calls using the resources of the iPECS. You may need to activate the Mobile Phone Extension feature and assign the Mobile Phone number. - Page 357 Press the button. HOLD SAVE To place a call from the mobile extension using the iPECS: Dial the ISDN DID number of the station, the system will check the Caller ID, answer the call and the user will receive intercom dial tone, ...
- Page 358 HOLD SAVE To place a call from the mobile extension using the iPECS System: Dial the ISDN DID number of the station; the system will check the Caller ID and answer the call. The user then will receive intercom dial tone, ...
-
Page 359: Background Music And Music On Hold
Background Music (BGM) and Music On Hold (MOH). In addition, a recorded message from the VMIM can be used. BGM is played over the speakers of the iPECS Phone when the station is idle. MOH is played to callers placed on Hold. -
Page 360: Push-To-Talk (Ptt) Page
Dial 544(iPECS-LIK)/546(iPECS-MG) (Meet-Me-Page code). 7.3 Push-To-Talk (PTT) Page iPECS Phones can be assigned as a member of one or more of the system’s nine Push-To-Talk (PTT) page groups. Users separately log-in or log-out of any one or all PTT groups to which the phone is assigned. Once... -
Page 361: Wake-Up Alarm
To activate the Door Open contacts: Lift the handset, Dial #* (Door Open code) and contact number 1 to 4. NOTE—Contacts 3 & 4 are only available in the iPECS -300 & 600. Contacts 1 is available in the iPECS -MG. -
Page 362: Power Fail Transfer
NOTE—Only activated features are announced. To hear Date & Time memo: Dial the Voice Memo code (661 for iPECS-100, or *661 for iPECS- 300 & 600, or 675+1 for iPECS-MG), Date and Time memo is heard, “Date is May 2nd.Time is xx:xx pm”. - Page 363 The user can review the current network configuration or modify a new phone network configuration. To access Network Config. Settings: Press T /PGM button and dial ##1(iPECS-LIK)/80(iPECS- RANS MG), Enter the password (default=147*), the following will display: ...
-
Page 364: Access The Isdn Network
7. PBX, Centrex & ISDN 8. PBX, Centrex & 8.1 Access PBX or Centrex ISDN The iPECS has been designed to operate with a host PBX system or Centrex services from your service provider. The iPECS connects to a host with analog CO lines. - Page 365 Press a Feature or Flex button. 8.2.2 Activating ISDN Caller ID restriction iPECS Phone users can restrict the transmission of Caller ID to the receiving phone (may be a subscription service of your carrier). Separate Flex buttons are required to activate outgoing, Connected Line (COL), and incoming, Calling Line ID (CLID) restriction.
-
Page 366: Assigning Features To Flex Buttons
9. Set Features & Flex 9.1 Entering Station Program Data Buttons A special code set is available for iPECS Phone users to assign certain attributes such as Authorization Codes (Passwords). After entering the User Program mode, dial the codes to select the attribute and setting. Once selected, the setting is saved. -
Page 367: Appendixa Flexible Numbering Plan
LIP-8004D User Guide Appendix A Flexible Numbering Plan In iPECS-LIK Feature iPECS- iPECS- iPECS- Remark 100- 100- 1000- Intercom Call 1599 501- 501- 501-535 Internal Page Zone Internal All Call Page Meet Me Page 545- 545- 545-546 External Page Zone 1-2... - Page 368 LIP-8004D User Guide Feature iPECS- iPECS- iPECS- Remark only Attendant Unavailable Alarm Reset Group Call Pickup Universal Answer Account Code with bin Walking COS Code ACD Supervisor On/Off Duty ACD Supervisor Login ACD Supervisor Logout ACD Help Code ACD Calls In Queue Display...
- Page 369 Door Open (3rd Door) & 600 iPECS-300 Door Open (4th Door) & 600 MCID Request Unsupervised Conference extend code PTT Group Login/Logout In iPECS-MG 1) Basic Number Name Code Remark 100 ~ 4xx Station Number CO Group Access Code 801 ~ 872(MG-300)
- Page 370 LIP-8004D User Guide Feature Name Code Remark Conference Room 6 Conference Room 7 Conference Room 8 Conference Room 9 Internal Page 543 + 00, xx 00: All Call Page Xx: Page Group # Personal VM Page Announcement Page For Attendant Page Auto Answer Internal Page Answer (Meet-Me Page)
- Page 371 LIP-8004D User Guide Feature Name Code Remark Direct Call Pickup Walking COS Call Parking Location 541 + xx Xx: Parking Location (00 ~ 49) PGM Mode Access Two-Way Record VMIB Access AME Access CO Line Access 88 + xxx Xxx: CO Line (001 ~ 200 : MG-300 01 ~ 80 :...
- Page 372 LIP-8004D User Guide Feature Name Code Remark Call Wait Request Preselected MSG PGM Forced Handsfree Call Call Based CLIR CLIR Access COLR Access Pilot Hunt Call Command Call Oneway Command Call Conf Intrude Register Camp On Register OHVO Register Mobile Num Register Mobile CLI Register Mobile Access CCR Access...
- Page 373 LIP-8004D User Guide Appendix B User Program Codes In iPECS-LIK Code Function Remarks Enblock Mode Dialing Select ICM Signal mode, 13 x Intercom Answer Mode 1: HF, 2: TONE, 3: Privacy 1+; On/Off, 2+: ring delay Call Coverage Attribute Setting...
- Page 374 ONITOR Button Assignment EDIAL Button Assignment Assign PTT Button {IN-ROOM INDICATION} Button 9* xx (xx : 01~10) Assignment In iPECS-MG Code Function Remarks 1:H, 2:T, 3:P Intercom Answer Mode 12 + User name creation 2 digit for each character Name...
- Page 375 LIP-8004D User Guide Code Function Remarks TRK Ring Type Ring Download LIP-Series Only Back Ground Music Temporary COS Auth. Code required Retrieve COS Auth. Code required COS Override Auth. Code required (Walking COS) Register Password Call Log Protect SMS Message Protect LIP-Series/LDP6000-Series 41 + 0-9, MSG...
- Page 376 www.lg-nortel.com...
- Page 377 LIP-8008D User Guide...
- Page 378 The information furnished by LG- Ericsson in this material is believed to be accurate and reliable, but is not warranted to be true in all cases. LG- Ericsson and iPECS are trademarks of LG- Ericsson Co., Ltd. All other brand and product names are trademarks or registered...
- Page 379 Important Safety Information To prevent unexpected danger or damage please read this information before installing or attempting to repair you phone. Warning and Caution information is provided to alert the consumer of known dangers: Warning: To reduce the possibility of electric shock, do not expose your phone to high humidity areas, such as a bathroom, swimming area, etc.
- Page 380 LIP-8008D User Guide TABLE OF CONTENTS ........................ EVISION ISTORY ................ISPOSAL OF YOUR OLD APPLIANCE ................MPORTANT AFETY NFORMATION TABLE OF CONTENTS..........................................1 1. I NTRODUCTION ....................................1 1.1 G ENERAL ...............................1 1.2 F EATURE NFORMATION ..............................1 1.3 F EATURE ROUPINGS .......................2 PECS LIP-8008 P...
- Page 381 LIP-8008D User Guide 3.2.5 To temporarily override dialing restrictions at a phone ........21 ..........................21 3.3 U SING UTOMATED IALING 3.3.1 Using Last Number Redial (LNR)..............21 3.3.2 Using and Entering Saved Number Dial ............22 3.3.3 Using System Speed Dial Numbers............... 22 3.3.4 Using and Entering Station Speed Dial Numbers ..........
-
Page 382: Ppendixa Flexible Umbering Lan
LIP-8008D User Guide ............41 PPENDIX LEXIBLE UMBERING ..............47 PPENDIX ROGRAM ODES... - Page 383 Employing state-of-the-art Voice over Internet Protocol (VoIP) technology, voice and data converge on a single IP packet network. Because each iPECS Phone is an IP appliance, it can be moved easily throughout the office LAN and maintain normal operation.
- Page 384 LIP-8008D User Guide arranged according to the difficulty of operation and frequency of use. 1.4 iPECS LIP-8008 Phone Description The iPECS LIP-8008D Phone incorporates the latest in VoIP technology intended basic communications (ex., a lobby or limited use phone). The following image shows the LIP-8008D.
- Page 385 LIP-8008D User Guide DND – Blocks all incoming calls; red LED illuminates. Speed – Access speed dialing, speed programming. Vol – Adjusts volume for ringing, headset, and speakerphone; adjusts LCD brightness (in idle state). Trans/PGM –Call transfer, or programming mode. Hold/Save –...
- Page 386 Phone. The other RJ-45 plug is inserted into the RJ-45 jack previously wired to an Ethernet switch port accessible by the iPECS system. To power the LIP Phone over the LAN, the switch port must support POE (Power over Ethernet) standard 802.3af.
- Page 387 LIP-8008D User Guide 1.5.3 Wall Mount The LIP-8000 series phones can be wall mounted as needed. The following instructions detail how to perform a wall mount installation: Mark and drill two (2) 7mm holes for plastic wall anchors. Insert the two (2) anchors into the holes and insert and tighten each screw leaving about 2.5 mm (1/8-inch) of the screw exposed.
- Page 388 Otherwise, you must press the flashing Flex button. External calls to an iPECS Phone will appear under the CO/IP line button or a LOOP button. External calls are from CO lines or VoIP channels that are programmed to ring at your phone.
- Page 389 2.3 Differential Ring Signals When multiple phones in a small area ring, it can be difficult to tell which are ringing. The iPECS Phone has 14 Ring Tones available for differentiating one phone’s ringing from another. Four of the tones are stored in the phone permanent memory;...
- Page 390 LIP-8008D User Guide In iPECS-LIK To download a Ring Tone from System memory: Press TRANS Dial 1 for Ring Tones, Dial 5 for Ring Tone download, Dial the phone’s memory location to receive the tone (5-8), ...
- Page 391 To answer a call ringing during night mode: Lift the handset, Dial 567(iPECS-Lik)/587(iPECS-MG) (UNA code). 2.5 Answering Calls to Other Stations When nearby stations are ringing, you may pick-up (answer) the call. Select to answer a call ringing at a...
- Page 392 LIP-8008D User Guide The Attendants and Secretary may be able to activate DND Override and Intrude on an active call. Attendants may also cancel DND at other stations. To toggle DND ON and OFF: While on an active call, press the DND button; the DND LED will illuminate, ...
- Page 393 LIP-8008D User Guide To activate Call Forward from your phone to another phone or internal system resource: Lift the handset, Press FWD soft button , Dial the type of forward code 1-4, Dial the destination number. To deactivate Call Forward from your phone: ...
- Page 394 Authorization Code. In addition, from a remote location, you must access the system through a DISA enabled CO line. In IPECS-LIK To activate Call Forward, Off Premise (forward to an external number) from your phone: Lift the handset, ...
- Page 395 Replace the handset, return to idle. 2.7.3 Forwarding callers to a Text Message Using an iPECS Phone, the system can be setup to return a ‘Text Message’ to callers. When calling your Station, Internal callers will automatically receive the...
- Page 396 IN OFFICE STA xxxx Message 08: IN MEETING RETURN AT TIME hh:mm Message 09: AT HOME Message 10: AT BRANCH OFFICE In iPECS-MG Message 1: LUNCH RETURN AT hh:mm Message 2: ON VACATION RETURN AT DATE mm:dd Message 3: OUT OF OFFICE...
- Page 397 LIP-8008D User Guide To activate Custom or Pre-defined Message Forward: Lift the handset, Press TRANS Dial User Program feature code 51, Dial the two-digit text Message code (00-20), Dial any auxiliary input for messages 01-04 and 06-08, ...
- Page 398 LIP-8008D User Guide In iPECS-MG To activate Custom or Pre-Defined Message Forward: Press TRANS Dial User Program feature code 41, Dial the one-digit text Message code (0-9), Dial any auxiliary input for messages 1-4 and 6-8, ...
- Page 399 LIP-8008D User Guide 3. Placing Calls 3. Placing Calls 3.1 Internal Calls You can place calls to other stations in the system over the Intercom. The call will ring, or for an ICM Voice Announce call, a splash tone will be heard. Ring or Voice Announce is normally determined by settings at the called station but you may change this by dialing ‘#’...
- Page 400 3.2.1 Placing external CO/VoIP calls External calls are placed on CO/IP lines. These ‘lines’ are accessed either using a button on the iPECS Phone assigned as a CO/IP line or using dial codes. CO/IP lines are grouped for different types of calls, local, long distance, etc.
- Page 401 LIP-8008D User Guide Flex button on the iPECS Phone assigned as a LOOP button lets you access a line from a group. Dial codes for access to CO/IP lines are: Individual CO/IP line access 88 + Line number (01-42 for iPECS-100, 001-200 for iPECS-300 &...
- Page 402 LIP-8008D User Guide NOTE—In the event of an emergency, assigned Emergency numbers (ex., a 911 call) may be dialed from any station in the System, regardless of a Station’s dialing restrictions (COS). To place an external call: Lift the handset, ...
-
Page 403: To Temporarily Override Dialing Restrictions At A Phone
To deactivate Temporary COS you must enter the Station’s Authorization code. To activate Temporary COS: Press TRANS Dial 21(iPECS-LIK)/31(iPECS-MG) (User Program code), Dial your Authorization code(iPECS-MG), Press HOLD SAVE To deactivate Temporary COS: ... -
Page 404: Using And Entering Saved Number Dial
To place a call using System Speed Dial: Lift the handset, Press SPEED Dial the desired System Speed Dial bin number (200-999 for iPECS-100 or 2000-4999 for iPECS-300 or 600 or 20000- 31999 for iPECS-1200, 2000-2999 for iPECs-MG100 , or 2000- 3999 for iPECS-MG300). -
Page 405: Using And Entering Station Speed Dial Numbers
Each station in the iPECS-100 System is allocated memory for 20 Station Speed Dial numbers (bins 00- 19) each up to 48 digits. The iPECS-300 & 600 & 1200 each support 100 Station Speed Dial numbers (bins 000-099). The iPECS-MG 100 & 300 each support 50 Station Speed Dial numbers (bins 000-049). -
Page 406: Call Handling
HOLD SAVE The LEDs for CO/IP line buttons flash at distinctive rates for the holding station and other iPECS Phone users. There are also user operations such as pressing a button that will place a call in Automatic Hold. Calls will remain in the held state for a period and then recall the user. -
Page 407: Broker Call: Switching Between Two Calls
To switch between two calls, Broker Call: Press the desired CO/IP line button. 4.4 Joining multiple people in a Conference You can establish a Conference with up to 3 parties(iPECS-LIK)/13 parties(iPECS-MG), or 24 parties when using a Multi-Party Conference Interface Module (MCIM)(iPECS-LIK). other parties Conference may be internal or external. - Page 408 MCIM. When setting up a Conference Room, a password can be designated for invited parties (internal and external parties) to use for accessing the established Conference Room. In iPECS-LIK To set-up a Conference Room: Press the...
-
Page 409: Call Park: Placing A Call On Hold To Page
Dial the Park Orbit code (601-610 for iPECS-100, or 601-619 for iPECS-300 & 600, 601-800 for iPECS-1200), Return to idle. To retrieve a parked call: Lift the handset, Dial the Park Orbit code (601-610 for iPECS-100, or 601 for iPECS-300 & 600, 601-800 for iPECS-1200). - Page 410 LIP-8008D User Guide In iPECS-MG To park an active external call: Press TRANS Dial the Park Orbit (541), Dial the Park number (00-49) Return to idle. To retrieve a parked call: Lift the handset, ...
-
Page 411: Retrieving & Responding To Mesages
Dial the telephone number of a DISA CO line assigned for answer by the Auto Attendant, Upon answer, dial # to receive the ‘Mail Box & Password’ prompt(iPECS-LIK)/ dial 523 (VMIB Access Code)(iPECS-MG), Dial the Mail Box and password to receive the ‘Number of Messages’... -
Page 412: Remote System Access
When away from your desk or office you can place and receive calls on a registered mobile phone. Calls to your iPECS Phone will ring your Mobile Phone and you can place calls using the resources of the iPECS. You may need to activate the Mobile Phone Extension feature and assign the Mobile Phone number. - Page 413 Press the button. HOLD SAVE To place a call from the mobile extension using the iPECS: Dial the ISDN DID number of the station, the system will check the Caller ID, answer the call and the user will receive intercom dial tone, ...
- Page 414 HOLD SAVE To place a call from the mobile extension using the iPECS System: Dial the ISDN DID number of the station; the system will check the Caller ID and answer the call. The user then will receive intercom dial tone, ...
-
Page 415: Misc. Features
Background Music (BGM) and Music On Hold (MOH). In addition, a recorded message from the VMIM can be used. BGM is played over the speakers of the iPECS Phone when the station is idle. MOH is played to callers placed on Hold. -
Page 416: Push-To-Talk (Ptt) Page
Dial 544(iPECS-LIK)/546(iPECS-MG) (Meet-Me-Page code). 7.3 Push-To-Talk (PTT) Page iPECS Phones can be assigned as a member of one or more of the system’s nine Push-To-Talk (PTT) page groups. Users separately log-in or log-out of any one or all PTT groups to which the phone is assigned. Once... -
Page 417: Wake-Up Alarm
To activate the Door Open contacts: Lift the handset, Dial #* (Door Open code) and contact number 1 to 4. NOTE—Contacts 3 & 4 are only available in the iPECS -300 & 600. Contacts 1 is available in the iPECS -MG. -
Page 418: Power Fail Transfer
NOTE—Only activated features are announced. To hear Date & Time memo: Dial the Voice Memo code (661 for iPECS-100, or *661 for iPECS- 300 & 600 & 1200, or 675+1 for iPECS-MG), Date and Time memo is heard, “Date is May 2nd.Time is xx:xx pm”. -
Page 419: Contrast
The user can review the current network configuration or modify a new phone network configuration. To access Network Config. Settings: Press T /PGM button and Dial 78(iPECS-LIK)/80(iPECS- RANS MG), Enter the password (default=147*), the following will display: ... -
Page 420: Pbx, Centrex & Isdn
8. PBX, Centrex & ISDN 8. PBX, Centrex & 8.1 Access PBX or Centrex ISDN The iPECS has been designed to operate with a host PBX system or Centrex services from your service provider. The iPECS connects to a host with analog CO lines. -
Page 421: Activating Isdn Caller Id Restriction
ACILITY Press a Feature or Flex button. 8.2.2 Activating ISDN Caller ID restriction iPECS Phone users can restrict the transmission of Caller ID to the receiving phone (may be a subscription service of your carrier). Separate Flex buttons are required to activate incoming, Connected Line (COL), and outgoing, Calling Line ID (CLID) restriction. -
Page 422: Set Features & Flex Buttons
9. Set Features & Flex 9.1 Entering Station Program Data Buttons A special code set is available for iPECS Phone users to assign certain attributes such as Authorization Codes (Passwords). After entering the User Program mode, dial the codes to select the attribute and setting. Once selected, the setting is saved. - Page 423 LIP-8008D User Guide Appendix A Flexible Numbering Plan In iPECS-LIK Feature iPECS- iPECS- iPECS iPECS Remark -600 -1200 100- 100- 1000- 1000- Intercom Call 1599 2199 501- 501- 501- 301~40 Internal Page Zone Internal All Call Page Meet Me Page...
- Page 424 LIP-8008D User Guide Feature iPECS- iPECS- iPECS iPECS Remark -600 -1200 SLT use Program Mode Access only Attendant Unavailable Alarm Reset Group Call Pickup Universal Answer Account Code with bin Walking COS Code ACD Supervisor On/Off Duty ACD Supervisor Login...
- Page 425 Door Open (1st Door) Door Open (2nd Door) Door Open (3rd Door) Door Open (4th Door) MCID Request Unsupervised Conference extend code PTT Group Login/Logout In iPECS-MG 1) Basic Number Code Name Remark 100 ~ 4xx Station Number CO Group Access Code...
- Page 426 LIP-8008D User Guide Feature Name Code Remark Conference Room 4 Conference Room 5 Conference Room 6 Conference Room 7 Conference Room 8 Conference Room 9 Internal Page 543 + 00, xx 00: All Call Page Xx: Page Group Personal VM Page Announcement Page For Attendant Page Auto Answer...
- Page 427 LIP-8008D User Guide Feature Name Code Remark Direct Call Pickup Walking COS Call Parking Location 541 + xx Xx: Parking Location (00 ~ 49) PGM Mode Access Two-Way Record VMIB Access AME Access CO Line Access 88 + xxx Xxx: CO Line # (001 ~ 200 : MG-300 01 ~ 80 :...
- Page 428 LIP-8008D User Guide Feature Name Code Remark Forced Handsfree Call Call Based CLIR CLIR Access COLR Access Pilot Hunt Call Command Call Oneway Command Call Conf Intrude Register Camp On Register OHVO Register Mobile Num Register Mobile CLI Register Mobile Access CCR Access CCR Access And Drop System Hold...
-
Page 429: Appendixb User Program Codes
LIP-8008D User Guide Appendix B User Program Codes In iPECS-LIK Code Function Remarks Enblock Mode Dialing 11 x Select Ring Tone 1-8 Differential Ring, Intercom 12 x Select Ring Tone 1-8 Differential Ring, CO/IP line Select ICM Signal mode, 13 x... - Page 430 Assign PTT Button {IN-ROOM INDICATION} Button 9* xx (xx : 01~10) Assignment Hot Desk Login Code Hot Desk Log out Code Force Fwd to Dest. In iPECS-MG Code Function Remarks 1:H, 2:T, 3:P Intercom Answer Mode 12 + Name User name creation...
- Page 431 LIP-8008D User Guide Code Function Remarks Set Backlight ICM Ring Type TRK Ring Type Ring Download LIP-Series Only Back Ground Music Temporary COS Auth. Code required Retrieve COS Auth. Code required COS Override Auth. Code required (Walking COS) Register Password Call Log Protect SMS Message Protect LIP-Series/LDP6000-Series...
- Page 432 LIP-8012D & 8024D User Guide...
-
Page 433: Revision History
LG-Ericsson in this material is believed to be accurate and reliable, but is not warranted to be true in all cases. LG-Ericsson and iPECS are trademarks of LG-Ericsson Co., Ltd. All other brand and product names are trademarks or... -
Page 434: Important Safety Information
LIP-8012D & LIP-8024D User Guide Important Safety Information To prevent unexpected danger or damage please read this information before installing or attempting to repair you phone. Warning and Caution information is provided to alert the consumer of known dangers: Warning: To reduce the possibility of electric shock, do not expose your phone to high humidity areas, such as a bathroom, swimming area, etc. -
Page 435: Introduction
1. I ....................1 NTRODUCTION General..................... 1 Feature Information ................1 Feature Groupings ................1 iPECS LIP-8012D & 8024D Phone Description ..........2 LIP-8012D & 8024D Phone Installation ............3 Phone Connections ..............3 1.5.1 Wiring Connectors ..............4 1.5.2 Power ..................4 1.5.3... - Page 436 LIP-8012D & LIP-8024D User Guide Leaving a Message Wait ............29 4.1.2 External Calls ................... 29 Placing external CO/VoIP calls ............. 29 4.2.1 Waiting for the next available CO/IP line.......... 31 4.2.2 Account Codes: Tracking External calls for billing ......31 4.2.3 Disable dialing from your phone............
- Page 437 LIP-8012D & LIP-8024D User Guide 9. PBX, C & ISDN ............61 ENTREX FEATURES Access PBX or Centrex features............. 61 Access the ISDN Network..............61 Using the Keypad facility to access ISDN features......61 9.2.1 Using ISDN Supplementary Services ..........62 9.2.2 Activating ISDN Caller ID Restriction..........
-
Page 438: General
Employing state-of-the-art Voice over Internet Protocol (VoIP) technology, voice and data converge on a single IP packet network. Because each iPECS Phone is an IP appliance, it can be moved easily throughout the office LAN and maintain normal operation. - Page 439 Features and functions of your iPECS are accessed either using the Fixed or Flexible buttons or by selecting a menu item using the Soft buttons. In the remainder of...
- Page 440 One port is for connecting to the LAN (‘D’ in graphic), and the other can be connected to a desktop data device such as a PC (‘B’ in graphic), or another LAN interface terminal (refer to iPECS Hardware and Installation Manual).
-
Page 441: Wiring Connectors
LIP-8012D & LIP-8024D User Guide iPECS LIP-8012D & 8024D Connections 1.5.2 Wiring Connectors The LIP-8012D & LIP-8024D each have two (2) 10/100 Base-T Ethernet ports, a “LAN” port and a “PC” port. An intelligent switch, which implements voice packet priority, connects the two (2) ports. This permits the... -
Page 442: Wall Mount
1.5.4 Wall Mount The LIP-8000 series phones can be wall mounted as needed. The following instructions describe how to perform a wall mount installation. For more information on installing your LIP-8000 series phone, refer to the iPECS Hardware Description Installation Manual. - Page 443 2. LCD, Speakerphone Using the Display Menu & Related Features The Liquid Crystal Display (LCD) of the iPECS LIP- 8012D has three lines, and the LIP-8024D has four lines of 24 characters each. The LCD is used to convey information to you. It provides the date, time and station number on the display while idle.
- Page 444 LIP-8012D & LIP-8024D User Guide 2.1.1 Phone Setting In iPECS-LIK To configure the Phone: Press M button and 1 (Phone Setting), The following menu displays: 1. STATION NAME PROGRAM 2. ICM RING 3. CO RING BACK 4. PASSWORD PROGRAM 5.
- Page 445 Set Contrast—Press the VOL buttons or Use Navigation up/down buttons to adjust the brightness, then press the OK Soft button to select. 2.1.2 Conference Room (iPECS-LIK) The User can create and delete Conference rooms. To configure a Conference Room: ...
- Page 446 LIP-8012D & LIP-8024D User Guide 2.1.3 ICM SMS (iPECS-LIK) The user can send SMS messages to other stations and retrieve received SMS messages. To retrieve a SMS message: Press M button and 3 (ICM SMS), The following menu displays: 1.
- Page 447 LIP-8012D & LIP-8024D User Guide 2.1.4 Network Config. The User can review the current network configuration or modify a new phone network configuration. To access Network Config. settings: Press M button and 2 (Network Config), Enter the password (default=147*); the following will display: MFIM #[1/2] ? MFIM #1 - CHANGE[#]...
- Page 448 Delete Conference Room—Enter the Conference Room number and press the OK Soft button to delete. Using the Speakerphone Activate the iPECS Speakerphone at any time (except for Paging) in place of lifting the handset to receive or place calls. Additionally, you may switch between the handset and Speakerphone during a call.
- Page 449 Before using the headset, the headset must be “paired” with the BTU, and then the headset must be enabled for use. Operation of the iPECS LIP- 8024D with the headset is the same as with the Speakerphone; press the Speaker button to activate the BTU to go ON and OFF-hook.
- Page 450 LIP-8012D & LIP-8024D User Guide To pair the wireless headset to the BTU: Press the H button, EADSET Dial 3(iPECS-LIK)/2(iPECS-MG), Press the button. HOLD SAVE To enable/disable the wireless headset: Set the Bluetooth headset to pairing mode, ...
- Page 451 LIP-8012D or LIP-8024D using the RS-232 cable. Be sure to verify the serial DSS and LSS capacities with the iPECS System to ensure usability (refer to iPECS Manual). The following graphics show the front and rear view of each.
- Page 452 LIP-8012D & LIP-8024D User Guide In iPECS-LIK To use a Serial DSS: Verify the Station has Serial DSS Usage authority (Admin PGM111-Flex21), Verify the DSS power is OFF (LIP-8048DSS only), Power-OFF the phone, Connect the serial DSS to the phone, ...
-
Page 453: Receiving Calls
Otherwise, you must press the flashing Flex button. External calls to an iPECS Phone will appear under the CO/IP line or a LOOP button. External calls are from CO lines or VoIP channels that are programmed to ring at your phone. For external calls, Delay Ring may be assigned allowing others to answer the call before the call rings at your phone. -
Page 454: Responding To A Call While Busy
There are two methods of notification and call screening provided, LED blink mode or Speaker hearing mode. Ring Mode(iPECS-Lik)/LED Blink Mode(iPECS- MG)—the Answering Machine Emulation (AME) Flex button will flash to notify you of a call. You may press the Flex button to hear the caller as the voice message is stored. -
Page 455: Differential Ring Signals
Differential Ring Signals When multiple phones in a small area ring, it can be difficult to tell which are ringing. The iPECS Phone has 14 Ring Tones available for differentiating one phone’s ringing from another. Four of the tones are stored in the phone permanent memory;... -
Page 456: Answering Calls At Night
To answer a call ringing during night mode: Lift the handset, Dial 567(iPECS-Lik)/587(iPECS-MG) (UNA code). To screen a call in Ring mode(iPECS-LIK)/LED blink mode(iPECS-MG): Press the flashing button, the caller’s voice is broadcast over the station speaker and stored in the voice mailbox (in the Speaker hearing mode, broadcast is automatic). -
Page 457: Answering Calls To Other Stations
LIP-8012D & LIP-8024D User Guide Answering Calls to Other Stations When nearby stations are ringing, you may pick-up (answer) the call. Select to answer a call ringing at a specific station (Directed Call Pick-Up) or you may choose to answer the oldest call ringing to your station group (Group Call Pick-Up). - Page 458 LIP-8012D & LIP-8024D User Guide Voice Mail and External Voice Mail. Your LCD and the LCD of the forward receiver will both indicate the forward status. Call Forward can be activated from your phone or from a different station (Call Forward, Remote). You may define the conditions or ‘type of forward’...
-
Page 459: Forwarding Calls To An External Number
LIP-8012D & LIP-8024D User Guide To activate Call Forward from your phone to another phone or internal system resource: Lift the handset, Press the Fwd Soft button, Dial the type of forward code 1-4, Dial the destination number. To deactivate Call Forward from your phone: ... - Page 460 Code. In addition, from a remote location, Authorization you must access the system through a enabled DISA CO line. In iPECS-LIK To activate Call Forward, Off Premise (forward to an external number) from your phone: Lift the handset, ...
-
Page 461: Forwarding Callers To A Text Message
Replace the handset, return to idle. 3.8.3 Forwarding callers to a Text Message Using an iPECS Phone, the system can be setup to return a ‘Text Message’ to internal callers. When calling your Station, internal callers will automatically receive... - Page 462 IN OFFICE STA xxxx Message 08: IN MEETING RETURN AT TIME hh:mm Message 09: AT HOME Message 10: AT BRANCH OFFICE In iPECS-MG Message 1: LUNCH RETURN AT hh:mm Message 2: ON VACATION RETURN AT DATE mm:dd Message 3: OUT OF OFFICE...
- Page 463 LIP-8012D & LIP-8024D User Guide In iPECS-LIK To activate Custom or Pre-Defined Message Forward: Press TRANS Dial User Program feature code 51, Dial the two-digit text Message code (00-20), Dial any auxiliary input for messages 01-04 and 06-08, ...
- Page 464 LIP-8012D & LIP-8024D User Guide In iPECS-MG To activate Custom or Pre-Defined Message Forward: Press TRANS Dial User Program feature code 41, Dial the one-digit text Message code (0-9), Dial any auxiliary input for messages 1-4 and 6-8, ...
-
Page 465: Placing Calls
LIP-8012D & LIP-8024D User Guide LACING A CALL 4. Placing Calls Internal Calls You can place calls to other stations in the system over the Intercom. The call will ring, or for an ICM Voice Announce call, a splash tone will be heard. Ring or Voice Announce is normally determined by settings at the called station but you may change this by dialing ‘#’... -
Page 466: External Calls
4.2.1 Placing external CO/VoIP calls External calls are placed on CO/IP lines. These ‘lines’ are accessed either using a button on the iPECS Phone assigned as a CO/IP line or using dial codes. CO/IP lines are grouped for different types of calls, local, long distance, etc. - Page 467 LIP-8012D & LIP-8024D User Guide CO/IP Group access— 801-820 for iPECS-100, or 801-872 for iPECS- 300 & 600 801-824 for iPECS-MG100, or 801-872 for iPECS- MG300 Any CO/IP Line access— When dialing on a CO line which uses pulse style...
-
Page 468: Waiting For The Next Available Co/Ip Line
LIP-8012D & LIP-8024D User Guide 4.2.2 Waiting for the next available CO/IP line If all the lines connected to your system are busy, you will receive an All Trunks Busy signal. You may request to be notified when a line becomes free. To activate a queue if the selected/dialed line is busy: ... -
Page 469: Using Last Number Redial (Lnr)
LIP-8012D & LIP-8024D User Guide To activate Temporary COS: Press TRANS Dial 21(iPECS-LIK)/31(iPECS-MG) (User Program code), Dial your Authorization code(iPECS-MG), Press HOLD SAVE To deactivate Temporary COS: Press TRANS Dial 22(iPECS-LIK)/32(iPECS-MG) (User Program code), ... -
Page 470: Using And Entering Saved Number Dial
LIP-8012D & LIP-8024D User Guide The last number dialed on an external call is automatically saved in the Last Number Redial (LNR) buffer. The iPECS Display Phone, the system will store numbers dialed last 15(iPECS- LIK)/100(iPECS-MG) calls. In iPECS-LIK To dial the Last Number for an external call: ... -
Page 471: Using System Speed Dial Numbers
While on an outgoing external call, press the Save Soft button. 4.3.3 Using System Speed Dial Numbers The iPECS-100 system has memory allocated for 800 System Speed Dial numbers (bins 200-999). The iPECS-300 & 600 systems each have memory allocated for 3000 System Speed Dial numbers (bins 2000-4999). - Page 472 LIP-8012D & LIP-8024D User Guide each up to 48 digits. The iPECS-300 & 600 support 100 Station Speed Dial numbers (bins 000-099). The iPECS-MG 100 & 300 each support 50 Station Speed Dial numbers (bins 000-049). These numbers are entered at the user’s station and may include several ‘special’...
- Page 473 LIP-8012D & LIP-8024D User Guide Letter Type Uppercase Lowercase Dial Pad (ABC) (ABC) button Button depressions < < Character Entry Chart(iPECS-MG)
- Page 474 To assign a Station Speed Dial number directly to a Flex button: Press TRANS Press the desired Flex button, Select the Tel Num Soft button(iPECS-LIK)/Dial ‘1’ for Number(iPECS-MG), Select/dial the CO/IP line/group, Dial the desired number, Press HOLD ...
- Page 475 SAVE To enter your station user name: Press the button, TRANS Dial 74(iPECS-LIK)/12(iPECS-MG) (Station User Name code), Enter the Name, up to 12 characters (press DND button to backspace/delete a character). To input characters: Press the second Soft button to select ABC> or abc>...
- Page 476 LIP-8012D & LIP-8024D User Guide To set up ACNR, while on an outgoing call: Use the Navigation button to display the next menu and select the ACNR Soft button, Hang-up handset. To cancel the ACNR request: Press the Stop Soft button.
-
Page 477: Call Handling
HOLD SAVE The LEDs for CO/IP line buttons flash at distinctive rates for the holding station and other iPECS Phone users. There are also user operations such as pressing a button that will place a call in Automatic Hold. -
Page 478: Broker Call: Switching Between Two Calls
To switch between two calls (Broker Call): Press the desired CO/IP line button. Joining Multiple People in a Conference You can establish a Conference with up to 3 parties(iPECS-LIK)/13 parties(iPECS-MG), or 24 parties when using a Multi-Party Conference Interface Module (MCIM)(iPECS-LIK). other parties Conference may be internal or external. - Page 479 LIP-8012D & LIP-8024D User Guide To establish a Conference: Establish call with one of the desired conference parties, Select the Conf Soft button, Establish call with the other conference party, Select the Conf Soft button, Select the Conf Soft button again to establish the conference.
-
Page 480: Setting Up A Conference Room
MCIM. When setting up a Conference Room, a password can be designated for invited parties (internal and external parties) to use for accessing the established Conference Room. In iPECS-MG To set-up a Conference Room: Press the... - Page 481 Park timer. In iPECS-LIK To park an active external call: Press TRANS Dial the Park Orbit (601-610 for iPECS-100, or 601-619 for iPECS-300 & 600), Return to idle. To retrieve a parked call: Lift the handset, ...
-
Page 482: Responding To A Station Message Waiting Indication
The message icon will be displayed on the LCD screen in LIP-8024D. If programmed, a flashing MSG LED on the iPECS Phone also will indicate when there is a Message Waiting. As a further notification, a Message Wait Reminder Tone can be provided. - Page 483 LIP-8012D & LIP-8024D User Guide Box is part of the integrated VMIM/VSF/VMIB module, the iPECS Feature Server or an external Voice Mail system. The Voice Mail system allows access to and management of received voice messages. While in your Mail Box, you have control of your password and Mail Box greeting.
- Page 484 At completion of session, hang-up. Sending and Receiving Short Text Messages You can exchange short text messages (up to 100 alphanumeric characters) with other iPECS display phone users. These messages will activate the message icon on the LCD (LIP-8024D). If the ring/message LED is set to Message Wait indication, the ring/message LED will flash.
- Page 485 LIP-8012D & LIP-8024D User Guide In iPECS-LIK To send an SMS message to another iPECS display Phone: Press the button, TRANS Dial 36 (SMS send code), Dial 1 to resend an existing message, or 2 to send a new or edit an existing message, ...
- Page 486 LIP-8012D & LIP-8024D User Guide In iPECS-MG To send an SMS message to another iPECS display Phone: Press the button, TRANS Dial 43 (SMS send code), Dial the station number to receive the message, Press the Add Soft button to append the next station number and Dial the station number, ...
-
Page 487: Remote System Access
Dial as needed for the desired system resource. Mobile Phone Extension When away from your desk or office you can place and receive iPECS calls on a registered mobile phone. You may need to activate the Mobile Phone Extension feature and assign the Mobile Phone number. - Page 488 Press the button. HOLD SAVE To place a call from the mobile extension using the iPECS System: Dial the ISDN DID number of the station; the system will check the Caller ID and answer the call. The user then will receive intercom dial tone, ...
- Page 489 Press the button. HOLD SAVE To place a call from the mobile extension using the iPECS System: Dial the ISDN DID number of the station; the system will check the Caller ID and answer the call. The user then will receive intercom dial tone, ...
-
Page 490: Misc . Features
LIP-8012D & LIP-8024D User Guide EATURES 8. Misc. Features Call Log Users can view a log of incoming, outgoing and missed calls on the display (up to 99 records). A LOG Soft button provides simple access to incoming (called), outgoing (dialed) and missed (lost) calls. NOTE—if a call is missed, the LOG Soft button will be displayed as LOG(M);... - Page 491 Press the Edit Soft button to modify selection. To select the CO code: Use Navigation up/down buttons to highlight the desired item, Press the Select Soft button. Contrast (iPECS-LIK) LCD contrast can be adjusted to enhance viewing ability.
- Page 492 These sources or an internal source provide input for Background Music (BGM) and Music On Hold (MOH). In addition, a recorded message from the VMIM can be used. BGM is played over the speakers of the iPECS Phone when the station is idle. MOH is played to callers placed on Hold.
-
Page 493: Push-To-Talk (Ptt) Page
Dial 544(iPECS-LIK)/546(iPECS-MG) (Meet-Me-Page code). Push-To-Talk (PTT) Page iPECS Phones can be assigned as a member of one or more of the system’s nine Push-To-Talk (PTT) page groups. Users separately log-in or log-out of any one or all PTT groups to which the phone is assigned. Once... -
Page 494: Wake-Up Alarm
LIP-8012D & LIP-8024D User Guide Wake-Up Alarm iPECS supports an Alarm clock for each station in the system. The alarm clock can be set to repeat daily or as a one-time alarm. When responding to the alarm by lifting the handset, BGM will be provided. -
Page 495: Power Fail Transfer
Voice Memos to provide Station Users with general information such as station number, date, time, and feature status. Voice Memos are heard over the iPECS Phone speaker and over the handset for SLTs. For the Station Status Memo, the following items are... - Page 496 LIP-8012D & LIP-8024D User Guide To hear Date & Time memo: Dial the Voice Memo code (661 for iPECS-100, *661 for iPECS-300 & 600, or 675+1 for iPECS-MG), Date and Time memo is heard, “Date is May 2nd.Time is xx:xx pm”.
- Page 497 LIP-8012D & LIP-8024D User Guide In iPECS-LIK To Log on to a Hot Desk station: Lift the handset, Dial your Authorization Code (Station Number and Password). To Log out of the Hot Desk station: Press the button, TRANS ...
-
Page 498: Access Pbx Or Centrex
9. PBX, Centrex, & Access PBX or Centrex features ISDN Features The iPECS has been designed to operate with a host PBX system or Centrex services from your service provider. The iPECS connects to a host with analog CO lines. -
Page 499: Activating Isdn Caller Id Restriction
, Conf, or CO line button to activate the desired feature. 9.2.3 Activating ISDN Caller ID Restriction iPECS Phone users can restrict the transmission of Caller ID to the far-end. This may be a subscription service of your carrier. Separate Flex buttons are required to activate outgoing, Connected Line (COL), and incoming, Calling Line ID (CLID) restriction. -
Page 500: Entering Station Program Data
10.1 Entering Station Program Data Buttons A special code set is available for iPECS Phone users to assign certain attributes such as Authorization Codes (Passwords). After entering the User Program mode, dial the codes to select the attribute and setting. Once selected, the setting is saved. - Page 501 LIP-8012D & LIP-8024D User Guide PPENDIX LEXIBLE UMBERING In iPECS-LIK FEATURE iPECS- iPECS- iPECS- REMARK 100- 100- 1000- Intercom Call 1599 501- 501- 501-535 Internal Page Zone Internal All Call Page Meet Me Page 545- 545- 545-546 External Page Zone 1~2...
- Page 502 LIP-8012D & LIP-8024D User Guide FEATURE iPECS- iPECS- iPECS- REMARK Universal Night Answer Account Code with bin Walking COS Code ACD Supervisor On/Off Duty ACD Supervisor Login ACD Supervisor Logout ACD Help Code ACD Calls In Queue Display ACD Supervisor Status...
- Page 503 Door Open (4 Door ) 300 & MCID Request AME Feature Unsupervised Conference Timer Extension code PTT Group Login/Logout In iPECS-MG 1) Basic Number Name Code Remark Station Number 100 ~ 4xx CO Group Access Code 801 ~ 872(MG-300)
- Page 504 LIP-8012D & LIP-8024D User Guide Feature Name Code Remark Personal VM Page Announcement Page For Attendant Page Auto Answer Internal Page Answer (Meet-Me Page) External Page Internal-External Page All Call Forward Register 554 + Type + Destination Pilot Hunt Call Forward Register 514 + Type + Destination Pilot Hunt Call Forward Cancel...
- Page 505 LIP-8012D & LIP-8024D User Guide Feature Name Code Remark CO Line Access 88 + xxx Xxx: CO Line # (001 ~ 200 : MG- 01 ~ 80 : MG- 100) VM MWI Enable VM MWI Cancel MCID Request Unsupervised Conf Extend PTT Group Access 524 + (0~9,*) 0 ~ 9: PTT Group...
- Page 506 LIP-8012D & LIP-8024D User Guide Feature Name Code Remark OHVO Register Mobile Num Register Mobile CLI Register Mobile Access CCR Access CCR Access And Drop System Hold Return Held CO Sys Memo DISA Tone Service All Feature Cancel Add Conf Member System Alarm Reset Fault Alarm Reset Door Open...
- Page 507 LIP-8012D & LIP-8024D User Guide PPENDIX ROGRAM ODES In iPECS-LIK CODE FUNCTION REMARK Enblock Mode Dialing iPECS LIP-7000 only 11 x Select Ring Tone 1-8 Differential Ring, Intercom 12 x Select Ring Tone 1-8 Differential Ring, CO/IP line Select ICM Signal mode, 13 x...
- Page 508 NTRUSION ICM Button Assign C Button Assign K EYPAD ACILITY Button Assign OHVO Button Button Assignment iPECS LIP-7000 only PEED Button Assignment iPECS LIP-7000 only Button iPECS LIP-7000 only Assignment Button Assignment iPECS LIP-7000 only Button Assignment iPECS LIP-7000 only...
- Page 509 LIP-8012D & LIP-8024D User Guide In iPECS-MG Code Function Remarks Intercom Answer Mode 1:H, 2:T, 3:P 12 + User name creation 2 digit for each character Name 13 + HH/mm, Set wake-up alarm time Time 24-hour clock Cancel Wake-up Alarm...
- Page 510 LIP-8012D & LIP-8024D User Guide Code Function Remarks Code Speaker/Headset Mode Speak/Headset/E-MIC Headset Ring Mode Speaker/Headset/Both Register Station ICLID View Station ICLID View IP Address IP Phone/ DTIM/SLTM View Mac Address IP Phone/ DTIM/SLTM View IP Phone version Network Setting LIP Series System Version System IP Address...
- Page 511 LIP-8040L User Guide...
- Page 512 LG-Ericsson in this material is believed to be accurate and reliable, but is not warranted to be true in all cases. LG-Ericsson and iPECS are trademarks of LG-Ericsson Co., Ltd. All other brand and product names are trademarks or...
- Page 513 Important Safety Information To prevent unexpected danger or damage please read this information before installing or attempting to repair you phone. Warning and Caution information is provided to alert the consumer of known dangers: Warning: To reduce the possibility of electric shock, do not expose your phone to high humidity areas, such as a bathroom, swimming area, etc.
- Page 514 LIP-8040L User Guide TABLE OF CONTENTS 1. I ....................1 NTRODUCTION 1.1 General................1 1.2 Feature Information..............1 1.3 Feature Groupings..............1 1.4 iPECS LIP-8040L Phone Description ..........2 1.5 LIP-8040L Phone Installation ............3 1.5.1 Power .................4 1.5.2 Wall Mount ..............4 LCD, S & R ..........6 PEAKERPHONE...
- Page 515 LIP-8040L User Guide 4.2 External Calls ..............31 4.2.1 Placing external CO/VoIP calls.......... 31 4.2.2 Waiting for the next available CO/IP line ......33 4.2.3 Account Codes: Tracking External calls for billing....33 4.2.4 Disable dialing from your phone ........33 4.2.5 Temporarily override dialing restrictions at a phone ....
- Page 516 LIP-8040L User Guide 9.1 Access PBX or Centrex features ..........62 9.2 Access the ISDN Network ............62 9.2.1 Using the Keypad facility to access ISDN features....62 9.2.2 Using ISDN Supplementary Services ........63 9.2.3 Activating ISDN Caller ID Restriction........63 10.
-
Page 517: Ntroduction
Employing state-of-the-art Voice over Internet Protocol (VoIP) technology, voice and data converge on a single IP packet network. Because each iPECS Phone is an IP appliance, it can be moved easily throughout the office LAN and maintain normal operation. - Page 518 Phone allows you to move through the menu choices when more than three selections are available. Features and functions of your iPECS are accessed either using the Fixed or Flexible buttons or by selecting a menu item using the Soft buttons. In the remainder of...
- Page 519 LIP-8040L User Guide iPECS LIP-8040L Diagram LIP-8040L Phone Installation The phone handset is attached as shown (A). The LIP- 8040L has 2 RJ-45 and 10/100 Base-T LAN connection ports (shown). One port is for connecting to the LAN (D), and the other can be connected to a desktop data device or PC (B), or another LAN interface terminal.
-
Page 520: Power
DSS Connection to IP Phone 1.5.2 Wall Mount The LIP-8000 series phones can be wall mounted as needed. The following instructions describe how to perform a wall mount installation. For more detailed instruction, refer to the iPECS Hardware Description and Installation Manual. - Page 521 LIP-8040L User Guide Mark and drill two (2) 7mm holes for plastic wall anchors. Insert the two (2) anchors into the holes and insert and tighten the each screw leaving about 2.5 mm (1/8- inch) of the screw exposed. ...
-
Page 522: Lcd, Speakerphone Elated Eatures
2. LCD, Speakerphone Using the LCD & Related Features The iPECS LIP-8040L has a large 9-line, 24 character across Liquid Crystal Display (LCD) which is divided into 3 sections. The upper section consists of 3 lines. The first line displays various icons. The 2... -
Page 523: Phone Setting
LIP-8040L User Guide In iPECS-LIK To activate the Display Menu: Press M button, Press the Navigation up/down buttons and press the OK Soft button to select, Dial the associated digit (Menu selections shown): Select (0-4) 1. PHONE SETTING 2. - Page 524 LIP-8040L User Guide 2.2.1 Phone Setting In iPECS-LIK To configure the Phone: Press M button and 1 (Phone Setting), The following menu displays: Select (1-8) 1. STATION NAME PROGRAM 2. ICM RING 3. CO RING 4. PASSWORD PROGRAM 5.
-
Page 525: Conference Room
Set Contrast—Press the VOL buttons or Use Navigation up/down buttons to adjust the brightness, then press the OK Soft button to select. 2.2.2 Conference Room (iPECS-LIK) The User can create and delete Conference rooms. To configure a Conference Room: ... -
Page 526: Icm Sms
LIP-8040L User Guide 2.2.3 ICM SMS (iPECS-LIK) The user can send SMS messages to other stations and retrieve received SMS messages. To send a SMS message: Press M button and 3 (ICM SMS), The following menu displays: SELECT (1-2) 1. -
Page 527: Network Config
LIP-8040L User Guide 2.2.4 Network Config The User can review the current network configuration or modify a new phone network configuration. To access Network Config. settings: Press M button and 4 (Network Config), Enter the password (default=147*); the following will display: MFIM #[1/2] ? MFIM #1 - CHANGE[#]... -
Page 528: Using The Speakerphone
Delete Conference Room—Enter the Conference Room number and press the OK Soft button to delete. Using the Speakerphone Activate the iPECS Speakerphone at any time (except for Paging) in place of lifting the handset to receive or place calls. To access the Attendant menu: ... -
Page 529: To Mute The Microphone
(within approximately 10 meters) and maintain a conversation. Before using the headset, the headset must be “paired” with the BTU, and then the headset must be enabled for use. Operation of the iPECS LIP- 8040L with the headset is the same as with the... - Page 530 1 meter apart. To pair the wireless headset to the BTU: Press the H button, EADSET Dial 3(iPECS-LIK)/2(iPECS-MG), Press the button. HOLD SAVE To enable/disable the wireless headset: ...
-
Page 531: Using A Serial Dss
LIP-8040L using the RS-232 cable. Be sure to verify the serial DSS and LSS capacities with the iPECS System to ensure usability (refer to iPECS Manual). The following graphics show the front and rear view of each. - Page 532 LIP-8040L User Guide LIP-8012DSS LIP-8012LDSS LIP-8048DSS In iPECS-LIK To use a Serial DSS: Verify the Station has Serial DSS Usage authority (Admin PGM111-Flex21), Verify the DSS power is OFF (LIP-8048DSS only), Power-OFF the phone, Connect the serial DSS to the phone, ...
- Page 533 LIP-8040L User Guide In iPECS-MG To use a Serial DSS: Set the Station’s Serial DSS Usage Map (Admin PGM120-Flex2), Verify the DSS power is OFF (LIP-8048DSS only), Power-OFF the phone, Connect the serial DSS to the phone, ...
-
Page 534: Receiving Calls
Otherwise, you must press the flashing Flex button. External calls to an iPECS Phone will appear under the CO/IP line or a LOOP button. External calls are from CO lines or VoIP channels that are programmed to ring at your phone. For external calls, Delay Ring may be assigned allowing others to answer the call before the call rings at your phone. -
Page 535: Responding To A Call While Busy
There are two methods of notification and call screening provided, Ring or Speaker mode. Ring mode(iPECS-Lik)/LED Blink Mode(iPECS- MG)—the Answering Machine Emulation (AME) Flex button will flash to notify you of a call. You may press... -
Page 536: Differential Ring Signals
Differential Ring Signals When multiple phones in a small area ring, it can be difficult to tell which are ringing. The iPECS Phone has 14 Ring Tones available for differentiating one phone’s ringing from another. Four of the tones are stored in the phone permanent memory;... - Page 537 LIP-8040L User Guide In iPECS-LIK To download a Ring Tone from System memory: Press TRANS Dial 1 for Ring Tones, Dial 5 for Ring Tone download, Dial the phone’s memory location to receive the tone (5-8), ...
-
Page 538: Answering Calls At Night
To answer a call ringing during night mode: Lift the handset, Dial 567 (iPECS-Lik)/ 587(iPECS-MG) (UNA code). Answering Calls to Other Stations When nearby stations are ringing, you may pick-up (answer) the call. Select to answer a call ringing at a... -
Page 539: Forwarding Calls
LIP-8040L User Guide The Attendants and Secretary may be able to activate DND Override and Intrude on an active call. Attendants may also cancel DND at other stations. To toggle DND ON and OFF: Press the DND button. Forwarding Calls 3.8.1 Forwarding calls to another Station or Voice Mail Incoming calls may be diverted to other resources of the system. -
Page 540: Forwarding Calls To An External Number
LIP-8040L User Guide Calls on a Private Line will not forward except to a station with an appearance of the Private Line or to Voice Mail. To activate Call Forward from your phone to another phone or internal system resource: ... - Page 541 Authorization Code. addition, from a remote location, you must access the system through a enabled CO line. DISA In iPECS-LIK To activate Call Forward, Off Premise (forward to an external number) from your phone: Lift the handset, Press the Fwd Soft button, ...
-
Page 542: Forwarding Callers To A Text Message
Replace the handset, return to idle. 3.8.3 Forwarding callers to a Text Message Using an iPECS Phone, the system can be setup to return a ‘Text Message’ to internal callers. When calling your Station, internal callers will automatically receive... - Page 543 IN OFFICE STA xxxx Message 08: IN MEETING RETURN AT TIME hh:mm Message 09: AT HOME Message 10: AT BRANCH OFFICE In iPECS-MG Message 1: LUNCH RETURN AT hh:mm Message 2: ON VACATION RETURN AT DATE mm:dd Message 3: OUT OF OFFICE...
- Page 544 LIP-8040L User Guide In iPECS-LIK To activate Custom or Pre-Defined Message Forward: Press TRANS Dial User Program feature code 51, Dial the two-digit text Message code (00-20), Dial any auxiliary input for messages 01-04 and 06-08, ...
- Page 545 LIP-8040L User Guide In iPECS-MG To activate Custom or Pre-Defined Message Forward: Press TRANS Dial User Program feature code 41, Dial the one-digit text Message code (0-9), Dial any auxiliary input for messages 1-4 and 6-8, ...
-
Page 546: Placing A Call
LIP-8040L User Guide 4. Placing Calls LACING A CALL Internal Calls You can place calls to other stations in the system over the Intercom. The call will ring, or for an ICM Voice Announce call, a splash tone will be heard. Ring or Voice Announce is normally determined by settings at the called station but you may change this by dialing ‘#’... -
Page 547: Leaving A Message Wait
4.2.1 Placing external CO/VoIP calls External calls are placed on CO/IP lines. These ‘lines’ are accessed either using a button on the iPECS Phone assigned as a CO/IP line or using dial codes. CO/IP lines are grouped for different types of calls, local, long distance, etc. - Page 548 LIP-8040L User Guide 88 + Line number (01-80 for iPECS-MG100, or 001-240 for iPECS-MG300). CO/IP Group access— 801-820 for iPECS-100, or 801-872 for iPECS- 300 & 600 801-824 for iPECS-MG100, or 801-872 for iPECS- MG300 Any CO/IP Line access— When dialing on a CO line which uses pulse style...
-
Page 549: Waiting For The Next Available Co/Ip Line
LIP-8040L User Guide To place an external call: Lift the handset, Dial the CO/IP line/group, Dial the desired number. 4.2.2 Waiting for the next available CO/IP line If all the lines connected to your system are busy, you will receive an All Trunks Busy signal. -
Page 550: Temporarily Override Dialing Restrictions At A Phone
LIP-8040L User Guide phone. To deactivate Temporary COS you must enter the station’s Authorization code. To activate Temporary COS: Press TRANS Dial 21(iPECS-LIK)/31(iPECS-MG) (User Program code), Dial your Authorization code(iPECS-MG), Press HOLD SAVE To deactivate Temporary COS: ... -
Page 551: Using And Entering Saved Number Dial
LIP-8040L User Guide The last number dialed on an external call is automatically saved in the Last Number Redial (LNR) buffer. The iPECS Display Phone, the system will store numbers dialed last 15(iPECS- LIK)/100(iPECS-MG) calls. In iPECS-LIK To dial the Last Number for an external call: ... -
Page 552: Using System Speed Dial Numbers
Each station in the iPECS-100 System is allocated memory for 20 Station Speed Dial numbers (bins 00- 19) each up to 48 digits. The iPECS-300 & 600 support 100 Station Speed Dial numbers (bins 000-099). The iPECS-MG 100 & 300 each support 50 Station Speed numbers (bins 000-049). - Page 553 U - 82 S - 73 Y - 93 V - 83 Q - 7* Z - 9# 8 - 80 7 - 70 9 - 90 *1 - Blank 0-00 *2 - : *3 - , Character Entry Chart(iPECS-LIK)
- Page 554 LIP-8040L User Guide Letter Type Uppercase Lowercase Dial Pad (ABC) (ABC) button Button depressions < < Character Entry Chart(iPECS-MG)
-
Page 555: Using Dial By Name And Entering Your Name
To assign a Station Speed Dial number directly to a Flex button: Press TRANS Press the desired Flex button, Select the Tel Num Soft button(iPECS-LIK)/Dial ‘1’ for Number(iPECS-MG), Select/dial the CO/IP line/group, Dial the desired number, Press HOLD ... -
Page 556: Using Automatic Called Number Redial (Acnr)
To enter your station user name: Press the button, TRANS Dial 74(iPECS-LIK)/12(iPECS-MG) (Station User Name code), Enter the Name, up to 12 characters (press DND button to backspace/delete a character): - To input alphabet 1. Select ABC> or abc> mode by pressing 2... - Page 557 LIP-8040L User Guide cancel the ACNR request as well as connect you to the remote party. To set up ACNR, while on an outgoing call: Use the Navigation button to display the next menu and select the ACNR Soft button, ...
-
Page 558: Transfer , Conference & Other Call Handling
HOLD SAVE The LEDs for CO/IP line buttons flash at distinctive rates for the holding station and other iPECS Phone users. There are also user operations such as pressing a button that will place a call in Automatic Hold. Calls will remain in the held state for a period and then recall the user. -
Page 559: Broker Call: Switching Between Two Calls
To switch between two calls (Broker Call): Press the desired CO/IP line button. Joining Multiple People in a Conference You can establish a Conference with up to 3 parties(iPECS-LIK)/13 parties(iPECS-MG), or 24 parties when using a Multi-Party Conference Interface Module (MCIM)(iPECS-LIK). other parties Conference may be internal or external. -
Page 560: Setting Up A Conference Room
MCIM. When setting up a Conference Room, a password can be designated for invited parties (internal and external parties) to use for accessing the established Conference Room. In iPECS-LIK To set-up a Conference Room: Press the... -
Page 561: Call Park: Placing A Call On Hold To Page
Park timer. In iPECS-LIK To park an active external call: Press TRANS Dial the Park Orbit (601-610 for iPECS-100, or 601-619 for iPECS-300 & 600), Return to idle. To retrieve a parked call: Lift the handset, ... -
Page 562: Two-Way Record: Recording A Call
LIP-8040L User Guide In iPECS-MG To park an active external call: Press TRANS Dial the Park Orbit (541), Dial the Park number (00-49) Return to idle. To retrieve a parked call: Lift the handset, ... -
Page 563: Send & Retrieve Messages
The message icon will be displayed on the LCD screen. If programmed, a flashing MSG LED on the iPECS Phone also will indicate when there is a Message Waiting. As a further notification, a Message Wait Reminder Tone can be provided. -
Page 564: Getting Voice Mail Messages
Getting Voice Mail Messages When callers are forwarded or recall to your Voice Mail Box, they can leave a voice message, as part of the integrated module, VMIM/VSF/VMIB iPECS Feature Server or an external Voice Mail system. Voice Mail system allows access management of received voice messages. -
Page 565: Sending And Receiving Short Text Messages
LCD screen in LIP-8024D. If the ring/message LED is set to Message Wait Indication (PGM111-FLEX10), the ring/message LED will flash. In iPECS-LIK To send an SMS message to another iPECS display Phone: Press the... - Page 566 Press the DELETE Soft button, Dial 1 to Delete the message, 2 to Cancel, or 3 to Delete all received Short text messages. In iPECS-MG To send an SMS message to another iPECS display Phone: Press the button, TRANS ...
-
Page 567: Remote System Access
Dial as needed for the desired system resource. Mobile Phone Extension When away from your desk or office you can place and receive iPECS calls on a registered mobile phone. You may need to activate the Mobile Phone Extension feature and assign the Mobile Phone number. - Page 568 Press the button. HOLD SAVE To place a call from the mobile extension using the iPECS System: Dial the ISDN DID number of the station; the system will check the Caller ID and answer the call. The user then will receive intercom dial tone, ...
- Page 569 Press the button. HOLD SAVE To place a call from the mobile extension using the iPECS System: Dial the ISDN DID number of the station; the system will check the Caller ID and answer the call. The user then will receive intercom dial tone, ...
-
Page 570: Misc . Features
LIP-8040L User Guide EATURES 8. Misc. Features Call Log Users can view a log of incoming, outgoing and missed calls on the display (up to 99 records). A LOG Soft button provides simple access to incoming (called), outgoing (dialed) and missed (lost) calls. NOTE—if a call is missed, the LOG Soft button will be displayed as LOG(M);... - Page 571 LIP-8040L User Guide To save an external call to the Station Speed dial: Use Navigation up/down buttons to highlight the desired external call item, Press the Select Soft button, Press the Save Soft button. The CO code in a log item is used to seize the co line when placing an external call using the call log.
-
Page 572: Contrast
Background Music (BGM) and Music On Hold (MOH). In addition, a recorded message from the VMIM can be used. BGM is played over the speakers of the iPECS Phone when the station is idle. MOH is played to callers placed on Hold. - Page 573 Dial the desired Page zone, If assigned, after page warning tone, make announcement. To queue for a page when busy is received(iPECS-LIK): Press the MSG button, Replace the handset returning to idle. To answer a Meet-me-Page: ...
-
Page 574: Push-To-Talk (Ptt) Page
LIP-8040L User Guide Push-To-Talk (PTT) Page iPECS Phones can be assigned as a member of one or more of the system’s nine Push-To-Talk (PTT) page groups. Users separately log-in or log-out of any one or all PTT groups to which the phone is assigned. Once... -
Page 575: Alarm/Door Bell
Dial Door Open code, #* and contact number 1-4. NOTE—Contacts 3 & 4 are only available in the iPECS -300 & 600. Contacts 1 is available in the iPECS -MG. Power Fail Transfer (PFT) When AC power to the system fails, back-up operation may be provided with back-up batteries or Power Fail Transfer (PFT). -
Page 576: Hot Desk
Locked (Temporary COS) COS x To hear Date & Time memo: Dial the Voice Memo code (661 for iPECS-100, or *661 for iPECS-300 & 600, or 675+1 for iPECS-MG), Date and Time memo is heard, “Date is May 2nd.Time is xx:xx pm”. - Page 577 When logged-out, calls to your station number are forwarded to the chosen destination. In iPECS-LIK To Log on to a Hot Desk station: Lift the handset, ...
-
Page 578: Pbx, Centrex & Isdn Features
9. PBX, Centrex, & Access PBX or Centrex features ISDN Features The iPECS has been designed to operate with a host PBX system or Centrex services from your service provider. The iPECS connects to a host with analog CO lines. -
Page 579: Using Isdn Supplementary Services
, Conf, or CO line button to activate the desired feature. 9.2.3 Activating ISDN Caller ID Restriction iPECS Phone users can restrict the transmission of Caller ID to the far-end. This may be a subscription service of your carrier. Separate Flex buttons are required to activate outgoing, Connected Line (COL), and incoming, Calling Line ID (CLID) restriction. -
Page 580: Features & Flex Buttons
10. Features & Flex 10.1 Entering Station Program Data Buttons A special code set is available for iPECS Phone users to assign certain attributes such as Authorization Codes (Passwords). After entering the User Program mode, dial the codes to select the attribute and setting. Once selected, the setting is saved. -
Page 581: A Flexible Numbering Plan
LIP-8040L User Guide PPENDIX LEXIBLE UMBERING In iPECS-LIK FEATURE iPECS iPECS iPECS- REMARK -100 -300 100- 100- 1000- Intercom Call 1599 501- 501- 501-535 Internal Page Zone Internal All Call Page Meet Me Page 545- 545- 545-546 External Page Zone 1~2... - Page 582 LIP-8040L User Guide FEATURE iPECS iPECS iPECS- REMARK -100 -300 Group Call Pickup Universal Night Answer Account Code with bin Walking COS Code ACD Supervisor On/Off Duty ACD Supervisor Login ACD Supervisor Logout ACD Help Code ACD Calls In Queue Display...
- Page 583 Door Open (4 Door ) 300 & MCID Request AME Feature Unsupervised Conference Timer Extension code PTT Group Login/Logout In iPECS-MG 1) Basic Number Name Code Remark 100 ~ 4xx Station Number CO Group Access Code 801 ~ 872(MG-300)
- Page 584 LIP-8040L User Guide Feature Name Code Remark Internal Page 543 + 00, 00: All Call Page Xx: Page Group # Personal VM Page Announcement Page For Attendant Page Auto Answer Internal Page Answer (Meet-Me Page) External Page Internal-External Page All Call Forward Register 554 + Type Destination...
- Page 585 LIP-8040L User Guide Feature Name Code Remark Call Parking Location 541 + xx Parking Location (00 ~ 49) PGM Mode Access Two-Way Record VMIB Access AME Access CO Line Access 88 + xxx Xxx: CO Line # (001 ~ 200 : MG- 01 ~ 80 : MG- 100)
- Page 586 LIP-8040L User Guide Feature Name Code Remark Cancel Temp COS Down Password Change Inter-Phone Group Access Call Wait Request Preselected MSG PGM Forced Handsfree Call Call Based CLIR CLIR Access COLR Access Pilot Hunt Call Command Call Oneway Command Call Conf Intrude Register Camp On Register OHVO Register...
-
Page 587: Appendixb User Program Codes
LIP-8040L User Guide PPENDIX ROGRAM ODES In iPECS-LIK CODE FUNCTION REMARK Enblock Mode Dialing iPECS LIP-7000 only 11 x Select Ring Tone 1-8 Differential Ring, Intercom 12 x Select Ring Tone 1-8 Differential Ring, CO/IP line Select ICM Signal mode, 13 x... - Page 588 LIP-8040L User Guide CODE FUNCTION REMARK 1: Speakerphone, 2: 62 x Headset Ring Mode Headset, 3: both LCD Display Mode Version Display Background Music 74 x Input up to 12 characters Station User Name Registration Display Phone IP Address Change Phone IP Address Display Phone MAC IP Address Change Mode...
- Page 589 LIP-8040L User Guide In iPECS-MG Code Function Remarks 1:H, 2:T, 3:P Intercom Answer Mode 12 + User name creation 2 digit for each character Name 13 + HH/mm, Set wake-up alarm time Time 24-hour clock Cancel Wake-up Alarm Set language for the display...
- Page 590 LIP-8040L User Guide Code Function Remarks & Auth Code Speaker/Headset Mode Speak/Headset/E-MIC Headset Ring Mode Speaker/Headset/Both Register Station ICLID View Station ICLID View IP Address IP Phone/ DTIM/SLTM View Mac Address IP Phone/ DTIM/SLTM View IP Phone version Network Setting LIP Series System Version System IP Address...
- Page 591 LIP-8050V User Guide...
- Page 592 LG-Ericsson in this material is believed to be accurate and reliable, but is not warranted to be true in all cases. LG-Ericsson and iPECS are trademarks of LG-Ericsson Co., Ltd. All other brand and product names are trademarks or registered trademarks of their respective companies.
- Page 593 LIP-8050V User Guide Important Safety Information To prevent unexpected danger or damage please read this information before installing or attempting to repair you phone. Warning and Caution information is provided to alert the consumer of known dangers: Warning: To reduce the possibility of electric shock, do not expose your phone to high humidity areas, such as a bathroom, swimming area, etc.
- Page 594 ....................1 NTRODUCTION 1.1 General........................1 1.2 Feature Information ....................1 1.3 Feature Groupings....................1 1.4 iPECS LIP-8050V Phone Description ..............2 1.5 LIP-8050V Phone Installation ................4 1.5.1 Power ......................4 1.5.2 Wall Mount ....................5 LCD, S & R ............6...
- Page 595 9. M ....................70 EATURES 9.1 Call Log ....................... 70 9.2 Background Music and Music on Hold (iPECS-Lik)..........71 9.3 Using Internal, External and Meet-Me Paging ............. 71 9.4 Push-To-Talk (PTT) Page..................73 9.5 Alarm/Door Bell ....................73 9.6 Power Fail Transfer (PFT) ................... 74...
- Page 596 LIP-8050V User Guide 10. PBX, C & ISDN ..............75 ENTREX FEATURES 10.1 Access PBX or Centrex features ................. 75 10.2 Access the ISDN Network ................... 75 10.2.1 Using the Keypad facility to access ISDN features........75 10.2.2 Using ISDN Supplementary Services............76 10.2.3 Activating ISDN Caller ID Restriction ............
-
Page 597: Introduction
Voice over Internet Protocol (VoIP) technology, voice and data converge on a single IP packet network. Because each iPECS Phone is an IP appliance, it can be moved easily throughout the office LAN and maintain normal operation. Feature Information We have taken every effort to make this user guide simple and straightforward. -
Page 598: Ipecs Lip-8050V Phone Description
Phone allows you to move through the menu choices when more than three selections are available. Features and functions of your iPECS are accessed either using the Fixed or Flexible buttons or by selecting a menu item using the Soft buttons. - Page 599 Navigation Button Flexible button Soft button Speaker Call History button Phone book button Trans / PGM button DND button Speed button Call Back button Hold/Save button Volume up button Speaker button Volume down button Microphone Camera Ring/MWI LED iPECS LIP-8050V Diagram...
-
Page 600: Lip-8050V Phone Installation
RJ-45 and 10/100 Base-T LAN connection ports. One port is for connecting to the LAN (D), and the other can be connected to a desktop data device or PC (B). iPECS LIP-8050V Connections 1.5.1 Power All LIP-8000 series phones can be powered by the AC/DC Adapter-K- (48 VDC @ 0.3A;... -
Page 601: Wall Mount
Wall Mount The LIP-8000 series phones can be wall mounted as needed. The following instructions describe how to perform a wall mount installation. For more detailed instruction, refer to the iPECS Hardware Description and Installation Manual. Mark and drill two (2) 7mm holes for plastic wall anchors. -
Page 602: Lcd, Speakerphone & Related Features
2. LCD & the Display Using the LCD Menu The iPECS LIP-8050V has a 4.3” (480 x 272 pixel) color graphic LCD which is divided into 3 sections. The upper section consists of a line to display various icons, date, time and station number display. -
Page 603: Preference
LIP-8050V User Guide 2.2.1 Preference You can configure the Call Preference menu and flexible button label. 2.2.1.1 Call preference You can configure the call preference items. -
Page 604: Contacts
LIP-8050V User Guide 2.2.1.2 Flexible button label You can set the label (name) for each flexible button. If the label is not set then the feature name displays. 2.2.2 Contacts You can configure call history and phone book in the contacts menu. - Page 605 LIP-8050V User Guide 2.2.2.1 Phonebook You can access the Phonebook menu from the Display Menu or, while idle, with the left navigation button. In the Phone Book, you can search and call contacts by the name.
- Page 606 LIP-8050V User Guide Press the CALL button, to call the Main number (in yellow) or MENU to select a different number available for the contact (Mobile/Home/Office/Station). To add or edit a contact record in the Phonebook, select Add from the Phonebook menu or Edit from the Search menu. You can enter various telephone numbers, identify the Main number and select the CO line for calling the contact.
- Page 607 LIP-8050V User Guide Scroll down; you can assign a ring tone and photo image that displays if the incoming Call ID matches an assigned contact. You can assign the CO line to use when calling a contact number. 2.2.2.2 Call History You can go to the Call History from the Display Menu or, while idle, with the right navigation button.
-
Page 608: Sms Short Message Service
LIP-8050V User Guide The Call History includes several call categories, incoming calls, outgoing calls, missed calls and all calls. The display indicates time and date for the call as well as any photo assigned and the duration of the call. You can scroll and call a record from selected in the Call History. - Page 609 LIP-8050V User Guide 2.2.3.1 New SMS You can enter and send an SMS message using edit box. To edit new message: Enter your message in the test box and check the box for recipients you desire and select S...
- Page 610 LIP-8050V User Guide 2.2.3.2 Received SMS You can check and view your received messages. The navigation button is used to move message. If you press OK button then you can view the message in detail. Select the highlighted message for the message time and number stamp.
- Page 611 LIP-8050V User Guide Select the highlighted message to view the recipient list and time stamp. 2.2.3.4 Delete SMS You can delete the Received, Sent or all messages.
-
Page 612: Organizer
LIP-8050V User Guide 2.2.4 Organizer You can set the alarm clock and organize your schedule. 2.2.4.1 Alarm You can configure the local phone Alarm Clock with up to ten (10) different alarm times. For each alarm, set the condition as once or repeated daily, the time, the alarm notification interval, the Ring tone group and ring tone for notification. - Page 613 LIP-8050V User Guide 2.2.4.2 Schedule You can configure your schedule from the Organizer menu to notify you of a scheduled event. You can assign up to 30 event schedules. If you press the A button the new schedule screen appears. The event date and time is set along with a name and ring tone group and tone for notification.
- Page 614 LIP-8050V User Guide To show saved schedules use the M pop-up to see the list of all or today’s schedules. Today’s scheduled events are displayed in yellow.
-
Page 615: Tools
LIP-8050V User Guide 2.2.5 Tools You can record and play video and audio files and also copy from/to USB memory. 2.2.5.1 Camera You can take pictures and configure it in the photo album. You can record video and configure it in the video album. Take photo You can adjust resolution using the navigation button before you Capture a picture. - Page 616 LIP-8050V User Guide Record video You can adjust resolution using the navigation button before you Record a video. Supported resolutions are: 176 144 352 288. Image gallery You can manage photo files. There are three categories Basic Images (photos stored in the phone at the factory), Taken Images (photos captured by you) and Received Images.
- Page 617 LIP-8050V User Guide Select a category to display the list of images and a thumb nail of the highlighted image. The highlighted can be stored as the background screen for the phone. Video album You can manage video files. There are two categories, Recorded Videos and Received Videos.
- Page 618 LIP-8050V User Guide Select a category to display the list of videos and a thumb nail of the highlighted video. 2.2.5.2 Audio You can record and play audio files. To record sound, select 1. Record Audio then select record to record your audio.
- Page 619 LIP-8050V User Guide In the Audio Gallery, you can view and manage your recorded audio files. 2.2.5.3 Internal memory You can review the internal memory status. 2.2.5.4 External memory You can review the external memory status and copy some files from/to USB memory.
- Page 620 LIP-8050V User Guide External memory You can review the external memory status. Copy from USB You can copy files from USB memory card that you connect to the back of the phone. You can copy image (photo) files from USB. The supported formats are jpg and png.
- Page 621 LIP-8050V User Guide You can copy audio files from USB. Support formats are MP3, AMR and WAV (CCITT u-law 8,000 kHz, 8 bit, mono). You can copy video files from USB. Support formats are MP4 and 3GP.
-
Page 622: Sound
LIP-8050V User Guide Copy to USB You can copy files to the USB memory card that you connect to the back of the phone. 2.2.6 Sound You can assign tone for intercom ring and CO ring as well as the alert tone for received SMS messages. -
Page 623: Display
LIP-8050V User Guide 2.2.6.2 SMS Alert sound You can assign SMS alert tone, the selected tone is played when new SMS message is received. 2.2.7 Display You can assign a picture for background image or video substitute image. You can also configure characteristics off the LCD. - Page 624 LIP-8050V User Guide 2.2.7.1 Background image You can select a picture for background image from one of three categories, Basic Images, Taken Photos or Received Images. 2.2.7.2 Brightness You can adjust the LCD brightness. 2.2.7.3 Substitute image You can select a picture for the video substitute image from one of three categories, Substitute images, Taken photos and Received images.
- Page 625 LIP-8050V User Guide 2.2.7.4 Window color 2.2.7.5 Font 2.2.7.6 Language...
-
Page 626: Settings
LIP-8050V User Guide 2.2.8 Settings From the Settings menu you can manage the Phone settings, configure network and initialize the LIP-8050. 2.2.8.1 Phone Management Under Phone management you can assign a station name, password, station number and maximum video frame rate. To register name:... - Page 627 LIP-8050V User Guide To change password: You can request a station number: You can assign the maximum video frame rate.
- Page 628 LIP-8050V User Guide 2.2.8.2 Network Configuration You can review and set some items related to your LAN and VLAN. LAN information You can review the network mode (static or DHCP), IP address, Subnet mask, Default gateway, DNS address, MAC address. LAN Configuration You can set the network mode (static or DHCP), IP address, Subnet mask, Default gateway and primary and secondary DNS...
- Page 629 LIP-8050V User Guide VLAN Configuration You can set the VLAN ID and priority for both LAN port and PC port of the phone. DIFFSERV Configuration You can set the DiffServ value for voice, signals and video. Check network You can ping and trace the route to an IP address.
- Page 630 LIP-8050V User Guide Ping Trace route 2.2.8.3 System Configuration You can set the system IP address and connection mode (Local / Local-Remote / Remote).
- Page 631 LIP-8050V User Guide 2.2.8.4 Initialization You can initialize some configuration and restart phone itself. Set to default You can initialize the Call History, PhoneBook, Multimedia data, Alarm clock and schedule and configuration Settings. Reboot You can restart phone from the Reboot menu.
-
Page 632: Lcd, Speakerphone
The LIP-8012DSS, LIP-8012LSS, and LIP-8048DSS can be connected with the LIP-8050V using the RS-232 cable. Be sure to verify the serial DSS and LSS capacities with the iPECS System to ensure usability (refer to iPECS Manual). The following graphics show the front and rear view of each. - Page 633 LIP-8050V User Guide LIP-8012LDSS LIP-8012DSS LIP-8048DSS...
-
Page 634: Receiving Calls
Otherwise, you must press the flashing Flex button. External calls to an iPECS Phone will appear under the CO/IP line or a LOOP button. External calls are from CO lines or VoIP channels that are programmed to ring at your phone. -
Page 635: Responding To A Call While Busy
button. Press the flashing IP LINE To activate One-time DND: Press the DND button. To send a Silent Text Message (iPECS-Lik): Press the programmed button, TEXT MESSAGE Select the desired message to send. Using Answering Machine Emulation (AME) When a call is connected to your voice mail, you can screen the call as if using a normal Answering Machine. -
Page 636: Differential Ring Signals
With the LIP-8050V, 12 ring tones are available for differentiating one phone’s ringing from another. These tones are stored on the phone’s permanent memory. To select a Ring Tone from phone memory (iPECS-Lik): Press the... -
Page 637: Answering Calls At Night
To answer a call ringing during night mode: Lift the handset, Dial 567(iPECS-Lik)/587(iPECS-MG) (UA code). Answering Calls to Other Stations When nearby stations are ringing, you may pick-up (answer) the call. Select to answer a call ringing at a specific station (Directed Call Pick-Up) or you may choose to answer the oldest call ringing to your station group (Group Call Pick-Up). -
Page 638: Using Do-Not-Disturb (Dnd) To Block Incoming Calls
LIP-8050V User Guide Using Do-Not-Disturb (DND) to Block Incoming Calls Activate Do-Not-Disturb when you wish not to be interrupted by pressing the DND button; the phone will block incoming calls. Internal callers will receive a fast busy tone and the display will show the DND status. - Page 639 554, Dial 0 (Remote Call Forward code) Dial your Authorization Code (Station number & password) ) and *(iPECS-MG) Dial the type of forward code 1-4(iPECS-Lik), Dial the destination number Press , forward confirmed (iPECS-MG). HOLD SAVE To deactivate Call Forward, Remote: ...
- Page 640 LIP-8050V User Guide To activate Call Forward, Off Premise (forward to an external number) from a different phone (In iPECS-Lik): Lift the handset, Press or dial 554, Dial the Remote Call Forward code 0, Dial your Authorization code (Station number & Password), ...
-
Page 641: Forwarding Callers To A Text Message
LIP-8050V User Guide 4.8.2 Forwarding callers to a Text Message Using an iPECS Phone, the system can be setup to return a ‘Text Message’ to internal callers. When calling your Station, internal callers will automatically receive the selected message or you can send a text message you select in response to an internal call, Silent Text Message. - Page 642 LIP-8050V User Guide To activate Custom or Pre-Defined Message Forward (iPECS-Lik): Press TRANS Dial User Program feature code 51, Dial the two-digit text Message code (00-20) Dial any auxiliary input for messages 01-04 and 06-08, Press , forward confirmed.
- Page 643 LIP-8050V User Guide In the iPECS-MG To activate Custom or Pre-Defined Message Forward: Press TRANS Dial User Program feature code 41 Dial one-digit text message code(0~9, *) Dial any auxiliary input for messages 01-04 and 06-08, ...
-
Page 644: Placing A Call
LIP-8050V User Guide LACING A CALL 5. Placing Calls Internal Calls You can place calls to other stations in the system over the Intercom. The call will ring, or for an ICM Voice Announce call, a splash tone will be heard. Ring or Voice Announce is normally determined by settings at the called station but you may change this by dialing ‘#’... -
Page 645: Leaving A Message Wait
Using the CO/IP line group code, you will be able to access any line from the group. A Flex button on the iPECS Phone assigned as a button lets you access a line from a group. Dial codes for... - Page 646 LIP-8050V User Guide Individual CO/IP line Line No System Access Code 01-42 iPECS-50 & 100 001-200 iPECS-300 001-400 iPECS-600 001-600 iPECS-1200 01-80 iPECS-MG100 001-240 iPECS-MG300 CO/IP Group access— CO/IP Group Access System Code 801 – 820 iPECS-50 & 100 801 – 872 iPECS-300 &...
-
Page 647: Waiting For The Next Available Co/Ip Line
LIP-8050V User Guide NOTE—In the event of an emergency, assigned Emergency numbers (ex., a 911 call) may be dialed from any station in the System, regardless of a Station’s dialing restrictions (COS). To place an external call: Lift the handset, ... -
Page 648: Disable Dialing From Your Phone
Place call as normal. Using Automated Dialing 5.3.1 Using Last Number Redial (LNR) The last number dialed on an external call is automatically saved in the Last Number Redial (LNR) buffer. The LIP-8050 phone will display the last 15(iPECS-Lik)/100(iPECS-MG) numbers. Press the SPEED... -
Page 649: Using And Entering Saved Number Dial
To store a number in the Save Number Dial: While on an outgoing external call, press the S button. 5.3.3 Using System Speed Dial Numbers iPECS System has memory allocated for System Speed Dial numbers. The System Speed Dial numbers are as below,... - Page 650 Dial the desired System Speed Dial bin number 5.3.4 Using and Entering Station Speed Dial Numbers Each station in iPECS System is allocated memory for his station speed dial numbers. The capacity of station speed dial numbers is as below,...
- Page 651 Q - 7* Z - 9# 8 - 80 7 - 70 9 - 90 *1 - Blank 0-00 *2 - : *3 - , Character Entry Chart (iPECS-Lik) Letter Type Uppercase Lowercase Dial Pad (ABC) (ABC) button Button depressions <...
- Page 652 LIP-8050V User Guide Letter Type Uppercase Lowercase Dial Pad (ABC) (ABC) button Button depressions Character Entry Chart(iPECS-MG)
- Page 653 SPEED Dial ‘1’ for station speed dial or ‘2’ for system speed dial (iPECS-MG) Dial the desired Station Speed Dial bin number (00-19 or 000- 099). To enter a Station Speed Dial number with CO Line and Name: ...
-
Page 654: Using Dial By Name And Entering Your Name
LIP-8050V User Guide 5.3.5 Using Dial by Name and Entering Your Name Dial by Name employs three different Directories: Private directory (Station Speed dial), Public Directory (System Speed dial), or Intercom directory. NOTE—To allow others to contact you via the Intercom directory, you must enter a name for your station (up to 12 characters). -
Page 655: Using Automatic Called Number Redial (Acnr)
LIP-8050V User Guide Select a person and press SEND button to place the call. 5.3.6 Using Automatic Called Number Redial (ACNR) When making an external call and a busy signal is received, the system can be set to retry the number until the call is connected, the feature is cancelled, or the maximum number of retries is attempted—this is Automatic Called Number Redial (ACNR). -
Page 656: Lacing A Call
HOLD SAVE The LEDs for CO/IP line buttons flash at distinctive rates for the holding station and other iPECS Phone users. There are also user operations such as pressing a button that will place a call in Automatic Hold. Calls will remain in the held state for a period and then recall the user. -
Page 657: Broker Call: Switching Between Two Calls
You may switch between the active call and a call on Hold, placing the active call on Hold acting as a broker between two or more parties (Broker Call). iPECS Phone users may ‘broker’ for multiple calls up to the number of CO/IP line buttons. -
Page 658: Setting Up A Conference Room
Press the button, TRANS Dial 53(iPECS-Lik)/54(iPECS-MG) to create a Conference Room, Dial the desired Conference Room number (1-9(iPECS- Lik)/571-579(iPECS-MG), If desired enter a password for the Conference Room (up to 12 digits), to establish the Room. -
Page 659: Call Park: Placing A Call On Hold To Page
To park an active external call: Press TRANS Dial the Park Orbit (601-610 for iPECS-50 & 100, 601-619 for iPECS-300, 601-699 for iPECS-600, 6001-6200 for iPECS- 1200), Dial the 541 (Call Parking Location Code) and 00-49(Park Orbit) for iPECS-MG ... -
Page 660: Two-Way Record: Recording A Call
Mail Box. To activate Two-Way Record while on a CO/IP call: In iPECS-Lik, Use the Navigation button to display the next Menu and select the Record button, In IPECS-MG, Press the TWO-WAY Flexible button. record warning tone is heard and recording starts. -
Page 661: Send & Retrieve Messages
(MWI) when you do not answer or your phone is in DND mode. The message icon will be displayed on the LCD screen. If programmed, a flashing MSG LED on the iPECS Phone also will indicate when there is a Message Waiting. -
Page 662: Getting Voice Mail Messages
When callers are forwarded or recall to your Voice Mail Box, they can leave a voice message, as part of the integrated VMIM/VSF/VMIB module, the iPECS Feature Server or an external Voice Mail system. These Voice Mail systems allow access to and management of received voice messages. - Page 663 CO line answered by DISA the VMIM/VSF/VMIB Auto Attendant, At answer, In iPECS-Lik, dial # to receive the ‘Mail Box & Password’ prompt, In iPECS-MG, dial 523 (VMIB Access Code). Dial the Mail Box(Station Number) and password and *(iPECS-MG) to receive the ‘Number of Messages’...
-
Page 664: Remote System Access
Mobile Phone Extension When away from your desk or office you can place and receive iPECS calls on a registered mobile phone. Calls to your iPECS Phone will ring your Mobile Phone and you can place calls using the resources of the iPECS. - Page 665 Press the HOLD SAVE To place a call from the mobile extension using the iPECS System: Dial the ISDN DID number of the station; the system will check the Caller ID and answer the call. The user then will receive intercom dial tone, ...
-
Page 666: Misc. Features
LIP-8050V User Guide EATURES 9. Misc. Features Call Log Users can view a log of incoming, outgoing and missed calls on A CALL HISTORY button the display (up to 100 records). provides simple access to all calls (incoming (called), outgoing (dialed) and missed (lost) calls) at any time. -
Page 667: Background Music And Music On Hold (Ipecs-Lik)
Music (BGM) and Music on Hold (MOH). In addition, a recorded message from the VMIM can be used. BGM is played over the speakers of the iPECS Phone when the station is idle. MOH is played to callers placed on Hold. - Page 668 Lift the handset, Dial the desired Page zone, If assigned, after Page warning tone, make announcement. To queue for a page when busy is received (iPECS-Lik): Press the CALL BACK button, Replace the handset returning to idle.
-
Page 669: Push-To-Talk (Ptt) Page
LIP-8050V User Guide Push-To-Talk (PTT) Page iPECS Phones can be assigned as a member of one or more of the system’s nine Push-To-Talk (PTT) page groups. Users separately log-in or log-out of any one or all PTT groups to which the phone is assigned. Once logged in, place or receive one-way page announcements to/from other users who are logged in to the same PTT group. -
Page 670: Power Fail Transfer (Pft)
The Station Number memo is heard, “This is station 150”. To hear Station Settings: Dial Voice Memo code (663 for iPECS-100, or *663 for iPECS- 300 & 600 & 1200 , or 671 + 3 for iPECS-MG), Station Status Memo is heard. NOTE—only activated features are announced. -
Page 671: Pbx, Centrex & Isdn Features
When accessing a CO line, the phone will act as an extension of the host, allowing access to the host system features using the host dial codes. While on a call, use the iPECS Flash feature to transfer calls to other host extensions or access features of the host. -
Page 672: Using Isdn Supplementary Services
10.2.3 Activating ISDN Caller ID Restriction iPECS Phone users can restrict the transmission of Caller ID to the far-end. This may be a subscription service of your carrier. Separate Flex buttons are required to activate outgoing, Connected Line (COL), and incoming, Calling Line ID (CLID) restriction. -
Page 673: Features & Flex Buttons
11.1 Entering Station Program Data Buttons A special code set is available for iPECS Phone users to assign certain attributes such as Authorization Codes (Passwords). After entering the User Program mode, dial the codes to select the attribute and setting. Once selected, the setting is saved. A list of the User Program codes, the feature/function and any input required are given in Appendix B. - Page 674 LIP-8050V User Guide Appendix A Flexible Numbering Plan In iPECS-Lik FEATURE iPECS- iPECS- iPECS- iPECS- iPECS- 1200 100-149 100-169 100-399 1000- 1000- Intercom Call 1599 2199 501-510 501-510 501-535 501-535 301-400 Internal Page Zone Internal All Call Page Meet Me Page...
- Page 675 LIP-8050V User Guide FEATURE iPECS- iPECS- iPECS- iPECS- iPECS- 1200 ACD Calls In Queue Display ACD Supervisor Status Display ACD Supervisor Monitor ACD Reroute Queued Call w/answer ACD Reroute Queued Call w/o answer Enter Conference Room Camp-On Answer 601-610 601-610...
- Page 676 LIP-8050V User Guide In iPECS-MG 1) Basic Number Code Name Remark 100 ~ 4xx Station Number 801 ~ 872(MG-300) CO Group Access Code 801 ~ 824(MG-100) 620 ~ 669(MG-300) Station Group Number 620 ~ 639(MG-100) 2) Feature Code Feature Name...
- Page 677 LIP-8050V User Guide Feature Name Code Remark Pilot Hunt Call Forward Cancel DND Status Change DND Delete Account Code CO Flash Last Number Redial Station Speed PGM Speed Dial MWI Register MWI Answer MWI Cancel Call Back Register Call Back Cancel Group Call Pickup Direct Call Pickup Walking COS...
- Page 678 LIP-8050V User Guide Feature Name Code Remark PTT Group Access 524 + (0~9,*) 0 ~ 9: PTT Group *: Log out Hot Desk Log In/Log out Name Register Create Conf Room 527 + Conf. Room Delete Conf Room 528 + Conf. Room Wake Up Register 529 + HH:MM Wake Up Cancel...
-
Page 679: Appendixb User Program Codes
Call Log Appendix B User Program Codes In iPECS-Lik CODE FUNCTION REMARK Enblock Mode Dialing iPECS LIP-7000 only 11 x Select Ring Tone 1-8 Differential Ring, Intercom 12 x Select Ring Tone 1-8 Differential Ring, CO/IP line Select ICM Signal mode,... - Page 680 LIP-8050V User Guide CODE FUNCTION REMARK May require Authorization code Walking COS ICR SCENARIO VM Mobile Notify Station Message Wait Retrieve CLI/IP Message Wait Retrieve Authorization Code (Password) Station number +up to 12 digits, no 33 x Entry Flex button Assign DID C Button Message Wait in...
- Page 681 EDIAL Button Assignment Assign PTT Button Hot Desk Login Code Hot Desk Log out Code Force Fwd to Dest. Register Bluetooth Bluetooth Usage In iPECS-MG User Description Remark PGM Code Intercom Answer Mode 1:H, 2:T, 3:P 12 + Name User name creation...
- Page 682 LIP-8050V User Guide User Description Remark PGM Code Back Ground Music Temporary COS Auth. Code required Retrieve COS Auth. Code required COS Override Auth. Code required (Walking COS) Register Password Call Log Protect SMS Message Protect LIP-Series/LDP6000-Series 41 + MSG 0-9, MSG Set Pre-defined Message.
- Page 683 ● SLT User Guide for iPECS-MG 100/300 SLT User Guide for iPECS-MG System Placing an Outside Call Making a Screened Transfer Lift handset. While connected to an outside line, press ● ● Dial 9. hook switch. ● ( In the following countries, dial 0 to access Dial the desired extension number and wait to be ●...
- Page 684 UNA line. Hang up. ● Returning Call to Host System Call Forward If your iPECS system is connected to another system, you can use this feature to transfer a call back to an Lift handset. ● extension on the other system.
- Page 685 ● SLT User Guide for iPECS-MG 100/300 SLT User Guide for iPECS-MG System Pre-selected Messages Recording Your Message; You can choose a pre-selected message to be displayed Lift handset. ● on the LCD of the phone calling your station. Dial 5 2 3.
- Page 686 ● SLT User Guide for iPECS-MG 100/300 SLT User Guide for iPECS-MG System Programming Authorization Code Following features are only available with iPECS Lift handset. Hotel S/W. ● Dial 5 2 1, the SLT Programming code. ● Dial 3 4, the Station User Program code.
Need help?
Do you have a question about the LDP-7008 D and is the answer not in the manual?
Questions and answers