Table of Contents
Advertisement
Advertisement
Table of Contents

Subscribe to Our Youtube Channel
Related Manuals for LG-Ericsson LDP-7024LD


Summary of Contents for LG-Ericsson LDP-7024LD
- Page 1 Important Safety Information...
- Page 2 Important Safety Information...
- Page 3 Important Safety Information...
-
Page 4: Table Of Contents
Table of Contents Putting into operation LDP-7024LD ICON description on LCD Input / Output Devices and Button Cable Connection ADP (Additional Device Port) Placing or answering an outside call 1. Placing an outside call 2. Answering an outside call 3 Soft & Navigation Button Basic Function 1. - Page 5 Table of Contents 4. Search by group 5. CO access code 6. Delete all entry Menu Button Function 1. EZ Menu 1.1 Dialed Calls 1.2 Received Calls 1.3 Speed dial 1.3.1 Dial by STA SPD 1.3.2 Dial by SYS SPD 1.3.3 Dial by ICM Name 1.3.4 Dial by STA SPD Name 1.3.5 Dial by SYS SPD Name...
-
Page 6: Putting Into Operation
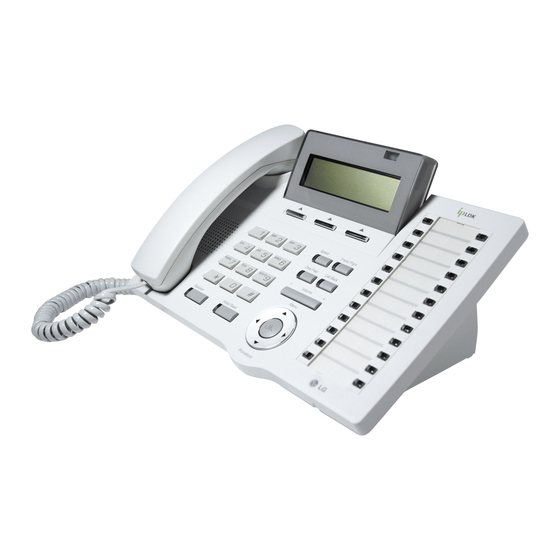
Putting into operation LDP-7024LD LDP-7024LD is a user-friendly digital keyset, which offer convenience to user with 3 soft key and navigation key. • Features -.Trendy and Stylish LDP Family design -.Multi Level Graphic LCD (9 * 32) -.Dual LED 24 Flexible buttons -.Additional Device Port for SLT and FAX... -
Page 7: Icon Description On Lcd
Putting into operation ICON description on LCD ICON Description 1. You have received message 2. Call forward 3. DND mode 4. Earphone mode 5. Full Duplex Speaker Phone Mode 6. Mute mode 7. Setting melody 8. Setting alarm 9. Schedule 10. -
Page 8: Input / Output Devices And Button
Putting into operation Input / Output Devices and Button Handset Message Waiting LED Earphone-Jack Socket 3 Soft Button (Ear/Mic Mode) Speaker Flexible Button Speed Button Trans/Pgm Button DND/Fwd Button Call back Button Speaker Button Volume Button Hold/Save Button Menu Button Phonebook Button Handsfree Microphone LCD Display... - Page 9 Putting into operation Used for handset call. Handset The optional earphone into the handset to provide a Earphone- hands-free phone conversation. Jack Socket Outputs tones and voice at your extension. Speaker Used to access speed dialing, speed programming, Speed Button save number redial, and last number redial.
-
Page 10: Cable Connection
Putting into operation Cable Connection ④ ③ ① ② Cable connection ①, ② Connect the end of the telephone cord to the handset and the other end to the handset jack at the bottom of the telephone. ③, ④ Connect the end of the cable to the port at the bottom of telephone and the other end to the switch port. -
Page 11: Adp (Additional Device Port)
Putting into operation ADP (Additional Device Port) - Page 12 Putting into operation ADP (Additional Device Port)
-
Page 13: Placing Or Answering An Outside Call
Placing or answering an outside call 1. Placing an Outside Call ICM Line ▶ ▶ talk Lift handset Enter the extension number CO Line Dial 9,0 or select ▶ ▶ ▶ CO line flexible talk button Lift handset Enter the desired phone number 2. -
Page 14: Soft & Navigation Button
3 Soft & Navigation Button 3 Soft Button “3 Soft Button” is located on the bottom of the LCD display and OptiCon IP systems provide some fitting message for each operation. It gives easy access to operations with a Navigation Button or volume up/down key. For example, when a user gets busy message of called extension, some operations which becomes available will be displayed “Message Wait”, “Camp-On”... -
Page 15: Basic Function
Basic Function The 3 soft button enables you to select the various function. For instance, if you want to select the pickup, press the first button on the left as below shown. And if there are more than three functions and displays an arrow on LCD, use Navigation Button to move the next or previous function. -
Page 16: Conference
Basic Function 1.2 Conference Dial the desired phone number. CALL TO STA 100 e.g.)100 FEB 01 04 05:34 pm The station 100 answers the call. FLASH Press the [CONF] button. CALL TO STA 100 FEB 01 04 05:34 pm TRANS CONF MUTE Dial the phone number of the desired party... -
Page 17: Redial
Basic Function 1.3 Redial Press the [REDIAL] button. STATION 100 (T) FEB 01 04 05:34 pm PICKUP CONF REDIAL Select the desired one with Navigation Button. DIALED CALLS 1234 5678 BACK DETAIL SEND Press [SEND] or button to make the call. SUN MON TUE WED THU FRI SAT 2004 9 10 11 12 13 14 15... -
Page 18: Off Hook
Basic Function 2. Off Hook FWD : Press the [FWD] button to forward a call to STATION 100 (T) another station. FEB 01 04 05:34 pm CONF : Press the [CONF] button to make a conference. REDIAL ▶ FORWARD CONF REDIAL : Press the [REDIAL] button to make a last number redial. -
Page 19: Intercom Do Not Disturb
Basic Function 6. Intercom DND CALLBK : Press the [CALLBK] button to leave the call DO NOT DISTURB STA 100 back request or message. FLASH : Press the [FLASH] button to disconnect the CALLBK FLASH line and re-seize. 7. Intercom Dialing Error INVALID FLASH : Press the [FLASH] button to disconnect the line and re-seize. -
Page 20: Co Dialing/Co Talk
Basic Function 11. CO Dialing/CO Talk TRANS : Press the [TRANS] button to transfer the 123456789 incoming call to another station. LINE 125 00:00:03 CONF : Press the [CONF] button to make a conference. MUTE ▶ TRANS CONF MUTE : Press the [MUTE] button to mute the handset, speakerphone, or headset but does not affect the speech coming over the speaker or handset. -
Page 21: Call Log
Call Log Call Log Button PGM : PGM + Flexible + PGM ’57’. Press the [Call Log] button. 1. RECEIVED CALL 2. DIALED CALL 3. LOST CALL 1. Received Call to select the list. RECEIVED CALLS Press [SEND] to dial the desired one. 1234 5678 Press [DETAIL] to see the information in... -
Page 22: Dialed Call
Call Log 2. Dialed Call to select the list. DIALED CALLS Press [SEND] to dial the desired one. 1234 5678 Press [DETAIL] to see the information in detail. BACK DETAIL SEND Press [DELETE] to delete the call log while DIALED CALL - 01 checking the detail information. -
Page 23: Answer
Call Log 3.1 ANSWER 0123456789 Press [ANSWER] to call the displayed number. 03/10 16:02 CNT :01 BACK SELECT > ANSWER 3.2 DEL CUR 0123456789 Press [DEL CUR] to erase current number. 03/10 16:02 CNT :01 BACK SELECT > DEL CUR 3.3 DEL ALL Press [SELECT] until [DEL ALL] appears in 0123456789... -
Page 24: Save
Call Log 3.4 SAVE 0123456789 To save CLI, press [SAVE] button. 03/10 16:02 CNT :01 BACK SELECT > SAVE Press [HOLD] or button, ENTER SPD BIN NO (000) CLI MSG USED speed dial is registered. PAUSE FLASH D-TONE ※ See the page 52. 3.5 NAME/TEL 0123456789 To check the name of the selected number,... -
Page 25: Phone Book
Phone Book The [PHONE BOOK] is used for registering the new phone number and searching, correcting and deleting the stored phone number. PHONE BOOK PHONE BOOK 1. NEW ENTRY ▲ 6. DELETE ALL ENTRY ▲ ▲ 2. SEARCH BY NAME 3. - Page 26 Phone Book Enter the type, select the desired one among the NEW ENTRY cellular phone number or office number or home NAME : JANE number or fax number or e-mail or address or TYPE : ◀ MOBILE ▶ memo. CO CODE : NOT USE NUMBER : GROUP : NO GR.
-
Page 27: Search By Name
Phone Book 2. SEARCH BY NAME Press [FIND] and then the phone book entry will be displayed. Press the [2] button. PHONE BOOK 1. NEW ENTRY ▲ 2. SEARCH BY NAME 3. SEARCH BY NUMBER 4. SEARCH BY GROUP 5. EDIT CO ACCESS CODE ▼ EXIT PHONE BOOK When entering the name, enter the full name or... -
Page 28: Search By Number
Phone Book 3. SEARCH BY NUMBER Press the [3] button. PHONE BOOK 1. NEW ENTRY ▲ 2. SEARCH BY NAME 3. SEARCH BY NUMBER 4. SEARCH BY GROUP 5. EDIT CO ACCESS CODE ▼ EXIT When entering the phone number, enter the PHONE BOOK part of the phone number or the full number 1. -
Page 29: Search By Group
Phone Book 4. SEARCH BY GROUP Press the [4] button. PHONE BOOK 1. NEW ENTRY ▲ 2. SEARCH BY NAME 3. SEARCH BY NUMBER 4. SEARCH BY GROUP 5. EDIT CO ACCESS CODE ▼ EXIT to select the group and press [FIND]. PHONE BOOK SEARCH BY GROUP 1. -
Page 30: Co Access Code
Phone Book 5. CO ACCESS CODE Press the [5] button. PHONE BOOK 1. NEW ENTRY ▲ 2. SEARCH BY NAME 3. SEARCH BY NUMBER 4. SEARCH BY GROUP 5. EDIT CO ACCESS CODE ▼ EXIT to select the code and enter the CO ACCESS CODE CODE-1 CO ACCESS CODE. -
Page 31: Menu Button Function
Menu Button Function 1.Ez MENU 6.VOICE MAIL 2.PHONE BOOK 3.SCHEDULE 4.CUSTOMIZE 5.SETTING Press the [MENU] button. EXIT 1. EZ MENU 1.1 DIALED CALLS to select the list. DIALED CALLS Press [SEND] to dial the desired one. 1234 5678 Press [DETAIL] to see the information. BACK DETAIL SEND... -
Page 32: Speed Dial
Menu Button Function 1.3 SPEED DIAL 1.3.1 DIAL BY STA SPD Press the [1] button. 1.DIAL BY STA SPD 2.DIAL BY SYS SPD 3.DIAL BY ICM NAME 4.DIAL BY STA SPD NAME 5.DIAL BY SYS SPD NAME BACK EXIT to select the desired one. 1234 (001) Press [SEND] to make the call. -
Page 33: Dial By Icm Name
Menu Button Function 1.3.3 DIAL BY ICM NAME Press the [3] button. 1.DIAL BY STA SPD 2.DIAL BY SYS SPD 3.DIAL BY ICM NAME 4.DIAL BY STA SPD NAME 5.DIAL BY SYS SPD NAME BACK EXIT to select the desired one. JANE (001) ROBERT (002) -
Page 34: Dial By Sys Spd Name
Menu Button Function 1.3.5 DIAL BY SYS SPD NAME Press the [5] Button. 1.DIAL BY STA SPD 2.DIAL BY SYS SPD 3.DIAL BY ICM NAME 4.DIAL BY STA SPD NAME 5.DIAL BY SYS SPD NAME BACK EXIT to select the desired one. JANE (2002) ROBERT (2004) -
Page 35: Call Forward
Menu Button Function 1.4 CALL FORWARD when user can’t receive a call because of having a meeting or absence, the call forwarding lets you forward your calls to another number. For detailed information about forward , refer to the programming manual. Select the desired type of forward from 0 to 1.UNCONO.FWD 6/9.OFFNET-NO ANS... -
Page 36: Absent Message
Menu Button Function 1.5 ABSENT MESSAGE The absent message list will be displayed. Use [NEXT] button or [BACK] button to enter the 01.LUNCH RETURN AT HH:MM number of the desired absent message. 02.ON VACATION ※ To erase the absent message, press [CANCEL]. 03.OUT OF OFFICE HH:MM 04.OUT OF OFFICE MM:DD 05.OUT OF OFFICE... -
Page 37: Paging
Menu Button Function 1.6 PAGING The paging is very convenient in case of emergency or finding someone. The external paging requires a external amplifier and speaker. The paging is available only for approval person. For detailed information about paging, refer to the programming manual. 1.INTERNAL 6.EXT ALL 1.INTERNAL... -
Page 38: Do Not Disturb
Menu Button Function 1.7 DO NOT DISTURB After setting the DND, the DND icon will be displayed on the top of LCD. SUN MON TUE WED THU FRI SAT 2004 9 10 11 12 13 14 15 07 / 01 16 17 18 19 20 21 22 23 24 25 26 27 28 29 30 31... -
Page 39: Phone Book
Menu Button Function 1.Ez MENU 6.VOICE MAIL 2.PHONE BOOK 3.SCHEDULE 4.CUSTOMIZE 5.SETTING Press the [MENU] button. EXIT 2. PHONE BOOK PHONE BOOK PHONE BOOK 1. NEW ENTRY ▲ 6. DELETE ALL ENTRY ▲ 2. SEARCH BY NAME 3. SEARCH BY NUMBER 4. -
Page 40: Schedule
Menu Button Function 1.Ez MENU 6.VOICE MAIL 2.PHONE BOOK 3.SCHEDULE 4.CUSTOMIZE 5.SETTING Press the [MENU] button. EXIT 3. SCHEDULE 3.1 SCHEDULE ADD/DEL/EDIT The number of the schedule can be added up to 50. The calendar of schedule is from 1960 to 2040. to select the date and SCHEDULE 1. - Page 41 Menu Button Function Set the alarm. SCHEDULE ADD Press the [SET] button to inform the schedule DATE : 01/JUL/04 (SAT) and enter the time. TIME : [PM ] 06 : 59 REPE : NONE ALARM : NONE TEXT : BACK SAVE SCHEDULE ADD Press [SAVE] to save the schedule.
-
Page 42: Find Schedule
Menu Button Function 3.2 FIND SCHEDULE FIND SCHEDULE to select the year. SEARCH : SCHEDULE YEAR 2004 ◀ ▶ MONTH TEXT BACK FIND FIND SCHEDULE to select the month. SEARCH : SCHEDULE Press the [FIND] button and the result will be YEAR 2004 MONTH... -
Page 43: Delete Past Schedule
Menu Button Function 3.3 DELETE PAST SCHEDULE The number of the past schedule is displayed. PAST SCHEDULE Press the [DEL] button. PAST SCHEDULE : 01 BACK to select [YES] or [NO]. PAST SCHEDULE ARE YOU SURE Press [DEL] to delete the past schedule. TO DELETE DATA? PAST SCH. -
Page 44: Delete All Schedule
Menu Button Function 3.5 DELETE ALL SCHEDULE to select [YES] or [NO]. PAST SCHEDULE ARE YOU SURE Press [OK] to delete the all schedule. TO DELETE DATA? PAST SCH. : 01 If selecting “YES”, delete it. If selecting “no”, don’t delete it. BACK... -
Page 45: Customize
Menu Button Function 1.Ez MENU 6.VOICE MAIL 2.PHONE BOOK 3.SCHEDULE 4.CUSTOMIZE 5.SETTING Press the [MENU] button. EXIT 4. CUSTOMIZE 4.1 CHANGE LANGUAGE Press the [1] to change language. 1.CHANGE LANG 6.BRIGHT LEVEL 2.REGISTER NAME 3.RING TYPE 4.SPKR/HEADSET 5.E-MIC MEADSET BACK EXIT 4.2 REGISTER NAME Press the [2] and enter the name. -
Page 46: Ring Type
Menu Button Function 4.3 RING TYPE Press the [1] button. 1.ICM RING 2.ICM MELODY 3.CO RING 4.CO MELODY BACK EXIT Use the dial button to select ring tone. ※ There are 15 types from 01 to 15. 1.ICM RING e.g ) 01 2.ICM MELODY 3.CO RING 4.CO MELODY... -
Page 47: Speaker/Headset
Menu Button Function 4.4 SPEAKER/HEADSET Enter [1] to select speaker and [0] to select 1.CHANGE LANG 6.BRIGHT LEVEL headset. Press the [SAVE] button to save it. 2.REGISTER NAME 3.RING TYPE 4.SPKR/HEADSET 5.E-MIC HEADSET SELECT SPEAKER/HEADSET (1:SPK 0:HEADSET) : 1 BACK SAVE EXIT 4.5 E-MIC HEADSET... -
Page 48: Setting
Menu Button Function 1.Ez MENU 6.VOICE MAIL 2.PHONE BOOK 3.SCHEDULE 4.CUSTOMIZE 5.SETTING Press the [MENU] button. EXIT 5. SETTING 5.1 ENBLOCK MODE Press [1] to set the EN-BLOCK MODE. Press [SAVE] to save it. 1.ENBLOCK MODE 2.STATION COS 3.PASSWORD 4.SPEED PGM 5.ANSWER MODE ENBLOCK MODE (1:ON/0:OFF) : OFF... -
Page 49: Station Cos
Menu Button Function 5.2 STATION COS The password is needed. Select the item. 1.TEMPORARY COS 2.WALKING COS BACK EXIT 5.2.1 TEMPORARY COS SET TEMPORARY COS Press the [1] TEMPORARY COS. 1.TEMPORARY COS 2.WALKING COS Press the [SAVE] button to down the COS. ICM ONLY MODE PRESS HOLD KEY BACK... - Page 50 Menu Button Function 5.2.2 WALKING COS Enter the COS Override code. 1.TEMPORARY COS 2.WALKING COS ENTER COS OVERRIDE CODE BACK SAVE EXIT Press the [SAVE] button to use the walking 1.TEMPORARY COS 2.WALKING COS ENTER COS OVERRIDE CODE PRESS HOLD KEY BACK SAVE EXIT...
-
Page 51: Password
Menu Button Function 5.3 PASSWORD REGISTER PASSWORD Press the [3] PASSWORD. 1.ENBLOCK MODE After entering the password(3-11 digits), 2.STATION COS press the [HOLD] button to save it. 3.PASSWORD 4.SPEED PGM 5.ANSWER MODE ENTER PASSWORD : BACK SAVE EXIT CHANGE PASSWORD Press the [3] PASSWORD. -
Page 52: Speed
Menu Button Function 5.4 SPEED PGM Press the [4] SPEED PGM. 1.ENBLOCK MODE 2.STATION COS 3.PASSWORD 4.SPEED PGM 5.ANSWER MODE BACK EXIT Enter speed bin no. SUN MON TUE WED THU FRI SAT e.g ) 005 2004 9 10 11 12 13 14 15 07 / 01 16 17 18 19 20 21 22 23 24 25 26 27 28 29... -
Page 53: Answer Mode
Menu Button Function 5.5 ANSWER MODE Press the [5] ANSWER MODE. 1.ENBLOCK MODE There are three modes and select the desired 2.STATION COS mode. Press the [SAVE] button to save it. 3.PASSWORD 4.SPEED PGM [1] HANDSFREE MODE 5.ANSWER MODE [2] TONE MODE ENTER ICM ANS MODE [3] PRIVATE MODE H (1) -
Page 54: Voice Mail
Menu Button Function 1.Ez MENU 6.VOICE MAIL 2.PHONE BOOK 3.SCHEDULE 4.CUSTOMIZE 5.SETTING Press the [MENU] button. EXIT 6. VOICE MAIL 6.1 INTERNAL VOICE MAIL Press the [1] button. 1.INT VOICE MAIL 2.EXT VOICE MAIL BACK EXIT Press [NEXT] to hear another voice mail, press [REPEAT] to repeat the current message and SUN MON TUE WED THU FRI SAT to erase the message, press [DELETE]. -
Page 55: Internal Voice Mail
Menu Button Function 6.2 EXTERNAL VOICE MAIL Press the [2] button. 1.INT VOICE MAIL 2.EXT VOICE MAIL BACK EXIT Use [NEXT] to move to the next voice mail group. To check the external voice mail, SUN MON TUE WED THU FRI SAT press [ANSWER]. -
Page 56: Entering Characters
Entering characters Enter the figure ▶ ▶ ▶ Dial Enter the symbol SYMBL ▶ ▶ ▶ ▶ Dial ▲▼ Norm 1 / 4 ◀▶ ※ Use the button and then select the symbol. ① ② ③ ④ ⑤ ⑥ ⑦ ⑧ ⑨ Enter the letters... -
Page 57: Glossary Of Terms
Glossary of Terms Intercom – describes internal calls within the telephone system Central Office Line – also known as a trunk line or outside CO Line line Speed Dial A commonly used number stored in a speed bin for easy access Do Not Disturb –...
Need help?
Do you have a question about the LDP-7024LD and is the answer not in the manual?
Questions and answers