
Related Manuals for LG-Ericsson iPECS LDP-9200 Series


Summary of Contents for LG-Ericsson iPECS LDP-9200 Series
- Page 1 LDP-9208D/9224D/9224DF/9240D User Guide Phone: 0333 043 4000 Email: support@communicatebetter.co.uk...
- Page 2 Revision History Issue Date Remark Jan, 2016 Initial Release Copyright© 2015 Ericsson-LG Enterprise Co., Ltd. All Rights Reserved. This material is copyrighted by Ericsson-LG Enterprise Co., Ltd. Any unauthorized reproductions, use or disclosure of this material, or any part thereof, is strictly prohibited and is a violation of Copyright Laws. Ericsson-LG Enterprise reserves the right to make changes in specifications at any time without notice.
- Page 3 Important Safety Information To prevent unexpected danger or damage please read this information before installing or attempting to repair you phone. Warning and Caution information is provided to alert the consumer of known dangers: Warning: To reduce the possibility of electric shock, do not expose your phone to high humidity areas, such as a bathroom, swimming area, etc.
- Page 4 9. Keep out of direct sunlight and away from heat. 10. No user-serviceable parts inside. Do not insert a screwdriver or any metal objects into the phone. This may cause electric shock or damage the equipment and will render the warranty void. 11.
- Page 5 This device complies with part 15 /RSS-GEN of the FCC/IC rules. Operation is subject to the following two conditions: (1)This device may not cause harmful interference; and (2) This device must accept any interference received, including interference that may cause undesired operation. This Class B digital apparatus complies with Canadian ICES-003.
-
Page 6: Table Of Contents
TABLE OF CONTENTS 1. I ............... 1 NTRODUCTION 1.1 General ....................1 1.2 Feature Information ................1 1.3 Feature Groupings ................1 1.4 LDP-9200 series Phone Description ..........2 1.5 LDP-9200 series phone Description ..........3 1.6 DSS Console ..................7 1.6.1 DSS(Direct Station Select) Console Installation ..... - Page 7 3.8.1 Forwarding calls to another Station or Voice Mail ....22 3.8.2 Forwarding calls to an external number ........ 24 3.8.3 Forwarding callers to a Text Message ........25 4. P ..............27 LACING A CALL 4.1 Internal Calls ................... 27 4.1.1 Using Camp-On when calling a busy station ......
- Page 8 7.2 Mobile Phone Extension ..............47 8. M ..............49 EATURES 8.1 Call Log ................... 49 8.2 Background Music and Music on Hold ..........49 8.3 Using Internal, External and Meet-Me Paging ........ 50 8.4 Push-To-Talk (PTT) Page ............... 51 8.5 Wake-Up Alarm ................
-
Page 9: Introduction
NTRODUCTION 1.1 General Your telephone is connected to an advanced-technology, highly-versatile, fully-featured telecom system designed to make office communications easy and productive. 1.2 Feature Information We have taken every effort to make this user guide simple and straightforward. The guide starts with the simpler operations of the Phone Speakerphone, moves on to receiving and placing calls, and then to more advanced features. -
Page 10: Ldp-9200 Series Phone Description
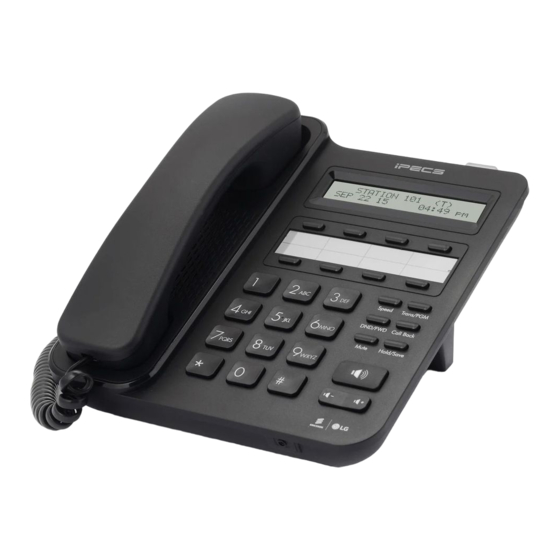
1.4 LDP-9200 series Phone Description Your telephone is connected to an advanced-technology, highly-versatile, fully-featured telecom system designed to make office communications easy and productive. LDP-9200 series (shown) incorporate user interface to provide you with a cost effective, simple to use, productive communications tool. -
Page 11: Ldp-9200 Series Phone Description
1.5 LDP-9200 series phone Description The figures below present line drawings of the front of each LDP-9200 series phone identifying major elements of the user interface. As shown, the layouts of LDP-9208D, LDP-9224D, LDP-9224DF and LDP-9240D are slightly different. Figure LDP-9208D Button name and layout Figure LDP-9224D Button name and layout... - Page 12 Figure LDP-9224DF Button name and layout Figure LDP-9240D Button name and layout...
- Page 13 The functions of button Below is a brief description of the elements called out in the above LDP-9200 series Phone diagrams. Ring/Message Indicator: Flashes when receiving a new call or you have a new message waiting. LCD Display: Displays your phones status, dialing directories, and text message information.
- Page 14 11. Fixed buttons LDP-9208D does not support some buttons: Flash, Directory, and Headset among the below buttons. Flash button: U se to seize the new line without on-hook. So you can make a call by dialing the desired number. ...
-
Page 15: Dss Console
1.6 DSS Console The available DSS are shown in figure below and described as follows: LIP-9012DSS has 12 flexible buttons with tri-color LED. The DSS button kit uses a paper label for the button designations. LIP-9024DSS has 24 flexible buttons with tri-color LED. The DSS button kit uses a paper label for the button designations. -
Page 16: Dss(Direct Station Select) Console Installation
1.6.1 DSS(Direct Station Select) Console Installation A DSS console can be installed with LDP-9200 series phone. As we described the available DSS for each phone, the available DSS is as below: LDP-9208D: no DSS LDP-9224D: LDP-9248DSS LDP-9224DF: LIP-9012DSS, LIP-9024DSS, and LDP-9248DSS ... -
Page 17: Ldp-9200 Series Phone Installation
1.7 LDP-9200 Series Phone Installation 1.7.1 Phone Connections LDP-9200 series each have 3 connection ports (refer to following figure). each port is for connecting to: Handset, Ear Mic., and the line cable. 1) Connect the telephone cord (curly cord) to the handset and the other end to the handset jack at the bottom of the telephone. -
Page 18: Wall Mount
1.7.3 Wall Mount LDP-9200 series phones can be mounted on the wall as needed. The following instructions describe the wall mount installation. Note the foot-stand must be removed. If installed, remove the foot-stand from the Phone and DSS. Connect all wiring to the phone as described in “1.7.1 Phone connection”. -
Page 19: Registering Station Name
1.8 Registering Station Name User can register Station name by using Character Entry Chart. LDP-9200 series have two types of Character Entry Chart: LDP-9208D/LDP-9224D, LDP-9224DF/LDP-9240D. First, we explain the way to register Station name for LDP-9208D/LDP-9224D phone. (e.g., A=21, B=22, C=23, T=81, Space=*1) To delete the character You can delete the character by pressing button. - Page 20 Second, we explain the way to register Station name for LDP-9224DF/LDP-9240D phone. To change input mode (ABC, abc, *, or 123) You can enter upper or lower case letters, symbols, or numeric characters. You can change the input mode (ABC, abc, Symbol, or 123) by pressing the second soft button.
-
Page 21: Entering Character By Using Entry Chart
1.9 Entering Character by using Entry chart Except registering Station name and Station Speed dial name assignment, entering Chracter is followed by the below ‘Character Entry chart’. Characters are entered by pressing the dial pad digit with the character multiple times based on the character position on the button. -
Page 22: Assigning Features To Flex Buttons
1.10 Assigning Features to Flex Buttons You may assign features and functions to the Flex buttons on your Phone (possibly CO/IP lines). Flex buttons may be assigned for most features providing One- Touch feature activation (ex., a Flex button may be assigned to access the Account Code feature and may include the Account code digits). - Page 23 Code Description {LOOP} button {INTRUSION} button {ICM} button {CAMP-ON} button ISDN {KEYPAD FACILITY} button {OHVO} button Push-To-Talk {Conference} button {Callback} button {DND} button {Flash} button {Mute} button {Monitor} button {Redial} button {Call Forward} button...
-
Page 24: Lcd, Speakerphone & Related Features
LCD, S & R PEAKERPHONE ELATED EATURES 2.1 Using the Display Menu The Liquid Crystal Display (LCD) of LDP-9208D has two lines, LDP-9224D/9224DF has three lines of 24/32 characters each. The LCD is used to convey information to you. It provides the date, time and station number on the display while idle. -
Page 25: Using The Speakerphone
2.2 Using the Speakerphone Activate the Speakerphone at any time (except for Paging) in place of lifting the handset to receive or place calls. Additionally, you may switch between the handset and Speakerphone during a call. By keeping the handset Off-hook, Group Listening (PGM 111: Enable) feature is activated, which provides incoming audio over the speaker with outgoing audio from the handset. -
Page 26: Receiving Calls
ECEIVING CALLS 3.1 Answering a Call While Idle There are 3 basic types of incoming calls; internal/external ringing calls, Intercom Voice Announce calls, and Hold recalls. Your phone may be assigned Ringing Line Preference (PGM 111); in this case, calls that ring are answered by lifting the handset. -
Page 27: Responding To A Call While Busy
3.2 Responding to a Call While Busy While you are busy on another call, you may receive a Muted Ring, Camp-On tones, or Voice-Over announcements. Muted Ring is provided over the speaker of your Phone indicating a Call Waiting. You also may receive Camp On tones, a burst of tones on top of the existing call, as an indication of another call waiting. -
Page 28: Using Answering Machine Emulation (Ame)
3.3 Using Answering Machine Emulation (AME) When a call is connected to your voice mail, you can screen the call as with a normal Answering Machine. The caller’s voice is played over your speaker while the message is being recorded. There are two methods of notification and call screening provided, LED blink mode or Speaker hearing mode. -
Page 29: Differential Ring Signals
3.4 Differential Ring Signals When multiple phones in a small area ring, it can be difficult to tell which are ringing. LDP-9200 Series Phone has 15 Ring Tones available for differentiating one phone’s ringing from another. To select a Ring Tone from phone •... -
Page 30: Using Do-Not-Disturb (Dnd) To Block Incoming Calls
• Dial the Intercom Number of the ringing station; the call will be connected. To answer a call ringing at a station in your group: • Lift the handset, • Dial 588 (Pick up Group Pick-Up code), the call is connected. - Page 31 2: Busy—Immediately forwards all calls, except recalls, when the station is busy. 3: No Answer—forwards all calls to the station, except recalls, when the station does not answer within the No Answer timer. 4: Busy/No Answer—forwards calls if the station is busy or does not answer within the No Answer timer.
-
Page 32: Forwarding Calls To An External Number
3.8.2 Forwarding calls to an external number Forward calls to an external destination; calls can be forwarded from an internal station or a remote location. You may define the conditions or ‘type of forward’ as listed below: 1: Unconditional—all calls to the station, except recalls, are forwarded. -
Page 33: Forwarding Callers To A Text Message
To activate Call Forward, Off Premise (forward to an external number) from a remote location: • Lift the handset, • Dial the telephone number of a DISA assigned CO line, • While receiving dial-tone, dial 554 (Call Forward feature code: the number may be different according to the numbering plan), •... - Page 34 To activate Custom or Pre-Defined Message • Forward: Press • Dial User Program feature code 51, • Dial the two-digit text Message code (00-20), • Dial any auxiliary input for messages of 01-04 and 06-08, • Press , forward confirmed. To cancel activated Message: SAVE •...
-
Page 35: Placing A Call
LACING A CALL 4.1 Internal Calls You can place calls to other stations in the system over the Intercom. The call will ring, or for an ICM Voice Announce call, a splash tone will be heard. Ring or Voice Announce is normally determined by settings at the called station but you may change this by dialing ‘#’... -
Page 36: Leaving A Message Wait
To Camp-On (wait off-hook) for a busy station: • Press * and await an answer. To request a Callback (wait on-hook) for a busy station: • Press the soft button or the button and hang- 4.1.2 Leaving a Message Wait If the called user does not answer or is in DND mode, you may leave a Message Wait. -
Page 37: Waiting For The Next Available Co/Ip Line
When dialing on a CO line which uses pulse style signals, you may activate Dial Pulse to Tone Switchover changing to DTMF style dialing (for banking services, etc.). CO Line singnal (DTMF or Pulse) can be set in PGM 141. When placing an IP call, you must dial an IP address using the ‘*’... -
Page 38: Account Codes: Tracking External Calls For Billing
4.2.3 Account Codes: Tracking External calls for billing In some cases, you or your company may desire to track calls for billing or other purposes. You may enter an Account Code, which is output from the system to a printer in the SMDR (Station Message Detail Recording) report. -
Page 39: Temporarily Override Dialing Restrictions At A Phone
4.2.5 Temporarily override dialing restrictions at a phone Override the dialing restrictions at any phone by activating Walking COS. The Walking COS dialing restriction levels are applied for a single call only. For multiple calls, you will need to reactivate Walking COS or use the F button to regain CO/IP LASH dial-tone. -
Page 40: Using Last Number Redial (Lnr)
S_SPD, DIAL BY SYS SPD NAME, and PUBLIC DIRECTORY mean the system speed information. User can assign Station Speed Dial numbers at his/her phone. Only an Attendant can assign System Speed Dial numbers via Web Admin (System Data > System Speed Dial). 4.3.1 Using Last Number Redial (LNR) The last number dialed on an external call is automatically saved in the Last Number Redial (LNR) buffer. -
Page 41: Using System Speed Dial Numbers
4.3.3 Using System Speed Dial Numbers You may, if allowed, use System Speed Dial to call frequently dialed numbers. In some cases, these numbers are divided into groups called System Speed Zone Groups. In this case, you may access some numbers and not others and your dialing restrictions may be invoked. - Page 42 FLASH as 1 digit—Activate dial tone detect. FLASH not as 1 digit—The system will generate a flash on the CO line. as 1 digit—Send digits as ISDN Keypad Facility message. ‘*’ as 1 digit—Display Security, the stored number will not be displayed when used.
- Page 43 • Use Volume Up/Down (or Navigation Up/Down key) to select ‘U_SPD:2 (9208D), 2.DIAL BY STA SPD NAME (9224D/DF), 1.PRIVATE DIRECTORY (9240D)’, • Select the desired Station Speed Dial, • Press the Soft button, the button, or the Send HOLD SAVE button.
-
Page 44: Using Automatic Called Number Redial (Acnr)
4.3.5 Using Automatic Called Number Redial (ACNR) When making an external call and a busy signal is received, the system can be set to retry the number until the call is connected, the feature is cancelled, or the maximum number of retries is attempted—this is Automatic Called Number Redial (ACNR). -
Page 45: Transfer , Conference & Other Call Handling
& O RANSFER ONFERENCE THER ANDLING 5.1 Call Transfer: Sendinga call to a different destination You can send an active call to another station or other resource of the system, Call Transfer. You can screen the transfer with the receiving party (Screened Call Transfer) or complete the transfer without screening (Unscreened Call Transfer). -
Page 46: Broker Call: Switching Between Two Calls
not answered in a timely manner, the Attendant will receive Attendant Hold Recall. To place a call on Hold: • Press button. HOLD SAVE 5.3 Broker Call: Switching between two calls You may switch between the active call and a call on Hold, placing the active call on Hold acting as a broker between two or more parties, Broker Call. -
Page 47: Setting Up A Conference Room
• Select the or press the programmed Conf Soft button Conf button again to establish the conference. To place a Conference on Hold: • Press the button. HOLD SAVE To retrieve the Conference from Hold: • Select the Soft button or press the programmed Conf Conf button. -
Page 48: Call Park: Placing A Call On Hold To Page
• Dial the Conference Room password. Or, press a preprogrammed button. Conf To transfer a call to a Conference Room: • Press the button, TRANS • Dial 59 (Conference Room Entry code), Or, Press a Conference Room flex button, • Hang up. -
Page 49: Two-Way Record: Recording A Call
5.6 Two-Way Record: Recording a call You may record an active external/Internal conversation in your Voice Mail Box. During recording a call, the LED of the Flex Record button is flashing. Before using the recording, the following admin have to be checked: 1. -
Page 50: Send & Retrieve Messages
& R ETRIEVE ESSAGES 6.1 Responding to a Station Message Waiting Indication Another station can leave a Station Message Waiting indication (MWI) when you do not answer or your phone is in DND mode. The message will be displayed on the LCD screen in LDP-9200 Series phone. -
Page 51: Getting Voice Mail Messages
To review your Station messages (9240D): • Press the button, the LCD shows the Message Summary display: 1. ICM MWI(000) 2. CLI MSG(000) 3. VSF MSG(000) 4. VMS MSG(000) 5. UMS MSG(000) 6. SMS(00) SELECT (1-6) • Select the message to use the navigation Up/Down key, •... - Page 52 VMIM/VSF/VMIB. You will need to register an Authorization Code for your station to access the VMIM/ VSF/VMIB Voice messages. To assign a {VMAILBOX} Flex button: TRANS/PGM + {FLEX} + VM group (PGM 190) + Mail-box (station) number + HOLD/SAVE To retrieve Voice Mail locally using a Flex button: •...
-
Page 53: Sending And Receiving Short Text Messages
To retrieve Voice Mail locally using button the (9240D): • Press the button, the LCD shows the Message Summary display: 1. ICM MWI(000) 2. CLI MSG(000) 3. VSF MSG(001) 4. VMS MSG(001) 5. UMS MSG(000) 6. SMS(00) SELECT (1-6) • Select ‘3. - Page 54 • Enter the station range to receive the message, to send to a single station enter the station number twice, • Dial your message using 2 key strokes for each character (refer to Character Entry Chart). • Press button to send your message. HOLD SAVE To view your received Short text messages (9208D):...
-
Page 55: Remote System Access
EMOTE YSTEM CCESS 7.1 Direct Inward System Access (DISA) DISA (Direct Inward System Access) allows remote users to gain access to the system’s resources (remote users may be required to enter an Authorization Code). The system will recognize remote user dialed inputs (call other stations, place calls over CO/IP lines, review voice mails, etc). - Page 56 • Press the button. HOLD SAVE To place a call from the mobile extension using the iPECS System: • Dial the ISDN DID number of the station; the system will check the Caller ID and answer the call. The user then will receive intercom dial tone, •...
-
Page 57: Misc . Features
EATURES 8.1 Call Log Users can view a log of Received, Dialed and Lost calls on the display. Pressing a Redial Soft button and then Back Soft button provides simple access to Received, Dialed and Lost calls. Or, view a log of Recived, Dialed, and Lost calls by using Call log Flexible button. -
Page 58: Using Internal, External And Meet-Me Paging
There are eleven possible selections for BGM and MOH by pressing the button & 73: TRANS 00: Off 01: Source BGM1 02: Source BGM2 03: VSF MOH 1 04: SLT MOH 1 05: SLT MOH 2 06: SLT MOH 3 07: SLT MOH 4 08: SLT MOH 5 09: VSF MOH 2 10:... -
Page 59: Push-To-Talk (Ptt) Page
• Dial the Numbering plan Meet-Me-Page code (refer to (106~109)). 8.4 Push-To-Talk (PTT) Page LDP-9200 series phones can be assigned as a member of one or more of the system’s nine Push-To-Talk (PTT) page groups. Users separately log-in or log-out of any one or all PTT groups to which the phone is assigned. -
Page 60: Alarm/Door Bell
8.6 Alarm/Door Bell The system can monitor external Alarm or Door Bell contacts: Alarm Monitor—should the external contact activate, a unique Alarm Ring signal and LCD display may be received. To restart the monitor circuit, the external contacts must be deactivated and the Alarm Ring signal terminated. - Page 61 Station IP Address (DTIM or DSIB) Station Mac Address (DTIM or DSIB) Number of messages x (x: number of all message waiting) Wake-Up Time (hh:mm) Do Not Disturb Forwarded to station xxx Forwarded to speed bin xxx Queued CO/IP line xxx Locked (Temporary COS) COS x To hear Date &...
-
Page 62: Pbx, Centrex & Isdn Features
PBX, C & ISDN ENTREX FEATURES 9.1 Access PBX or Centrex features The iPECS system has been designed to operate with a host PBX system or Centrex services from your service provider. The iPECS system connects to a host with analog CO lines. When accessing a CO line, the phone will act as an extension of the host, allowing access to the host system features using the host dial codes. -
Page 63: Using Isdn Supplementary Services
To deactivate Keypad Facility operation: • Press button, KEYPAD FACILITY • Press a Feature or Flexible button. 9.2.2 Using ISDN Supplementary Services ISDN service providers may incorporate features similar to those of Centrex. These ISDN Supplementary services are provided on a subscription basis, and as with Centrex, are accessed using the Flash button on a Phone. -
Page 64: Features & Flex Buttons
& F EATURES LEX BUTTONS 10.1 Entering Station Program Data A special code set is available for LDP-9200 series phone users to assign certain attributes such as Authorization Codes (Passwords). After entering the User Program mode, dial the codes to select the attribute and setting. Once selected, the setting is saved. -
Page 65: Appendixa User Program Code
PPENDIX ROGRAM CODE Fixed Function Codes, refer to Table A-1 and A-2, are digit sequences users and the Attendant may dial while in the User Program Mode to assign certain Flex buttons and affect the status of a feature or setting. For more information on the User Program Mode, refer to the iPECS Features and Operation Manual. - Page 66 Table A-1 STATION USER PROGRAM FIXED FUNCTION CODES CODE FUNCTION 51XX Custom/Pre-select Message Display (XX = 00-20, 00: User Custom message, 01-10: Fixed message, 11-20: Unregister Message (Attendant station: PGM +0+5+3) or Web Admin: System Data > Custom message on Web or System Attendant keyset), #: Cancel) Register Custom Message (Message 00) Active Conference Room (Create Conference room...
- Page 67 Table A-2 ATTENDANT USER PROGRAM FIXED FUNCTION CODES CODE FUNCTION 0111 Print SMDR, by Station 0112 Delete SMDR, by Station 0113 Display Call Charge 0114 Abort Print 0115 Print Lost Call Report 0116 Delete Lost Call Report 0121 Print Traffic Analysis (All summary) 0122 Print Traffic Analysis (All summary periodically) 0123...
- Page 68 CODE FUNCTION External Page Music -2 Assignment/Cancel LCD Display Language PTT Login/Logout with station range Display CPU redundancy state Admin Programming Code...
-
Page 69: Appendixb Flexible Numbering Plan
PPENDIX LEXIBLE UMBERING The System Numbering Plan can be selected from 1 of 9 basic Numbering Plans. Table B-1 provides a brief description of the plans and Table B-2 and Table B-3 provide the Numbering Plan codes for each of the eight basic plans. The Number Plan is selected in Program 100 and individual codes in the plan can be changed using the Flexible Numbering Plan Programs 106 to 109. - Page 70 Table B-2 Basic Numbering Plan 1-4, Default Values for eMG80/eMG800 Basic Numbering Plan Feature Remark All Call Page *549 (Internal/External) SMDR Account *550 Code Enter Flash Command *551 to CO Line SLT Last Number *552 Redial Do Not Disturb *553 (Toggle On/Off) Call Forward *554...
- Page 71 Table B-2 Basic Numbering Plan 1-4, Default Values for eMG80/eMG800 Basic Numbering Plan Feature Remark ACD Supervisor * 572 Login ACD Supervisor * 573 Logout ACD Help Code * 574 ACD Calls In * 575 Queue Display ACD Supervisor * 576 Status ACD Supervisor * 577...
- Page 72 Table B-2 Basic Numbering Plan 1-4, Default Values for eMG80/eMG800 Basic Numbering Plan Feature Remark VM Message Wait Enabled VM Message Wait cancel Door Open (1st Door ) Door Open (2nd Door ) MCID Request Unsupervised conference time Extension code PTT Group Login/Logout ACD Agent...
- Page 73 Table B-2 Basic Numbering Plan 1-4, Default Values for eMG80/eMG800 Basic Numbering Plan Feature Remark group SLT ACNR * 58# ACD Supervisor * 570 Ring Mode Company * 563 Directory Name ISDN Supplementary *57* Hold ISDN Supplementary *57# Conf Forced Channel *56* Seize Override...
- Page 74 Table B-3 Basic Numbering Plan 5-9, Default Values for eMG80/eMG800 Basic Numbering Plan Feature Remark Intercom Call for 2000-3199 2100-3299 1000-2199 1000-2199 1000-2199 eMG800 Internal Page 401- 429 *101-*135 *301-*335 *301- *335 301~335 Zone Internal All Call *543 *543 Page Meet Me Page *544 *544...
- Page 75 Table B-3 Basic Numbering Plan 5-9, Default Values for eMG80/eMG800 Basic Numbering Plan Feature Remark SLT Program *561 *561 Mode Access Attendant *562 *562 Unavailable AME Feature *564 *564 Alarm Reset *565 *565 Group Call *566 *566 Pickup Universal Night *567 *567 Answer...
- Page 76 Table B-3 Basic Numbering Plan 5-9, Default Values for eMG80/eMG800 Basic Numbering Plan Feature Remark Pilot Number Station User VSF Features Access Call Coverage Ring Direct Call Pickup Access CO Group Access Individual CO/IP Line Access Held CO/IP Access Held Individual CO/IP Access CO in First CO Group...
- Page 77 Table B-3 Basic Numbering Plan 5-9, Default Values for eMG80/eMG800 Basic Numbering Plan Feature Remark primary login ACD Agent *582 *582 primary logout ACD Agent *583 *583 secondary login ACD Agent secondary *584 *584 logout Wrap-up end *585 *585 T-NET CM *586 *586 Login/out...
- Page 78 Table B-3 Basic Numbering Plan 5-9, Default Values for eMG80/eMG800 Basic Numbering Plan Feature Remark Forced Channel *56* *56* Seize Override *56# *56# DND/Forward Cancel Call Back Transfer to VSF *55* *55* Number Room type conf Group join Last Number [REDIAL] [REDIAL] [REDIAL]...
- Page 79 Table B-2 Basic Numbering Plan 1-4, Default Values for UCP Basic Numbering Plan Feature Remark SLT Last Number *552 Redial DND (Toggle On/Off) *553 Call Forward *554 Speed Dial *555 Programming Activate Message *556 Wait/Callback Message * 557 Wait/Callback Answer SLT Speed Dial * 558 Access...
- Page 80 Table B-2 Basic Numbering Plan 1-4, Default Values for UCP Basic Numbering Plan Feature Remark Call Answer ACD Reroute Queued * 579 Call No Answer Camp-On Answer * 621 Call Parking Locations #601~#800 #601~#800 #601~#800 #101~#300 Station Group Pilot 401 – 500 *401 –...
- Page 81 Table B-2 Basic Numbering Plan 1-4, Default Values for UCP Basic Numbering Plan Feature Remark ACD Agent primary * 582 logout ACD Agent secondary * 583 login ACD Agent secondary * 584 logout Wrap-up end * 585 T-NET CM Login/out * 586 Enter Into Conf-Room * 59...
- Page 82 Table B-2 Basic Numbering Plan 1-4, Default Values for UCP Basic Numbering Plan Feature Remark Station Speed Dial [SPEED] + [SPEED] + [SPEED] + [SPEED] + XXX: Access 000~099 System Speed Dial [SPEED] + [SPEED] + [SPEED] + [SPEED] + XXXXX: Access XXXXX...
- Page 83 Table B-3 Basic Numbering Plan 5-8, Default Values for UCP Basic Numbering Plan Feature Remark SLT Speed Dial *558 *558 Access DND/FWD *559 *559 cancel SLT CO System *560 *560 Hold SLT Program *561 *561 Mode Access Attendant *562 *562 Unavailable AME Feature *564...
- Page 84 Table B-3 Basic Numbering Plan 5-8, Default Values for UCP Basic Numbering Plan Feature Remark Answer Camp-On *621 *629 *621 *621 Answer Call Parking #601 – #601 – #601 – #601 – #800 #601 – #800 Locations #800 #800 #800 Station Group #401 - 620-719...
- Page 85 Table B-3 Basic Numbering Plan 5-8, Default Values for UCP Basic Numbering Plan Feature Remark Door ) (Except MCID Request version) Unsupervised conference time Extension code PTT Group Login/Logout ACD Agent *581 *581 primary login ACD Agent *582 *582 primary logout ACD Agent *583 *583...
- Page 86 Table B-3 Basic Numbering Plan 5-8, Default Values for UCP Basic Numbering Plan Feature Remark ACD Supervisor *570 *570 Ring Mode Company *563 *563 Directory Name ISDN Supplementary *57* *57* Hold ISDN Supplementary *57# *57# Conf Forced Channel *56* *56* Seize Override *56#...
Need help?
Do you have a question about the iPECS LDP-9200 Series and is the answer not in the manual?
Questions and answers
How do I add contacts into the directory for regular numbers coming into the phone.
The manual does not provide specific instructions on how to add contacts to the directory on the LG-Ericsson iPECS LDP-9200 Series phone. However, it mentions that users can access the directory by pressing the SPEED button twice or the DIRECTORY button. Additionally, users can assign Station Speed Dial numbers on their phones, while only an Attendant can assign System Speed Dial numbers via Web Admin.
This answer is automatically generated