Table of Contents
Advertisement
Quick Links
Advertisement
Table of Contents

Related Manuals for HME DX300ES


Summary of Contents for HME DX300ES
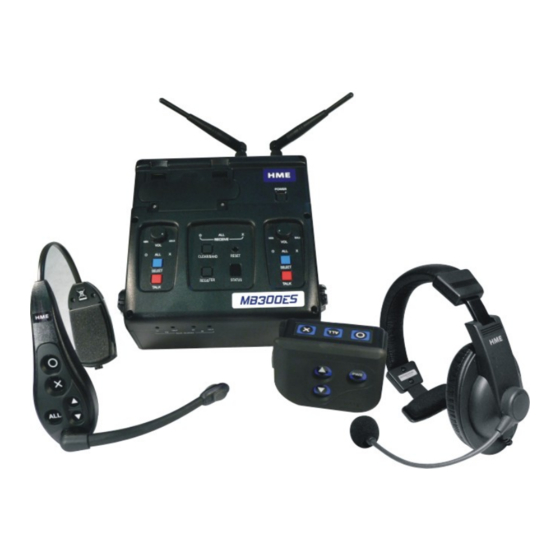
- Page 1 HME# 400G623 Rev B 9/24/09 DX300ES Wireless Headset System Operating Instructions...
-
Page 2: Table Of Contents
Table of Contents SECTION 1. INTRODUCTION....................1 SECTION 2. EQUIPMENT IDENTIFICATION..............2 STANDARD EQUIPMENT............................. 2 OPTIONAL EQUIPMENT ............................3 EQUIPMENT FEATURES ............................4 Base Station ................................. 4 Beltpac ................................. 6 All-In-One Headset (optional) ..........................6 SECTION 3. EQUIPMENT SETUP ..................7 BATTERY CHARGER............................7 BASE STATION.............................. -
Page 3: Fcc Notice
The European Union (EU) WEEE Directive (2002/96/EC) places an obligation on producers (manufacturers, distributors and/or retailers) to take-back electronic products at the end of their useful life. The WEEE Directive covers most HME products being sold into the EU as of August 13, 2005. Manufacturers, distributors and retailers are obliged to finance the costs of recovery from municipal collection points, reuse, and recycling of specified percentages per the WEEE requirements. -
Page 4: Introduction
SECTION 1. INTRODUCTION The DX300ES is a digital wireless communication system that enables hands- free two-way secure communication on two independent channels, or both channels at the same time. It can be operated with AC or battery power. Multiple base stations can be interconnected for expanded capabilities. -
Page 5: Equipment Identification
SECTION 2. EQUIPMENT IDENTIFICATION STANDARD EQUIPMENT Antennas Base station interconnect cable Power adapter and cord Headset Base statio 8-pin and 10-pin spring clamp connectors Battery sled Beltpac with headset, pouch and battery All-in-one headset with battery Battery charger with power supply and cord for beltpac and all-in-one headset batteries Travel case... -
Page 6: Optional Equipment
OPTIONAL EQUIPMENT Headset with dual ear muffs All-in-one headset with battery Model # HS15D Model # WH300 Headset extension cable, 6 ft (1.83 meter) Foam earmuffs for all-in-one headset Rechargeable battery for base station Battery charger for use with rechargeable Model # BAT850 base station batteries Model # AC850... -
Page 7: Equipment Features
EQUIPMENT FEATURES Base Station Top Panel — Antennas Battery compartment latches Power button Right Left headset headset volume volume control control Left talk Right talk lights lights Right select Left select button button Right talk Left talk button button Active Channel Clear/Band Reset Registration... -
Page 8: Front Panel
Front Panel — Auxiliary audio in/out volume adjustments (recessed) Left Side Panel — Cable “input” from another base station Left headset connector Microphone gain adjustment for left headset Primary/Secondary Single/Dual base station base station selection switch selection switch Right Side Panel — Right headset connector... -
Page 9: Beltpac
Beltpac O-channel button button Power/O-channel X-channel light button Battery Battery Power/X-channel release light latch Power button Headset Volume cable up button Volume connector down button All-In-One Headset (optional) O-channel button X-channel button Volume up button Power Power/Talk button light Volume down button Headband slide-to-fit... -
Page 10: Equipment Setup
SECTION 3. EQUIPMENT SETUP BATTERY CHARGER NOTE: Set up the battery charger and charge all beltpac and/or all-in-one headset batteries while you are setting up the base station. Connect power supply to charger and electrical outlet Power supply Power supply cord Charge all beltpac batteries Charging time is approximately 3 hours Put up to 4 batteries... -
Page 11: Base Station
BASE STATION Antenna and AC Power Connections 90° angle Screw both antennas onto the connectors on the back of the base station. Tighten at 90° angle. Antenna connectors Set up base station where no objects are blocking the line-of-sight from base station to the beltpacs. If base station can not be set up with no objects in line-of-sight between it and the beltpacs, install the antennas away from the base station. -
Page 12: Optional Battery Operation Of Base Station
Optional Battery Operation of Base Station NOTE: Always plug base station into AC power when it is available. Turn base station off when it is not being used, to conserve battery power. Typical base station battery life when used continuously is as follows: Energizer Lithium 6 hours BAT850 Rechargeable Battery... -
Page 13: Spectrum Friendly™ Interference Avoidance
Spectrum Friendly™ Interference Avoidance Interference such as popping sounds may occur when frequencies of a WiFi system, a wireless DMX lighting system or another HME system is in use. This interference may be avoided if these systems can be limited to one portion of the 2.4GHz to 2.48GHz frequency band, and your base station is set... -
Page 14: Multiple Base Stations
Multiple Base Stations Up to 20 crewmembers can communicate in the dual-channel mode, 5 per base station, by interconnecting base stations as described below. Audio Connection Connect base stations with the provided interconnect cable, from the BASE OUT connector on one to the BASE IN connector on the other. BASE OUT BASE IN connector... -
Page 15: Multiple Base Station Initialization
Multiple Base Station Initialization Multiple base stations must be “initialized” according to the following instructions, so their frequencies will not cause interference. After initializing each base station, register each beltpac that will be used with that base station (See page 15). Primary/Secondary Base Station Setting Set the BASE switch on each base station as described below, and then configure each base station through the initialization procedure that follows. - Page 16 Repeat steps 1 – 5 to initialize up to three secondary base stations. NOTE: When multiple HME base stations are to be used in the Spectrum Friendly™ mode, the primary base station should always be set to the required band first.
-
Page 17: Base Station Microphone Gain Adjustment
Base Station Microphone Gain Adjustment The microphone gain adjustment allows you to adjust the level of your voice as it is transmitted from the headsets plugged into the base station, to the rest of the system. Microphone gain must be adjusted for each base station headset. Use a headset that is plugged into the right side of a base station, and locate the MIC GAIN adjustment that is recessed in a hole on the right side of the base station. -
Page 18: Beltpacs
BELTPACS Beltpac Registration NOTE: Registration of all-in-one headsets is the same as the beltpac registration described below, except for step 2. If you have more than one base station, you must register each beltpac and/or all-in-one headset to the base station it will be used with. Turn the base station power on, and beltpac power off. -
Page 19: Beltpac Or All-In-One Headset Adjustments
Beltpac or All-In-One Headset Adjustments Sidetone Adjustment (Beltpac only, not on all-in-one headset) When you speak into the microphone, you can hear sidetone (your own voice) in the beltpac headset. Sidetone can be adjusted as follows: Be sure the beltpac power is on. While holding down the “O”... -
Page 20: Optional Remote Antenna Installation
OPTIONAL REMOTE ANTENNA INSTALLATION If it is not possible to avoid obstructions that may block signals between the base station and the beltpacs and/or all-in-one headsets, it may be necessary to locate the antennas away from the base station. Remote antenna kits with either 6 foot (1.83 meter) or 30 foot (9.14 meter) cables can be used to mount the antennas wherever necessary to alleviate this problem. -
Page 21: Optional Auxiliary Equipment Connection
OPTIONAL AUXILIARY EQUIPMENT CONNECTION Equipment requiring 4-Wire audio interfacing, such as audio/video recorders or hardwired intercoms, can be connected to the 10-pin connector and plugged into the rear panel of the base station. Equipment requiring relay closure, such as a router or mobile radio, can be connected to the 8-pin connector and plugged into rear panel of the base station. -
Page 22: Equipment Operation
SECTION 4. EQUIPMENT OPERATION BASIC OPERATION Base Station Headset volume Channel indicator lights (O, ALL or X) Green – Listen only – Talk and listen Left Right headset headset Channel select button controls controls (O, ALL or X) Talk button (Push ON –... -
Page 23: Beltpac / All-In-One Headset
Beltpac / All-In-One Headset The O, X and ALL button functions described below are for operation in the standard default mode. The buttons can also be set to function in other modes. See page 22 for operating mode setups. Be sure fully charged battery is in the unit. If using beltpac —... -
Page 24: Changing Batteries
Changing Batteries Beltpac batteries typically provide 20 hours of continuous use in listen mode. If you hear “Change battery” in your headset ― If using beltpac, remove it from its pouch. On beltpac or all-in-one headset, slide battery release latch in direction of arrow. -
Page 25: Operating Mode Setup
Operating Mode Setup Set up beltpacs and/or all-in-one headsets to operate in the desired mode by pressing and holding the button combinations shown below when you press the PWR (power) button to turn the unit on. Mode Button Combination Button Functions X = X-channel only (default) Hold X + O + ALL and press PWR... -
Page 26: Radio Applications
RADIO APPLICATIONS Emergency Services Operating Scenario All crewmembers will hear both the Crew Channel and Radio Channel ● simultaneously. All crewmembers have the ability to talk to other crewmembers in either ● Latching (hands-free) or PTT (push-to-talk) modes, using either the O or X buttons. -
Page 27: Production Crew With Separate Radio Channel
Production Crew with Separate Radio Channel Operating Scenario Production Manager will monitor Radio Channel and Production Crew ● Channel simultaneously, hands free. Production Manager can selectively talk to Radio channel or Production Crew Channel. Production Crew members will hear and talk to Production crew members ●... -
Page 28: Troubleshooting
SECTION 5. TROUBLESHOOTING If you are unable to correct any of the problems described below or if your problem is not covered, call 1-800-848-4468 for assistance. Power light on base station does not come on when power button is pressed. Be sure the power supply is properly connected to the base station, and the power cord is properly connected to the power supply and electrical outlet. - Page 29 In the event of an electrical power outage — such as from lightning or a power generator failure, if you experience problems with your DX300ES equipment after the power comes on again, unplug the AC power supply from its electrical outlet and wait 15 seconds, then plug it...
-
Page 30: Frequently Asked Questions
FREQUENTLY ASKED QUESTIONS Are the battery charger and base station power supplies interchangeable? Yes. What is the maximum recommended number of base stations that can be linked together with interconnect cables? Four. Does linking the base stations automatically prevent them from interfering with each other? No, all bases that are linked together must be initialized or set to the high or low portion of the frequency band to prevent them from interfering with each other’s frequencies. -
Page 31: Technical Data
SECTION 6. TECHNICAL DATA EQUIPMENT SPECIFICATIONS Base Station GENERAL ⎯ Frequency Range: All, 2400 – 2483.5 MHz Low, 2401.92 to 2439.94 MHz High, 2443.39 to 2481.41 MHz Frequency Response: 200 Hz to 3.5 kHz Power Requirements: 100-240VAC, 50-60Hz 12-14VDC or six AA batteries (NiMH optional) Temperature Range: 32-122°F (0-50°C) Size:... -
Page 32: Beltpac
TRANSMITTER ⎯ Type: Frequency hopping, spread spectrum Transmit Power: 100mW burst Modulation Type: Gaussian filtered FSK, TDMA Frequency Stability: 13 ppm Harmonics/Spurious: Exceeds FCC and ETSI specifications over temperature RECEIVER ⎯ Type: Frequency hopping, spread spectrum RF Sensitivity: <–90dBm w 10 Frequency Stability: 13 ppm Distortion:... -
Page 33: Base Station Block Diagram
BASE STATION BLOCK DIAGRAM... -
Page 34: Index
SECTION 7. INDEX Base station audio connection (multiple base stations) ................11 features............................4 interference avoidance, Spectrum Friendly™ .................10 microphone gain adjustment ....................14 operation..........................19 primary/secondary setting (multiple base stations) ..............12 setup (multiple base stations)....................11 setup (single base station)......................8 setup for battery operation......................9 single/dual channel setting ......................11 specifications ...........................28 Base station block diagram ......................30...
Need help?
Do you have a question about the DX300ES and is the answer not in the manual?
Questions and answers