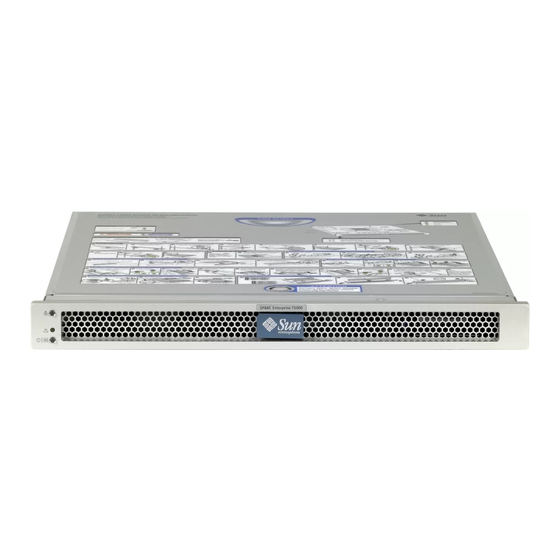
Sun Microsystems Sun Fire T1000 Installation Manual
Hide thumbs
Also See for Sun Fire T1000:
- Service manual (118 pages) ,
- Administration manual (80 pages) ,
- Installation manual (68 pages)

Related Manuals for Sun Microsystems Sun Fire T1000


Summary of Contents for Sun Microsystems Sun Fire T1000
- Page 1 Sun Fire T1000 Server ™ Installation Guide Sun Microsystems, Inc. www.sun.com Part No. 819-3247-10 January 2006, Revision A Submit comments about this document at: http://www.sun.com/hwdocs/feedback...
- Page 2 Copyright 2006 Sun Microsystems, Inc., 4150 Network Circle, Santa Clara, Californie 95054, Etats-Unis. Tous droits réservés. Sun Microsystems, Inc. a les droits de propriété intellectuels relatants à la technologie qui est décrit dans ce document. En particulier, et sans la limitation, ces droits de propriété...
-
Page 3: Regulatory Compliance Statements
FCC radio frequency emission limits. Networking connections can be made using unshielded twisted-pair (UTP) cables. Modifications: Any modifications made to this device that are not approved by Sun Microsystems, Inc. may void the authority granted to the user by the FCC to operate this equipment. - Page 4 ICES-003 Class B Notice - Avis NMB-003, Classe B This Class B digital apparatus complies with Canadian ICES-003. Cet appareil numérique de la classe B est conforme à la norme NMB-003 du Canada. Sun Fire T1000 Server Installation Guide • January 2006...
-
Page 5: Bsmi Class A Notice
BSMI Class A Notice The following statement is applicable to products shipped to Taiwan and marked as Class A on the product compliance label. T33012 CCC Class A Notice The following statement is applicable to products shipped to China and marked with “Class A” on the product’s compliance label. - Page 6 Sun Fire T1000 Server Installation Guide • January 2006...
-
Page 7: Declaration Of Conformity
Declaration of Conformity... - Page 8 Sun Fire T1000 Server Installation Guide • January 2006...
-
Page 9: Table Of Contents
Slide Rail Assembly Notes 5 Cable Management Notes 8 Data Port and Cabling Notes 9 Port Locations 9 Cabling Notes 9 Safety Precautions 10 Installing the Sun Fire T1000 Server 11 Rackmount Kit 11 Installing the Server in a Rack 12... - Page 10 Example of a Normal System Initialization 34 Booting the Solaris Operating System 35 ▼ To Boot the Solaris Operating System 36 ▼ (Optional) To Reset the System 37 ▼ To Power Cycle the System 37 Sun Fire T1000 Server Installation Guide • January 2006...
- Page 11 Updating the Sun Fire T1000 Firmware 39 Updating the Firmware 39 ▼ To Update the Firmware 39 Selecting a Boot Device 47 Connecting the Network Interface to the Network 47 ▼ To Connect the Network Interface to the Network 48...
- Page 12 Sun Fire T1000 Server Installation Guide • January 2006...
- Page 13 Figures The Sun Fire T1000 Server 1 FIGURE 1-1 Features of the Slide Rail Assembly 6 FIGURE 1-2 Mounting Bracket Locks 7 FIGURE 1-3 Cable Management Bracket 8 FIGURE 1-4 Locations of Ports and Connectors on the Back Panel 9...
- Page 14 Sun Fire T1000 Server Installation Guide • January 2006...
- Page 15 Tables Ethernet Connection Transfer Rates 10 TABLE 1-1 Typical System Controller Parameter Settings 29 TABLE 3-1 Sun Fire T1000 Device List 35 TABLE 3-2...
- Page 16 Sun Fire T1000 Server Installation Guide • January 2006...
-
Page 17: Preface
Chapter 1 provides an overview of the Sun Fire T1000 server installation process. Chapter 2 provides instructions for installing the Sun Fire T1000 server into a rack. Chapter 3 provides instructions for configuring and powering on the server, and for installing additional software. -
Page 18: Typographic Conventions
You must be superuser to do this. with real names or values. To delete a file, type rm filename. * The settings on your browser might differ from these settings. xviii Sun Fire T1000 Server Installation Guide • January 2006... - Page 19 Sun Fire T1000 Server System Administration Guide How to perform administrative tasks that 819-3249 are specific to the Sun Fire T1000 server Sun Fire T1000 Server Service Manual How to run diagnostics to troubleshoot 819-3248 your server and how to remove and replace parts in the server Advanced Lights Out Management (ALOM) CMT v1.1...
-
Page 20: Sun Welcomes Your Comments
You can submit your comments by going to: http://www.sun.com/hwdocs/feedback Please include the title and part number of your document with your feedback: Sun Fire T1000 Server Installation Guide, part number 819-3247-10 xx Sun Fire T1000 Server Installation Guide • January 2006... -
Page 21: Preparing For Installation
C H A P T E R Preparing for Installation This chapter describes the Sun Fire T1000 server installation, and provides background information about the installation procedures that begin in Chapter The Sun Fire T1000 Server FIGURE 1-1 This chapter contains these topics: “Tools Needed”... -
Page 22: Tools Needed
ESD mat and grounding strap ■ Shipping Kit Inventory List Standard components of Sun Fire T1000 server are installed at the factory. However, if you ordered options such as additional memory or a PCI card, these are shipped to you separately. -
Page 23: Optional Components
However, if you ordered options such as additional memory or a PCI card, these are shipped separately. Install these components prior to installing the server in a rack. If you ordered any other options that are not factory-installed, see the Sun Fire T1000 Server Service Manual for installation instructions. - Page 24 ALOM-CMT firmware. ALOM-CMT times out after 60 seconds and the ALOM-CMT display disappears as it reverts to the system console. For more information, refer to the Sun Fire T1000 Server Advanced Lights Out Manager (ALOM) Guide.
-
Page 25: Slide Rail Assembly Notes
Boot the Solaris Operating System” on page 13. Install any required patch or patches to the server. Refer to the Sun Fire T1000 Server Product Notes for a list of the required patches. 14. Load additional software from the Solaris media kit (optional). -
Page 26: Figure 1-2 Features Of The Slide Rail Assembly
If you unlock the mounting bracket, it slides an additional 4 in. (100 mm) before separating from the slide rail. The mounting brackets mount directly to the sides of the Sun Fire T1000 chassis. There are two locks on each Sun Fire T1000 mounting bracket ( ). The ■... -
Page 27: Figure 1-3 Mounting Bracket Locks
Mounting bracket release Mounting bracket lock (2 buttons) Mounting Bracket Locks FIGURE 1-3 Chapter 1 Preparing for Installation... -
Page 28: Cable Management Notes
Cable Management Notes A cable management bracket ( ) is included in the Sun Fire T1000 slide rail FIGURE 1-4 kit. The cable management bracket clips onto the slide rails. Use cable ties or cable straps to attach cabling to the bracket. -
Page 29: Data Port And Cabling Notes
Network Management Port” on page 28. The SC network management port uses an RJ-45 cable for a 10/100 BASE-T connection. This port does not support connections to Gigabit networks. See the Sun Fire T1000 Server Overview for more information. Chapter 1 Preparing for Installation... -
Page 30: Safety Precautions
Gigabit Ethernet 1000BASE-T 1000 Mbit/sec TTYA serial port. Use the Sun Fire T1000 DB-9 connector with a null modem ■ cable for serial devices. This port appears as ttya in Solaris OS and OpenBoot PROM™ messages. This port is not connected to the SC serial management port. -
Page 31: Installing The Sun Fire T1000 Server
C H A P T E R Installing the Sun Fire T1000 Server This chapter provides instructions for installing the Sun Fire T1000 server in an open rack or closed cabinet. This chapter contains the following sections: “Rackmount Kit” on page 11 ■... -
Page 32: Installing The Server In A Rack
Pull the mounting bracket out until it stops. c. Slide the mounting bracket release button to the left ( ), then slide the FIGURE 2-2 mounting bracket completely out of the slide rail. Sun Fire T1000 Server Installation Guide • January 2006... -
Page 33: Figure 2-2 Mounting Bracket Release Button
Mounting Bracket Release Button FIGURE 2-2 2. Attach a mounting bracket to the right side of the Sun Fire T1000 chassis. a. Position the mounting bracket against the server chassis ( ) so that the FIGURE 2-3 slide rail lock is at the front and the two keyed openings on the mounting bracket are aligned with the two locating pins on the side of the chassis. -
Page 34: Figure 2-3 Attaching A Mounting Bracket To The Chassis
Verify that both locating pins are trapped in the keyed openings and that the front locating pin has engaged the mounting bracket lock ( FIGURE 2-3 3. Attach the second mounting bracket to the left side of the Sun Fire T1000 chassis. Sun Fire T1000 Server Installation Guide • January 2006... -
Page 35: To Install The Slide Rails
This action allows movement of the rear section so that you can adjust the length of each slide rail. Front Captive Screws on the Slide Rail FIGURE 2-4 4. Determine if the slide rails are long enough to fit your rack. Chapter 2 Installing the Sun Fire T1000 Server... -
Page 36: Figure 2-5 Using The Extension Bracket
Loosely attach the front of a slide rail to the right front rack post using two screws (M5 or M6, as appropriate to the size of the screw holes on the rack post). Do not tighten the screws yet. Sun Fire T1000 Server Installation Guide • January 2006... -
Page 37: Figure 2-6 Mounting The Slide Rail
7. Use the slide rail spacing tool to adjust the distance between the slide rails. a. At the rear of the rack, plug the left side of the tool into slots at the end of the middle section on the left slide rail ( FIGURE 2-7 Chapter 2 Installing the Sun Fire T1000 Server... -
Page 38: Figure 2-7 Using The Slide Rail Spacing Tool To Adjust The Distance Between The Slide Rails
At this point, the distance between the ends of the rails is 17.4 in (442 mm). f. Tighten the two screws to lock the rails in place. Sun Fire T1000 Server Installation Guide • January 2006... -
Page 39: To Install The Server In The Rack
3. Slide the chassis into the rack. Caution – Before continuing, verify that the server is securely mounted in the rack, and that the slide rails are locked to the mounting brackets. Chapter 2 Installing the Sun Fire T1000 Server... -
Page 40: To Install The Cable Management Bracket
Removing the Server From the Rack for Service To install or replace internal parts in the Sun Fire T1000 server, you must first remove the server from the rack. For the removal procedure, refer to the Sun Fire T1000 Server Service Manual. -
Page 41: To Connect The Sc Serial Management Port
If connecting to a serial port on a personal computer, you can use Sun Part No. ■ 530-3100-01 or equivalent. If connecting to a Sun workstation or server, you can use Sun Part No. ■ 530-2889-03 or equivalent. Chapter 2 Installing the Sun Fire T1000 Server... -
Page 42: To Connect The Sc Network Management Port
Connect a Category 5 cable from the NET MGT network management port to your network switch or hub. To Connect the Ethernet Network Cables ▼ The Sun Fire T1000 server has four network connectors, marked NET0, NET1, NET2, and NET3 ( ). These connectors are RJ-45 gigabit Ethernet. FIGURE 2-9 1. - Page 43 Caution – The server goes into standby mode and the system controller initializes as soon as the AC power cables are connected to the power source. 2. Go to “Powering On the System for the First Time” on page Chapter 2 Installing the Sun Fire T1000 Server...
- Page 44 Sun Fire T1000 Server Installation Guide • January 2006...
-
Page 45: Powering On The System
ALOM-CMT firmware. ALOM-CMT times out after 60 seconds and the ALOM-CMT display disappears as it reverts to the system console. For more information, refer to the Sun Fire T1000 Server Advanced Lights Out Manager (ALOM) Guide. -
Page 46: Figure 3-1 Ac Connector
0:0>VBSC selecting POST MAX Testing. 0:0>VBSC enabling L2 Cache. 0:0>VBSC enabling Full Memory Scrub. 0:0>VBSC enabling threads: f0f0f0f 0:0>Init CPU 0:0>Start Selftest......0:0>IO-Bridge unit 1 lpu init test 0:0>IO-Bridge unit 1 interrupt test 0:0>INFO: Sun Fire T1000 Server Installation Guide • January 2006... -
Page 47: Logging In To The System Controller
Excerpt of a System Controller Boot Sequence (Continued) CODE EXAMPLE 3-1 0:0>POST Passed all devices. 0:0> 0:0>DEMON: (Diagnostics Engineering MONitor) 0:0>Select one of the following functions 0:0>POST:Return to OBP. 0:0>INFO: 0:0>POST Passed all devices. 0:0>Master set ACK for vbsc runpost command and spin... SC Alert: Host System has Reset 0:0>... -
Page 48: To Configure The System Controller Network Management Port
– Specified whether the SC is on the network or not ■ netsc_ipaddr – IP address of the system controller ■ netsc_ipgateway – IP address of the gateway for the subnet ■ netsc_ipnetmask – Netmask for the system controller subnet ■ Sun Fire T1000 Server Installation Guide • January 2006... - Page 49 To configure these parameters you must use the setsc command. The usage is: setsc parameter 1. Set the netmask for the system controller. sc> setsc netsc_ipnetmask 255.255.255.0 This example uses 255.255.255.0 to set the netmask. Your network environment subnet might require a different netmask. Use a netmask number most appropriate to your environment.
- Page 50 9600 ser_parity none ser_stopbits ser_data xx:xx:xx:xx:xx:xx netsc_enetaddr xx:xx:xx:xx:xx:xx sys_enetaddr Sun Fire T1000 Server Installation Guide • January 2006...
-
Page 51: To Reset The System Controller
To Reset the System Controller ▼ After setting the configuration parameters, you must reset the system controller for the new values to take affect. ● Issue the resetsc command. You are prompted to confirm that you want to reset the system controller. Type y when prompted. -
Page 52: To Log In To The System Controller Using The Network Management Port
Trying 129.xxx.xx.xx... Connected to 129.xxx.xx.xx. Escape character is '^]'. Copyright 2003 Sun Microsystems, Inc. All rights reserved. Use is subject to license terms. Sun(tm) Advanced Lights Out Manager 1.0.11 () Please login: Sun Fire T1000 Server Installation Guide • January 2006... -
Page 53: Using The System Controller For Common Operations
2. Login as admin using the password you previously set. Please login: admin Please Enter password: password sc> Using the System Controller for Common Operations To Initiate the Power On Sequence ▼ Powering on the system requires you to use the poweron command at the SC console. -
Page 54: Example Of A Normal System Initialization
Sun Fire T1000, No Keyboard Copyright 1998-2004 Sun Microsystems, Inc. All rights reserved. OpenBoot FW build_11***PROTOTYPE_BUILD***, 16376 MB memory installed, Serial #51454515. [firmware obp4.x #0] Ethernet address 0:3:ba:ce:a1:3d, Host ID: 83112233. {0} ok Sun Fire T1000 Server Installation Guide • January 2006... -
Page 55: Booting The Solaris Operating System
/pci@7c0/pci@0/pci@8/scsi@2 Booting the Solaris Operating System The Solaris OS is preinstalled on the disk drive (for Sun Fire T1000 configurations that include a hard drive). The Solaris OS is not configured. If you boot the system from this drive, you will be prompted to configure the Solaris OS for your environment. -
Page 56: To Boot The Solaris Operating System
Setting default IPv4 interface for multicast: add net 224.0/4: gateway wgs94-181 syslog service starting. volume management starting. Creating new rsa public/private host key pair Creating new dsa public/private host key pair The system is ready. wgs94-181 console login: Sun Fire T1000 Server Installation Guide • January 2006... -
Page 57: (Optional) To Reset The System
(Optional) To Reset the System ▼ ● If it is necessary to reset the system, use the uadmin command. # uadmin 2 1 Do not power the system off and on. To Power Cycle the System ▼ If a simple reset does not clear a system problem, you can power the system off and on with this procedure. - Page 58 5. Reconnect to the system console using the console command. sc> console -f Enter #. to return to ALOM. The systems displays various messages, followed by the ok prompt. Sun Fire T1000 Server Installation Guide • January 2006...
-
Page 59: Updating The Sun Fire T1000 Firmware
A P P E N D I X Updating the Sun Fire T1000 Firmware The flashupdate command updates both the system controller firmware and the host firmware. The flash image consists of the following components: System controller firmware ■ OpenBoot ■... - Page 60 -v is the flag to turn on verbose message output ■ sc> flashupdate -s xxx.xxx.xx.xx -f pathname Username: username Password: password ..............Update complete. Reset device to use new image. sc> Sun Fire T1000 Server Installation Guide • January 2006...
- Page 61 0:0> 0:0>@(#) ERIE Integrated POST 4.x.0.build_12-erie 2005/06/14 12:19 /export/common-source/firmware_re/ontario- fireball_fio/build_12/erie-build_12/post/Niagara/erie/integrated (firmware_re) 0:0>Copyright © 2005 Sun Microsystems, Inc. All rights reserved SUN PROPRIETARY/CONFIDENTIAL. Use is subject to license terms. 0:0>VBSC selecting POST MAX Testing. 0:0>VBSC enabling L2 Cache. 0:0>VBSC enabling Full Memory Scrub.
- Page 62 Testing Memory Channel 0 Rank 0 Stack 0 0:0> Testing Memory Channel 3 Rank 0 Stack 0 0:0> Testing Memory Channel 0 Rank 1 Stack 0 0:0> Testing Memory Channel 3 Rank 1 Stack 0 Sun Fire T1000 Server Installation Guide • January 2006...
- Page 63 2:0>IMMU TLB DATA RAM Access 4:0>IMMU TLB DATA RAM Access 6:0>IMMU TLB DATA RAM Access 2:0>IMMU TLB TAGS Access 4:0>IMMU TLB TAGS Access 6:0>IMMU TLB TAGS Access 2:0>IMMU CAM 4:0>IMMU CAM 6:0>IMMU CAM Appendix A Updating the Sun Fire T1000 Firmware...
- Page 64 0:0>FPU Registers and Data Path 2:0>Enable Icache 2:0>Enable Dcache 4:0>Enable Icache 4:0>Enable Dcache 6:0>Enable Icache 6:0>Enable Dcache 0:0>Enable Icache 0:0>Enable Dcache 0:0>Scrub Memory 0:0>Scrub 00000000.00600000->00000000.80000000 on Memory Channel [0 3 ] Rank 0 Stack 0 Sun Fire T1000 Server Installation Guide • January 2006...
- Page 65 0:0>IO-Bridge unit 1 int init test 0:0>IO-Bridge unit 1 msi init test 0:0>IO-Bridge unit 1 ilu init test 0:0>IO-Bridge unit 1 tlu init test 0:0>IO-Bridge unit 1 lpu init test 0:0>IO-Bridge unit 1 interrupt test 0:0>INFO: Appendix A Updating the Sun Fire T1000 Firmware...
- Page 66 0:0>Select one of the following functions 0:0>POST: Return to OBP. 0:0>INFO: 0:0> POST Passed all devices. 0:0>Master set ACK for vbsc runpost command and spin... SC Alert: Host System has Reset 0:0> Sun Fire T1000 Server Installation Guide • January 2006...
-
Page 67: Selecting A Boot Device
Sun Fire T1000 Server Administration Guide. Note – The serial management port on the ALOM-CMT card is preconfigured as the default system console port. For more information, see the Sun Fire T1000 Server Overview. Connecting the Network Interface to the Network To boot from a network, you must connect the network interface to the network. -
Page 68: To Connect The Network Interface To The Network
The show-devs command lists the system devices and displays the full path name of each PCI device. Sun Fire T1000 Server Installation Guide • January 2006... -
Page 69: Index
Index Symbols cabinet defined, 4 cable management bracket #., system console escape sequence, 37 description, 8 cables adapters for serial data cables, 21 AC power cable, 10 cable connections list, 9 AC power turns on system controller, 4 cable management bracket, 20 adapters for serial cables, 21 shielded, iii adjusting length of slide rails, 15... - Page 70 SC network management port, 32 logging in from SC serial management port, 27 login prompt, 26 rack defined, 4 regulatory compliance statements, iii removing server from rack, 20 Sun Fire T1000 Server Installation Guide • January 2006...
- Page 71 39 submit comments and suggestions to Sun, xx Sun documentation web site, xix Sun Fire T1000 server documentation, xix VCCI class A and B, iv support and training web site, xix switching to the SC console with #. escape...
- Page 72 Sun Fire T1000 Server Installation Guide • January 2006...
Need help?
Do you have a question about the Sun Fire T1000 and is the answer not in the manual?
Questions and answers