Table of Contents
Advertisement
Quick Links
Advertisement
Table of Contents

Related Manuals for Blaupunkt BB+13


Summary of Contents for Blaupunkt BB+13
- Page 1 Digital Radio Boombox BB+13...
- Page 2 BB+13...
- Page 3 BB+13...
- Page 4 BB+13...
- Page 5 BB+13...
- Page 6 BB+13...
- Page 7 BB+13...
- Page 8 BB+13...
- Page 9 BB+13...
- Page 10 BB+13...
- Page 11 BB+13...
- Page 12 BB+13...
- Page 13 BB+13...
- Page 14 BB+13...
- Page 15 BB+13...
- Page 16 BB+13...
- Page 17 BB+13...
- Page 18 BB+13...
- Page 19 BB+13...
- Page 20 BB+13 (Bitte beachten Sie die Seite 25-26)
- Page 21 BB+13...
- Page 22 BB+13...
- Page 23 BB+13...
- Page 24 BB+13...
- Page 25 BB+13...
- Page 26 BB+13...
- Page 27 BB+13...
- Page 28 BB+13...
- Page 29 BB+13...
- Page 30 BB+13...
- Page 31 BB+13...
- Page 32 BB+13...
- Page 33 BB+13...
- Page 34 BB+13...
- Page 35 BB+13...
- Page 36 BB+13...
- Page 37 BB+13...
- Page 38 BB+13...
- Page 39 BB+13...
-
Page 40: Important Notes
BB+13 Warning TO PREVENT FIRE OR SHOCK HAZARD DO NOT EXPOSE THIS APPLIANCE TO RAIN OR MOISTURE LIGHTNING FLASH WITH ARROWHEADSYMBOL- EXCLAMATION POINT- within an equilateral triangle, is intended to alert POINT-within an equilateral triangle, is used t h e u s e r t o t h e p r e s e n c e o f u n i n s u l a t e d... -
Page 41: Safety Instructions
Trade name: Blaupunkt Responsible party: M3 Electronic GmbH Gutenbergstrasse 5, D-65830 Kriftel. Germany Hereby, Blaupunkt Competence Center Audio M3 Electronic GmbH, declares that this Class 1 equipment is in compliance with the essential requirement and other relevant provisions of Directive 1999/5/EC. - Page 42 BB+13 14. SERVICING – the user should not attempt to service the appliance beyond that described in the user operation instructions. All other servicing should be referred to qualified service personnel. 15. DO ensure that all electrical connections (including the mains plug, extension leads and inter-connections between the pieces of equipment) are properly made and in accordance with the manufacturer's instructions.
-
Page 43: Back View
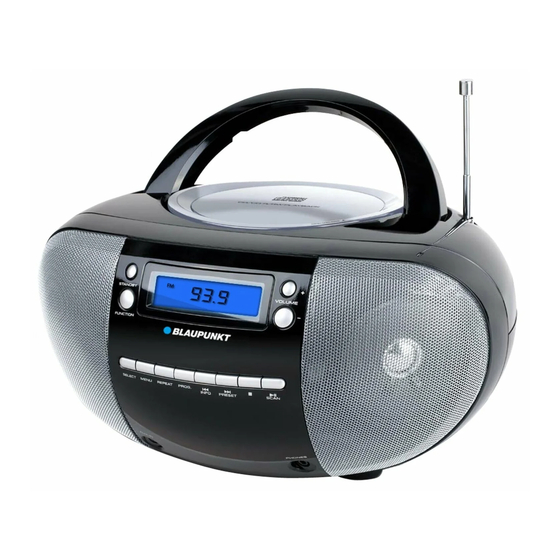
BB+13 CONTROLS & CONNECTIONS TOP VIEW BACK VIEW 15. FM/DAB antenna 1. Function button 8. Play Mode button 2. Standby button 9. Prog. / Preset button 16. CD door 3. Volume + button 10. Tuning 17. Battery compartment 18. DC jack 4. -
Page 44: Getting Started
BB+13 GETTING STARTED DAB/FM AERIAL Before using your radio for DAB or FM reception, pull out the telescopic antenna. You may need to adjust the position of the telescopic antenna for maxing signal strength. CONNECTING POWER Before connecting the power, check that the mains voltage on the rating plate of the AC adaptor is the same as the voltage in your area. -
Page 45: Adjusting The Volume
BB+13 INTIAL SCAN When your radio is switched on for the first time the scanning display will be shown while the scanning process takes place: The radio scans all usable stations (full scan) and stores them alphanumerically -1 Radio, 2 Radio, AA Radio, AB Radio…The initial scan will take a few minutes. -
Page 46: Dab Display Modes
BB+13 DAB SCANNING RE-SCANNING FOR DAB STATIONS When first used, your radio scanned the DAB band for available stations. The station services found were then stored in your system's memory. You can re-scan the band at any time if you move to a different area or just to refresh the stored list of available stations. -
Page 47: Selecting A Source
BB+13 DLS (Dynamic Label Segment): This is a scrolling message giving real-time information-song titles, news headlines, etc. PROGRAMME TYPE: This describes the style of the programme being broadcast. MULTIPLEX NAME: DAB Digital radio stations are broadcast in multiplexes. Each multiplex is a bundle of radio stations transmitted in a signal frequency. -
Page 48: Station Presets
BB+13 STATION PRESETS To store any preset 1-10 • Tune to the station you want to store as a preset. • Press and hold the PRESET button. “Preset Store” will be displayed. • Press the button repeatedly to find the preset number you want to store. - Page 49 BB+13 SET TIME/DATE: This main option enables the clock to be set manually if these is no available DAB transmission. To set the time and data manually: • When unit on FM/ AUX IN/CD/DAB mode, press MENU button, then press button, go to “Set Time/Date”, press Select button, then press...
-
Page 50: Fm Settings Menu
BB+13 FM SETTINGS MENU FM SETTINGS MENU There are also some menu settings that are specific to FM radio operation. These settings may be changed through the Settings Menu. To enter the FM Settings Menu: • Set to FM mode. -
Page 51: Listening To A Cd
BB+13 FM DISPLAY MODES FM DISPLAY MODE OPTIONS The bottom line of the display can be switched to show different items of information that may be transmitted with an FM station. To change the display mode: Press the INFO. button on the front panel repeatedly to change the information displayed while playing an FM radio station. -
Page 52: Program Play
BB+13 CD PLAYBACK, PAUSE: • Load the CD. • Press the / SCAN button to start the CD playing • When a CD IS playing, pressing the / SCAN button at any time will pause playback. Press the button again to re-start play. -
Page 53: Care And Maintenance
BB+13 HEADPHONES To play music from an iPod or Personal Audio player Connected to the AUX IN jack- • Press the FUNCTION button to select AUX mode. • Set the volume level on your Personal Audio player up To abut half level.
Need help?
Do you have a question about the BB+13 and is the answer not in the manual?
Questions and answers