Table of Contents
Advertisement
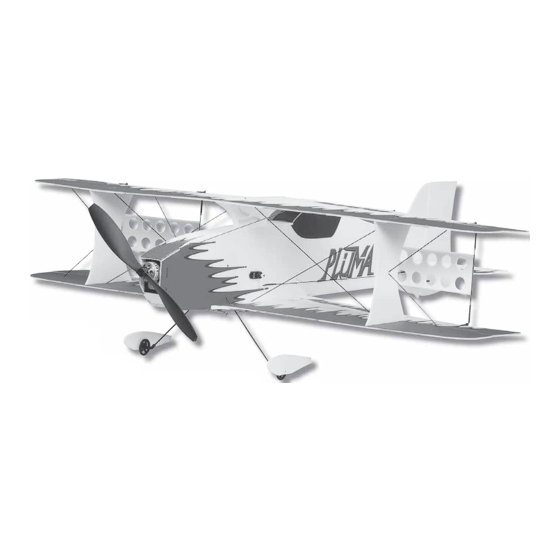
Wingspan: 32.5 in [830mm]
2
2
Wing Area: 518 in
[33.4dm
]
Weight: 8.4 – 9.5 oz [240 – 270g]
2
Wing Loading: 2.3 – 2.6 oz/ft
[7 – 8g/dm
Length: 38 in [955mm]
Radio:
4-channel radio system with micro receiver and three micro servos
Motor & Propeller: RimFire
™
28-22-1380 with APC 8" x 3.8 slo fl yer prop (APCQ5000) or
GWS 8" x 4 (GWSQ2009) -OR-
RimFire 28-26-1000 with GP 10" x 4.5 slo-fl yer prop (GPMQ6660)
Great Planes
®
Model Manufacturing Co. guarantees this kit to be
free from defects in both material and workmanship at the date
of purchase. This warranty does not cover any component parts
damaged by use or modifi cation. In no case shall Great Planes'
liability exceed the original cost of the purchased kit. Further,
Great Planes reserves the right to change or modify this warranty
without notice.
In that Great Planes has no control over the fi nal assembly or
material used for fi nal assembly, no liability shall be assumed nor
accepted for any damage resulting from the use by the user of
the fi nal user-assembled product. By the act of using the user-
assembled product, the user accepts all resulting liability.
If the buyer is not prepared to accept the liability associated
with the use of this product, the buyer is advised to return this
kit immediately in new and unused condition to the place of
purchase.
READ THROUGH THIS MANUAL BEFORE STARTING CONSTRUCTION. IT CONTAINS IMPORTANT
INSTRUCTIONS AND WARNINGS CONCERNING THE ASSEMBLY AND USE OF THIS MODEL.
Entire Contents © Copyright 2008
INSTRUCTION MANUAL
2
]
WARRANTY
To make a warranty claim send the defective part or item to Hobby
Services at the address below:
Hobby Services
3002 N. Apollo Dr., Suite 1
Champaign, IL 61822 USA
Include a letter stating your name, return shipping address, as
much contact information as possible (daytime telephone number,
fax number, e-mail address), a detailed description of the problem
and a photocopy of the purchase receipt. Upon receipt of the
package the problem will be evaluated as quickly as possible.
Champaign, Illinois
(217) 398-8970, Ext 5
airsupport@greatplanes.com
™
GPMZ1130 for GPMA1130 V1.0
Advertisement
Table of Contents

Subscribe to Our Youtube Channel
Related Manuals for GREAT PLANES Pluma 3D


Summary of Contents for GREAT PLANES Pluma 3D
-
Page 1: Instruction Manual
Include a letter stating your name, return shipping address, as In that Great Planes has no control over the fi nal assembly or much contact information as possible (daytime telephone number, material used for fi nal assembly, no liability shall be assumed nor... -
Page 2: Table Of Contents
TABLE OF CONTENTS INTRODUCTION For the latest technical updates or manual corrections INTRODUCTION ............... 2 to the Pluma 3D ARF visit the Great Planes web site at AMA .................. 2 www.greatplanes.com. Open the “Airplanes” link and then SAFETY PRECAUTIONS ..........2 select the Pluma 3D ARF. -
Page 3: Lithium Battery Handling & Usage
6. You must check the operation of the model before every • NEVER discharge below 2.5V per cell. fl ight to insure that all equipment is operating and that the model has remained structurally sound. Be sure to check • NEVER place on combustible materials or leave the pushrods, heat shrink tubing and Z-bends or other unattended during charge or discharge. -
Page 4: Additional Items Required
fi t. This is the list of adhesive and building supplies required to fi nish the Pluma 3D ARF. Order numbers are provided • Whenever the term glue is written you should rely upon in parentheses. -
Page 5: Kit Inspection
If any parts are missing or are not of acceptable quality, or if you need assistance with assembly, contact Great Planes Product Support. When reporting defective or missing parts, use the part names exactly as they are written in the Kit Contents list. -
Page 6: Getting Started
GETTING STARTED Take the time to look over your Pluma 3D ARF. Assembly is pretty simple and straight-forward, as you’ve already seen by looking over the table of contents section in this manual. Look for damage to the foam or broken parts. The Pluma 3D ARF uses a light-weight type of fl... -
Page 7: Link The Ailerons
Link the Ailerons ❏ 1. Locate four 1 x 145mm carbon pushrods, eight 1 x 30mm Z-bends, and eight 25mm pieces of heat shrink tubing. Assemble four aileron link rods as shown in the sketch above so that they measure 2-1/8" [156mm] from Z-bend center to Z-bend center. -
Page 8: Horizontal & Vertical Tail Installation
horns until the top and bottom ailerons are completely parallel with zero control throw. When you’re satisfi ed with the aileron position, use thin foam-safe CA to glue the aileron link horns securely to each aileron. Run a bead along both sides of each link horn and let the model sit until the CA cures. -
Page 9: Hinge The Rudder
of the wings, lightly sand the slot using 150-grit sandpaper Hinge the Rudder until the stab is aligned. ❏ 1. Locate the 7-1/2" [190mm] strip of hinge tape. Cut the tape so that you have one 4" [100mm] piece, one 2-3/4" [70mm] piece, and one 3/4"... -
Page 10: Install The Servos
INSTALL THE SERVOS ❏ 1. Remove the servo arm screws and the servo arms from all three of your servos. Use your radio to center the servos. Retain the servo arm screws. ❏ 4. Locate the longest servo arms that came with your servos. -
Page 11: Install The Pushrods
❏ ❏ ❏ 2. Install the other control horn to the right side of the 3. Install one control alignment tool onto the vertical rudder as shown. Apply a bead of thin foam-safe CA around stabilizer to hold the rudder straight. the base of the control horn. -
Page 12: Motor & Esc Installation
CA to the fuselage-to-fi rewall joint. MOTOR & ESC INSTALLATION For this build-up we chose to install the Great Planes 28-26-1000 RimFire. We recommend this motor if you plan on doing most of your fl ying outdoors. -
Page 13: Final Assembly
❏ 2. Install the 1 x 296mm carbon rods in the wings as shown. Square the fuselage with the wing and glue the wing ❏ braces in place. 6. Cut a 1" [25mm] strip from the supplied adhesive- backed hook and loop material. Peel the backing paper off and stick the loop side (fuzzy side) onto the back of your ESC. -
Page 14: Install The Aileron Servo
Install the Aileron Servo ❏ 1. Turn the model over. Locate the two remaining control horns. Glue them into the slots provided in the bottom of each lower aileron. ❏ 4. Locate the two 1 x 145mm front wing supports. Route each through its respective hole in the LE of the upper wing and into the holes in the forward fuselage. -
Page 15: Install The Radio, Landing Gear & Propeller
Install the Radio, Landing Gear & Propeller ❏ 5. Locate the two 1 x 112mm carbon aileron pushrods, four pieces of heat shrink tubing, and the remaining four Z-bends. Assemble one end of the pushrods as shown. ❏ 6. Install one control surface alignment tool on each aileron. ❏... - Page 16 ❏ 4. Apply several generous beads of medium or thick foam- safe CA to the back side of the landing gear doubler (the side ❏ you just sanded). Center the doubler over the holes in the 7. Slide each landing gear leg though the holes provided bottom of the lower wing and glue it in place.
-
Page 17: Balance The Model (C.g.)
If additional weight is required, Additionally, the throws and C.G. shown are true, real data use Great Planes (GPMQ4485) “stick-on” lead. which will allow the model to perform in the manner in which it was intended when fl... -
Page 18: Set The Control Throws & Direction Of Travel
These are the recommended control surface throws: SET THE CONTROL THROWS & DIRECTION OF TRAVEL HIGH RATE ELEVATOR: 1-3/8" [35mm], 26° up 1-3/8" [35mm], 26° down Check the Control Directions RUDDER: 2-3/4" [70mm], 36° left 2-3/4" [70mm], 36° right ❏ 1. -
Page 19: Charge The Batteries
We use a Top Flite Precision Magnetic Prop Balancer 1) I will not fl y my model aircraft in sanctioned events, air shows, (TOPQ5700) in the workshop and keep a Great Planes or model fl ying demonstrations until it has been proven to be Fingertip Prop Balancer (GPMQ5000) in our fl... -
Page 20: Check List
9) Under no circumstances may a pilot or other person touch a powered model in fl ight; nor should any part of the The Pluma 3D ARF is an airplane suitable for both indoor model other than the landing gear, intentionally touch and outdoor fl... -
Page 21: Takeoff
fl y in a safe manner. GOOD LUCK AND GREAT FLYING! The Pluma 3D ARF can take off from the ground (ROG) or can be hand launched. Rise-off-ground (ROG) takeoffs should be reserved for indoor fl ying and should be performed with the model rolling away from you and others. - Page 22 eliminates the need for a gearbox, making them the simpler, tend to last longer than unbalanced packs – and that means lighter and less expensive alternative to a brushed motor and maximum value for your battery dollar! ElectriFly offers Power gearbox.
-
Page 24: Templates
TEMPLATES TEMPLATES...
Need help?
Do you have a question about the Pluma 3D and is the answer not in the manual?
Questions and answers