Table of Contents
Advertisement
Advertisement
Table of Contents

Related Manuals for Topcon RL-H3A


Summary of Contents for Topcon RL-H3A
- Page 1 P O W E R INSTRUCTION MANUAL ROTATING LASER RL-H3A/B...
-
Page 3: Foreword
Foreword Thank you for purchasing the Topcon RL-H3A/B Rotating Laser. To quickly and effectively use the RL-H3A/B, please read these brief instructions carefully, and keep them in a convenient location for future reference. Handling Precautions Before starting work or operation, be sure to check that the instrument is functioning cor- rectly with normal performance. -
Page 4: Safety Information
• There is a risk of fire,electric shock or physical harm if you attempt to disassemble or repair the instrument yourself. This is only to be carried out by TOPCON or an authorized dealer,only! • Laser beams can be dangerous,and can cause eye injury if used incorrectly . - Page 5 • High temperature may cause fire. Do not cover the charger while it is charging. • Risk of fire or electric shock. Do not use damaged power cable, plug and socket. • Risk of fire or electric shock. Do not use a wet battery or charger. •...
- Page 6 CAUTION • Use of controls or adjustment or performance of procedures other than those speci- fied herein may result in hazardous radiation exposure. • Do not connect or disconnect equipment with wet hands,you are at risk of electric shocks if you do! •...
-
Page 7: User Precautions
User Precautions Wear the required protectors (safety shoes, helmet, etc.) when operating. Exceptions from Responsibility The user of this product is expected to follow all operating instructions and make periodic checks of the product’s performance. The manufacturer, or its representatives, assumes no responsibility for results of a faulty or intentional usage or misuse including any direct, indirect, consequential damage, and loss of profits. -
Page 8: Laser Safety
Publication 60825-1) provided on the safety standards for laser products. As per the said standard, RL-H3A standard model is classified as “Class 3R Laser Product” RL-H3B model is classified as “Class 1 Laser Products”. In case of any failure, do not disassemble the instrument. - Page 9 RL-H3B Beam aperture Class 1 Laser Product Visible Laser Beam Laser output : Approx. 0.9mw...
-
Page 10: Table Of Contents
Contents Foreword ................1 Handling Precautions ............1 Safety Information ..............2 Safety Precautions ..............2 User Precautions ..............5 Exceptions from Responsibility ..........5 Laser Safety ................6 Contents ................8 Standard System Components ..........9 Nomenclature ..............10 Preparation for Use ............ -
Page 11: Standard System Components
Standard System Components RL-H3B RL-H3A 1)RL-H3B Instrument ....1set 1)RL-H3A Instrument ....1set 2)Battery unit ......1set 2)Battery unit ......1set 3)LS-70A/B Laser Sensor ..1pc. 3)LS-70A/B Laser Sensor ..1pc. 4)Laser Sensor holder model 6 ..1pc. 4)Laser Sensor holder model 6 ..1pc. -
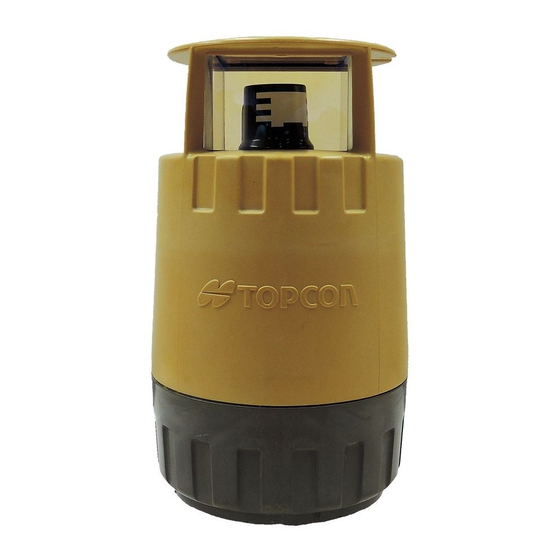
Page 12: Nomenclature
Nomenclature Rotary head Laser emitting window Control panel (Beam aperture) Battery status lamp Handle Automatic leveling lamp Height alert off lamp P O W E R Power key Height alert on/off key Control panel Battery compartment lock Battery holder DB-57C/57... -
Page 13: Preparation For Use
Preparation for Use Power Source Connect the battery according to the type of battery purchased. For handling batteries, see the "Handling Power Sources" chapter. Setting Instrument Up Set the instrument on a tripod or smooth surface. Power Key Turn the instrument ON or OFF by pressing the power key. Automatic leveling will start by turning the power switch ON. -
Page 14: Auto-Leveling Lamp
Auto-leveling Lamp Blinking : Leveling automatically. When automatic leveling is almost complete, blinking will slow. The rotary head is rotating slowly, and the laser beam is emitting. On solid : Completes leveling. The rotary head is rotating (600rpm) and emits a laser beam horizontally. -
Page 15: How To Operate
To change the on-grade precision of the laser sen- sor, press the on-grade precision mode button. (page 27) Place the laser sensor in the path of rotating laser beam. For more information about Topcon laser sensors, see pages 26 and 27 in this manual. - Page 16 Move the laser sensor up or down until the LCDÅ@ and audible indicators identifies the center of the laser beam has beam located.. Normal Higher than datum position precision (Buzzer sound:High frequent beep sound) mode Move the sensor downward. Datum position High precision (Buzzer sound:Continuous beep sound)
-
Page 17: Operational Example
Operational Example... -
Page 18: Maintaining Power Sources
Maintaining Power Sources Dry Battery Replacing Dry Batteries Remove the battery cover by turning the battery cover knob to “OPEN”. As illustrated, remove the old batteries and replace them with new dry batteries in direction Replace the battery cover and turn the knob to “LOCK”. -
Page 19: Rechargeable Battery
Red flashing : BT-49Q battery pack protection feature is working automatically. RL-H3A/B can be used in this state. Automatic protection feature: In case of overcharge or high or low temperature state exceed- ing charging range, charging will be stopped or changed to protect battery. - Page 20 Note : 1) The BT-49Q rechargeable battery can be charged while using the laser. 2) The BT-49Q rechargeable battery can be charged when removed from the instrument. 3) When the BT-49Q rechargeable battery cells are removed from the DB-57C battery holder, the instrument can be used with alkaline batteries installed in the battery pack.
-
Page 21: Checking And Adjusting
Checking and Adjusting Horizontal Calibration Checking about 20m(66ft) about 20m(66ft) Mark Mark Wall B Wall A Laser Sensor Laser Sensor PO W ER Paper Paper Set up the tripod at a midpoint between two walls, A and B. Ideally, the walls should be 40 meters (130 feet) apart. - Page 22 B1 and B2. Add the two distances together. If the total distance is less than that indicated below for your model, no adjust-ment is necessary for the X axis. RL-H3A: ±3mm or .12 inches (approximately 1/8 inch) RL-H3B: ±4mm or .16 inches...
-
Page 23: Adjusting
If no adjustment is needed in the X axis, repeat this procedure for the Y-axis using sides Y1 and Y2. Adjusting After checking calibration as described in the previous, follow this procedure if adjust- ment is required. Be sure not to move the tripod or paper used while checking calibration. Make a calibration reference mark (AX) on wall A as follows: a.Measure the distance between marks A1 and A2. - Page 24 Turn the instrument off. While pressing the height alert on/off key, press the power key. Then press the height alert on/off key again within two seconds to enter adjustment mode. The height alert lamp and battery status lamps will flash. Note: Height Alert On/Off key Do not disturb the instrument or tripod while...
- Page 25 Turn the instrument off. Repeat the checking procedure in the previous section to confirm proper calibration has been obtained. If Y axis adjustment was required, repeat this procedure for the y axis.
-
Page 26: Horizontal Rotation Error Of Cone
Horizontal Rotation Error of Cone Perform the following check after completing "Horizontal Calibration" on the previous page. 2m(6.6ft) about 38m(125.5ft) about 20m(66ft) about 20m(66ft) Mark Mark Mark Laser Sensor Wall A Laser Sensor Laser Sensor Wall B Wall A Wall B Paper Paper Paper... -
Page 27: Storage Precautions
2mm is less than 4mm so cone error adjustment is not required. Note: If difference exceeds 4mm (0.16 inch), contact your Topcon dealer. Storage Precautions Always clean the instrument after use. Use a clean cloth, moistened with a neutral detergent or water. Never use an abrasive cleaner, ether, thinner benzene, or other solvents. -
Page 28: Standard / Optional Accessories
Standard / Optional Accessories Laser sensor holder model 3 Laser sensor holder model 5 Laser sensor holder model 6 Clamp knob Clamp knob Clamp knob POWER Laser sensor holder model 6 Laser sensor Laser sensor holder model 3 holder model 5 Laser sensor Laser sensor Holder model 5 allows sensor to... - Page 29 LS-70A Laser Sensor LS-70B/70C Laser Sensor Indicator LS-70B: Beam receiving window The indicators are Beam receiving window located on front and Indicator back sides of the instrument. LS-70C: Index The indicator is Index Index located only on front side. On-grade precision switch Index Buzzer sound...
- Page 30 Display (LS-70A/70B) Normal precision mode High precision mode Height alert warning of rotating laser *1 Higher than datum position (Buzzer sound:High frequent beep sound) A flash and a buzzer sound signifies that Move the sensor downward. the height alert function of rotating laser is operating.
- Page 31 Detective Range (LS-70A/70B) Replacing Battery (LS-70A/70B) Press the lid in the direction of the arrow HIGH NORMAL to lift. LS-70A ±2mm/±.0064mm Take out the battery and ±1mm/±.0032ft (4mm/.013 ft width) (2mm/.0064ft width) place a new one into the LS-70B ±1mm/±.0032ft battery box.
-
Page 32: Specifications
Specifications Accuracy RL-H3A : ±1.9mm(0.074in)/50m(164ft) (±8”) (±8 arc seconds) RL-H3B : ±2.4mm(0.094in)/50m(164ft) (±10”) (±10 arc seconds) Auto-leveling range : ±3° Measuring range (Diameter) RL-H3A : Approx.2~700m(6.5~2300ft) (with LS-70A/B) RL-H3B : Approx.2~400m(6.5~1300ft) (with LS-70A/B) Rotation speeds : 600 (rpm) Light source : L.D (Visible laser) - Page 33 LS-70A/B Laser Sensor Detective range 50mm (2.0 in) Detective precision High precision:±1mm(±0.04 in) Normal precision:±2mm(±0.08 in) Detective beam indication Liquid crystal and buzzer Power source DC 9V dry battery Auto shut-off delay Approx. 30 minutes without beam detection. Operating temperature -20°C to +50°C (-4°F to +122°F) Continuous operating time at +20°C (68°F) Alkaline manganese dry batteries...
- Page 35 TOPCON (GREATBRITAIN) LTD. TOPCON POSITIONING SYSTEMS, INC. HEAD OFFICE 5758 West Las Positas Blvd., Pleasanton, CA 94588, U.S.A. Topcon House Kennet Side, Bone Lane, Newbury, Berkshire RG14 5PX U.K. Phone: 925-460-1300 Fax: 925-460-1315 www.topcon.com Phone: 44-1635-551120 Fax: 44-1635-551170 TOPCON CALIFORNIA survey.sales@topcon.co.uk laser.sales@topcon.co.uk...
Need help?
Do you have a question about the RL-H3A and is the answer not in the manual?
Questions and answers