Table of Contents
Advertisement
Advertisement
Table of Contents

Summary of Contents for Ozito bsr-800
-
Page 2: Specifications
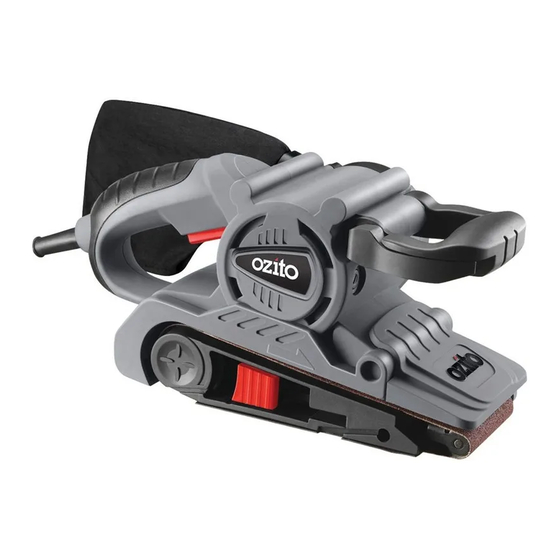
SPECIFICATIONS - MODEL NO. BSR-800 Motor: 800W Input: 230-240V ~ 50Hz No load speed: 260/min Belt Size: 457 x 76mm (18" x 3") Weight: 3.1kgs KNOW YOUR PRODUCT 1. Rear soft grip handle 6. Dust bag 2. On/Off switch 7. Front roller 3. -
Page 3: Table Of Contents
TABLE OF CONTENTS SPECIFICATIONS…………………………………………. Page 1 INTRODUCTION………………………………………….. Page 3 ELECRICAL SAFETY………………………………………. Page 3 GENERAL POWER TOOL SAFETY WARNINGS……….. Page 4 BELT SANDER SAFETY WARNINGS…………………… Page 6 PREPARATION & SETUP………………………………….. Page 7 OPERATION………………………………………………… Page 11 MAINTENANCE…………………………………………… Page 12 SPARE PARTS……………………………………………… Page 13 DESCRIPTION OF SYMBOLS……………………………. -
Page 4: Introduction
The electric motor has been designed for 230V and 240V only. Always check that the power supply corresponds to the voltage on the rating plate. Note: The supply of 230V and 240V on Ozito tools are interchangeable for Australia and New Zealand. -
Page 5: General Power Tool Safety Warnings
GENERAL POWER TOOL SAFETY WARNINGS Warning! Read all safety warnings and all instructions. Failure to follow the warnings and instructions may result in electric shock, fire and/or serious injury. Save all warnings and instructions for future reference. The term "power tool" in all of the warnings refers to your mains-operated (corded) power tool or battery-operated (cordless) power tool. - Page 6 GENERAL POWER TOOL SAFETY WARNINGS d) Remove any adjusting key or wrench before turning the power tool on. A wrench or a key left attached to a rotating part of the power tool may result in personal injury. e) Do not overreach. Keep proper footing and balance at all times. This enables better control of the power tool in unexpected situations.
-
Page 7: Belt Sander Safety Warnings
BELT SANDER SAFETY WARNINGS Hold power tool by insulated gripping surfaces, because the belt may contact its own cord. Cutting a "live" wire may make exposed metal parts of the power tool "live" and could give the operator an electric shock. This appliance is not intended for use by persons (including children) with reduced physical, sensory or mental capabilities, or lack of experience and knowledge, unless they have been given supervision or instruction concerning use of the appliance by a... -
Page 8: Preparation & Setup
PREPARATION & SETUP WARNING! Failure to unplug your belt sander could result in accidental starting causing possible serious injury. Attaching the Dust Bag to the Belt Sander Fig. 1 Attach the dust bag (6) to the belt sander by sliding the plastic dust bag adaptor over the dust ejection port on the left hand side of the belt sander beside the rear soft grip handle (1) (Fig. - Page 9 PREPARATION & SETUP (cont.) Removing Sanding Belts 1. Place the belt sander on its left side on a flat surface. 2. Pull out the belt tension release lever (9). Push it towards the front of the sander until it locks into place. The front roller retracts, releasing tension on the belt (Fig.
- Page 10 PREPARATION & SETUP (cont.) Tracking Adjustment CAUTION: Ensure body parts, cords, workpieces and any loose items are clear of the sanding belt before performing the tracking adjustment operation. It is necessary to ensure the belt is tracking correctly, in Fig. 8 a straight line, to avoid the belt 'tracking off' the belt sander's rollers.
- Page 11 PREPARATION & SETUP (cont.) Precautions to Take When Sanding Paint CAUTION: A dust mask should be worn at all times. Your belt sander will also help remove old paint, varnish or lacquer. However, if the coating consists of several layers, remove as much as possible with a paint remover. This will assist in removing the paint faster and not clogging up your belts and belt sander.
-
Page 12: Operation
OPERATION On/Off Switch WARNING! Prior to connecting the tool to the power supply, ensure the switch is not locked on. Always squeeze and release the on/off switch (2) before connecting it to the power supply, this will ensure the lock on switch (4) is not engaged. -
Page 13: Maintenance
Always replace both brushes at the same time. Note: Ozito Industries will not be responsible for any damage or injuries caused by the repair of the tool by an unauthorised person or by mishandling of the tool. -
Page 14: Spare Parts
SPARE PARTS Limited spare parts are available subject to availability. Please contact your local Bunnings Special Orders Desk to order the required spare parts. Most common spare parts listed below Spare Part Part No. Front Wheel Assembly SPBSR800-16A Brush Holder Cap (pair) SPBSR800-48A Carbon Brushes (pair) SPBSR800-49... -
Page 15: Contents
Reuse of recycled material decreases pollution in the environment. Please recycle packaging where facilities exist. Check with your local council authority for recycling advice. CONTENTS 1 x Belt Sander BSR-800 1 x Dust Bag 1 x Sanding Belt 1 x Instruction Manual... -
Page 16: Warranty
If the tool shows signs of damage or defects caused by or resulting from abuse, accidents or alterations. • Failure to perform maintenance as set out within the instruction manual. • If the tool is disassembled or tampered with in any way. OZITO Australia/New Zealand (Head Office) 1-23 Letcon Drive, Bangholme, Victoria, Australia 3175...


Need help?
Do you have a question about the bsr-800 and is the answer not in the manual?
Questions and answers