VeriFone VX690 User Manual
Hide thumbs
Also See for VX690:
- User manual (52 pages) ,
- Quick user manual (1 page) ,
- Installation manual (48 pages)

Related Manuals for VeriFone VX690


Summary of Contents for VeriFone VX690
- Page 1 Sivu 1(36) 28.9.2016 VX690 User Manual English Author: Verifone Finland Oy Date: 28.9.2016 Pages: 20...
-
Page 2: Table Of Contents
Sivu 2(36) 28.9.2016 INDEX: 1. BEFORE USE .......................... 5 1.1 Important ............................ 5 1.2 Terminal Structure ......................... 6 1.3 Terminal start-up and shutdown .................... 6 1.4 Technical data .......................... 7 1.5 Connecting cables ... - Page 3 4.2 Online transactions ........................ 2 1 4.2.1 General information on online transactions ................. 2 1 4.2.2 Online batch .......................... 2 1 4.2.3 Verifone reporting ........................ 2 1 4.3 Reports and bank connection .................... 2 2 4.3.1 Print batch .......................... 2 2 ...
- Page 4 Sivu 4(36) 28.9.2016 5.5 Invoice ............................ 2 8 5.6 Preauthorization ........................... 2 8 5.7 Multi cashier version ........................ 3 0 6. EXTRA VERSIONS ........................ 3 1 6.1 Multiuser version .......................... 3 1 6.2 Product version .......................... 3 1 7.
-
Page 5: Before Use
Sivu 5(36) 28.9.2016 1. BEFORE USE 1.1 Important Protect the power cord. If it is damaged it can not to be used anymore. The terminal is not waterproof or dustproof, and is intended for indoor use only. ... -
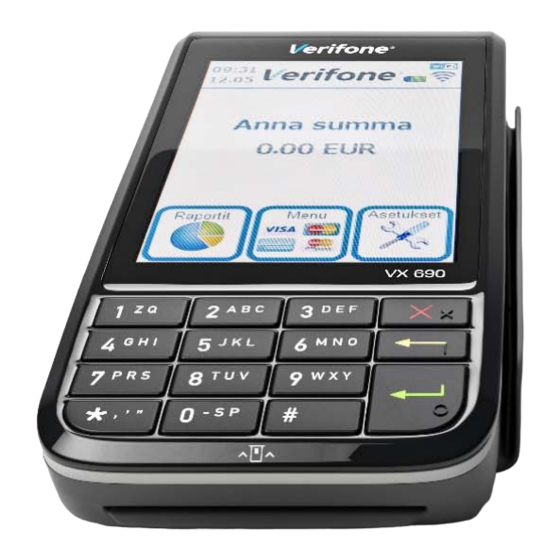
Page 6: Terminal Structure
Sivu 6(36) 28.9.2016 1.2 Terminal Structure 1.3 Terminal start-up and shutdown The terminal is switched on by pressing the Enter key for a while or by connecting it to the power cord. To shut down the terminal press the Cancel key until the terminal shuts down. NOTE! The terminal will not shutdown if the power cord is connected. -
Page 7: Technical Data
Sivu 7(36) 28.9.2016 1.4 Technical data Processor: 400 MHz | ARM11 32-bit RISC Operating System: Verix OS Display: 3.5” QVGA | capacitive touch screen Memory: 192MB (128MB Flash, 64MB SDRAM) Connections: HSPA+ 3G radio | 5GHz Wi-Fi & 2.4 GHz Wi-Fi | Bluetooth 4.0 Printer: 30 lps | paper roll width 57mm, diameter 40 mm Readers:... -
Page 8: Sim-Card
Sivu 8(36) 28.9.2016 1.6 SIM-card 1 Turn off the terminal. 2 Place the terminal upside down on a soft, clean surface to protect the lens from scratches. 3. Remove the back cover of the unit. 4 Lift the battery pack to expose the SIM slots. 5. -
Page 9: Using The Menus
Sivu 9(36) 28.9.2016 1.8 Using the menus To see the terminal’s various settings and functions, press the desired menu icon from the screen. To scroll inside the menu’s press the arrow keys from the screen, or numbers 1 and 3 from the keypad. To select a particular function or setting, press its text field from the screen. -
Page 10: Replacing Paper Roll
Sivu 10(36) 28.9.2016 1.11 Replacing paper roll 1. Pull the cover of the paper tray. 2 Gently lift the printer cover up and back. 3 Remove any partial roll of paper in the printer tray. 4 Hold the roll so the paper feeds from the bottom of the roll when the terminal is inverted. 5. -
Page 11: Pa-Dss Standard
CVV2 or the PIN-code. Companies must use solutions for card payment processing that are approved according to the PCI- DSS –standard. For the latest version of the Verifone PA-DSS Implementation Guide, go to http://www.verifone.fi/manuals 1.14 Base Station and Bluetooth Base Station is not included in the normal delivery it needs to be separately purchased. - Page 12 Sivu 12(36) 28.9.2016 Connect the Ethernet cable into the ETH port. And the other end into your modem. Place the terminal to the base as shown in the image. The battery will load while on the base. PAIRING 1.
-
Page 13: Settings
Sivu 13(36) 28.9.2016 2. SETTINGS 2.1 Terminal Settings To get to the terminals setting menu, select the Settings icon from the screen and press Enter. Some of the listed settings are explained in later sections. From the Settings menu choose EDIT. BATCH TIME Batch sending time CASHIER NUMBER... -
Page 14: Cashier Number
Sivu 14(36) 28.9.2016 To set the sending time, choose BATCH TIME from the EDIT menu. Type on the screen the sending time that you want with four digits (e.g. 0315). 2.4 Cashier Number If you have in use more than one terminal, you can specify them by giving them individual Cashier Numbers. -
Page 15: Power Save Mode
Sivu 15(36) 28.9.2016 CHANNEL = Number for the channel in use FIND WIFI NETWORKS = The terminal seeks all available networks from the area and lists them on the display. After choosing a network the terminal asks for the WEP KEY. Input the correct wep key and press enter. -
Page 16: Downloads
Sivu 16(36) 28.9.2016 DOWNLOADS 3.1 Application downloads NOTE! The terminal should be kept still and connected to the power cord during the entire download. Do not download software to the terminal e.g. in a moving vehicle. This might disrupt the download. Send the batch from the terminal before downloads. -
Page 17: Daily Use
Sivu 17(36) 28.9.2016 DAILY USE 4.1 Transactions 4.1.1 Chip card transactions ENTER AMOUNT: Type the precise amount, including the cents, and press Enter. INSERT/SWIPE OR PRESENT CARD: Insert the card into the chip reader, located at the front of the terminal, with the chip side facing up. -
Page 18: Swipe Card Transactions
Sivu 18(36) 28.9.2016 4.1.2 Swipe card transactions ENTER AMOUNT: Type the precise amount, including the cents, and press Enter. INSERT/SWIPE OR PRESENT CARD: Swipe the card from the magnetic reader. CREDIT / DEBIT: Choose the payment method The terminal prints out the merchant’s receipt and asks to print the customer’s receipt. -
Page 19: Reversal
Sivu 19(36) 28.9.2016 4.1.4 Reversal NOTE! A reversal can only be done to a transaction that is still in the terminals memory. Press the Menu icon from the screen and choose REVERSAL. ENTER RECEIPT NUMBER: The terminal suggests the number of the last transaction. Accept by pressing Enter. -
Page 20: Receipt Copy
Sivu 20(36) 28.9.2016 The terminal prints out the merchant’s receipt and asks to print the customer’s receipt. Press Enter if you wish to print out the customer’s receipt. Otherwise, press Cancel. The terminal will remind you to check the customer’s ID, depending on the card used. Press Enter, check the ID and write the last 4 digits of the social security number and which ID was checked to the receipt. -
Page 21: Online Transactions
4.2 Online transactions 4.2.1 General information on online transactions Online batch is a function that sends the transaction to the Verifone service right after it is made. This is to prevent the loss of information from the payment terminal. 4.2.2 Online batch During possible connection problems payment transactions cannot be sent forward after they have been made. -
Page 22: Reports And Bank Connection
Select the Reports menu from the screen and press Enter. Choose SEND BATCH. The terminal prints out the report and connects to Verifone reporting. The terminal sends the transactions, retrieves the necessary files: return report, EMV keys, AID and BIN tables, and the blacklist. -
Page 23: Blacklist
Actions = Contact your own Acquirer and check the duplicates that the batch contains. If the batch must be sent again, it will be done by Verifone, contact customer service. If the batch has been processed through other ways, the issue can be acknowledged. -
Page 24: Issue Acknowledgment
SENT TO TCS: The total count and amount of transactions that are sent to Verifone reporting as online transactions NOT SENT TO TCS: The total count and amount of transactions that have not been sent to Verifone reporting as online transactions. -
Page 25: Authorization Notifications
Sivu 25(36) 28.9.2016 4.4 Authorization notifications When a transaction is declined at the authorization centre a declining code is printed on the receipt. This code tells you the reason why it has been declined. The transaction is declined by a notification given by the bank or the credit card company. - Page 26 Sivu 26(36) 28.9.2016 200-299 Declined, card removal needed Declined Card expired Suspected card counterfeit Cashier, contact the recipient Limited card Cashier, contact recipients’ security department Exceeds PIN-code attempts Special situation Extinct card Stolen card Suspected abuse Successful Unsuccessful unsuccessful, form fault...
-
Page 27: Special Functions
Sivu 27(36) 28.9.2016 5. SPECIAL FUNCTIONS 5.1 Cash receipt Cash receipt is used when a customer pays with cash and a receipt is wanted from the terminal. Cash receipts are also seen on batch reports. Cash receipt is activated from the Settings menu. Making a cash receipt sale: Select the Menu icon from the screen Choose CASH RECEIPT... -
Page 28: Mandatory Authorization
Sivu 28(36) 28.9.2016 5.4 Mandatory authorization Mandatory authorization is activated from the Settings menu. When the mandatory authorization is activated, the terminal automatically authenticates all transactions regardless of the amount or the card type. 5.5 Invoice The invoice works in the same way as a cash receipt, except that the text INVOICE is printed on the receipt instead of CASH RECEIPT. - Page 29 Sivu 29(36) 28.9.2016 2. Ending the preauthorization Pre-authorizations can be charged or reversed. The sum of the preauthorization can also be changed. Menu -> Preauthorization -> Finalize pre-auth a) Reversal pre-auth Insert or swipe card The card number can be typed by pressing the * key, preauthorization ID can be typed by pressing the # key.
-
Page 30: Multi Cashier Version
Sivu 30(36) 28.9.2016 Amount is smaller than pre-auth: The terminal prints out separate merchant receipt’s from the reversed and charged amounts. The terminal asks to print the customer’s receipt. Press Enter or Cancel. NOTE! The terminal informs “failed” if there are no pre-authorizations with the card. -
Page 31: Extra Versions
Product version allows you to define products for your terminal. In this version receipts print out details of the sold products. This version can replace receipts from cash registers. In order to update your terminal to this version, please contact Verifone. Forming VAT-groups Select Settings, press enter and choose Edit. - Page 32 Sivu 32(36) 28.9.2016 VAT%: Type the VAT percent and press Enter. The display shows the group number and VAT percent. Accept this group by pressing enter; cancel by the cancel-key. Add next VAT: If you wish to add a new group, press enter. Otherwise press cancel. b) Edit VAT group VAT group: Type the group number and press Enter.
- Page 33 Sivu 33(36) 28.9.2016 Product id: Type the products number and press enter. The display shows the product name, VAT group and the price. Accept the removal by pressing enter; cancel by the cancel-key. Delete next product: If you wish to remove another product, press enter. Otherwise, press cancel. Product and VAT group lists To print product or VAT group lists, press Settings, enter and choose Print.
-
Page 34: Trouble Shooting
Sivu 34(36) 28.9.2016 Resetting the report: The terminal gathers transactions to the report until it is been reset. The report can be reset at any time. Press Reports, enter and choose Product report. Choose daily report and select reset report. Choose yes. -
Page 35: Notifications On The Receipt
Sivu 35(36) 28.9.2016 WRONG PIN = Customer has typed the wrong PIN-code for the card. DOWNLOAD NEEDED = Software needs to be downloaded to the terminal. Contact customer service. TAMPERING DETECTED = Terminal has suffered a knock or a power surge, which has caused it to go into a security lock mode. - Page 36 You do not have to send the cables with the terminal unless you want them tested too. Send the terminal by post. The postage is always paid by the sender. Service address is: Verifone Finland Oy/ Huolto Vantaankoskentie 14 01670 Vantaa...
Need help?
Do you have a question about the VX690 and is the answer not in the manual?
Questions and answers
I **** trying to insert a new WIFI code but can't find how to switch between capital letters and lower case. There is no up arrow on the screen
To switch between capital and lowercase letters on the VeriFone VX690 when entering a new WiFi code, press the same key again to toggle between uppercase and lowercase letters.
This answer is automatically generated