
Subscribe to Our Youtube Channel
Related Manuals for Booster BDVM-8360UBT


Summary of Contents for Booster BDVM-8360UBT
- Page 1 THE PERFECT SOUND BDVM-8360UBT MANUAL DE INSTALAÇÃO DO PROPRIETÁRIO DVD com Receptor Multimídia 3 "True Color TFT widescreen...
-
Page 2: Table Of Contents
Please read all instructions carefully before attempting to install or operate Due to its technical nature, it is highly recommended that your BOOSTER BDVM-8350MP is installed by a professional installer of an authorized dealer. This product is only for use in vehicles with 12V DC negative ground only. -
Page 3: Acessórios
BDVM-8360UBT Accessory Accessory Package contains the following accessories for installation and operation of the unit. The Unit 1x Mounting Bracket 1x Assemble Bar 1x Screw B15x16 4x Bolt M5 1x Nut M5 1x Flat washer 1x Spring washer 2x Unit ejection bars 1x UNIT IR-Remote Control with one CR2025 3Volt cell battery. -
Page 4: Precausões
BDVM-8360UBT Precautions Precautions Load one disc with the label side facing upwards and make sure you do not touch the data side with your fingers. Press the [OPEN] button on the unit to open and fold down the faceplate for loading or unloading a disc. -
Page 5: Notas De Instalação
BDVM-8360UBT Notes on Installation Notes on Installation If your car is fitted with a one (1x) DIN size opening for a car audio system, you can install the Car Radio according these steps. Note: Unit should be installed horizontally in an angle less than 30°. - Page 6 BDVM-8360UBT INSTALLATION Notes on Installation Note: Step 7 and 8 are only possible when you can reach the back of the unit inside the dashboard. To remove the unit, CAREFULLY remove the front rim (do not use force, else the connection...
-
Page 7: Remoção E Instalação Do Painel Frontal
BDVM-8360UBT INSTALLATION Removing and Attaching the Faceplate Removing Open the front to min 45 degrees or to its fold down position. Gently press the right side towards the left and gently remove the faceplate by pulling it towards you. Attaching Gently place the left side of the front onto the locking pin, then gently click the right side onto the locking pin and close the front until you hear a click. -
Page 8: Conexão Dos Cabos
BDVM-8360UBT Wire Connection Diagram Wire Connection Diagram Make sure you have good chassis ground. A good ground connection will eliminate most electrical noise problems. A good chassis ground requires a tight connection to the vehicle‟s metal chassis. The area around the ground connection should be clean, bare metal without rust, paint, plastic, dust, or dirt for a good electrical connection. -
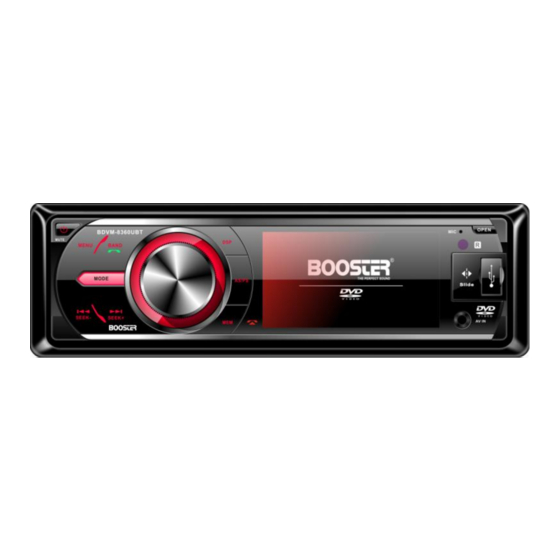
Page 9: Control Locations - Receiver
BDVM-8360UBT Control Locations – Receive Control Locations – Receiver 1. POWER/MUTE 12. MEM/PLAY/PAUSE/REJECT 2. MENU CALL 3. BAND/ACCEPT CALL 13. TFT LCD DISPLAY 4. VOLUME KNOB /OK 14. AV IN 5. DSP 15. USB SOCKET 6. AS/PS 16. SD CARD SLOT 7. -
Page 10: General Operation
BDVM-8360UBT GENERAL OPERATION General Operation Power /MUTE button Press the power button to switch the unit ON. Long press again to switch it OFF. Press the button briefly to Mute. Please note that the volume will be muted on all audio output connectors. The MUTE icon will be seen on the information display. - Page 11 BDVM-8360UBT GENERAL OPERATION General Operation AS (Auto Store) / AS (Auto Store): In tuner mode, Press the AS/PS on the panel or PS (Preset Scan) RPT/P.SCN button on the remote and hold for 2 seconds to store radio station‟s with the best reception to the preset buttons automatically.
- Page 12 BDVM-8360UBT GENERAL OPERATION General Operation PICTURE MENU Adjust level of red color. Support 50 levels. Default level is 25. Adjust level of green color. Support 50 levels. GREEN Default level is 25 Adjust level of blue color. Support 50 levels.
- Page 13 BDVM-8360UBT GENERAL OPERATION General Operation AV IN Connect an optional AV cable to your external AV device (such as a video camera), then press the MODE button to switch to the AV mode. Note: If there is no external video input, the TFT displays “NO VIDEO SIGNAL”.
- Page 14 BDVM-8360UBT REMOTE CONTROL OPERATION Control Locations – Remote Handset MODE NUMBERS 0-9 POWER ON-OFF PLAY / PAUSE BAND / RANDOM MUTE ENTER / CONFIRM MAIN MENU / LEFT, RIGHT, UP, DOWN MEDIA FILE MENU navigation arrows SUB TITLE ST/MO MEDIA FILE SETUP...
-
Page 15: Control Locations - Remote
BDVM-8360UBT REMOTE CONTROL OPERATION Control Locations – Remote 1. MODE button Press it to select the mode: Radio, DISC (if there is a disc in unit), USB (if there is a USB device in the unit), CARD (if there is a SD/SDHC card in the unit), BLUETOOTH (if the connection is ok) and AV IN. - Page 16 BDVM-8360UBT REMOTE CONTROL OPERATION Control Locations – Remote 9 / 24. buttons In Movie file or audio file mode, Press button to restart a track, press it twice to skip to the previous track. Press button to skip to the next track.
- Page 17 BDVM-8360UBT REMOTE CONTROL OPERATION Control Locations – Remote 19. ANGLE Button Press it repeatedly to change the viewing angle (Available only with a recorded DVD file or DVD disc that has this function). 20. INT Button Press it to activate the intro function. You can play the beginning of every track for 10 seconds in sequence.
-
Page 18: Changing The Battery
BDVM-8360UBT Changing the Battery Changing the 1. Press the catch and at the same time pull out the battery tray. 2. Insert the 1 x lithium battery, type CR 2025 3V battery with the stamped Battery (+) mark facing upward. Insert the battery tray into the remote control. -
Page 19: Multimedia Set Up Menu
BDVM-8360UBT Multimedia Set Up Menu Multimedia Set Up Menu When in Multimedia mode, press the SETUP button on the remote control to enter the Multimedia player setup menu to setup the Multimedia player operation setting. Press SETUP button to enter into the system settings main menu;... - Page 20 BDVM-8360UBT Multimedia Set Up Menu Control Locations – Remote Code Description 1.NONE Kid safe General Audiences – ALL ages admitted PARENTAL GUIDANCE 3.PG SUGGESTED-Some material may not be suitable for children PARENTS STRONGLY CAUTIONED-Some 4.PG-13 material may be inappropriate for children...
- Page 21 BDVM-8360UBT Multimedia Set Up Menu Control Locations – Remote [3]. Subtitle Lang setting: With this option you can select the preferred language for the subtitles. When the selected language is recorded on the Multimedia file or DVD then this language will automatically be shown. If not, the first language recorded on the Multimedia file or DVD is displayed.
- Page 22 BDVM-8360UBT Multimedia Set Up Menu Control Locations – Remote [2]. Contrast setting: With this option you can change the Contrast setting of the image. [3]. Hue setting: With this option you can change the Hue setting of the image. [4]. Saturation setting: With this option you can change the Saturation setting of the image.
-
Page 23: Usb, Sd/Mmc Operation
BDVM-8360UBT USB, SD/MMC Operation USB, SD/MMC Operation Inserting the SD/MMC card/ USB device 1. Turn the power on. 2. Insert the USB device into the USB slot on the front panel. The playing mode will be changed into USB mode automatically. The unit will read the files automatically. - Page 24 BDVM-8360UBT USB, SD/MMC Operation USB, SD/MMC Operation In MP3 mode press “ ”/” ” on remote control or long press BAND on the panel , cursor move to folder, then press “Enter” on remote control or press “VOL” on the panel to confirm selection .then press...
-
Page 25: Bluetooth Operation
BDVM-8360UBT Bluetooth OPERATION Bluetooth Operation The unit is compatible with Bluetooth international standard wireless communication technology V1.2 & V2.0 EDR and supports HFP, A2DP, AVRCP. The working range is ± 10 meters, but the actual connection distance depends on the working environment. Maximum 1 telephone can be connected at one time to the unit. - Page 26 BDVM-8360UBT Bluetooth OPERATION Bluetooth Operation number is entered, press the green ACCEPT CALL button to dial the number. Store speed dial numbers: After inputting a phone number, long press a digit button (any of the 0-9 number) to store the phone number to this digit (10 numbers can be saved as speed dial numbers in locations 0 to 9).
- Page 27 BDVM-8360UBT Bluetooth OPERATION Bluetooth Operation RECEIVED LIST mode Press it will display RECEIVED LIST that the calling you have received .Press the cursor up/down button on remote control to browse , Press the green ACCEPT CALL button to dial the selected number.
- Page 28 BDVM-8360UBT Bluetooth OPERATION Bluetooth Operation Streaming Audio with A2DP (Advanced With A2DP and Mobiles phones that support the Bluetooth A2DP Audio protocol, songs stored on the mobile phone can be played wirelessly via Distribution Profile) the speakers of the car radio unit.
-
Page 29: Specification
BDVM-8360UBT SPECIFICATION Specification GENERAL Operational voltage: ······················ 12 Vdc (10.8 ~16V allowable) Fuse: 15 A Grounding: ··································· Negative pole on the vehicle body Installation angle: ·························· Vertical 0° to +30°, horizontal ±15° Net weight: ··································· 1.80 kg Composite video input: ··················· 1 (Front, 3.5mm) Audio input (AUX, Stereo): ··············... -
Page 30: Tft Monitor
BDVM-8360UBT SPECIFICATION Specification Frequency range (± 3 dB): ······· 20 Hz – 20 KHz Audio input level: ··················· 200mV (2V Max) Audio output level: ·················· 2Vrms (1KHz, 0dB) ± 0.3V VIDEO Normal video input level: ··············· 1.0Vp ±0.2V (CVBS) Video input impedance: ················· 75 Ω...
Need help?
Do you have a question about the BDVM-8360UBT and is the answer not in the manual?
Questions and answers