Mendota DXV-45 Installation & Operating Instructions Manual
Gas direct vent fireplace
Hide thumbs
Also See for DXV-45:
- Installation & operating instructions manual (52 pages) ,
- Operating instructions manual (56 pages) ,
- Installation & operating instructions manual (42 pages)
Table of Contents
Advertisement
GAS DIRECT VENT FIREPLACE
INSTALLATION & OPERATING INSTRUCTIONS
WARNING: This product must be installed by a licensed plumber or gas fitter when installed in the commonwealth of Massachusetts. Improper installa-
tion, adjustment, alteration, service or maintenance can cause injury or property damage. Refer to this manual. For assistance or additional information
consult a qualified installer, service agency or the gas supplier.
FOR YOUR SAFETY:
IF YOU SMELL GAS:
1.
OPEN WINDOWS.
2.
DO NOT TOUCH ELECTRICAL SWITCHES.
3.
DO NOT TRY TO LIGHT ANY APPLIANCE.
4.
EXTINGUISH ANY OPEN FLAME
5.
DO NOT USE THE PHONE IN YOUR BUILDING.
6.
IMMEDIATELY CALL YOUR GAS SUPPLIER FROM A NEIGHBOR'S
PHONE.
7.
FOLLOW THE GAS SUPPLIERS INSTRUCTIONS.
8.
IF YOU CANNOT REACH YOUR GAS SUPPLIER, CALL THE FIRE
DEPARTMENT.
WARNING: IF THE INFORMATION IN THIS MANUAL IS NOT FOLLOWED EXACTLY, A FIRE OR EXPLOSION MAY RESULT CAUSING PROPERTY
DAMAGE,
PERSONAL INJURY OR LOSS OF LIFE.
IMPORTANT: THESE INSTRUCTIONS ARE TO REMAIN WITH THE HOME OWNER!
MENDOTA
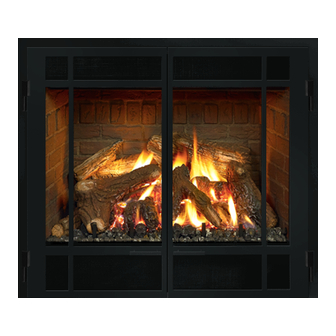
Model DXV-45
SHOWN WITH OPTIONAL PRAIRIE DOOR KIT AND OVERLAY
NO. 1002
FOR YOUR SAFETY
INSTALLATION AND SERVICE MUST BE PERFORMED BY A QUALIFIED
INSTALLER, SERVICE AGENCY, OR THE GAS SUPPLIER. DO NOT STORE
OR USE GASOLINE OR OTHER FLAMMABLE VAPORS AND LIQUIDS IN THE
VICINITY OF THIS OR ANY OTHER APPLIANCE
WARNING:
DO NOT OPERATE THIS APPLIANCE WITH THE GLASS
REMOVED, CRACKED OF BROKEN. REPLACEMENT OF GLASS
SHOULD BE DONE BY A
LICENSED OR QUALIFIED PERSON.
WARNING:
MENDOTA GAS FIREPLACES ARE HEAT PRODUCING
APPLIANCES. DO NOT BURN WOOD, PAPER OR OTHER
MATERIALS IN THE FIREPLACE.
DESIGNED AS A SUPPLEMENTAL HEAT SOURCE. IT IS
ADVISABLE TO HAVE AN ALTERNATE HEAT SUPPLY.
THE FIREPLACE IS
Advertisement
Table of Contents
Troubleshooting

Related Manuals for Mendota DXV-45


Summary of Contents for Mendota DXV-45
- Page 1 LICENSED OR QUALIFIED PERSON. IMMEDIATELY CALL YOUR GAS SUPPLIER FROM A NEIGHBOR'S PHONE. WARNING: MENDOTA GAS FIREPLACES ARE HEAT PRODUCING FOLLOW THE GAS SUPPLIERS INSTRUCTIONS. APPLIANCES. DO NOT BURN WOOD, PAPER OR OTHER IF YOU CANNOT REACH YOUR GAS SUPPLIER, CALL THE FIRE MATERIALS IN THE FIREPLACE.
-
Page 2: Table Of Contents
Gas appliances must be tested and certified by a nationally recognized testing and certification agency to American National Stan- dards Institute - ANSI Gas Appliance Safety Standards. For more information see pg. 36. The Mendota Gas DXV Fireplace has been tested and certified by Intertek Testing Services 8431 Murphy Drive, Middleton, WI... -
Page 3: Locating The Fireplace And General Information
Fireplace and replace any part of the control system and any gas control, which has been under water. DO NOT use this fireplace if the burner does not light immediately. Turn unit off and call Mendota approved service person if there is any delay in burner light off. - Page 4 HEARTH PROTECTION REQUIREMENTS: A non-combustible hearth protector is required and must extend a minimum of 14" in front of the fireplace (see Figure 1 on pg. 4 for raised hearths). We suggest installing the Mendota Fireplace 6 to 12 inches above the floor by utilizing an elevated hearth.
- Page 5 45 GAS DIRECT VENT FIREPLACE DXV- SPECIFICATIONS & CLEARANCES DIRECT VENT SIZE: 5" I.D., 8" O.D. FIGURE 1: Specifications & Clearances...
-
Page 6: Installation Instructions
CAUTION: Each installation must conform to all local, state and national codes. Refer to the national fuel gas code and local zoning and code authorities for details on installation requirements. The Mendota Fireplace must be vented to the outside in accordance with the latest edition of the National Fuel Gas Code. In the ab- sence of local codes, the installation must conform with the most current edition of the National Fuel Gas Code ANSI Z223.1, also known as NFPA 54. -
Page 7: Gas Supply Requirements
GAS SUPPLY REQUIREMENTS CORRECT GAS PRESSURE AND PROPER GAS SUPPLY LINE SIZING IS IMPERATIVE TO THE SUCCESSFUL PERFORMANCE OF YOUR MENDOTA GAS FIREPLACE. BE SURE THE GAS SUPPLIER OR PLUMBER CAREFULLY CHECKS FOR CORRECT GAS PRESSURE AND GAS LINE SIZING WHEN INSTALLING THE FIREPLACE. -
Page 8: Gas Pressure Requirements
GAS PRESSURE REQUIREMENTS A MAJOR CAUSE OF OPERATING PROBLEMS WITH GAS APPLIANCES CAN BE IMPROPER GAS PRESSURE! Such problems as changes in flame color or configuration, gas pilot or burner outages, intermittent operation, changes in heat output, excessive burner noise, etc. can be the result of changes in gas pressure or improper gas pressure at the time of the installation. -
Page 9: Exterior Vent Locations And Restrictions
EXTERIOR VENT LOCATIONS AND RESTRICTIONS FIGURE 3: Exterior Vent Locations ∨ - ∧ - ≡ - Vent Terminal Air Supply Inlet Area where terminal is not permitted Clearance above grade, veranda, porch, deck, or bal- *Not to be installed above a meter/regulator assembly cony (*18 inches (45 cm) minimum) within three feet (90 cm) horizontally from the center-line of the regulator... -
Page 10: Flue Venting Instructions
FLUE VENTING INSTRUCTIONS The Mendota Fireplace must be vented using DuraVent or Amerivent or Security venting system. All warran- ties will be voided and serious fire, health or other safety hazards may result from any of the following actions: Installation by unauthorized personnel; Installation of any damaged component; unauthorized modification of vent system;... -
Page 11: Flue Venting Requirements
FLUE VENTING REQUIREMENTS NOTE: IF A 90º ELBOW IS CONNECTED DIRECTLY TO THE FLUE OULET, THE MAXIMUM HORIZONTAL DISTANCE FROM THE FLUE OUTLET CENTERLINE TO THE OUTSIDE WALL IS 24". A MAXIMUM OF THREE (3) 90ºELBOWS ARE ALLOWED PER INSTALLATION. EACH 90º... -
Page 12: Flue Venting Components
5"/ 8"FLUE VENTING COMPONENTS ITEM # PART # DESCRIPTION 45-01-00222 12" VENT STACK 5" / 8" 45-01-00223 24" VENT STACK 5" / 8" 45-01-00224 36" VENT STACK 5" / 8" 45-01-00225 48" VENT STACK 5" / 8" 45-01-00228 º GALVANIZED ELBOW 5" / 8" º... -
Page 13: Minimum Rise Through-The-Wall Venting
MINIMUM RISE THROUGH-THE-WALL VENTING The horizontal distance from flue outlet center to outside wall must not exceed 24" if a 90 elbow is connected directly to flue outlet. ALWAYS MAINTAIN 1" CLEARANCES FROM VENT PIPE TO COMBUSTIBLES, 2" ABOVE PIPE ON HORIZONTAL RUNS. Use "fixed" pipe sections in place of adjustable pipe sections wherever possible. - Page 14 A-2 ELEVATED RISE THROUGH-THE-WALL VENTING The minimum vertical rise from top of fireplace, is 48 in. when used with the maximum horizontal run of 16 ft. For other venting configurations within these maximum limits see pg. 10. NOTE: All horizontal runs of vent pipes must have a ¼" rise for every 1' of run toward the termination. Never allow the vent to run downward.
-
Page 15: Vertical Through-The-Roof Venting
B - 1 VERTICAL THROUGH-THE-ROOF VENTING The maximum vertical run of vent pipe is 36 ft. from the top of the fireplace. The fireplace will support a run of a maximum of 36 ft. Maintain 1" air space clearances on all sides of vents (2" above horizontal vents). IMPORTANT: REFER TO DRAWING ON PAGE 10 &... - Page 16 8. Height "*H" of top of vent cap can be determined follows: "H" DIMENSION ROOF PITCH FEET METERS FLAT to 6/12 7/12 to 9/12 10/12 to 12/12 13/12 to 16/12 17/12 to 21/12 9. Complete installation with storm collar and vent cap.
-
Page 17: Mendota Designer Fronts Installation Information
MENDOTA DESIGNER FRONTS INSTALLATION INFORMATION The following Designer Fronts are available for the DXV-45 Fireplace: Andover Arched Door Kit with Firescreen with optional Overlays as listed below: Black Andover Overlay Pewter Andover Overlay Antique Copper Andover Overlay Gold Andover Overlay... - Page 18 Hearth Protection Pad Installation Information when planning to Install the Andover or Prairie Fronts Any hearth protection pad installed in front of the DXV-45 Fireplace must be designed, built and installed so that the hearth protection pad’s top surface is flush with the bottom-most surface of the DXV45 Fireplace.
-
Page 19: Dxv Door Operation
DXV DOOR OPERATION TO REMOVE DOOR 1. Place both thumbs on lower doorframe directly above Spring Loaded Door Holding Bar. 2. Reach fingers under Bar and pull Bar straight out from Fireplace front. 3. Pull Bar down and move bar inward until bar clears doorframe - then release. 4. -
Page 20: Coal Bed And Logs Installation
COAL BED AND LOGS INSTALLATION With door removed, proceed as follows: Carefully unpack the shipping boxes containing the coal bed sections and logs and remove them gently from the foam packing. Note: Each coal bed and log is ”lettered” on its underside. Locate the 3 bags of embers and coals: LARGE CHUNK COALS - SMALL COALS - GLOWING EMBERS Place Coal Bed “A”... - Page 21 Place right rear log “B” behind back burner as shown. Guide log pins into holes into air box. Place left rear log “C” behind back burner as shown. Guide log pins into holes into air box. Place charred log “D” as shown – Between rear burner “U-tube” runners Place log pins into air box holes. Place left front log “E”...
- Page 22 in charred log “D”. Place right log “F” as shown – Front lower end against right grate upright, and right upper end over pin in charred log “D”. Carefully place large chunk coals on coal bed “A” - between front and middle burner - in a loose, check- erboard arrangement.
- Page 23 11. Place small log “H” with smooth branch under left log “E”. This log may be placed in front of pilot, BUT DO NOT REST AGAINST PILOT. Place small log “I” between logs “E & “G” as shown. There is not one correct location for this log – it may be placed as desired.
-
Page 24: Installation Check Off List
rear burner holes. COMPLETED LOGS AND COAL BED ASSEMBLY The following Check Off Lists must be completed prior to final operation of the Fireplace, or manufacturer's warranty and liabilities will be voided: INSTALLATION CHECK OFF LIST... -
Page 25: Lighting Check Off List
Co-axial vent rigid pipe, wall vent cap or roof vent cap must be installed by a Mendota approved person in accordance with instructions. All joints must be se- cured, "twist-locked" and leak-proof. 2000 silicate sealant (Millpak #65-06- º 00909) must be used on the inner pipe joints of all pipe sections (Dura Vent only). -
Page 26: Lighting Instructions
LIGHTING INSTRUCTIONS IMPORTANT: Be sure all items on "INSTALLATION CHECK OFF LIST" (pg. 22) have been completed! CAUTION: If the pilot goes out, be sure to wait a minimum of five minutes before relighting - be sure to always remove the glass before relighting the pilot. - Page 27 13. Main burner should now light IMMEDIATELY and flame should not "lift" off burner. If there is any delay in igni- tion or if flame is "lifting off" burner, turn off burner and carefully check for proper installation of logs/coals, vent system and proper pilot flame impingement on burner and thermopile.
-
Page 28: Thermostat Or Remote Control Operation
60 seconds and repeat lighting procedure. If burner does not come on immediately after sec- ond try, recheck complete installation. If necessary, contact your Mendota dealer. NOTE: If thermostat is located over 25 ft. from fireplace the pilot flame may need to be increased up to 450 millivolts. - Page 29 BLOWER OPERATION The Mendota DXV Fireplace is designed so the blower operates at all times the fireplace is operating. The blower output can be regulated with the rheostat (included), but it must be "on" at all times the burner is "on". NOTE: There will be a time delay in blower operation during "heat-up"...
-
Page 30: Troubleshooting Mendota Gas Dxv Fireplace
3. If flame is too "orange" or is causing sooting on viewing glass pull air shutter control knob in approx. 1/16" incre- ments until sooting stops. IF SOOTING DOES NOT STOP, TURN OFF UNIT AND CALL YOUR MENDOTA SERVICE PERSON. -
Page 31: Customer Information And Trouble Shooting
Fireplace viewing glass or on the outside of the home around the vent cap) the unit must be immediately turned off and the local Mendota dealer promptly informed. Mendota products are designed and tested to oper- ate without producing any "sooting" when installed and operated correctly. Mendota dealers will correct "soot- ing"... -
Page 32: Maintenance
1. ANNUAL MAINTENANCE OF MENDOTA UNITS IS REQUIRED. The following procedures must be per- formed each year by a Mendota approved service person. NOTE: Any adjustments to burner, pilot or logs must be done by a qualified Mendota service person. - Page 33 HA-42-00072 This conversion must be made by a qualified service technician. A Natural Gas to LPG conversion kit #HA-42-00072 is included with the DXV45 Fireplace. This conversion kit is located within the Ziplok bag containing this Installation and Operating Instructions Manual. LP Conversion Kit #HA-42-00072 contains the following parts: One LP Pressure Regulator, One LP Pilot Ori- fice Thimble, One Cap Orifice drill #52 (for rear burner) and One Cap Orifice drill #3/64 (for front burner).
- Page 34 Figure 10...
-
Page 35: Replacement Parts
REPLACEMENT PARTS MENDOTA DXV-45 FIREPLACE PART NO DESCRIPTION PART NO DESCRIPTION HA-41-00047 DOOR GASKET 05-04-00035 PILOT ASS'Y. NAT. 05-04-00036 LP PILOT ORIFICE 65-06-00658 GLASS - FLAT 05-07-00067 THERMOCOUPLE HA-42-00015 DOOR FRAME ASS'Y. – FLAT HA-42-00072 LP KIT HA-41-00024 REAR ORIFICE (Nat. Gas) # 35... - Page 36 Electrical Rating (Courant nominal): 120 volts 60 hertz 1.5 amperes DO NOT REMOVE OR COVER THIS LABEL VEILLEZ Á NE JAMAIS ENLEVER NI DISSIMULER CETTE ÉTIQUETTE MODEL: DXV-45 WH# __________________...
-
Page 37: Warranty
Dealer (Place of Purchase) ___________________________________________________________ City ________________________________________ State ______Zip_______________________ Date of Purchase _______________________ Serial Number________________________________ Purchaser's Signature________________________________________________________________ MENDOTA DXV-45 DIRECT VENT FIREPLACE Check that flame is "stable" and is not "lifting" off burner BRIEF OWNER ON OPERATION AND MAINTENANCE OF UNIT Light Pilot Operate Burner Explain blower "delay"... - Page 38 -------------------------------------------------------------------------------------------------------------------------------------------------------- POSTAGE NEEDED JOHNSON GAS APPLIANCE COMPANY 520 E AVENUE N.W. CEDAR RAPIDS, IA 52405 MENDOTA EXTENDED LIFETIME PROTECTION...
- Page 39 The use of unauthorized components will make this warranty null and void. This warranty shall be effective only if the original purchaser of the Mendota appliance is registered with Mendota Division within thirty (30) days of the date of purchase. Such registration or the failure to register shall not be deemed to create any obligation or liability by the manufacturer and this warranty with its conditions and limitations shall be the only procedure for obtaining any rights against the manufacturer and expresses the sole obligation and respon- sibilities of the manufacturer which are offered to the original purchaser and accepted upon purchase of the appliance.
- Page 40 Johnson Gas Appliance Company 520 E Avenue N.W. - Cedar Rapids, IA 52405 Mendota Hearth Division www.johnsongas.com 2002 Part # 65-05-00090...
Need help?
Do you have a question about the DXV-45 and is the answer not in the manual?
Questions and answers