Atag Q 25S Instructions Manual
Hide thumbs
Also See for Q 25S:
- Installation & servicing instructions manual (44 pages) ,
- Installation & servicing instructions manual (52 pages)
Table of Contents

Subscribe to Our Youtube Channel
Related Manuals for Atag Q 25S


Summary of Contents for Atag Q 25S
- Page 1 I n s t a l l a t i o n & S e r v i c i n g Instructions Boiler G.C No Q 25S 41-310-08 Q 38S 41-310-09 Q 51S 41-310-10 Q 60S 41-310-11 Q 25C...
-
Page 2: Explanations Of Symbols And Signs On The Control Tower Display
Explanations of symbols and signs on the Control Tower display. Operation indication (in the first display position by technical read out) No heat requirement Ventilation phase Ignition phase Burner active on central heating Burner active on hot water Fan check Burner off when room thermostat is demanding Pump overrun phase for central heating Pump overrun phase for hot water... -
Page 3: Table Of Contents
Content Introduction ............................4 Rules ............................4 Scope of the supply ........................6 Description of the boiler .........................6 Mounting the boiler .........................7 Dimensions .........................8 Connecting the boiler ........................10 Central heating system .....................10 Expansion vessel ......................12 6.2.1 Expansion vessel module ....................13 Underfloor heating system (plastic pipes) .................14 Gas connection .........................14 Hot water supply .......................14 Condensation drain pipe ....................15... -
Page 4: Introduction
Bord Gais installers in connection with the installation and putting into operation of ATAG boilers. It is advisable to read these instructions thoroughly, well in ad- vance of installation. Separate instructions for use are supplied with the boiler for users of ATAG central heating boilers. - Page 5 The current, Electricity at Work Regulation must be complied with and also be in accordance with the relevant and current editions of the British Standards. The ATAG Q boiler is a certified appliance and must not be modified or installed in any way contrary to this Installation Manual. Manufacturers instructions must not be taken in any way as overriding statutory obligations.
-
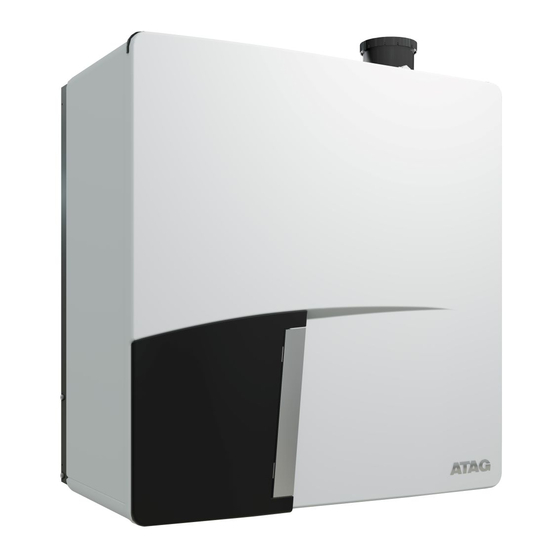
Page 6: Scope Of The Supply
Benchmark logbook. screws; Description of the boiler Room sealed boiler The ATAG Q boiler is a room sealed, condensing and modulating central heating The boiler retreives its boiler, with or without an integrated hot water facility. combustion air to out-... -
Page 7: Mounting The Boiler
Mounting the boiler The room where the boiler will be placed must always be frost free. It is NOT necessary to have a purpose provided air vent in the room or internal space in which the boiler is installed. Neither is it necessary to ventilate a cupboard or compartment in which the boiler is installed, due to the extremely low surface temperature of the boiler casing during operation. -
Page 8: Dimensions
5.1 Dimensions ceiling dimensions (in mm) figure 1 Solo Combi Q25S Q51S Q25C Boiler type Q51C Q38S Q60S Q38C A Height B Width 1000 C Depth D Left side / flue gas exhaust Centre to centre / flue gas exhaust and supply F back / flue gas exhaust G Left side / gas pipe... - Page 9 boiler connections figure 2 Solo Combi Q25S Q51S Q25C Q51C Boiler type Q38S Q60S Q38C Combustion air supply / flue gas 80/125 80/125 80/125 80/125 system Gas pipe - g ½" female ¾" female ½" female ¾" female Flow pipe - f Return pipe - r Condensate pipe - c Expansion pipe - e...
-
Page 10: Connecting The Boiler
A low velocity header must be connected to the Q51C, Q51S and Q60S to prevent flow problems over the boiler. ATAG supplies the AA1OV09U Low velocity header for 1 boiler. This can be connected directly under the boiler on the flow and return pipe. - Page 11 If the installation resistance is higher than the stated value the pump will rotate at maximum pump capacity and the load will be adjusted until an acceptable temperature difference between flow and return water has been obtained. If, after this, the temperature difference remains to much then the boiler will switch itself off and wait until an acceptable temperature has arisen.
-
Page 12: Expansion Vessel
6.2 Expansion vessel The central heating system must be provided with an expansion vessel. The expansion vessel which is used should be geared to the water content of the installation. The pre-charge pressure depends on the installation height above the mounted expansion vessel. -
Page 13: Expansion Vessel Module
By this means the external expansion vessel is not required. This expansion vessel module is placed behind the ATAG Q boiler, by which means the expansion vessel is not noticeable. The content of the two expansion vessels is 20 litres. The pre-charge pressure is 1 bar. -
Page 14: Underfloor Heating System (Plastic Pipes)
Make sure that the gas pipe work does not contain dirt, particularly with new pipes. When the boiler has to be converted from natural gas to LPG, ATAG provides special kits for this purpose. Special instructions are supplied with the kit. -
Page 15: Condensation Drain Pipe
6.6 Condensation drain pipe ATAG boilers produce condensate. This condensate must be drained otherwise the boiler will not function. The collecting condensation drain pipe should be connected to the drain by means of an open connection. By this means the possibility of drain gases ending up in the boiler is prevented. -
Page 16: Flue Gas Exhaust System And Air Supply System
6.7 Flue gas exhaust system and air supply system The flue gas exhaust system and air supply system consists of: Flue gas pipe; Air supply pipe; Roof or wall terminal. The flue gas exhaust system and air supply system must comply with: United Kingdom: The flue gas outlet and air supply installation must comply with the current regulation requirements. - Page 17 The appliance connection diameter is 80/125 mm, to which the flue gas outlet and air supply system can be fitted, with or without elbow pieces. The maximum permissible pipe length is set out in Table 5. Boiler conversion from concentric to parallel It is also possible to use a parallel pipe connection of 2x 80mm.
- Page 18 For further information about the available components of the flue gas and air supply system we recommend you consult the Monopass Flue systems. The ATAG flue gas system is meant and designed solely the use on ATAG central heating boilers adjusted for Nat gas or LPG. The maximum flue gas temperatures are below 70°C (full load 80/60°C)
- Page 19 In certain weather conditions condensation may also accumulate on the outside of the air inlet pipe. Such conditions must be considered and where necessary insulation of the inlet pipe may be required. In cold and/or humid weather water vapour may condense on leaving the flue terminal. The effect of such ‘plumeing’...
-
Page 20: Dimensions Of The Flue Gas And Air Intake Duct
31 – ( 2 x 1.1 ) = 28.8 meters. Pipes with 60/100 diameter are only permitted on wall terminals in combination with ATAG boilers untill 25kW. Two pipe flue system + chimney lining in m in m ø80mm... -
Page 21: External Hot Water Cylinders
External hot water cylinders Depending of the comfort preferences different external hot water cylinders can be connected to the boiler. The choice of the cylinder depends on the coil output. The coil output must comply with the boiler output. A cylinder which is used in combination with a Q 51S or Q 60S, should have a minimal capacity of 40 kW resp. -
Page 22: Electrical Connection
Should it be necessary to change it, the mains power supply cable may only be replaced with an ATAG mains power supply cable (item No. S4407300). The ATAG room thermostat and controls must be connected to their allocated connections. All other types or makes of room thermostats or controls which are used must have a Volt free contact. -
Page 24: Boiler Controls
Boiler controls The boiler is provided with a fully automatic microprocessor control, called CMS Control Management System. This control simplifies operation by undertaking all major control functions. Initially when power to the unit is switched on it will remain on standby. -
Page 25: Explanation Of The Function Keys
9.1 Explanation of the function keys Central Heating programme key. Switching the Central Heating on or off (Led on/off); Hot Water programme key. Switching the Domestig Hot Water (DHW) facility on or off (Led on/off); PC programme key. adjusts the pump to continuous water circulation in the central heating system (Led on), or according to the pump overrun times on the relevant programs (Led off);... -
Page 26: Filling And Venting The Boiler And Installation
Filling and venting the boiler and installation The central heating installation needs to be filled with potable water. For filling or topping up the installation you use the filling loop according to the following procedure: Switch on the power supply; 2 The diplay will show FILL;... -
Page 27: Commissioning The Boiler
Commissioning the boiler Before the boiler is fired, ensure that the boiler and the system are well vented and free of air. Purge the gas line between the gas meter and the boiler and carry out a gas soundness test as specified in the current Gas Safety Regulations. The boiler does not require adjustment of the burner pressure and air quantity because it is self adjusting and is factory set at the correct value. -
Page 28: Adjustments
In certain cases adjustment have to be altered in case of : Lower flow temperature More boilers in Cascade, i.e.. Read through the Parameter chapter to adjust the boiler to its installation. Contact ATAG Heating in case of doubt. Please follow next procudere to alter adjustments: Altering adjustments STEP 1 Press the Mode-key for 5 secondss. - Page 29 100% Maximum pump capacity Heating 40-100 % Type of communication bus: Automatic recognition of ATAG Bus or ATAG Z-Bus (30 Seconds waiting time after connecting BrainQ RSC thermostat) ATAG Z-Bus ATAG Bus (BrainQ and MadQ) Address of boiler in cascade...
-
Page 30: Activating Factory Settings (Green Key Function)
* Most of the data in this table can be requested by the BrainQ. Most of the adjustments which are stated in this table are unnecessary when in combination with the ATAG BrainQ thermostat and will be taken care of by the BrainQ itself and do not have to be adjusted. For further information regarding to the BrainQ thermostat we refer to the ATAG BrainQ installation manual. -
Page 31: Isolating The Boiler
Isolating the boiler In some situations it may be that the entire boiler must be switched off. By switching off the three keys with the lamps for central heating, hot water and pump programme ), the boiler is switched off. Leave the plug in the wall socket, which means the circulation pump and the three-way valve are activated once every 24 hours in order to prevent jamming. -
Page 32: Checking For Contamination
13.1 Checking for contamination In order to be able to check the boiler for contamination in the following years it is advisable to measure the maximum air displacement in the boiler when putting the boiler into operation. This value can be different with each type of boiler. In order to be able to measure this value follow the next procedure: Press the MODE-key for 5 seconds. -
Page 33: Checking The Co
13.2 Checking the CO The CO percentage is factory-set. This has to be checked at commissioning, maintance and faults. This can be checked by means of the following procedure: Remove the black cover of the gas valve by unscrewing the sealed screw. Put the boiler into operation and take care that it can deliver its heat;... -
Page 34: Maintenance Activities
13.3 Maintenance activities To carry out the maintenance activities please follow the next procedure: switch off the power supply; remove the screw behind the door on the front of the casing (see fig. 17); Lift the casing and remove it towards the front. Removing casing figure 17 The air box... - Page 35 Make sure that during refitting of the clamping rods, they are put into the correct position. They should be turned vertically. Ignition electrode The replacement of the electrode is only necessary when the electrode is worn off. This can be checked by measuring the ionisation current. The minimum ionisation current has to be higher the 4µA on full load.
-
Page 36: Draining The Installation
In the event that parts require replacement, use only genuine parts supplied by ATAG Heating UK Ltd. Please contact your installer or ATAG Heating UK Ltd. for further details. Contact details can be found on the back page of this manual. -
Page 37: User's Instructions
Please contact ATAG Heating UK Ltd. for further details. Contact details can be found on the back page of this manual. 13.6 Maintenance frequency ATAG Heating UK Ltd advises an annual inspection, with a full strip down service every 4 years, depending on the operational hours listed in the warranty conditions. -
Page 38: Technical Specifications
Technical specifications ATAG Q-Serie Combi Solo Boiler type Q25C Q38C Q51C Q25S Q38S Q51S Q60S Input Hs CH Input Hi CH 22,5 34,2 45,9 22,5 34,2 45,9 Input Hi DHW 31,5 Efficiency class according BED Efficiency according EN677 109,7 109,1... -
Page 39: Parts Of The Boiler
Parts of the boiler 13 14 ATAG Q figure 15 1 heat exchanger 9 cylinder DHW (Combi) 17 combustion air supply 2 ignition unit 10 operating panel 18 air box 3 fan unit 11 Control Tower (CMS) 19 type plate... -
Page 40: Installation Examples
Installation examples 17.1 Radiator installation without thermostatic radiator valves installation example figure 16 A Boiler: Connection terminal ATAG Q ATAG BrainQ thermostat Outside sensor ARV12 Thermostatic radiator valve Automatic by-pass Use alway a by pass in combination with thermostatic radiator valves. -
Page 41: Radiator Installation With Underfloor Heating Zone
Connection terminal MadQ built in B Cylinder: Cylinder sensor Three-way valve cylinder C Direct zone: Pump direct zone D Mixing zone: Flow sensor mixing zone Three way valve mixing zone 230V~ Pump mixing zone See also the installation manual ATAG MadQ Zone controller. -
Page 42: Error Indication
Error indication A detected error is indicated on the display by means of blocking or error messages. A distinction should be made between these two messages due to the fact that bloc- king can be of a temporary nature, however, error messages are fixed lockings. The control will try its utmost to prevent locking and will temporarily switch off the unit by blocking it. -
Page 43: Declaration Of Conformity
CE Declaration of conformity CE DECLARATION OF CONFORMITY Hereby declares ATAG Verwarming Nederland BV that, the condensing boiler types: ATAG Q25S Q25C Q38S Q38C Q51S Q51C Q60S are in conformity with the provisions of the following EC Directives, including all amendments,... -
Page 44: Kiwa Certificate
Kiwa certificate... -
Page 45: Benchmark Checklist
Failure to install and commission according to the manufacturer’s instructions and complete this Benchmark Commissioning Checklist will invalidate the warranty. This does not affect the customer’s statutory rights. If yes, and if required by the manufacturer, has a water scale reducer been fitted? Condensing Boilers only The condensate drain has been installed in accordance with the manufacturer’s instructions and/or BS5546/BS6798 If the condensate pipe terminates externally has the pipe diameter been increased and weatherproof insulation fitted? -
Page 46: Service Record
service record It is recommended that your heating system is serviced regularly and that the appropriate Service Interval Record is completed. service Provider Before completing the appropriate Service Record below, please ensure you have carried out the service as described in the manufacturer’s instructions. - Page 48 ATA G H e a t i n g U K L t d . • U n i t 3 • B e a v e r Tr a d e P a r k • Q u a r r y L a n e C h i c h e s t e r W e s t S u s s e x P O 1 9 8 N Y Phone: 01243 815 770 • Fax 01243 839 596 • E-mail: info@atagheating.co.uk • Internet: www.atagheating.co.uk E.
Need help?
Do you have a question about the Q 25S and is the answer not in the manual?
Questions and answers