Table of Contents
Advertisement
Quick Links
Advertisement
Table of Contents
Troubleshooting

Related Manuals for Motorola Astro XTS 4000


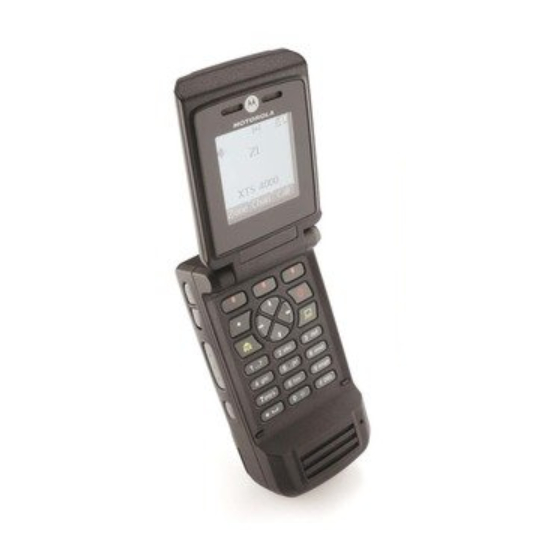
Summary of Contents for Motorola Astro XTS 4000
- Page 3 ® ® ASTRO 4000 Digital Portable Radios Basic Service Manual Motorola Solutions, Inc. 1303 E. Algonquin Rd. 6871619L01-E Schaumburg, IL 60196-1078 U.S.A.
-
Page 4: Foreword
No duplication or distribution of this document or any portion thereof shall take place without the express written permission of Motorola. No part of this manual may be reproduced, distributed, or transmitted in any form or by any means, electronic or mechanical, for any purpose without the express written permission of Motorola. -
Page 5: Document History
Modified Specifications and Accessories info. 6871619L01-D Added in Antenna NAE6553_ (85012029001) 380 – Oct. 2010 470 MHz to Table 10.2, 10.3, 10.4 & Appendix A.1 6871619L01-E Update Motorola Solutions Info and rectify pdf Dec. 2011 orientation issues from previous revision... - Page 6 Document History Notes...
-
Page 7: Table Of Contents
VII. Governing Law........................xiv Model Numbering, Charts, and Specifications..........xv Portable Radio Model Numbering System ....................xv ASTRO XTS 4000 VHF Model Chart ....................... xvi ASTRO XTS 4000 UHF Model Chart ...................... xvii Specifications for VHF Radios........................ xviii Specifications for UHF Range 1 Radios ....................xix Chapter 1 Introduction ................. - Page 8 Table of Contents General Repair Procedures and Techniques................. 2-2 Chapter 3 Basic Theory of Operation ..........3-1 Major Assemblies........................... 3-1 Digital Mode of Operation ......................3-2 Main Board............................. 3-3 Chapter 4 Recommended Test Equipment and Service Aids ..4-1 Recommended Test Equipment ....................4-1 Service Aids ...........................
- Page 9 Motorola Online ..........................B-1 Mail Orders ............................B-1 Telephone Orders..........................B-1 Fax Orders.............................B-2 Parts Identification .........................B-2 Product Customer Service......................B-2 Appendix C Motorola Service Centers...........C-1 Servicing Information ........................C-1 Motorola Service Center ........................C-1 Motorola Federal Technical Center ....................C-1 Motorola Canadian Technical Logistics Center ................C-1 Glossary ..................Glossary-1...
- Page 10 viii Table of Contents Index ..................... Index-1...
-
Page 11: List Of Tables
List of Tables List of Tables Table 1–1. ASTRO XTS 4000 Basic Features..................1-2 Table 2–1. Lead Free Solder Wire Part Number List................2-2 Table 2–2. Lead Free Solder Paste Part Number List ................2-2 Table 3–1. Local Oscillator and First IF Frequencies ................3-3 Table 4–1. - Page 12 List of Figures List of Figures Figure 3–1. XTS 4000 Overall Block Diagram ..................3-1 Figure 3–2. Receiver Block Diagram......................3-2 Figure 3–3. Transceiver (VHF) Block Diagram (Power and Control Omitted).......... 3-3 Figure 5–1. Performance Checks Test Setup................... 5-1 Figure 6-1. Radio Alignment Test Setup....................6-1 Figure 6–2.
- Page 13 List of Figures Figure 8–27.Adhere Flip Flex into Front Housing ................... 8-20 Figure 8–28.Reassemble UCM Board ....................8-21 Figure 8–29.Attach Secure Pad to Keypad Backer Sub-Assembly ............8-21 Figure 8–30.Reassemble Flip Flex ......................8-22 Figure 8–31.Assemble T6 screws to Front Housing ................8-22 Figure 8–32.Assemble T6 screws to Front Housing ................
-
Page 14: Commercial Warranty
Product Accessories One (1) Year Motorola, at its option, will at no charge either repair the Product (with new or reconditioned parts), replace it (with a new or reconditioned Product), or refund the purchase price of the Product during the warranty period provided it is returned in accordance with the terms of this warranty. Replaced parts or boards are warranted for the balance of the original applicable warranty period. -
Page 15: Iii. State Law Rights
Warranty service will be provided by Motorola through one of its authorized warranty service locations. If you first contact the company which sold you the Product, it can facilitate your obtaining warranty service. You can also call Motorola at 1-888-567-7347 US/Canada. -
Page 16: Vi. Patent And Software Provisions
A. that MOTOROLA will be notified promptly in writing by such purchaser of any notice of such claim; B. that MOTOROLA will have sole control of the defense of such suit and all negotiations for its settlement or compromise; and C. -
Page 17: Model Numbering, Charts, And Specifications
Model Numbering, Charts, and Specifications: Portable Radio Model Numbering System Model Numbering, Charts, and Specifications Portable Radio Model Numbering System Typical Model Number: Position: Position 1 - Type of Unit H = Hand-Held Portable Position 12 - Unique Model Variations Positions 2 &... -
Page 18: Astro Xts 4000 Vhf Model Chart
Model Numbering, Charts, and Specifications: ASTRO XTS 4000 VHF Model Chart ASTRO XTS 4000 VHF Model Chart MODEL NUMBER DESCRIPTION H18KCN9PW9AN XTS4000 PORTABLE ASTRO DIGITAL 136–174MHZ 1–2W ITEM NUMBER DESCRIPTION NUD2897_ XTS 4000 VHF Tanapa NUD7115_ XTS 4000 VHF Main... -
Page 19: Astro Xts 4000 Uhf Model Chart
Model Numbering, Charts, and Specifications: ASTRO XTS 4000 UHF Model Chart xvii ASTRO XTS 4000 UHF Model Chart MODEL NUMBER DESCRIPTION H18QCN9PW9AN XTS4000 PORTABLE ASTRO DIGITAL 380–470MHZ 0.25–2W ITEM NUMBER DESCRIPTION NUE3623_ XTS 4000 UHF Tanapa NUE7350_ XTS 4000 UHF Main... -
Page 20: Specifications For Vhf Radios
xviii Model Numbering, Charts, and Specifications: Specifications for VHF Radios Specifications for VHF Radios All specifications are per Telecommunications Industries Association TIA-603 unless otherwise noted. RECEIVER TRANSMITTER GENERAL (TYPICAL PERFORMANCE) (TYPICAL PERFORMANCE) FCC Designation: AZ489FT3814 Bandwidth: 38 MHz RF Power: 136–174 MHz: 1–2 Watts Frequency Ranges:... -
Page 21: Specifications For Uhf Range 1 Radios
Model Numbering, Charts, and Specifications: Specifications for UHF Range 1 Radios Specifications for UHF Range 1 Radios All specifications are per Telecommunications Industries Association TIA-603 unless otherwise noted. RECEIVER TRANSMITTER GENERAL (TYPICAL PERFORMANCE) (TYPICAL PERFORMANCE) FCC Designation: AZ489FT4881 Bandwidth: 90 MHz RF Power: 380–470 MHz: 0.25–2 Watts... - Page 22 Model Numbering, Charts, and Specifications Notes...
-
Page 23: Chapter 1 Introduction
Chapter 1 Introduction This manual contains information needed for Levels One and Two radio servicing. Level One servicing consists of radio programming, radio alignment, and installation and removal of the antenna and battery. Level Two servicing covers disassembly and reassembly of the radio to replace circuit boards. -
Page 24: Radio Description
VHF (136–174 MHz) and UHF (380–470 MHz) frequency bands. The ASTRO XTS 4000 radio provides improved voice quality across more coverage area. The digital process, called embedded signaling, intermixes system signaling information with digital voice, resulting in improved system reliability and the capability of supporting a multitude of advanced features. -
Page 25: Chapter 2 Basic Maintenance
In order to avoid operating outside the limits set by the FCC, we recommend that you align the ASTRO XTS 4000 radio’s reference oscillator every time the radio is taken apart, or once per year, whichever comes first. Periodic visual inspection and cleaning is also recommended. -
Page 26: General Repair Procedures And Techniques
When damaged parts are replaced, identical parts should be used. If the identical replacement component is not locally available, check the parts list for the proper Motorola part number and order the component from the nearest Motorola Radio Products and Solutions Organization listed in Appendix B of this manual. - Page 27 Basic Maintenance: General Repair Procedures and Techniques 2.3.2 Rigid Circuit Boards The family of radios uses bonded, multi-layer, printed circuit boards. Since the inner layers are not accessible, some special considerations are required when soldering and unsoldering components. The through-plated holes may interconnect multiple layers of the printed circuit. Therefore, care should be exercised to avoid pulling the plated circuit out of the hole.
- Page 28 Basic Maintenance: General Repair Procedures and Techniques 2.3.4 Shields Removing and replacing shields is recommended to be done with the Air Blower, BOSCH GHG 603 or equivalent. • To remove the shield: Place the circuit board in the circuit board holder. Add solder paste flux around the base of the shield.
-
Page 29: Chapter 3 Basic Theory Of Operation
Chapter 3 Basic Theory of Operation This chapter discusses the basic operational theory of the ASTRO XTS 4000 radio, which is a wideband, synthesized radio available in the VHF (136–174 MHz) and UHF (380–470 MHz) frequency bands. All ASTRO XTS 4000 radios are capable of ASTRO mode (digital) operation (12.5 kHz). -
Page 30: Digital Mode Of Operation
Basic Theory of Operation: Digital Mode of Operation Digital Mode of Operation This section provides an overview of the digital mode receive and transmit theory of operation. 3.2.1 Receiving When the radio is receiving (See Figure 3–2), the signal comes from the antenna connector to the Main board, passing through the antenna switch and the receiver front end. -
Page 31: Main Board
Basic Theory of Operation: Main Board 3.2.2 Transmitting When the radio is transmitting, microphone audio is passed through gain stages to the CODEC, where the signal is digitized. The CODEC passes digital data to the DSP, where pre-emphasis and low-pass (splatter) filtering are done. The DSP passes this signal to a digital/analog converter (DAC), where it is reconverted into an analog signal and scaled for application to the voltage-controlled oscillator as a modulation signal (See Figure... - Page 32 Basic Theory of Operation: Main Board The frequency generation function is performed by two ICs - two VCOs, and associated circuitry. The reference oscillator IC provides a frequency standard to the synthesizer. The fractional-N synthesizer turns on the two external VCOs and tunes it to RX LO or TX carrier frequency. The VCO buffer amplifies the signal to the required power level.
-
Page 33: Chapter 4 Recommended Test Equipment And Service Aids
Chapter 4 Recommended Test Equipment and Service Aids This chapter provides lists of recommended test equipment and service aids, as well as information on field programming equipment that can be used in servicing and programming ASTRO XTS 4000 radios. Recommended Test Equipment The list of equipment contained in Table 4–1... -
Page 34: Service Aids
“Appendix B Replacement Parts Ordering” on page B-1. While all of these items are available from Motorola, most are standard shop equipment items, and any equivalent item capable of the same performance may be substituted for the item listed. Table 4–2. Service Aids... -
Page 35: Chapter 5 Performance Checks
Chapter 5 Performance Checks This chapter covers performance checks used to ensure that the ASTRO XTS 4000 radio meets published specifications. The recommended test equipment listed in the previous section approaches the accuracy of the manufacturing equipment, with a few exceptions. Accuracy of the test equipment must be maintained in compliance with the manufacturer’s recommended calibration... -
Page 36: Display Radio Test Mode
Performance Checks: Display Radio Test Mode Initial equipment control settings should be as indicated in Table 5–1 and should be the same for all performance checks and alignment procedures, except as noted. Table 5–1. Initial Equipment Control Settings System Analyzer Test Set Power Supply Monitor Mode: Standard*... -
Page 37: Table 5-2. Test-Mode Displays
Performance Checks: Display Radio Test Mode 2. Within 10 seconds after “SELF TEST” is complete, press the Side Button five times in succession. The radio shows a series of displays that give information regarding various version numbers and subscriber specific information. The displays are described in Table 5–2. -
Page 38: Table 5-3. Test Frequencies (Mhz)
5.2.3 RF Test Mode When the ASTRO XTS 4000 radio is operating in its normal environment, the radio's microcomputer controls the RF channel selection, transmitter key-up, and receiver muting, according to the customer codeplug configuration. However, when the unit is on the bench for testing, alignment, or repair, it must be removed from its normal environment using a special routine, called RF TEST MODE. -
Page 39: Table 5-4. Test Environments
Performance Checks: Display Radio Test Mode Table 5–4. Test Environments Display Description Function Carrier RX: unsquelch if carrier detected Squelch TX: mic audio Tone RX: unsquelch if carrier and tone (192.8 Hz) Private-Line detected TX: mic audio + tone (192.8 Hz) ASTRO RX: none TX: 1200 Hz tone *... - Page 40 Performance Checks: Display Radio Test Mode 5.2.4.2 Keypad Checks: To continue to the keypad checks: - Press 0, “48/1” appears; release, “48/0” appears. - Press 1, “49/1” appears; release, “49/0” appears. - Press 2, “50/1” appears; release, “50/0” appears. - Press 3, “51/1” appears; release, “51/0” appears. - Press 4, “52/1”...
-
Page 41: Receiver Performance Checks
Performance Checks: Receiver Performance Checks 5.2.6 CID Test Mode (Only applicable to External Display) To perform the CID Test: 1. Press and release the Emergency Button (Top Right Orange button); all pixels are on. 2. Press any key; Checker box 1 test appears. 3. - Page 42 Performance Checks: Receiver Performance Checks Table 5–5. Receiver Tests for ASTRO Conventional Channels* (Continued) Test Name System Analyzer Radio Test Set Comments These tests require a communications system analyzer with the ASTRO 25 test options.
-
Page 43: Transmitter Performance Checks
Performance Checks: Transmitter Performance Checks Transmitter Performance Checks The following table outline the performance checks for the transmitter. Table 5–6. Transmitter Tests for ASTRO Conventional Channels* Test Name System Analyzer Radio Test Set Comments RF Power Mode: Proj 25 Std Radio Tuner PTT to continuous VHF: 1–2 Watts... - Page 44 5-10 Performance Checks: Transmitter Performance Checks Notes...
-
Page 45: Chapter 6 Radio Alignment Procedures
Chapter 6 Radio Alignment Procedures This chapter describes both receiver and transmitter radio alignment procedures. Test Setup A personal computer (PC) and tuner software are required to align the radio. Refer to the applicable manual for installation and setup procedures for the software. To perform the alignment procedures, the radio must be connected to the PC and to a universal test set. -
Page 46: Tuner Main Menu
Radio Alignment Procedures: Tuner Main Menu Tuner Main Menu › Select Tuner from the START menu. To read the radio, use the File Read Device menu or click on Figure 6–2 illustrates how the alignment screens are organized. To access a screen, double-click on the desired screen name in the Tuner menu. -
Page 47: Softpot
Radio Alignment Procedures: Softpot Softpot The alignment screens introduce the concept of the “softpot,” an analog SOFTware-controlled POTentiometer used for adjusting all transceiver alignment controls. DO NOT switch radios in the middle of any alignment procedure. Always left-click the Close button on the screen to return to the Main Menu screen before disconnecting the radio. -
Page 48: Radio Information
Radio Alignment Procedures: Radio Information Adjusting the softpot value sends information to the radio to increase (or decrease) the voltage in the corresponding circuit. For example, left-clicking the UP spin button in the New Softpot Value scroll box on the Reference Oscillator screen instructs the radio’s microcomputer to increase the voltage across a varactor in the reference oscillator, which increases the frequency. -
Page 49: Figure 6-6. Reference Oscillator Alignment Screen - Vhf
Radio Alignment Procedures: Reference Oscillator Alignment • Initial setup using the R-2670 Communication Analyzer: – RF Control: MONITOR – B/W: WB – Freq: CPS frequency under test – Attenuation: 20dB – Mon RF in: RF I/O – Meter: RF Display –... -
Page 50: Table 6-1. Reference Oscillator Alignment
Radio Alignment Procedures: Reference Oscillator Alignment Figure 6–7. Reference Oscillator Alignment Screen – UHF 2. Click the PTT Toggle button to make the radio transmit. The screen indicates whether the radio is transmitting. 3. Measure the transmit RF frequency with your service monitor. 4. -
Page 51: Transmit Power Alignment
Radio Alignment Procedures: Transmit Power Alignment Transmit Power Alignment This alignment procedure adjusts the transmit power of the radio and must be performed for three different power levels (Low, Mid, and High), at multiple frequencies for each power level, to allow for proper alignment across the entire RF band. -
Page 52: Table 6-2. Transmit Power Settings
Radio Alignment Procedures: Transmit Power Alignment Table 6–2. Transmit Power Settings Transmit Transmit Power Power Power Level (Watts) (Watts) 1.2–1.4 0.2–0.3 High 2.2–2.4 2.2–2.4 6. Repeat Steps 2 through 5 for all frequencies and all power levels. 7. Click the Program All button to save the tuned values in the radio. 8. -
Page 53: Transmit Deviation Balance Alignment
Radio Alignment Procedures: Transmit Deviation Balance Alignment Transmit Deviation Balance Alignment This alignment procedure balances the modulation contributions of the low- and high-frequency portions of a baseband signal. Proper alignment is critical to the operation of signalling schemes that have very low frequency components (for example, DPL) and could result in distorted waveforms if improperly adjusted. -
Page 54: Figure 6-11. Transmit Deviation Balance Alignment Screen - Vhf
6-10 Radio Alignment Procedures: Transmit Deviation Balance Alignment Figure 6–11. Transmit Deviation Balance Alignment Screen – VHF Figure 6–12. Transmit Deviation Balance Alignment Screen – UHF 6. Click the PTT Tone: Low button. 7. Click the PTT Toggle button on the screen to enable transmission. The screen indicates whether the radio is transmitting. -
Page 55: Transmit Deviation Limit Alignment
Radio Alignment Procedures: Transmit Deviation Limit Alignment 6-11 10. Adjust the softpot value until the measured deviation/voltage, when using the high tone, is within +/- 1.5% of the value observed when using the low tone. 11. Repeat the above process for all frequencies. 12. -
Page 56: Figure 6-13.Transmit Deviation Limit Alignment Screen - Vhf
6-12 Radio Alignment Procedures: Transmit Deviation Limit Alignment 3. Select the TX Deviation Limit alignment screen. The screen will indicate the transmit frequencies to be used. See Figure 6–13 (VHF)/ Figure 6–14 (UHF) on page 6-12. Figure 6–13. Transmit Deviation Limit Alignment Screen – VHF Figure 6–14. -
Page 57: Front End Filter Alignment
Radio Alignment Procedures: Front End Filter Alignment 6-13 8. Click the Program All button to save the tuned values in the radio. 9. Click the Close button to return to the Transmitter Alignments menu. Front End Filter Alignment This procedure should only be attempted by qualified service technicians. This alignment procedure adjusts the front end receiver bandpass filters for the best receiver sensitivity and selectivity. -
Page 58: Figure 6-16.Front End Filter Alignment Screen - Vhf
6-14 Radio Alignment Procedures: Front End Filter Alignment 4. Repeat the above process for all frequencies. 5. Click the Program All button to save the tuned values in the radio. Figure 6–16. Front End Filter Alignment Screen – VHF Figure 6–17. Front End Filter Alignment Screen – UHF... -
Page 59: 6.10 Bit Error Rate
Radio Alignment Procedures: Bit Error Rate 6-15 6.10 Bit Error Rate This section describes the Bit Error Rate (BER) test of the radio’s receiver at a desired frequency (see Figure 6–18, on page 6-16). 6.10.1 Bit Error Rate Fields Set up the R2670 Communication Analyzer as follows: 1. -
Page 60: 6.11 Transmitter Test Pattern
6-16 Radio Alignment Procedures: Transmitter Test Pattern NOTE: When Continuous Operation = Yes, all fields will be grayed out while the test is in progress. They will be enabled when the STOP button is pressed. When Continuous Operation = No, a wait cursor will be displayed while the test is in progress and return to normal when the test is done. -
Page 61: Figure 6-19.Transmitter Test Pattern Screen - Vhf
Radio Alignment Procedures: Transmitter Test Pattern 6-17 Figure 6–19. Transmitter Test Pattern Screen – VHF Figure 6–20. Transmitter Test Pattern Screen – UHF... - Page 62 6-18 Radio Alignment Procedures Notes...
-
Page 63: Chapter 7 Encryption
Chapter 7 Encryption This chapter provides procedures for using the encryption capability of your radio. The following procedures are outlined: • Loading an encryption key • Selecting an encryption key • Selecting an Index • Erasing an encryption key Load an Encryption Key To load an encryption key: 1. -
Page 64: Select An Encryption Index
Encryption: Select an Encryption Index 3. Press Left Navigation Button or Right Navigation Button to scroll through the list of encryption keys. NOTE: If you select an erased key, the display alternates between showing the encryption key and “ERASED KEY.” 4. -
Page 65: Erase An Encryption Key
Encryption: Erase an Encryption Key 7.4.1 Use the Menu To select an index using the menu: 1. Press Right Navigation Button until the display shows “INDX.” 2. Press Left Menu Select Button, Middle Menu Select Button, or Right Menu Select Button directly below “INDX.”... -
Page 66: Table 7-1. Encryption Key Zeroization Options
Encryption: Erase an Encryption Key – Using the keypad, enter the location number of the desired key. The display shows the selected key, as well as the available menu selections shown in Table 7–1. Table 7–1. Encryption Key Zeroization Options Menu Action Selection... -
Page 67: Chapter 8 Disassembly/Reassembly Procedures
Chapter 8 Disassembly/Reassembly Procedures This chapter provides detailed procedures for disassembling/reassembling XTS 4000 radios. When performing these procedures, refer to “Chapter 10: Exploded Views and Parts Lists” on page 10-1 and the diagrams that accompany the text. Items in parentheses ( ) throughout this chapter refer to item numbers in the exploded view diagrams and their associated parts lists. -
Page 68: Table 8-1. Corresponding Xts 4000 Exploded View And Parts List
Disassembly/Reassembly Procedures: XTS 4000 Exploded View (Partial) Figure 8–1. XTS 4000 Partial Exploded View Table 8–1. Corresponding XTS 4000 Exploded View and Parts List Item Description Exploded View and Parts List Number Refer “10.2 Exploded View and Parts List – Flip Assembly Flip-Front Housing Assemblies”... -
Page 69: Required Tools And Supplies
Disassembly/Reassembly Procedures: Required Tools and Supplies Required Tools and Supplies Table 8–2. Required Tools and Supplies Motorola Part Supplier Part Tools and Supplies Supplier Number Number Anti-static ground kit 0180386A82 Magnetic screwdriver set with bits 0180320B16 Tape, Top and Side Controls... -
Page 70: Antenna
Disassembly/Reassembly Procedures: Antenna Antenna This section explains how to attach and remove the antenna. 8.4.1 Attach the Antenna To attach the antenna: With the radio turned off, turn the antenna clockwise to attach it to the radio. Figure 8–2. Attaching the Antenna 8.4.2 Remove the Antenna To remove the antenna:... -
Page 71: Battery
30 seconds after battery removal. NOTE: The Motorola-approved battery shipped with the XTS 4000 radio is uncharged. Prior to using a new battery, charge it for a minimum of 16 hours to ensure optimum capacity and performance. -
Page 72: Radio Disassembly
Disassembly/Reassembly Procedures: Radio Disassembly 2. Rotate and remove the battery from the radio. release button Figure 8–5. Removing the Battery Radio Disassembly This section contains instructions for disassembling the radio. For this section, please refer to “10.1 Exploded View and Parts List – Main Assemblies” on page 10-2,“10.2 Exploded View and Parts List –... -
Page 73: Figure 8-6. Separating Flip-Front Housing Assembly From Chassis Assembly
Disassembly/Reassembly Procedures: Radio Disassembly 8.6.1 Separate the Flip-Front Housing and Chassis Assemblies To separate the Flip-Front Housing Assembly (A+B) from the Chassis Assembly (C): 1. Turn off the radio by holding down the Power Button for 3 seconds. 2. Remove the Antenna Assembly (D), Battery Assembly (E) or any accessory connected to the radio. -
Page 74: Figure 8-7. Unplugging Flexes
Disassembly/Reassembly Procedures: Radio Disassembly Figure 8–7. Unplugging Flexes 8.6.2 Disassemble the Chassis Assembly To disassemble the chassis (C): 1. Gently disconnect the CE-UCM Connector Flex (28) from the Main Board (29). Figure 8–8. Disconnecting CE-UCM Connector Flex and Lifting Main Board... -
Page 75: Figure 8-9. Rotating Main Board 90° And Unplugging Top Control Inner Jumper Flex
Disassembly/Reassembly Procedures: Radio Disassembly 2. Lift up the Main Board (29) from the bottom of the Main Chassis (39) and rotate 90° towards the chassis top side. Figure 8–9. Rotating Main Board 90° and Unplugging Top Control Inner Jumper Flex 3. -
Page 76: Figure 8-10.Removing Control Band
8-10 Disassembly/Reassembly Procedures: Radio Disassembly 7. Hold the chassis with the back facing up; push down the Control Band (20) on the PTT side so that the latches are unlocked from the Main Chassis (39). Gently pull the Control Band side outwards to disengage the Control Band. -
Page 77: Figure 8-12.Removing Ce Dust Cover
Disassembly/Reassembly Procedures: Radio Disassembly 8-11 Push the tab down ° Push the Rotate 90 tab out from the Control B Figure 8–12. Removing CE Dust Cover 10. Gently disengage the snap on Audio Jack Insulator (38). Place the tip of the tweezers at bottom of Insulator ring. -
Page 78: Figure 8-14.Removing Ce Retainer And Spacer
8-12 Disassembly/Reassembly Procedures: Radio Disassembly 14. Unplug the female connector of the CE-UCM Connector Flex (28) from the CE Connector Board (36) at the bottom of the Main Chassis (39) to remove the CE-UCM Connector Flex. 15. To remove the Bottom CE Retainer (34) from the Main Chassis (39), push the CE Retainer towards the front side of the Main Chassis direction until it stops. -
Page 79: Figure 8-16.Disassemble Speaker Compartment Seal, Main Keyboard And Ucm Board
Disassembly/Reassembly Procedures: Radio Disassembly 8-13 8.6.3 Disassemble the Front Housing Assembly To disassemble the Front Housing Assembly (B): 1. Remove the Main Seal (19) from the Keypad Backer Sub-Assembly (15). 2. Remove the 4 screws from the Keypad Backer Sub-Assembly with a Torx T6 bit. 3. -
Page 80: Figure 8-17.Separating Keypad Backer Inner Jumper Flex
8-14 Disassembly/Reassembly Procedures: Radio Disassembly 7. Separate the Keypad Backer Inner Jumper Flex (17) from the Keypad Backer Sub-Assembly (15) by gently sliding the flat end of the Black Stick under the flex beginning from the side of the flip fold. Keypad Inner Jumper Flex Figure 8–17. -
Page 81: Figure 8-19.Removing Front Housing From Flip Assembly
Disassembly/Reassembly Procedures: Radio Disassembly 8-15 9. With the flip in the open position, insert the flat end of the Black Stick between the flip assembly (A) and the Front Housing. With a corner of the Black Stick positioned as shown in Figure 8–19, gradually increase the gap between the Flip Assembly and Front Housing by twisting the Black Stick until the Flip Assembly separates. -
Page 82: Figure 8-21.Removing Microphone Boot And Microphone From Front Housing
8-16 Disassembly/Reassembly Procedures: Radio Disassembly 12. Remove the Microphone Boot (8*) and microphone from the Front Housing by gently lifting the Microphone Boot from the side with the flat end of the Black Stick as shown in Figure 8–21. Separate the Microphone Boot from the microphone. Figure 8–21. -
Page 83: Radio Reassembly
Disassembly/Reassembly Procedures: Radio Reassembly 8-17 3. Insert the pointed tip of the Black Stick into one of the screw holes to push out the CID Bezel Kit (1). Extreme care must be taken during removal of the CID Bezel Kit (1), particularly near the thin ribs adjacent to the CID Display. -
Page 84: Figure 8-24.Flip Flex
Item 5 align to these 2 edges Adhesive Location – Front View Adhering the Adhesive to Flip Flex – Overview Items 2 align to arrow marking & edge Item Motorola Description Part number 1171646L01 Adhesive, Flip Flex Seal 2 (Flip) 7571858L01... -
Page 85: Figure 8-25.Inserting Flip Flex
Disassembly/Reassembly Procedures: Radio Reassembly 8-19 2. Carefully insert the Flip Flex (2) into the hinge compartment of the Flip Sub-Assembly (3) as shown in Figure 8–25.Peel off the liner of the adhesive at the new Flip Flex (2) connector area and plug in the Flip Flex to the display module. Press fit for 10 seconds to ensure the adhesive is properly activated. -
Page 86: Figure 8-27.Adhere Flip Flex Into Front Housing
8-20 Disassembly/Reassembly Procedures: Radio Reassembly 2. While holding the Flip Assembly (A), feed the Flip Flex (2) through the top opening of the Front Housing. 3. With the flip in the open position, assemble the Flip Assembly as follows: Be careful not to pull or pinch the Flip Flex during the assembling process. -
Page 87: Figure 8-28.Reassemble Ucm Board
Disassembly/Reassembly Procedures: Radio Reassembly 8-21 7. Assemble the Main Keypad (12) to the Front Housing. Plug in the Speaker Flex Connector to the UCM board (10) with the board position as shown in Figure 8–28. Rotate the UCM board (10) into the front housing between the screw bosses and alignment tab. 2. -
Page 88: Figure 8-30.Reassemble Flip Flex
8-22 Disassembly/Reassembly Procedures: Radio Reassembly 10. Prepare the surface of the Keypad Backer Sub-Assembly (15) as discussed in the first caution note of Section “8.7 Radio Reassembly” on page 8-17. Remove the 2 liners from the connector area of the Flip Flex (2). While holding the Front Housing Assembly (B) in one hand and the Keypad Backer Assembly in the other as shown in Figure 8–30, plug the... -
Page 89: Figure 8-32.Assemble T6 Screws To Front Housing
Disassembly/Reassembly Procedures: Radio Reassembly 8-23 8.7.3 Reassemble the Chassis Assembly To reassemble the chassis assembly (C): 1. To replace the Top and Side Control Flex, prepare the surface as described in the first cau- tion note of Section “8.7 Radio Reassembly” on page 8-17. -
Page 90: Figure 8-34.Reassemble Ce Retainer And Spacer
8-24 Disassembly/Reassembly Procedures: Radio Reassembly Gently push downwards to engage Direct into the casting Figure 8–34. Reassemble CE Retainer and Spacer 5. Prepare the Audio Jack Adhesive (27) surfaces as described in the first caution note of Section “8.7 Radio Reassembly” on page 8-17. -
Page 91: Figure 8-36.Slide Audio Jack Insulator Into Chassis
Disassembly/Reassembly Procedures: Radio Reassembly 8-25 6. Slide the Audio Jack Insulator (38) by using the Audio Jack Insertion Tool (refer “8.2 Required Tools and Supplies” on page 8-3 for part number) into the opening of the Chassis until a click sound is heard. -
Page 92: Figure 8-38.Assemble Audio Jack Dust Cover
8-26 Disassembly/Reassembly Procedures: Radio Reassembly 8. Position the Audio Jack Dust Cover (22) 90° to the Control Band (20). Hook and push the long end of the tab into the opening of the Control Band. Simultaneously rotate both sides of the Audio Jack Dust Cover 90°. -
Page 93: Figure 8-40.Reassemble Control Band
Disassembly/Reassembly Procedures: Radio Reassembly 8-27 NOTE: Be careful not to bend the keypad during the assembly of the Control Band (20). Make sure while rotating the control band towards the chassis, the protrusion on the retainer is inserted properly into the control band bottom sleeve. 10. -
Page 94: Figure 8-41.Assemble B Plus Seal To B Plus Connector
8-28 Disassembly/Reassembly Procedures: Radio Reassembly 14. Plug in the connector of the Top Control Inner Jumper Flex (33) to the Side and Top Control Flex (40). Avoid any hard contact with the sharp corners of the casting when assembling to avoid damaging the connector and flex Figure 8–41. -
Page 95: Figure 8-43.Holding Ce-Ucm Flex
Disassembly/Reassembly Procedures: Radio Reassembly 8-29 18. While holding the CE-UCM Flex as shown in Figure 8–43 so as to clear the Main Board, rotate the Main Board (29) towards the chassis and into position by aligning the board to the two chassis alignment pins. -
Page 96: Servicing Cid Bezel Only
8-30 Disassembly/Reassembly Procedures: Servicing CID Bezel Only 2. Rotate the chassis assembly towards the Flip-Front Housing Assembly. Snap fit both assemblies by pressing the 2 snaps on the PTT side and the 2 snaps on the opposite PTT side. Ensure there is no bulging between the Front Housing and the Control Band (20) to confirm that the 4 snaps are properly engaged. -
Page 97: Chapter 9 Basic Troubleshooting
Level one and two troubleshooting will support only radio alignment, programming, battery replacement, and knob replacement, and circuit board replacement. Component-level service information can be found in the “ASTRO XTS 4000 Portable Radios Detailed Service Manual,” Motorola publication number 68P71620L01. -
Page 98: Operational Error Codes
Basic Troubleshooting: Operational Error Codes Table 9–1. Power-Up Error Code Displays (Continued) Error Description Corrective Action Code Secure Hardware Error Turn the radio off, then on 09/10 Secure Hardware Fatal Error Turn the radio off, then on 09/90 Note: If the corrective action does not fix the failure, send the radio to the depot. Operational Error Codes During radio operation, the radio performs dynamic tests to determine if the radio is working properly. -
Page 99: Transmitter Troubleshooting
Basic Troubleshooting: Transmitter Troubleshooting Table 9–3. Receiver Troubleshooting Chart (Continued) Correction or Test Symptom Possible Cause (Measurements at Room Temperature) Audio Distorted or Not Loud Synthesizer Not On Check synthesizer frequency by measuring the Enough Frequency transmitter frequency; realign if off by more than ±1000 Hz RF Sensitivity Poor 1. -
Page 100: Encryption Troubleshooting
Basic Troubleshooting: Encryption Troubleshooting Encryption Troubleshooting Table 9–5 lists the possible causes of, and corrections for, encryption problems. Table 9–5. Encryption Troubleshooting Chart Symptom Possible Cause Corrective Action No “KEYLOAD” on Radio Display When 1. Defective Keyload Cable Send radio to depot Keyloading Cable is Attached to the Radio 2. -
Page 101: Chapter 10 Exploded Views And Parts Lists
Chapter 10 Exploded Views and Parts Lists This chapter contains exploded views and associated parts lists for the ASTRO XTS 4000 digital portable radios. The following table lists the various exploded views and parts lists for the XTS 4000 radios: Table 10–1. -
Page 102: Exploded View And Parts List - Main Assemblies
Exploded Views and Parts Lists: Exploded View and Parts List – Main Assemblies 10.1 Exploded View and Parts List – Main Assemblies Table 10-2. Parts List – Main Assemblies Item No. Motorola Part Number Description A. Flip Assembly B. Front Housing Assembly C. -
Page 103: Exploded View And Parts List - Flip-Front Housing Assemblies
10-3 10.2 Exploded View and Parts List – Flip-Front Housing Assemblies Table 10–3. Parts List – Flip-Front Housing Assemblies Item No. Motorola Part Number Description A. Flip Assembly (NNTN7209_) 1371710L02 Bezel, CID (Note: To replace, order NNTN7171_: Field Service Kit – CID Bezel) 0104024J62 Flex, Flip (Note: To replace, order NNTN7163_: Field Service Kit –... -
Page 104: Exploded View And Parts List - Chassis Assembly
10-4 Exploded Views and Parts Lists: Exploded View and Parts List – Chassis Assembly 10.3 Exploded View and Parts List – Chassis Assembly Table 10–4. Parts List – Chassis Assembly Motorola Part Number Description Motorola Part Number Description 0371907L01 Screw, 3MT-P965-0backer A. -
Page 105: Parts List - Service Kit
Exploded Views and Parts Lists: Parts List – Service Kit 10-5 10.4 Parts List – Service Kit Motorola Item No. Description Part Number Table 10–5. Service Kit Table 0371903L01 Screw, 3MT-P975-0Flip Motorola 3371777L01 Label, Flip Inner Item No. Description Part Number... - Page 106 10-6 Exploded Views and Parts Lists Notes...
-
Page 107: Appendix A Accessories
Appendix A Accessories Motorola provides the following approved optional accessories to improve the productivity of the XTS 4000 portable radio. For a complete list of Motorola-approved antennas, batteries, and other accessories, visit the following web site: http://www.motorolasolutions.com/governmentandenterprise. Antennas NAD6581_ Antenna 146 – 162 MHz, 1.69” (42.8mm), Black Coded NAD6582_ Antenna 136 –... -
Page 108: Surveillance Accessories
Accessories: Surveillance Accessories Surveillance Accessories A.5.1 Headsets and Earpieces Headset Earbud with PTT NNTN5006BP 2-wire Surveillance Kit † NNTN5211_ NOTE: Recommendation settings via CPS: • Read the radio setting using CPS. • Click Radio Wide and select Tx Audio Control Per Mode. * NNTN5006BP –... -
Page 109: Appendix B Replacement Parts Ordering
Motorola Online Motorola Online users can access our online catalog at https://www.motorola.com/businessonline To register for online access, please call 1-800-422-4210 (for U.S. and Canada Service Centers only). -
Page 110: Fax Orders
Replacement Parts Ordering: Fax Orders Fax Orders Radio Products and Solutions Organization* (United States and Canada) 1-800-622-6210 1-847-576-3023 (United States and Canada) USFGMD (Federal Government Orders) 1-80526-8641 (For Parts and Equipment Purchase Orders) Parts Identification Radio Products and Solutions Organization* (United States and Canada) 1-800-422-4210 Product Customer Service... -
Page 111: Appendix C Motorola Service Centers
If a unit requires further complete testing, knowledge and/or details of component level troubleshooting or service than is customarily performed at the basic level, please send the radio to a Motorola Service Center as listed below. Motorola Service Center 45D Butterfield Trail... - Page 112 Motorola Service Centers Notes...
-
Page 113: Glossary
Glossary Glossary This glossary contains an alphabetical listing of terms and their definitions that are applicable to ASTRO portable and mobile subscriber radio products. Term Definition See analog-to-digital conversion. Abacus IC A custom integrated circuit providing a digital receiver intermediate frequency (IF) backend. - Page 114 Glossary-2 Glossary Term Definition CODEC See coder/decoder. codeplug Firmware that contains the unique personality for a system or device. A codeplug is programmable and allows changes to system and unit parameters. See also firmware. coder/decoder A device that encodes or decodes a signal. See Customer Programming Software.
- Page 115 FLASHcodes are only applicable for radios which are upgradeable through the FLASHport process. FLASHport A Motorola term that describes the ability of a radio to change memory. Every FLASHport radio contains a FLASHport EEPROM memory chip that can be software written and rewritten to, again and again.
- Page 116 See low-speed handshake. Master In Slave Out SPI data line from a peripheral to the MCU. Master Out Slave In SPI data line from the MCU to a peripheral. See microcontroller unit. Motorola Digital Communications. MCU/DSP Interface internal to the Patriot IC.
- Page 117 Data transmitted on the control channel from the central controller to the word subscriber unit. over-molded pad- A Motorola custom IC package, distinguished by the presence of solder array carrier balls on the bottom pads. over-the-air rekeying Allows the dispatcher to remotely reprogram the encryption keys in the radio.
- Page 118 Glossary-6 Glossary Term Definition See phase-locked loop. private-line tone A continuous sub-audible tone that is transmitted along with the carrier. squelch See also DPL. Programmable A memory chip on which data can be written only once. Once data has Read-Only Memory been written onto a PROM, it remains there forever.
- Page 119 Glossary Glossary-7 Term Definition RESET Reset line: an input to the microcontroller that restarts execution. See radio frequency. RF PA See radio frequency power amplifier. See Radio Interface Box. See read-only memory. RPCIC Regulator/power control IC. RPT/TA See repeater/talkaround. See Radio Service Software. See real-time clock.
- Page 120 Glossary-8 Glossary Term Definition squelch Muting of audio circuits when received signal levels fall below a pre- determined value. With carrier squelch, all channel activity that exceeds the radio’s preset squelch level can be heard. SRAM See static RAM. SRIB Smart Radio Interface Box.
- Page 121 Glossary Glossary-9 Term Definition vector sum excited A voice-encoding technique used in ASTRO digital voice. linear predictive coding Very-High Frequency. Vehicle Interface Port. VOCON See vocoder/controller. vocoder An electronic device for synthesizing speech by implementing a compression algorithm particular to voice. See also voice encoder. vocoder/controller A PC board that contains an ASTRO radio’s microcontroller, DSP, memory, audio and power functions, and interface support circuitry.
- Page 122 Glossary-10 Glossary Notes...
- Page 123 Index Index-1 Index Index reassembling 8-23 chassis to flip-front housing assemblies assemble 8-29 CID bezel servicing 8-30 CID test mode, display radio 5-8 cleaning external plastic surfaces 2-1 Abacus III theory of operation 3-4 control top and keypad test mode, display radio 5-6 accessories copyrights antennas A-1...
- Page 124 Index-2 Index complete revisions ii chassis assembly 10-4 model chart flip assembly 10-2 numbering system xv front housing assembly 10-3 UHF xvii partial 8-2 VHF xvi model numbering system, radio xv multikey conventional 7-1 trunked 7-1 field programming equipment 4-2 FLASHport 1-2 flip assembly disassembling 8-16...
- Page 125 Index Index-3 flip assembly 8-18 receiver backend 3-4 front housing assembly 8-19 reference oscillator 3-4 RF test mode 5-4 synthesizer 3-4 RGB test mode 5-7 transceiver (XCVR) operation 3-3 test mode menu 5-2 transmitter power amplifier 3-4 vibration test 5-8 VCO buffer 3-4 receiver VOCON operation...
- Page 126 Index-4 Index VOCON operation theory of operation 3-4 warning, caution, and danger notations 1-1 warranty commercial xii coverage period xii...
Need help?
Do you have a question about the Astro XTS 4000 and is the answer not in the manual?
Questions and answers