Advertisement
Advertisement
Table of Contents

Related Manuals for Yada Dash Road Cam HD


Summary of Contents for Yada Dash Road Cam HD
-
Page 2: Table Of Contents
TABLE OF CONTENTS 1. Introduction ....................................1 2. Package Contents ..................................2 3. Product Specifications ................................3 4. Safety Information ..................................5 5. Operation ......................................6 6. Settings ......................................8 7. Viewing Files ....................................13 8. Warranty ......................................13... -
Page 3: Introduction
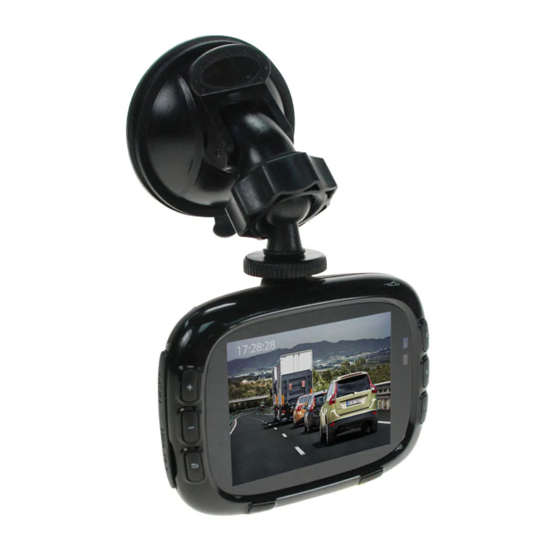
1. INTRODUCTION The Yada Dash Road Cam HD is a video recording camera intended to capture incidents while driving. The 2.7” LCD is convenient for instant playback. Simply mount the camera as directed and use loop recording or motion detection recording to capture events while driving. -
Page 4: Package Contents
DCIM and you can view Videos in the 100MEDIA folder, The Yada dash road cam HD is for interior use only. Please and Pictures in the Camera folder check all local laws before operating. This camera is not waterproof and is charged via 12V only. -
Page 5: Product Specifications
3. PRODUCT SPECIFICATIONS Sensor 1.3M CMOS sensor, (1/4)inch Camera Lens Wide angle 90 degrees, the maximum aperture: F2.8 Lens of Low Illumination 3300mv / (Lux.sec) sensitivity Zoom 16x digital zoom LCD Screen 2.7 inch 4:3 Resolution: 960x240 TFT LCD Video Output HDMI interfaces: HDMI output up to 1280x720 Photograph JPG 12million pixels 4000x3000... - Page 6 Mount Volume/ Exposure Menu Up Value Volume/ Menu Menu Down Return Enter Camera Accident! Power On/Off Mount Flashlight Reset Key USB / Charging Micro SD Jack Storage Card Speaker HDMI Output Socket Cover...
-
Page 7: Safety Information
4. SAFETY INFORMATION a. Please read all safety warnings listed in this user’s manual. b. Do not operate or adjust the camera while driving. The camera should be set prior to operating the vehicle. c. Make sure the camera is not blocking the driver’s line of sight and check local laws and regulations for placement instructions. -
Page 8: Operation
5. OPERATION a. Charge the Camera i. For safety, the camera should be fully charged prior to operating. The first few times we suggest charging the camera for 12 hours. Normally the camera will fully charge in 3 hours. ii. Using the USB to 12V charger provided simply plug the USB end into the camera and the 12V end into any vehicle 12V socket. - Page 9 Please check your local laws and regulations regarding where mounting on the windshield is permitted. ii. The Dash Road Cam HD position on the front windshield and its forward-facing angle greatly affect the video recording quality. Follow these instructions to get the best results: 1.
-
Page 10: Settings
6. SETTINGS a. The Dash Road Cam HD has several different functions available for your use. To access the shooting modes, scroll using the Menu Up or Menu Down buttons on the camera. LOOP RECORD • This is the default recording setting for the camera. - Page 11 On / Off then press . Having the Standby Videos On will means the Dash Road Cam HD will continue recording even the power disconnected or engine off. In the Standby recording mode, the screen will shut off 30 seconds after the power disconnected,...
- Page 12 CONTINUOUS RECORD • Press key to Continuous Record Mode. • Press to start preview, again to start recording. • A red dot “REC” on the screen flashing indicates recording. • Files are NOT deleted or recorded over. Once Micro SD Card is full the camera will notify you.
- Page 13 TAKE PICTURE • Press key to Take Picture Mode • Press to start preview, again to take picture. • Press each time you want to take a picture • Files are NOT deleted or recorded over. Once Micro SD Card is full the camera will notify you.
- Page 14 ISO Setting: Select Auto, 100, 200, or 400. The default is Auto. Face Detection Setting: Select Off, Face Detection or Smile Detection. The default is Off. Quick Review Setting: Select Off, 2 Seconds or 5 Seconds. The default is Off. Date Stamp Setting: Select Off, Date, Date / Time.
- Page 15 Voice Record • Press key to Voice Record Mode • Press to start preview, again to record voice, again to stop record. • Files are NOT deleted or recorded over. Once Micro SD Card is full the camera will notify you. •...
-
Page 16: System Settings
SYSTEM SETTINGS Date/Time Setting: Press to enter Date/Time setting. Press key to save the settings. Auto Power Off Setting: Select off, 2 minutes, 5 minutes, 10 minutes. Press key again to save the settings. The default is 5 minutes. Beep Sound Setting: Select On or Off. Press key again to save the settings. -
Page 17: Viewing Files
7. VIEWING FILES a. Connect the camera to your PC with the provided mini USB to USB connector; you can also view the Micro SD card on your PC b. On your PC open up DCIM and you can view videos in the 100MEDIA folder, and pictures in the Camera folder c. - Page 18 Winplus North America and/or its affiliates do not guarantee or promise that the user of Dash Road Cam HD will not be in an accident or otherwise not collide with an object and/or person. Our Dash Road Cam HD is...
- Page 19 The Dash Road Cam HD is not intended to be a substitute for rearview mirrors or for any other motor vehicle equipment mandated by law. Even when properly installed, our Dash Road Cam HD has a limited field of vision and does not provide a comprehensive view of the rear area of the vehicle.
- Page 20 11 On Lai Street, Shatin, N.T., Hong Kong www.winplus.com www.letsyada.com © 2013 Winplus North America Inc. All Rights Reserved. Winplus, the logo design, and Yada are trademarks or registered trademarks of Winplus North America Inc. The Bluetooth word mark and logos are owned by the ®...
Need help?
Do you have a question about the Dash Road Cam HD and is the answer not in the manual?
Questions and answers
Why does my dash camera only record for 5 minutes? Then shuts off. I need it to record continously.
The Yada Dash Road Cam HD does not automatically shut off after 5 minutes. It uses loop recording with selectable video segment lengths (3, 5, 10, or 15 minutes). If it stops recording after 5 minutes, it may be due to the loop video setting or a full micro SD card. When the card is full, the camera notifies the user but does not delete or overwrite files unless configured to do so.
This answer is automatically generated
How do I reset my 1080p dash cam
If the Yada Dash Road Cam HD locks and does not allow operation, reset it by switching off and on the Reset button.
This answer is automatically generated
Can you replace battery? It doesn't seem to hold a charge.
How to heck do I playback on this yada roadcam 1080p?