Table of Contents
Advertisement
Quick Links
Advertisement
Table of Contents

Related Manuals for Matrox Avio F120 Series


Summary of Contents for Matrox Avio F120 Series
- Page 1 ENGLISH Matrox ® Avio ™ Series Avio F120 User Guide 20158-301-0110 2012.12.04...
-
Page 2: Table Of Contents
OSD main menu ............................14 Information ..........................15 EDID Management ........................ 16 Volume ............................ 17 Options ........................... 17 Product information ....................18 Specifications ............................18 Avio F120 ..............................18 Environmental ........................18 Power consumption and supply voltage ................18 Matrox Avio Series – User Guide... - Page 3 Mounting guidelines ..........................24 Customer support ....................25 Matrox Web ............................25 Technical support ..........................25 Information we need ......................25 Firmware package ..........................25 View your warranty information ......................26 Register your Matrox product .......................26 Index ........................27 Matrox Avio Series – User Guide...
-
Page 4: About This User Guide
If you’re viewing online, click green text to jump to what’s being referenced. More information Be sure to check for any last-minute release notes included with your product. Also, check the Matrox Web site (www.matrox.com/graphics) for the latest Matrox software, technical support, and product information. -
Page 5: Overview
LC-LC optical cable - multi-mode (62.5/125 µm (OM1), 50/125 µm (OM2, OM3, or OM4)) or LC-LC optical cable - single-mode (9/125 µm (OS1 or OS2)) * The hardware supplied with your Matrox product may vary depending on the SKU or part number of your product. For more information, contact your Matrox representative. - Page 6 USB A to mini-B cables Rack mounting kit Note: To purchase any cables or adapters not included with your Matrox product, see the Matrox online store (shopmatrox.com). For a single-mode transceiver upgrade, contact your sales representative. Matrox Avio Series – User Guide...
-
Page 7: Connecting Your Avio F120 Unit
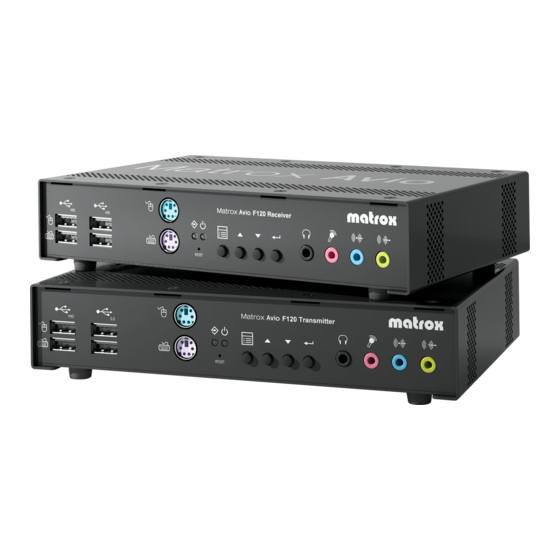
Connecting your Avio F120 unit How it works Matrox Avio consists of a transmitter unit and a receiver unit connected by a fiber optic cable. A Matrox Avio environment is made up of four (4) areas defined around its transmitter and receiver... -
Page 8: Before You Begin
OSD (On-Screen Display) controls of your Avio units, see “Configuring your Avio product”, page Avio F120 Transmitter – Front PS/2 keyboard (local) Line-in USB HID USB 2.0 (local) (local) (local) Microphone PS/2 mouse (local) (local) Headphones Line-out (local) (local) Matrox Avio Series – User Guide... -
Page 9: Avio F120 Transmitter - Back
USB links (host) (local) power input (host) Main USB PS/2 keyboard (host) (host) Avio F120 Receiver – Front PS/2 keyboard (remote) Line-in (remote) USB HID Microphone PS/2 mouse (remote) (remote) (remote) Headphones Line-out (remote) (remote) Matrox Avio Series – User Guide... -
Page 10: Avio F120 Receiver - Back
A USB A to mini-B cable is required to connect to each of these connectors. To purchase these cables, see the Matrox online store (shopmatrox.com). DVI-D SL/DL Using the DVI-D cable provided with your... - Page 11 To be able to connect your computer to the host PS/2 keyboard connector on your transmitter, you need a male-to-male PS/2 cable. To purchase this cable, see the Matrox online store (shopmatrox.com). PS/2 mouse Connect your PS/2 mouse to this connector.
-
Page 12: Description Of Leds
DVI SL and VGA+DVI SL connectors are disabled. Description of LEDs The LEDs on your Matrox unit provide status information on your unit and its optical connection. The following describes the different LEDs: Green No LED (black) Power and status Unit is operational. -
Page 13: Validating Your Avio Setup
Make sure your optical cables are properly connected on your Avio units. Audio To use audio on your Avio units, the line-in and line-out from your host system must be respectively connected to the line-out and line-in connectors of your transmitter unit. Matrox Avio Series – User Guide 13... -
Page 14: Configuring Your Avio Product
– to select how monitor settings are provided to your host system. EDID management – to control the volume of the audio inputs and outputs of your unit. Volume – to view the options for the OSD menu. Options 14 Matrox Avio Series – User Guide... -
Page 15: Information
Temperature of the main controller of your Avio unit. Model and serial number of your Avio unit, and the version numbers of the firmware package and its firmware. Matrox Avio Series – User Guide 15... -
Page 16: Edid Management
These settings are used until you update them or until you change the EDID mode. Disconnecting your optical cable has no effect as the EDID settings for your monitors are always the settings saved on your transmitter unit. 16 Matrox Avio Series – User Guide... -
Page 17: Volume
If you disable the OSD buttons, you can access the OSD menu by quickly pressing [Reset] with the tip of a paperclip. You can also update the firmware of your unit from this menu. Matrox Avio Series – User Guide 17... -
Page 18: Product Information
1020hPa (-50 meters / -164 feet) Power consumption and supply voltage Avio F120 unit 12V DC, maximum 2.5 A Power requirements (2.5 A fuse for overcurrent protection) Power connector DIN 4 female (4-pin) 18 Matrox Avio Series – User Guide... -
Page 19: Audio
>76 dBA Notes An Avio F120 transmitter requires an Avio F120 receiver. Your Matrox product is 100% VGA compatible and supports all VESA® standards: VBE 3.0 (Super VGA modes), DPMS (energy saving), DDC-2B (Plug-and-Play monitor), and DDC-CI. The display resolutions and refresh rates available depend on your graphics hardware, display driver, software monitor settings, and monitor. -
Page 20: Digital Flat Panel Information
Digital flat panel information TMDS® (Transition Minimized Differential Signaling) encoding for DVI connectors DDWG (Digital Display Working Group) compliant DVI connector EDID (Extended Display Identification Data) 1.2 and 1.3 support VESA Display Data Channel (DDC) support 20 Matrox Avio Series – User Guide... -
Page 21: Appendix 1 - Connection Overview
Mouse and keyboard PS/2 connectors at the front of your transmitter and receiver units are supported only if the system is connected to the mouse and keyboard PS/2 connectors at the back of your transmitter unit. Matrox Avio Series – User Guide... - Page 22 Notes Matrox Avio Series – User Guide...
-
Page 23: Appendix 2 - Mounting Your Units
Appendix 2 – Mounting your units This section provides guidelines for mounting your Avio unit using the rack mounting kit (sold separately). To purchase the rack mounting kit, contact your Matrox sales representative. Rack mounting kit Your Avio unit can be mounted on a 19-inch mounting shelf. You can mount two (2) units side by side on a single shelf. -
Page 24: Mounting Guidelines
Use a hand screwdriver to carefully tighten each screw. Make sure not to overtighten the screws. Mounting guidelines To prevent damage to your Matrox hardware, read the following guidelines before mounting your Matrox hardware: Make sure not to block the ventilation holes on your unit. -
Page 25: Customer Support
Matrox values your business and offers professional support for your Matrox product. If your product was purchased through a Matrox dealer, contact your dealer for product support. This is the quickest and most effective method of technical assistance. Your dealer is familiar with your complete system. -
Page 26: View Your Warranty Information
View your warranty information Matrox makes warranty information available on the Matrox site (www.matrox.com/graphics/en/about/warranty). Register your Matrox product Please register online (www.matrox.com/graphics/en/registration) to be eligible for customer support, new product announcements, and information on special offers and upcoming events. 26 Matrox Avio Series – User Guide... -
Page 27: Index
Options User Guide – Customer support About Power supply Specifications – Product information Environmental VESA Specifications Specifications Registration Firmware package Warranty Web, Matrox Specifications LEDs Avio unit Environmental Power supply Status LEDs Notes Matrox Avio Series – User Guide 27... - Page 28 FCC Compliance Statement Compliance Remark for the Matrox hardware products supported by this guide This equipment has been tested and found to comply with the limits for a Class A digital device, pursuant to Part 15 of the FCC Rules. These limits are designed to provide reasonable protection against harmful interference when the equipment is operated in a commercial environment.
- Page 29 A. (Español) Información para usuarios europeos – Declaración de conformidad Observación referente a los productos de hardware de Matrox apoyados por este manual Estos dispositivos cumplen con la directiva de la CE 2004/108/EC para dispositivos digitales de Clase A. Dichos dispositivos han sido sometidos a prueba y se ha comprobado que cumplen con las normas EN55022/CISPR22 y EN55024/CISPR24.
- Page 30 Bitte wenden Sie sich an der Matrox-Website (www.matrox.com/environment/en/weee) für Recycling-Informationen. (Italiano) Informazioni per gli utenti europei – Direttiva sui rifiuti di apparecchiature elettriche ed elettroniche (RAEE) Si prega di riferirsi al sito Web Matrox (www.matrox.com/environment/en/weee) per le informazioni di riciclaggio.
- Page 31 Copyright © 2012 Matrox Graphics Inc. • (English) All rights reserved. • (Français) Tous droits réservés. • (Deutsch) Alle Rechte vorbehalten. • (Italiano) Tutti i diritti riservati. • (Español) Reservados todos los derechos. Trademarks • Marques déposées • Warenzeichen • Marchi registrati •...
- Page 32 However, no responsibility is assumed by Matrox Graphics Inc. for its use, for its reproduction and/or distribution, in whole or in part;...
- Page 33 Matrox Graphics Inc. 1055 Saint Regis Boulevard Web site: www.matrox.com/graphics Dorval, Quebec, Canada H9P 2T4 Technical support: North America: 1-800-361-1408 www.matrox.com/graphics/support International: (514) 822-6000 To locate the sales office nearest you, visit Email: graphics@matrox.com www.matrox.com/graphics/contact...
Need help?
Do you have a question about the Avio F120 Series and is the answer not in the manual?
Questions and answers