
Related Manuals for Chroma Color Force Compact


Summary of Contents for Chroma Color Force Compact
- Page 1 Chroma-Q ® Color Force Compact™ User Manual Version 1.8.1 August 2014, Software Version 1.7/1.8 PN: 627-0500...
- Page 2 Chroma-Q unless the Customer provides acceptable proof to Chroma-Q that the defect or damage was not caused by the above; (e) by modification, repair or service by anyone other than Chroma-Q, who has not applied for and been approved by Chroma-Q to do such modification, repair or service unless the Customer provides acceptable proof to Chroma-Q that the defect or damage was not caused by the above;...
- Page 3 Chroma-Q products are safe, effective, and fully satisfactory for the intended end use. Suggestions of use shall not be taken as inducements to infringe any patent.
-
Page 4: Table Of Contents
4. 4. 4. 4. Specification Specification Specification Specification ................................35 Technical specifications ........................... 35 Drawings ................................ 38 Wireless Card Installation ..........................41 5. 5. 5. 5. Maintenance Maintenance ................................43 Maintenance Maintenance www.chroma-q.com Color Force Compact User Manual V1.8.1 December 2014... -
Page 5: Product Overview Product Overview
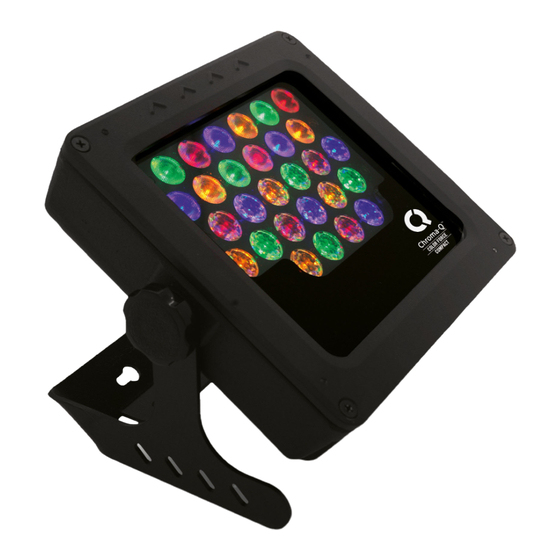
The Color Force Compact uses its huge RGBA colour mixing palette to deliver a full range of high brightness colours across the spectrum. Deep cold blues, red hot lava looks and super soft pastels are all available from a single fixture. -
Page 6: Operation Operation
15-way Power Supply Unit (PSU15) The Color Force Compact PSU15 supplies power and data to a maximum total of 15 Color or Studio Force Compact fixtures. The PSU15 features 3 XLR4 outputs and each output with a maximum capacity of up to 5 fixtures daisy-chained together. The PSU15 can be controlled remotely through an external DMX control console via XLR 5-pin cable or with the wireless option. -
Page 7: Cabling
Cabling The Color Force Compact system use XLR 4-pin connectors for power and control data input and through. The chassis are ground bonded. Power Supply Output Configuration: PSU15 Power Supply Output Configuration: PSU15 Power Supply Output Configuration: PSU15 Power Supply Output Configuration: PSU15... - Page 8 Black Live (L) Hot (Gold) Important Notice: The use of an opto-splitter for DMX signal distribution is highly recommended when several fixture units are not plugged into the same power source. www.chroma-q.com Color Force Compact User Manual V1.8.1 December 2014...
-
Page 9: Mounting
Mounting The Color Force Compact fixture is built with a mounting yoke for floor, wall and truss mounting applications. The yoke features an added pair of holes for height adjustment. The fixture enclosure mounted on the top holes of the yoke allows the fixture to face upwards and perpendicular. - Page 10 For truss mounting, we recommend the use of a ½”-13UNC x ¾” long bolt to avoid damage. Rack mounting brackets are available in single unit and dual unit versions. www.chroma-q.com Color Force Compact User Manual V1.8.1 December 2014...
-
Page 11: Optical Accessories
1. Position the plate to match package holes. (Fig. 4) 2. Fasten the plate to the frame. 3. Use the locking plate for adjustments and to fix in place the accessories Figure 4 www.chroma-q.com Color Force Compact User Manual V1.8.1 December 2014... -
Page 12: Chevrons
Control Mode, and the number of Channels. Display Mode: Display Mode: Display Mode: Display Mode: The LCD is backlit when you access the menus. This will turn off when left undisturbed for 5 seconds. www.chroma-q.com Color Force Compact User Manual V1.8.1 December 2014... - Page 13 System: System: The control system of the PSU15 can be set to control Color Force Compact RGBA fixtures, Studio Force D, V and Phosphor V Compact fixtures. The control system of the PSU-300 can be set to control Color Force Compact RGBA fixtures, Studio Force D, V, Phosphor V Compact fixtures, Color Block 1 and Color Block 2 Plus fixtures.
- Page 14 Color Force Compact fixture: es for Color Force Compact fixture: The Color Force Compact fixture consists of a single LED engine with 4 circuits of 7 (Red, Green, Blue, Amber) LEDs each, for a total of 28 LEDs.
- Page 15 Master Standalone – assigns the unit to be the Master unit where StandAlon stand-alone control options are set. Slave Slave Standalone – assigns the unit to be the Slave unit and follows the StandAlon control options assigned to the Master unit. www.chroma-q.com Color Force Compact User Manual V1.8.1 December 2014...
- Page 16 Master Standalone – assigns the unit to be the Master unit StandAlon where stand-alone control options are set. Slave Slave Standalone – assigns the unit to be the Slave unit and StandAlon follows the control options assigned to the Master unit. www.chroma-q.com Color Force Compact User Manual V1.8.1 December 2014...
- Page 17 Control Mode Control Mode The Color Force Compact power supply unit can be set to operate in various DMX controlled modes and standalone modes. The grouping options are Single, Output, All and Block. In Control Mode, scroll through and select from the options available then save.
- Page 18 Dim4x Single 15 x CW CW CW CW Dim1x Single 15 x CW Dim1x FxDim Int Fx + CW Look sel Look Select Mastr StandAlon Master Standalone Slave StandAlon Slave Standalone www.chroma-q.com Color Force Compact User Manual V1.8.1 December 2014...
- Page 19 1s + 5 x RGBI fxHSI 6fx + HSI RGB (*with Magic Amber) RGBA RGBA sRGBI 1s + RGBI Look sel Look Select Mastr Master Standalone StandAlon Slave Slave Standalone StandAlon www.chroma-q.com Color Force Compact User Manual V1.8.1 December 2014...
- Page 20 When DMX is Lost In When DMX is Lost When DMX is Lost, scroll and select an output option When DMX is Lost When DMX is Lost Press Enter for 2 seconds to save. www.chroma-q.com Color Force Compact User Manual V1.8.1 December 2014...
- Page 21 To edit the channel numbers and levels of a selected Look: From the Main Menu, scroll and select Look Store Look Store Look Store Look Store Scroll and select a Look Store number www.chroma-q.com Color Force Compact User Manual V1.8.1 December 2014...
- Page 22 Press Enter to toggle back to the channel number. When the desired effect is created press Enter for 2 seconds to save the edited Look. System System System System In this menu, the control system can be set to control Color Force Compact, Studio Force Compact and Color Block fixtures: Fixture Fixture System Options System Options...
- Page 23 Unlink Receivers Press Enter, Unlink Receivers Unlink Receivers blinks for a few seconds until the display goes back to the previous menu Unlink Receivers Unlink Receivers and then the main menu. www.chroma-q.com Color Force Compact User Manual V1.8.1 December 2014...
- Page 24 The Green LED circuit will light up (low intensity) to indicate completion of a successful Upload and the Uploader display shows DONE. Power-cycle the unit. (See Quick Start Guide of the Chroma-Q Uploader) Fan Speed (PSU15 only) Fan Speed (PSU15 only)
- Page 25 Software Uploads: The control software for the operation of the Compact fixtures can be uploaded directly from the Chroma-Q Uploader to the Compact power supply unit via the XLR 5-pin connection with both units powered and no need to access the control menu.
-
Page 26: Dmx Protocol
DMX Protocol (PSU15 V1.7, PSU-300 V1.8) Color Force Compact DMX Personality Mode 1-3: (Single Grouped) Control Mode 1 Control Mode 2 Control Mode 3 7fx + 15 x HSI 15 x HSI 15 x RGB (with *Magic Amber) [PSU15 =... - Page 27 Channels 22 DMX channels (PSU-300) 15 DMX channels 15 DMX channels (PSU-300) (PSU-300) Color Force Compact DMX Personality Mode 4-5: (Single Grouped) Control Mode 4 Control Mode 5 1s + 15 x RGBI 15 x RGBA [PSU15 = 61ch] [PSU15 = 60ch]...
- Page 28 61 DMX channels (PSU15) Total DMX Channels 20 DMX channels (PSU-300) 21 DMX channels (PSU-300) Color Force Compact DMX Personality Mode 6-8: (Output Grouped – PSU15 only) Control Mode 6 Control Mode 7 Control Mode 8 6fx + 3 x HSI...
- Page 29 ...and so on up to output 3 Total DMX 15 DMX channels 9 DMX channels 9 DMX channels Channels Color Force Compact DMX Personality Mode 9-10: (Output Grouped – PSU15 only) Control Mode 9 Control Mode 10 1s + 3 x RGBI 3 x RGBA [13ch] [12ch] www.chroma-q.com...
- Page 30 ...and so on up to output 3 ...and so on up to output 3 Total DMX 12 DMX channels 13 DMX channels Channels Color Force Compact DMX Personality PSU15 Mode 11-12 / PSU-300 Mode 6-7: (All Grouped) www.chroma-q.com Color Force Compact User Manual V1.8.1 December 2014...
- Page 31 Saturation for all fixtures Channel 9 Intensity for all fixtures Total DMX 9 DMX channels 3 DMX channels Channels Color Force Compact DMX Personality PSU15 Mode 13-15 / PSU-300 Mode 8-10: (All Grouped) www.chroma-q.com Color Force Compact User Manual V1.8.1 December 2014...
- Page 32 Blue for all fixtures Channel 5 Intensity for all fixtures Total DMX 3 DMX channels 4 DMX channels 5 DMX channels Channels Color Force Compact DMX Personality Mode 16: Mode 16 [1ch] Look Select www.chroma-q.com Color Force Compact User Manual V1.8.1 December 2014...
- Page 33 Light Cyan Full 62-64 Blue Full 65-68 Light Blue Full 69-71 3200 White 72-74 5600 White 75-78 Empty 79-81 Empty 83-85 Empty 86-88 Empty 89-91 Empty 92-94 Empty 95-97 Empty 98-100 Empty www.chroma-q.com Color Force Compact User Manual V1.8.1 December 2014...
-
Page 34: Troubleshooting Troubleshooting
Fans of the PSU unit are not working. Check the fans of the PSU unit. Fixture malfunction. Check PSU unit for airflow - to and from the internal fans. Check PSU area ventilation. Check/replace fixture unit. www.chroma-q.com Color Force Compact User Manual V1.8.1 December 2014... -
Page 35: Specification Specification
FxHSI, HSI, RGB, RGBA, sRGBI, Look Select, Master Standalone, Slave Standalone Dimming Curve Theatrical Variable Effects Engine Effects Parameters Grouping, colour speed, colour fan, colour range, colour step, intensity effects and intensity fan www.chroma-q.com Color Force Compact User Manual V1.8.1 December 2014... - Page 36 Detachable rack-mounting brackets "Rack Ears" and M4 pem nut provision for optional bumper feet installation Colour Black IP Rating IP20 Operating temperature 0ºC to 40ºC Approvals CSA C22. No. 166-M1983: R2008 CAN/CSA-C22.2 No. 60950-1-07 UL 60950-1:2007, EN 60950-1/A1:2010 www.chroma-q.com Color Force Compact User Manual V1.8.1 December 2014...
- Page 37 Powder coated steel Colour Black Built-In Hardware Nut insert for ½"-13UNC x ¾" bolt IP Rating IP20 Approvals CSA C22. No. 166-M1983: R2008 CAN/CSA-C22.2 No. 60950- 1-07 UL 60950-1:2007, EN 60950-1/A1:2010 www.chroma-q.com Color Force Compact User Manual V1.8.1 December 2014...
-
Page 38: Drawings
Drawings Color Force Compact www.chroma-q.com Color Force Compact User Manual V1.8.1 December 2014... - Page 39 Color Force Compact PSU15 www.chroma-q.com Color Force Compact User Manual V1.8.1 December 2014...
- Page 40 PSU 5 Way for Compact www.chroma-q.com Color Force Compact User Manual V1.8.1 December 2014...
-
Page 41: Wireless Card Installation
W-DMX card as shown in Figure 1 Figure 1 Before mounting the card in the unit, attach the antenna cable first in the mating connector on the card www.chroma-q.com Color Force Compact User Manual V1.8.1 December 2014... - Page 42 Figure Screw in the antenna then fold it in the existing space so it doesn’t get damaged. The antenna can be unfolded at any time when it needs to be used. www.chroma-q.com Color Force Compact User Manual V1.8.1 December 2014...
-
Page 43: Maintenance Maintenance
Maintenance With care, the Color Force Compact fixture and power supply unit will require little maintenance. However, as the unit is likely to be used in a stage environment we recommend periodical internal inspection and cleaning of any resulting dust and cracked oil residue.
Need help?
Do you have a question about the Color Force Compact and is the answer not in the manual?
Questions and answers