Table of Contents
Advertisement
Advertisement
Table of Contents

Related Manuals for T+A K 6 CV


Summary of Contents for T+A K 6 CV
- Page 1 USER MANUAL V 7.0 Order No. 9103-0302...
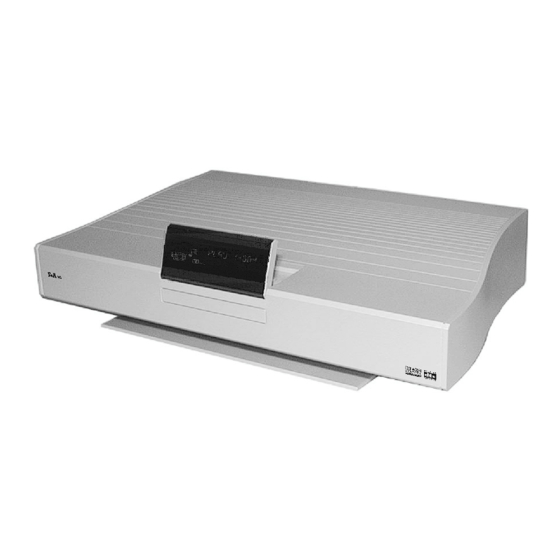
- Page 2 Welcome! We are delighted that you have purchased a product. The K6 DVD surround receiver forms the basis of a superb digital AV surround system whose overall design and comprehensive facilities fulfil all the requirements of a high-quality video and home cinema system.
-
Page 3: Table Of Contents
Operation Front panel controls and connections Primary switch / Emergency buttons / Opening and closing the drawer / Headphone socket / Screen F6 remote control handset Switching On-/Off/Standby / Screen brightness adjustment / Screen angle adjustment / Source selection Volume control Muting ... -
Page 4: Front Panel Controls And Connections
Front panel controls and connections Primary switch Emergency buttons To the right of the primary switch on the underside of the The K6 is normally switched on and off using the ... -
Page 5: Headphone Socket
CD / DVD drawer Sensor Infra-red sensor for opening the CD/DVD drawer. Opening the drawer To open the drawer first select the Disc Player as pro- gram source, then hold the ... -
Page 6: F6 Remote Control Handset
F6 remote control handset The F6 remote control handset Basic functions controls all the functions of the K6 Switches the K6 on from the Off state *), and switches the unit DVD surround receiver. The ad- press to stand-by mode from the On state. -
Page 7: Main Menu
Menu control system A menu control system is used to adjust the tone con- The 'Main Menu' contains all the functions required to trols and the surround decoder settings, and also to set operate the K6 in normal daily use. Press the ... - Page 8 Tone controls - treble and bass: Loudness: These two menu points enable you to alter the treble and The term Loudness refers to an automatic volume- bass settings to compensate for tonal differences in sensitive tone control designed to compensate for the programme material.
-
Page 9: General Information
Surround sound - explanatory notes A digital multi-channel signal is detected by its encoding General information method, and the K6 automatically sets the correct loud- The following section is not concerned directly with the speaker assignment. The current reproduction mode is operation of your K6, but is rather intended to explain displayed on the front panel screen. - Page 10 Unfortunately not all listening rooms are suitable for SOUND FIELD SIMULATION exploiting the full dynamic range. For example, it may be The surround processes already described require pro- necessary to take your neighbours' feelings into account gramme material which is encoded using the appropriate - especially in the late evening hours.
-
Page 11: Using The Tuner
Using the tuner Listening to radio programmes Operation: Explanation: Press the button on the RC handset to switch on TUNER TUNER TUNER TUNER the tuner; it will be set to the program which you last se- ... -
Page 12: Program Search
Program search Operation: Explanation: If you hold one of the tuning buttons ( / ) pressed With Tuner selected . . . in for about 2 seconds when in Tuner mode, the K6 Start program search in ... - Page 13 Manual storing of radio programs Operation: Explanation: If you wish to operate the Tuner as described under 'Lis- With Tuner selected . . . tening to radio programs', you must first tune in all your Starts program search / ...
- Page 14 Clearing (erasing) Programs Operation: Explanation: Programs containing stations received at poor quality, or With Tuner selected . . . the same stations on different frequencies, should be e.g. erased, or cleared. Call up Tuner Menu *) press MODE NORM MODE NORM...
- Page 15 Exchanging two Programs Operation: Explanation: All the Tuner's Programs are stored in the order in which With Tuner selected . . . the Autostore function detected them. e.g. Call up Tuner Menu *) press You can re-arrange the order to suit your preference using MODE NORM MODE NORM MODE NORM...
- Page 16 Renaming a Program Operation: Explanation: Not all radio transmitters broadcast the station name, and With Tuner selected . . . in such cases the integral screen displays the tuning indi- e.g. cator and the reception frequency instead of the station Call up Tuner Menu press name.
-
Page 17: The Tuner As Alarm Clock
The Tuner as alarm clock Operation: Explanation: The K6 includes a timer module which can switch the TUNER TUNER TUNER TUNER unit on at a pre-set time. The 'Alarm Menu' provides Switch on Tuner mode then e.g. access to all the settings which are required for the alarm WDR 2 WDR 2... - Page 18 The Disc Player The integral Disc Player is a play-back device for digital In addition to DVDs you can also play audio CDs (in- audio and video media which comply with the universal cluding CD-R and CD/RW) and Photo CDs. DVD video standard.
- Page 19 Using the Disc Player to play audio CDs Inserting an audio CD Operation: Explanation: Audio CDs contain recordings of music, DISC DISC DISC DISC and they can be recognised by the logo Select Disc mode then e.g. shown here.
-
Page 20: Playing A Track
Playing a track Operation: Explanation: Selecting a track Press the button to start CD playback from the first track. DISC DISC DISC DISC Selecting a track Select Disc mode then e.g. During playback you can jump from one track to another Stop Stop Stop... -
Page 21: Selecting Tracks
Creating a playback program for a CD The track select program enables you to re-arrange the It is very easy to assemble the track select program with playing sequence of the tracks of an audio CD. To do the help of the on-screen menu. Ensure that the TV set this you must switch to programming mode with a long is switched on first. - Page 22 Playback variants (Repeat Track, Repeat Disc, Scan and Shuffle) Operation: Explanation: The K6 offers several playback variants for the CD in the With CD playing . . . drive drawer. You can cycle through the variants on the ...
- Page 23 Operation...
-
Page 24: Inserting A Dvd
Using the Disc Player to play DVDs Inserting a DVD Operation: Explanation: You can recognise DVDs by the logo DISC DISC DISC DISC shown here. The DVD may contain Select Disc mode then e.g. one or more titles, and each title may No DISC No DISC No DISC... -
Page 25: Calling Up Additional Dvd Player Information
Calling up additional DVD player information Operation: Explanation: The integral screen shows which passage of the inserted With DVD playing . . . DVD is currently being played. The information can be e.g. displayed in two different ways: ... -
Page 26: Selecting A Chapter
Playing a title Operation: Explanation: Under normal circumstances playback starts automati- Selecting a title cally when you close the drawer. DISC DISC DISC DISC Selecting a title Select Disc mode then e.g. Some DVDs request you to select a particular menu point. -
Page 27: Slow Motion
Search Operation: Explanation: You can invoke a search using the / buttons as With DVD playing . . . follows: Search forward (press For a search forward or back at higher speed press the repeatedly if necessary) ... -
Page 28: Camera Angle
Camera angle Operation: Explanation: If the DVD or VCD contains scenes which were recorded with the angle symbol superimposed . . . using different camera angles, the camera angle symbol appears on the screen. Enter the number of the desired camera angle The numbers above the symbol on the screen indicate ... - Page 29 Sub-title language Operation: Explanation: Generally speaking, the sub-title language is selected With DVD playing . . . within the Disc menu when you start the DVD. Please Open the select sub-title follow the operating notes included in the menu. ...
-
Page 30: Disc Menu Function
Disc Menu Function Operation: Explanation: A DVD may contain Disc Menus which enable you to With DVD playing or stopped . . . select individual titles and / or chapters. The menu may also offer alternative camera viewing angles, synchro- Call up Disc Menu press nous languages, sub-titles etc., depending on the DVD. - Page 31 Player Setup Operation: Explanation: The purpose of the 'Player Setup Menu' is to enable you Open menu to adjust the basic settings of the integral Disc Player to press suit your personal preference. for 2 sec. ...
- Page 32 Using the Disc Player to play other media Video-CDs (VCD) Playing MP3 CDs recognised by the logo shown An MP3 CD can hold up to 32 album directories. here. The VCD may contain one or more tracks, and each track may To select an album directory press the ...
- Page 33 Basic settings for the K6 Operation: Explanation: The 'Configuration Menu' provides the means for you to e.g. Open Configuration set up and adjust all the audio and video components of press Menu M-OSD ON M-OSD ON M-OSD ON M-OSD ON your surround system so that they match each other...
-
Page 34: Configuration Menu
Configuration Menu Switch TV output for On-Screen main menu on / off: Loudspeaker: If you just wish to adjust the balance or tone controls The purpose of the 'Loudspeaker Menu' is to control the temporarily, it is not essential to access the main menu distribution of the output signals to the loudspeaker sys- (see 'Menu control system, Main Menu') on the TV tem in your room. -
Page 35: Assistant Menu
Assistant Menu The purpose of the Setup Assistant is to help you must be straight-line visual contact between the micro- phone and each loudspeaker. set up your surround system correctly. If you follow the steps described below, the K6 will automatically calibrate First connect the supplied microphone to the headphone your loudspeakers with the help of the measurement socket on the right-hand side of the K6, below the front... -
Page 36: Loudspeaker Menu
Loudspeaker Menu Not all the possible loudspeakers (center, surround and The purpose of the 'Loudspeaker Menu' is to distribute subwoofer) are present in every system, and to ensure the output signals correctly to the loudspeakers which that no sound information is lost in such cases the ab- are present in your system. - Page 37 Rear speaker: Satellite high pass: Set the size and bass capability of the surround loud- In this menu point you can set the cross-over frequency according to the requirements of your loudspeaker sys- speakers. Select one of the following settings: tem.
- Page 38 Loudspeaker Position Menu This enables the system to compensate for delays due to In the 'Loudspeaker Position Menu' you can enter the unequal distances from the listening position. correct distance to the listening position for each loud- speaker separately (in 0.3 m increments). Measure the distance between the listening position and As can be seen in the diagram, the select buttons access the loudspeakers which are present.
- Page 39 Loudspeaker Balance Menu If the DVD surround receiver is to supply a balanced The 'Loudspeaker Balance Menu' is designed to set sound image, it is important to adjust the volume of the the exact levels of all channels. individual channels carefully to each other. You can also use the select buttons to select the channel When you initially activate the 'Loudspeaker Balance to be corrected directly, instead of relying on the auto-...
-
Page 40: Tone Adjust Menu
Tone adjust Menu Tone values can be adjusted separately for all the output The K6 DVD surround receiver features an active channels used by your system, and the system is there- (+/- 6dB) tone adjust system. This is designed to com- fore capable of compensating fully for the effects of dif- pensate for room influences or unfavourable loudspeaker ferent speaker locations. -
Page 41: Video Norm Menu
Video Norm Menu A series of different picture norms exists in the video Notes field. The most important of these are Standard Video Some picture display devices support automatic format (also known as FBAS, CVBS or Composite), S-Video switching between 4:3 and 16:9 in S-Video mode. The (also known as YC or S-VHS) and Component Video switching voltage for this must be present at the C-pin of (RGB or YUV;... -
Page 42: Inputs Menu
Inputs Menu Four AV source devices (providing picture and ana- If the K6 is set up in this way the signal from the digital logue sound signals) can be connected to the DVD sur- source device is accepted and processed instead of the round receiver;... -
Page 43: Safety Notes
Installation Using the system for the first time Safety notes This section describes all those matters which are of fundamental importance when setting up and first using the equipment. This information is not relevant in daily use, but you should nevertheless read and note it be- fore using the equipment for the first time. - Page 44 Approved usage General notes on setting up the K6: This device is designed exclusively for reproducing Carefully unpack the K6 and store the original packing sound and/or pictures in the domestic environment. It materials carefully. The carton and packing are specially must be operated in a dry indoor room which meets all designed for this unit and will be needed again if you the recommendations stated in these instructions.
- Page 45 Notes on wiring the system: Safety notes Be sure to push all plugs firmly into their sockets. Loose Please read right through these operating instructions connections can cause hum and other unwanted noises. carefully before you attempt to use your new equipment. Note in particular the information regarding setting up Before wiring up the system remove the back panel, and operating the unit, and the safety notes.
-
Page 46: Rear Panel Connections
Rear panel connections TAPE 1 TAPE 2 (CINCH) (CINCH) (DIGITAL) Input / output sockets to connect an analogue recorder Input / output sockets for connecting a digital recorder (tape, cassette etc.). (MD, DAT, CD recorder etc.). ... - Page 47 FM ANT - aerial input A - FRONT The K6 features a 75 Ohm VHF aerial input (domestic Terminals for front loudspeakers * aerial or cable). ...
- Page 48 Typical wiring diagram: Connecting passive loudspeakers Use of banana plugs: see the section entitled 'Back panel connections'. Setting up...
- Page 49 Typical wiring diagram: Connecting active loudspeakers Setting up...
- Page 50 Connection diagrams for monitors/TVs The correct choice of colour norm (RGB / YUV [YPbPr The K6 supports the three picture norms Standard / YCbCr]) for the system’s Component Video function Video, S-Video and Component Video; Component depends on two factors: the AV source device con- Video supplies the best possible picture quality.
- Page 51 Connection diagram for monitors / TVs with standard (composite) video input Note Audio connections can be omitted if the monitor has no audio in-/outputs. Connection diagram for monitors / TVs with S-Video inputs Note Audio connections can be omitted if the monitor has no audio in-/outputs. Setting up...
- Page 52 Connection diagram for monitors / TVs with component (YUV) inputs Note Audio connections can be omitted if the monitor has no audio in-/outputs. Setting up...
- Page 53 Typical wiring diagrams: Source device connection Connecting a digital recorder Connecting an analogue recorder Phono module (type PHE) MM or MC (optional acces- sory) required! Connecting a turn table Setting up...
- Page 54 *) If a digital output is present: Use a Cinch digital cable or an optical cable Connecting a set-top box Setting up...
- Page 55 Typical wiring diagram: adjacent room operation The K6 can provide sound in an adjacent room. A TV set in the adjacent room can also be connected to an unused Monitor/TV output socket. The K6 is set up in the main room (Room A), i.e. the To simplify the cabling, or as a superior solution if the room in which the speakers connected to loudspeaker route to the TV set in the adjacent room is very long, it is...
- Page 56 Conformity with EC directives In its original condition the unit meets all currently valid Infringing any of these conditions invalidates con- German and European regulations. It is approved for use formity and approval, and the unit may not then be oper- as stipulated within the EC.
- Page 57 Care of the K6 Always disconnect the unit from the mains supply before again check carefully that no short-circuits exist at the cleaning it. The surfaces of the case should be wiped terminals, and that you have not disturbed any connec- clean with a soft, dry cloth only.
-
Page 58: General Problems
Appendix A Trouble-shooting Many problems have a simple cause and a correspond- Short-circuit in the speaker cables, e.g. Cause 2: ingly simple solution. The following section describes a stray wire ends touching at the speaker few difficulties you may encounter, and the measures terminals, or mechanical damage to the you need to take to cure them. - Page 59 Cause 3: K6 not set to surround mode. Problem: Neither on-screen menu nor other external programs appear on the TV Set to surround mode, or select one of Remedy: screen. TV only shows those sta- the sound fields. tions which are received via its own Programme contains no information on Cause 4: aerial.
- Page 60 Problems in DVD / CD mode: Problem: When playing an NTSC or PAL-DVD the on-screen menu is distorted. Problem: The disc does not play after the The TV set does not feature automatic Cause: drawer is closed. format detection for NTSC or PAL, and Disc not correctly inserted.
- Page 61 Problem: The picture is too small, or not Problem: After a house move the integral shown completely (cut off). screen still displays the old program names - but the stations can no The DVD in the drawer is not set to the Cause 1: longer be picked up.
-
Page 62: Pre Out
Appendix B Pin assignments PRE OUT CONTROL View from outside Signal Pre out Gnd. Pre out Front left Speaker mute control signal (0 / +8V) Pre out Front right Control Gnd. 'On control' signal (0 / +5V) Appendix... - Page 63 Appendix C Specification Connections Video input sockets 2x S-Video, 3x Composite, 1x Component (YUV) Video Monitor output sockets 1x S-Video, 1x Composite, 1x Component (YUV) VCR output 1x S-Video, 1x Composite Audio inputs Cinch Analogue Stereo 1 x phono (optional) Digital inputs optical Multi-channel and Stereo-PCM (SP/DIF), 44.1 kHz and 48 kHz...
- Page 64 elektroakustik GmbH & Co KG Herford * Deutschland * Germany...
Need help?
Do you have a question about the K 6 CV and is the answer not in the manual?
Questions and answers