Table of Contents
Advertisement
Advertisement
Table of Contents

Related Manuals for Elo TouchSystems Aegis Series


Summary of Contents for Elo TouchSystems Aegis Series
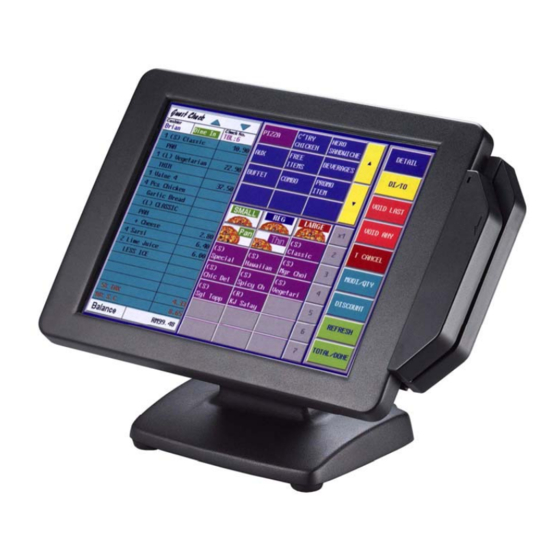
- Page 1 Aegis Series...
-
Page 2: Table Of Contents
Aegis – Series TABLE OF CONTENTS Features Specifications Physical Diagrams What comes with Aegis Switch and Controls OSD Settings Installation External Power Adapter MCR Installation MCR Parameter Modification VFD Customer Display Installation Trouble Shooting... - Page 3 MonitorMice is a registered trademark of Elo Touchsystems...
-
Page 4: Features
Aegis – Series FEATURES Cast aluminium front and base construction - rugged and durable Compact size and small footprint - fits where space is at a premium Standard VGA for easy interface to a standard PC VGA port. Flicker-free LCD display - easy on the eyes Low radiation - poses less hazard to user’s health Power-thrift - environmentally friendly Tiltable display - adapts to placement, user position and lighting... -
Page 5: Specifications
Aegis – Series SPECIFICATIONS Model A152TA A121TA A122TA Display Panel TFT LCD TFT LCD TFT LCD Type Display Area 15.00” 12.1” 12.1” Display Resolution 1024 x 768 XGA 800X600 800X600 Colour Resolution 262,144 16.7M 16.7M Pixel Pitch 0.297x 0.297 0.306X0.306 0.306X0.306 Brightness 350 nits (typ) -
Page 6: Physical Diagrams
Aegis – Series PHYSICAL DIAGRAMS A12xTA A152TA... - Page 7 Aegis – Series...
-
Page 8: What Comes With Aegis
Aegis – Series WHAT COMES WITH AEGIS Upon unpacking, please inspect to make sure all items are in place and in good condition. If there is any damaged or missing item, please contact your dealer immediately. The following items come as standard 1. -
Page 9: Switch And Controls
Aegis – Series SWITCH AND CONTROLS Model A152TA / A12xTA has built-in OSD (on screen display) controls to adjust various display parameters. The control buttons are located on the bottom of the back cover. OSD Controls... -
Page 10: Osd Settings
Aegis – Series OSD SETTINGS There are four buttons on OSD panel: Menu / Enter, Right, Left and LCD ON/OFF. The functions of these four buttons are as follows Menu/Enter Button Press it to open OSD window and enter user mode to do the function adjustment or selection of the item. -
Page 11: Main Menu
Aegis – Series OSD Menu Structure Main Menu If push the “ MENU” key the screen will appear this main menu page, you can use the “UP” or “ADJ. +” AND “Down” or “ADJ. –“ key ( appear Pic1 ) to select the function you need. - Page 12 Aegis – Series B..BRIGHTNESS If select BRIGHTNESS function on OSD MAIN MENU and push the MENU key. ( appear Pic3 ) You can push ADJ+ or ADJ- key to increase or decrease backlight current of the inverter. Pic3 C. CONTRAST If select CONTRAST function on OSD MAIN MENU and push the MENU key.
- Page 13 Aegis – Series D. Screen Settings If select DISPLAY ADJUST function on OSD MAIN MENU and push the MENU key. In this mode, that will into the sub-page ( appear Pic5 ) to adjust display’s function of the picture. Pic5 D-1 H-POSTION In this function, than could adjust the picture in horizontal position.
- Page 14 Aegis – Series D-3 CLOCK In this function, than could adjust the clock frequency of the picture. D-4 PHASE In this function, than could adjust the clock phase of the picture. D-5 QUALITY In this function, than could adjust the scanning filter of the picture. E.
- Page 15 Aegis – Series color of the picture Pic 6 E-1 : 9300K : In this mode , than could recall the value for the color temperature of 9300K. E-2 : 7500K : In this mode , than could recall the value for the color temperature of 7500K.
- Page 16 Aegis – Series E-6 GREEN In this function, than could adjust the green gain in user’s mode of color temperature. E-7 BLUE In this function, than could adjust the blue gain in user’s mode of color temperature. F. LANGUAGE In this mode, that could into the sub-page ( Pic7 ) to select the language for display.
- Page 17 Aegis – Series Pic 7 G.OSD DISPLAY If select OSD DISPLAY function on OSD MAIN MENU and push the MENU key. this function will into the sub-page ( Pic8 ) to adjust the display’s function for OSD. Pic8 G-1 : OSD H-POS In this function, than could adjust the horizontal position of OSD display.
- Page 18 Aegis – Series G-2 OSD V-POS In this function, than could adjust the vertical position of OSD display. G-3 OSD TIMER In this function, than could adjust the time of OSD display. Except “0” is always display.
- Page 19 Aegis – Series G-4 OSD TRANSPARENCY In this function, than could adjust the transparency of OSD display H. VGA / DVI INPUT If select VGA/DVI function on OSD MAIN MENU and push the MENU key. In this function, that will into the sub-page ( appear Pic9 ) to select input source.
-
Page 20: Installation
Aegis – Series INSTALLATION Model A152TA / A12xTA This model uses a standard VGA interface. 1. Turn off the computer. 2. Put the Aegis on a steady surface. 3. Please refer to Power Adapter section for instruction on using an external power adapter and skip this step. - Page 21 Aegis – Series Aegis – Series...
-
Page 22: External Power Adapter
Aegis – Series EXTERNAL POWER ADAPTER For situation where the Power Bracket cannot be used to power the Aegis, an optional External Power Adapter can be used instead. 1. Check the items in the External Power Adapter kit, including a power adapter and an AC cord. -
Page 23: Mcr Installation
Aegis – Series MCR INSTALLATION The MCR (magnetic card reader) option can be fitted to the right side of Aegis. This option allows the reading of magnetic stripe card through keyboard input. * If there is a need to modify the MCR parameters, such as country code and track combination, please follow the instruction in the section, MCR Parameter Modification. - Page 24 Aegis – Series 1. Check the items in the MCR option kit. 2. Turn off Power to the Aegis and the computer. 3. Unplug the loopback from the MCR socket. The MCR Socket is found on the right side on the back of the main Unit...
- Page 25 Aegis – Series 4. Attach the MCR Assembly to the main unit and connect the MCR cable to the MCR socket. 5. Secure the MCR to the main unit with 2 screws. 6. Turn on Aegis power. 7. Put the back cover on Aegis and secure with screws. * If the MCR is taken off, the loopback plug must be re-inserted.
-
Page 26: Mcr Parameter Modification
Aegis – Series MCR Parameter Modification This option is for users who need to customize the MCR parameters for a particular task. Some of the useful parameters include: The selection of country code, other than the default English. The choice of track combinations. The preamble/postamble codes. - Page 27 Aegis – Series MCR Utility Reader...
-
Page 28: Vfd Customer Display Installation
Aegis – Series VFD CUSTOMER DISPLAY INSTALLATION 1. Check the items in the VFD Customer Display Kit. - Page 29 Aegis – Series 2. Turn off power to Aegis and the computer. 3. Remove the VFD Mounting Cover from the Base of Aegis.
- Page 30 Aegis – Series 4. Secure the VFD Mounting Coupler to the Base with three VFD Mounting Screws.
- Page 31 Aegis – Series 5. Thread the RJ-45 phone connector of the VFD Signal Cable through the VFD Mounting Coupler, from the bottom of Aegis. 6. Plug the RJ-45 connector to the VFD Customer Display.
- Page 32 Aegis – Series 7. Fit the VFD Customer Display onto the VFD Mounting Coupler. 8. Plug the DB9F connector of the VFD Signal Cable to a COM port on the computer. 9a. For powering from the computer. a. Plug the 3 pin connector of VFD Power Cable to one of the connector on the Power Bracket.
-
Page 33: Trouble Shooting
Aegis – Series TROUBLE SHOOTING When encountering difficulties in using this product, please follow the steps below. If the problem persists, please contact the dealer. 1. No picture on screen a. Check the AC cord and signal cable. Make sure they are properly connected.
Need help?
Do you have a question about the Aegis Series and is the answer not in the manual?
Questions and answers