Table of Contents
Advertisement
Advertisement
Table of Contents

Subscribe to Our Youtube Channel
Related Manuals for Marantz PMD560


Summary of Contents for Marantz PMD560
- Page 1 Model PMD560 User Guide Solid State Recorder...
- Page 2 CAUTION RISK OF ELECTRIC SHOCK DO NOT OPEN CAUTION: TO REDUCE THE RISK OF ELECTRIC SHOCK, DO NOT REMOVE COVER (OR BACK). NO USER-SERVICEABLE PARTS INSIDE. REFER SERVICING TO QUALIFIED SERVICE PERSONNEL. The lightning flash with arrowhead symbol within an equilateral triangle is intended to alert the user to the presence of uninsulated "dangerous voltage"...
-
Page 3: Important Safety Instructions
IMPORTANT SAFETY INSTRUCTIONS READ BEFORE OPERATING EQUIPMENT This product was designed and manufactured to meet strict quality and safety standards. There are, however, some installation and operation precautions, which you should be particularly aware of. 1. Read Instructions – All the safety and operating instructions 15. -
Page 4: Regulatory Compliance
Regulatory Compliance NOTE: Changes or modifications may cause this unit to fail to comply with Part 15 of the FCC Rules and may void the user's authority to operate the equipment. ANTENNA LEAD IN WIRE WARNINGS GROUND ANTENNA CLAMP DISCHARGE UNIT Do not expose the equipment to rain or moisture. - Page 5 SI DICHIARA CHE L'APPARECCHIO SINTO-AMPLIFACATORE SR-39 RISPONDE ALLE PRESCRIZIONI DELL'ART. 2 COMMA 1 DEL D.M. 28 AGOSTO 1995 N° 548. FATTO A EINDHOVEN, IL 1/1/1997. MARANTZ EUROPE B.V. 5600 EINDHOVEN THE NETHERLANDS "Este aparato lleva elementos antiparasitarios necesarios para cumplir con los limites que se establecen en el Anexo V del Reglamento sobre Pertubaciones Radioelectricas e Interferencias aprobado en el Real Decreto 138/1989.
-
Page 6: Table Of Contents
Table of Contents Package contents .........2 Virtual Track and Copy Segment ..14 Creating a Virtual Track ........14 Introduction ...........3 Using Copy Segment to create a new file ..15 Features ...............3 Entering Virtual Track Playback mode ....16 Controls and Connections ....4 Virtual Track Edit mode ........16 Copy SEG? Front side ..............4... -
Page 7: Package Contents
Package contents • PMD560 • Security screws (2) • Power cord ISO 3x10 (3mm x 10mm long) For CF card door. • Plastic pin and retainer (spare - for CF card door) Europe models include 2 power cords • CD-ROM Contents of the CD may vary. -
Page 8: Introduction
*The EDL marking system is proprietary to Marantz Professional solid state recorders. • Automatic recording The PMD560 can be set to stop recording when there is • Virtual Track silence (Silent Skip) and automatically start when sound Virtual Track allows you to set an in point and an out point resumes. -
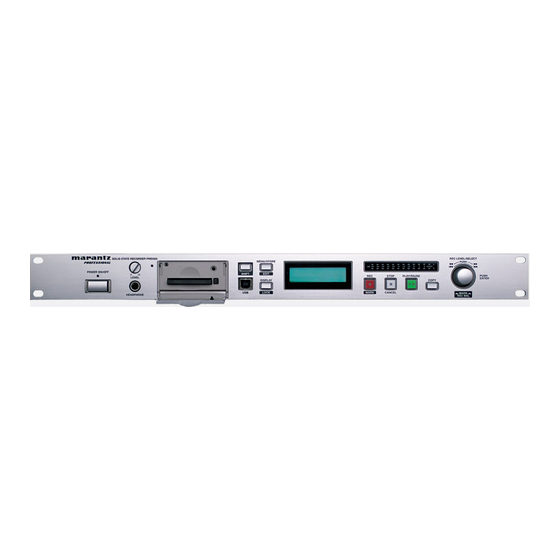
Page 9: Controls And Connections
During menu operations, push to cancel all entries made This is a main control, which changes function depending and return to stop mode. on the state of the PMD560. REC / MARK button Turn the Jog Wheel to: • REC •... -
Page 10: Rear Side
USB port USB mode is started by connecting a USB cable while stopped. The CF card in the PMD560 appears as an external drive on a connected computer. It may also be removed for data transfer. See page 18, How to connect via the USB port. -
Page 11: Display
The PMD560 comes factory preset for recording in stereo. Display These are settings for recording a meeting, not settings for recording a vocal performance. 1. Rack mount the PMD560 or install on a stable cart or MARK S.SKIP stand. IN - STEREO 44.1K... -
Page 12: Cf Cards
CF cards The PMD560 records onto various types of CF (Compact d. Push the Card eject button and remove the CF card. Flash) cards. Please refer to the Marantz Professional web site at www.d- mpro.com for what kinds of media are recommended. -
Page 13: Recording
Recording Recording Procedure Recording Format parameters The PMD560 can record in several compression algorithms. • Compressed recording using MPEG1 Layer III (MP3) 1. Push the POWER switch to turn on. mono and stereo. • Uncompressed recording using 16-bit linear Pulse Code Modulation (PCM). -
Page 14: How To Adjust Record Level
Setup the "Auto Trk" of the preset menu. (page 24) Pre Record When PreRecord is on and the PMD560 is in record-pause, it 'listens to' the selected audio input(s) and continuously buffers 2 seconds of audio. Then, when record is started, the PMD560 writes the previously buffered 2 seconds of audio to the card &... -
Page 15: Playback
Playback Playback Procedure Track Access 1. Push the POWER switch to ON. 2. Push the PLAY/PAUSE button to begin playback. • TRACK JUMP During playback or play-pause, turn left to jump to the previous track. If turned while playing the first track, it jumps to the last The PLAY indicator and the green light in the track on the CF card. -
Page 16: Audible Search
• If Auto Mark is on and the machine is in record - pause, when recording is resumed a mark will be added. • If Auto Mark is on and the PMD560 is recording audio below the sound threshold for more than three seconds, audio that crosses the threshold will cause a mark to be added. -
Page 17: Edit
Edit Edit menu, accessed from stop by pushing and holding the 1. Trk Erase (How to erase tracks) SHIFT button then pushing the MENU/STORE/EDIT button, TrkErase lets you erase a selected track. lets you erase tracks, erase EDL marks, format the CF card After identifying the track number you want to erase. -
Page 18: Allmkerase (How To Erase All Edl Marks)
AllMkErase lets you erase all EDL marks on the CF card. occasionally prevent a CF card from being able to read and write at the speeds required by the PMD560. Card Check 1. Select the AllMkErase Edit menu choice: does a sample read/write to check if a CF card has While in stop, push and hold the SHIFT button then push problems. -
Page 19: Virtual Track And Copy Segment
000 : 00 : 08 Tracks. page 16, Virtual Track Edit mode. 3. Continue to let the PMD560 play to your desired Out point, or use the standard transport controls like the Jog wheel to span greater time lengths. 4. When you have reached your desired Out point, push the COPY button. -
Page 20: Using Copy Segment To Create A New File
• When a copy area spans across two or more tracks, a track is connected and copied. 3. Continue to let the PMD560 play to your desired Out point, or • When the copy area spans across files of different use the standard transport controls like the Jog wheel to RecFormat or RecChannel, it can not copy. -
Page 21: Entering Virtual Track Playback Mode
If a Virtual Track is playing, push the STOP button twice. [How to convert all Virtual Tracks to new files] If the PMD560 is in Virtual Track Playback mode and When in Virtual Track Edit mode, “Copy SEG A?” lets you copy stopped, simply push the STOP button once. -
Page 22: Vt Erase
The display switches to the “All” blinking in the upper numeric display. 4. Push the Jog wheel. “Executing” will be displayed while the erasing process works. Then “Completed” will be displayed for one second. The PMD560 and display returns to stop mode. 5. Push the STOP/CANCEL button to cancel. -
Page 23: Usb Mode
How to connect via the USB port Recordings can then be transferred to your desktop or The CF card in the PMD560 appears as an external drive on laptop computer by removing the CF card from the PMD560, a connected computer. -
Page 24: Diagram Of File Structure
|---aaaaa002.MP3 |---aaaaa003.MP3 Changes made to file names or structures on your computer will prevent file recognition and playback in the PMD560. Machine ID An audio track (file) has Machine ID information. This information is included in a file name. For example, if the Machine ID is "aaaaa", the first file is numbered... -
Page 25: Additional Functions
Additional Functions Key lock REMOTE2 jack The key lock secures the PMD560 in the state it is in during The REMOTE2 jack is for the optional Record, Playback or Stop. REMOTE2 REMOTE1 RC2332C RC600PMD remote. Push and hold the SHIFT button while pushing the The RC600PMD is designed for DISPLAY/LOCK button to turn KEY LOCK on. -
Page 26: Display
Playback. • During Stop: • Remaining record time for the CF card General Menu procedure (Default display) 1. With the PMD560 at Stop, Push the MENU/STORE/EDIT ↓ button. • Total EDL marks on CF card. ↓ 2. Turn the Jog wheel to choose the Preset number. -
Page 27: Table Of Preset Defaults (Americas)
Table of Preset defaults (Americas) Display Selection range Default Setting Preset1 Preset2 Preset3 1. Date/Time 2005 - 2099 2005 2005 2005 Jan - Dec 1 - 31 AM/PM 00:00 - 11:59 AM 00:00 AM 00:00 AM 00:00 2. Rec Format MP3-44.1K/ MP3-48K/ MP3-44.1K MP3-44.1K... - Page 28 RecChannel choice (Stereo or Mono) is flashing. (How to set or change the Rec Format parameters) 6. Turn the Jog wheel to tab through the RecChannel The PMD560 can record in several compression algorithms. choices. 7. When correct, push the Jog wheel.
- Page 29 5. PreRecord 7. Auto Trk When PreRecord is on and the PMD560 is in record-pause, With Auto Trk (Automatic Track incrementing) on, a new it 'listens to' the selected audio input(s) and continuously track begins automatically at specified intervals of recording buffers 2 seconds of audio.
- Page 30 When that occurs, the PMD560 switches to record pause. • If Auto Mark is on and the PMD560 is recording audio When a signal above the preset level is input, recording below the sound threshold for more than three seconds, resumes.
- Page 31 10. Remote 12. Default The Remote Menu setting is for a wired remote( not The Default menu choice resets all Menu (not Edit menu) supplied) plugged into the REMOTE1 jack. items in the Preset to their default values. This is convenient if you are setting up a new Preset configuration because you do not have to check all the settings 1.
-
Page 32: Rs-232C Control Windows Application
• save setup/preset settings as a text file. Connect your Windows compatible computer to the PMD560 • convert a setup text file to a PMD560 Preset. via the REMOTE RS-232C connector on the PMD560 to your computer's RS-232C port. Install the software on your computer. -
Page 33: Rs-232C Control
Not Connected Not Connected 4. When data output finishes, the host sets RTS to L. Receive Data Transmit Data 5. The PMD560 checks if RTS is L and sets CTS to L. Transmit Data Receive Data Not Connected Not Connected... - Page 34 Hand shake flow charts for control commands Control command codes Host sends a command that causes a change in PMD560 The control command packets have a data length of 7~11 status. bytes. ASCII codes from 0x00 to 0x7f are used to receive serial data.
- Page 35 Table of Control command codes Control Command Code Manual Track ........"@02300"+ CR ........"@0MT00"+ CR ........"@02301"+ CR ........"@0MT01"+ CR ........"@02302"+ CR Auto Track ........"@02303"+ CR ........"@0AT0000"+ CR ........"@02304"+ CR Time(hhmm)........"@0AThhmm"+ CR ........"@02305"+ CR Auto Mark ........"@02306"+ CR ........"@0AM00"+ CR ........"@02307"+ CR ........"@0AM01"+ CR ........"@02308"+ CR Level(XX)
- Page 36 Table of Status Request and Status Information codes When a Status Request Command from the host is received by the PMD560, the PMD560 sends the Status Information to the host. When the PMD560 changes status, the PMD560 automatically sends Status Information to the host.
-
Page 37: Troubleshooting
If the condition cannot The PMD560 seems to record, but there is no sound on be remedied after the following check, please consult your playback. -
Page 38: Error Message
Error Message Display Description CF Card No Card No CF card inserted, or card is not detected. Unformat CF card is formatted other than FAT16 or FAT32. Full Card Remaining capacity of CF card is less than a few kbytes. Full 999 The number of tracks on the CF card has reached the 999 maximum. -
Page 39: Specifications
Specifications Digital audio system Included accessories System ..........Solid State Recorder Power cord Compatible media ........ CF memory cards Americas model ............1 Microdrive Europe model ..............2 USB cable ................ 1 Recording and media methods Audio cable ..............2 mp3 ........MPEG1 Layer III compression Screws (ISO 3x10 mm) ............ -
Page 40: Limited Warranty
Some States do not allow limitations on how long an implied to follow supplied instructions. warranty lasts and/or do not allow the exclusion or limitation c) Repair or attempted repair by a non-Marantz authorized of incidental or consequential damages, so the above limitations and exclusions may not apply to you. - Page 41 M Holdings Inc. & PROFESSIONAL BUSINESS COMPANY Printed in Japan 2005/12 00M39BS851250 ecmf-g...
Need help?
Do you have a question about the PMD560 and is the answer not in the manual?
Questions and answers