Table of Contents
Advertisement
Advertisement
Table of Contents

Related Manuals for Marantz Professional PMD661


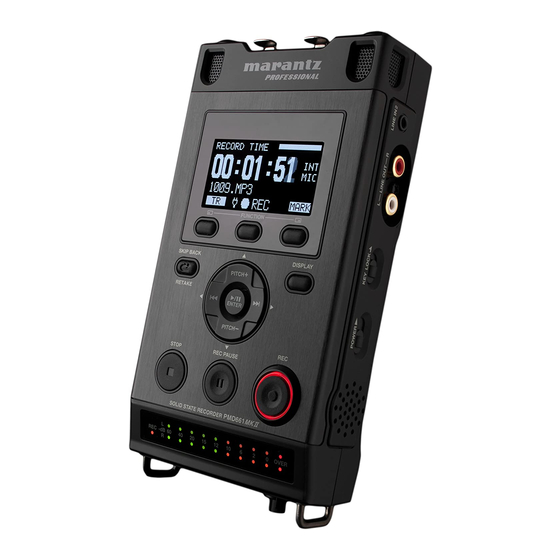
Summary of Contents for Marantz Professional PMD661
- Page 1 Model PMD661 User Guide Handheld Solid State Recorder...
- Page 2 CAUTION RISK OF ELECTRIC SHOCK DO NOT OPEN CAUTION: TO REDUCE THE RISK OF ELECTRIC SHOCK, DO NOT REMOVE COVER (OR BACK). NO USER-SERVICEABLE PARTS INSIDE. REFER SERVICING TO QUALIFIED SERVICE PERSONNEL. The lightning flash with arrowhead symbol within an equilateral triangle is intended to alert the user to the presence of uninsulated "dangerous voltage"...
-
Page 3: Important Safety Instructions
IMPORTANT SAFETY INSTRUCTIONS READ BEFORE OPERATING EQUIPMENT This product was designed and manufactured to meet strict quality and safety standards. There are, however, some installation and operation precautions which you should be particularly aware of. 1. Read these instructions. 2. Keep these instructions. 3. - Page 4 NOTE: This equipment has been tested and found to comply with the limits for a Class B digital device, pursuant to Part 15 of the FCC Rules. These limits are designed to provide reasonable protection against harmful interference in a residential installation. This equipment generates, uses and can radiate radio frequency energy and, if not installed and used in accordance with the instructions, may cause harmful interference to radio communications.
-
Page 5: Declaration Of Conformity
English We declare under our sole responsibility that this product, to which this declaration relates, is in conformity with the following standards: EN55022, EN55024, EN61000-3-2 and EN61000-3-3 Following the provisions of 2004/108/EC Directive. Français Nous déclarons, sous notre responsabilité exclusive que ce produit, auquel cette déclaration se rapporte, est conforme aux normes suivantes : EN55022, EN55024, EN61000-3-2 et EN61000-3-3 suivant les prescriptions de la directive 2004/108/EC. - Page 6 English WARNINGS Do not handle the AC adaptor with wet hands. Do not cover the ventilation with any items such as tablecloths, newspapers, curtains, etc. No naked flame sources, such as lighted candles, should be placed on the equipment. When disposing of used batteries, please comply with governmental regulations or environmental public instruction’s rules that apply in your country or area.
- Page 7 Italiano AVVERTENZE Non maneggiare l’adattatore CA con le mani umide. Non coprire le fessure di ventilazione con tovaglie, giornali, tendeod oggetti analoghi. Non posare sull'apparecchio sorgenti di fiamme scoperte qualicandele accese. Smaltire le pile usate in conformità alle norme governative odisposizioni ambientali vigenti nel proprio paese o zona.
- Page 8 A NOTE ABOUT RECYCLING: English This product's packaging materials are recyclable and can be reused. Please dispose of any materials in accordance with the local recycling regulations. When discarding the unit, comply with local rules or regulations. Batteries should never be thrown away or incinerated but disposed of in accordance with the local regulations concerning chemical waste. This product and the accessories packed together constitute the applicable product according to the WEEE directive except batteries.
- Page 9 NOTA RELATIVA AL RICICLAGGIO: Italiano I materiali di imballaggio di questo prodotto sono riutilizzabili e riciclabili. Smaltire i materiali conformementealle normative locali sul riciclaggio. Per smaltire l’unità, osservare la normativa in vigore nel luogo di utilizzo. Non gettare le batterie, né incenerirle, ma smaltirle conformemente alla normativa locale sui rifiuti chimici. Questo prodotto e gli accessori inclusi nell’imballaggio sono applicabili alla direttiva RAEE, ad eccezione dellebatterie.
-
Page 10: Table Of Contents
Table of Contents Package Contents...2 Introduction ...3 Features ... 3 Quick Start Guide ...4 Names and Functions ...6 Top ... 6 Right Side ... 8 Left Side ... 8 Front ... 9 Back ... 9 Bottom ... 10 Display ... 10 Preparation Before Use ...11 Installing the carry strap ... -
Page 11: Package Contents
Package Contents • PMD661 • Audio cable • USB cable • AC adapter • User guide • CD-ROM • Carry strap • Customer registration document (US only) • SD card... -
Page 12: Introduction
Introduction Thank you for selecting the Marantz Professional PMD661 Portable Solid State Recorder. The PMD661 is an audio recorder that records in digital audio formats onto an SD (Secure Digital) card. SD cards, also used in digital cameras, are widely available at consumer electronics retailers and computer resellers. -
Page 13: Quick Start Guide
Quick Start Guide Follow the instructions on this page to Quick Start your new PMD661 Solid State Recorder and begin recording. The PMD661 comes with factory preset defaults for MP3 recording using internal microphones. Unpack the AC adapter and the PMD661. Setup the power supply. - Page 14 Press the REC button to start recording. Press the STOP button to stop recording. Press the 3/8¥ENTER button to play the just recorded file via headphones or speaker. Press the 3/8¥ENTER button again to pause playback. Press the STOP button to stop playback. ☞...
-
Page 15: Names And Functions
Names and Functions q Internal Microphones Stereo condenser microphones. w DISPLAY The display shows the information of the PMD661. ( e FUNCTION button Press the FUNCTION button to change the functions on (F2) buttons with toggle operation. The functions are different depending on each operation mode. - Page 16 t DISPLAY button Press the DISPLAY button to change the display contents like the time information with toggle operation. The content is different depending on each operation mode. y 4 / ¢ button • While in Stop, Playback, or Play-Pause mode, press this button to choose the file (Jump to previous/next file).
-
Page 17: Right Side
Right Side q Speaker Internal speaker of R channel. w POWER slide switch Slide and hold for a little time to turn power On. Slide to turn power Off. During Record and Rec-Pause mode, the POWER switch is invalid. e KEY LOCK slide switch Slide switch for the Key Lock On and Off control. -
Page 18: Front
Front q PHONES Jack For monitoring and private listening, you can connect your headphones to this jack. w HP/SPK VOL Control Use this to adjust the output level of the headphones or internal speakers. Warning! When using headphones, take care not to turn the volume too high. Listening at high volumes for extended periods of time may result in permanent hearing damage. -
Page 19: Bottom
Bottom q Tripod Hole Threaded screw hole for Tripod mount. w Battery compartment For 4 AA alkaline or rechargeable Ni-MH batteries. Display q Remaining space of the card w Input source e F2 function r Status t Battery icon y Timer icon This icon appears if the Timer Record/Playback is set. -
Page 20: Preparation Before Use
Preparation Before Use Installing the carry strap Put the carry strap through the shaft of the PMD661. Put the carry strap through the stopper of the PMD661. Secure the carry strap by putting it through the second stopper. Installing batteries Remove the battery compartment cover. -
Page 21: Removing Batteries
Removing batteries Battery compartment is located in the bottom of the unit. Remove the battery compartment door. Remove four AA type batteries. Close the battery compartment door. Safety cautions on handling batteries Always follow the points below when using batteries to avoid electrolyte leakage, overheating, fire, rupturing, ingestion, etc. -
Page 22: Installing A Memory Card
Installing a memory card The PMD661 records onto various types of SD cards. Check that the power is turned off. Pull the SD card lid. Fully insert the SD card. Close the SD card lid. Removing a memory card Check that the power is turned off. Pull the SD card lid. -
Page 23: Clock Setting
Clock Setting The date and time are written on each audio track (file) when the track is started. When an audio track is viewed on a computer, this date and time appears as when the file was 'modified'. From Stop, press the (F1: MENU) button. -
Page 24: Language
Language The Language menu item allows you to choose a display language (English, French, Spanish, German, Italian and Swedish). From Stop, press the (F1: MENU) button. Press the PITCH + or PITCH – button to select “Language”. Press the 3/8/ENTER button to enter the Language setting. •... -
Page 25: Basic Recording Operation
Basic Recording Operation Connection Diagram MIC IN MICROPHONE AMPLIFIER LINE Recording Procedure Slide and hold the POWER switch to turn on. Press the REC button to begin recording. • The Rec indicator will be lit and steady while recording. • The display will show the information display of recording. LINE... - Page 26 Press the REC PAUSE button to pause recording. Press the STOP button to stop recording and end the file (close the audio file). You can press the 3/8/ENTER button to play the just recorded file or press the STOP button again to enter the Stop mode. Then pressing the 3/8/ENTER button will play the beginning of the first audio file.
-
Page 27: Audio Input For Recording
Audio Input for Recording The audio input for recording can be set from the “Input” menu. ( Set the “Rec Channel” menu to “stereo” to create a stereo (2-channel) sound file. Or set it to “D.Mono” to create a stereo sound file. The left channel input is recorded in both left and right channels. -
Page 28: Recording Time Chart
Recording Time Chart All times are approximated record times. Different media manufacturers allow more or less space for error correction and the like on their respective products. Recording Time Stereo channel Settings Bitrates PCM-16 (44.1KHz) 1411 kbps PCM-16 (48KHz) 1536 kbps PCM-16 (96kHz) 3072 kbps PCM-24 (44.1KHz) -
Page 29: Recording Level Control
Recording Level Control The recording level control lets you select the type of input level Control. – At the Manual Level Control When Manual is set in the Level Control setting, adjust the REC LEVEL Control on the front panel of the PMD661 to control the audio input level. -
Page 30: Basic Playback Operation
Basic Playback Operation Connection Diagram AMPLIFIER LINE PHONES HEADPHONE Playback Procedure Slide and hold the POWER switch to turn on. Press the 4 or ¢ button to choose the file you wish to play. LINE Press the 3/8/ENTER button to begin playback. Press the 3/8/ENTER button again to pause playback. -
Page 31: Access From File List
Press the STOP button to stop playback. You can press the 3/8/ENTER button to play the just played file, or press the STOP button again to enter the Stop mode. Then pressing the 3/8/ENTER button will play the beginning of the first audio file. -
Page 32: Search
Search In Play-Pause mode, press and hold the 4 or ¢ button for high speed searching without audio. 10X searching speed from 1 second to 4 seconds, and 140X speed over 4 seconds until release the button. When you release the button, the recorder returns to playback paused. -
Page 33: Advanced Features
Advanced Features Microphone(s) – Attenuator The microphone attenuation switch permits the direct use of microphones that differ in sensitivity. • 0dB : No microphone attenuation. • –6dB : Input from a microphone(s) connected to the MIC jack is cut by 6dB. •... -
Page 34: Pre Record
Pre Record When PreRecord is on and the PMD661 is in record pause, it listens to the selected audio input(s) and continuously buffers 2 seconds of audio. Then, when record is started, the PMD661 writes the previously buffered 2 seconds of audio to the card and continues to record from there. -
Page 35: Auto Track
Auto Track With the Auto Track (Automatic Track incrementing) On, a new audio file is begun automatically at specified intervals of recording time. The Auto Track can be set to increment every 1, 5, 10, 15 or 30 minutes, or every 1, 2, 6, 8, 12 or 24 hours. The Auto Track makes finding a particular point in a recording easier. -
Page 36: File Divide
Continue to let the PMD661 play to your desired OUT-point, or use the standard transport controls like the 4 or ¢ button to span greater time lengths. When you have reached your desired OUT-point, press the COPY) button. “Set as OUT?” is displayed. Press the 3/8/ENTER button to store the OUT-point. -
Page 37: Marking
Marking Marks can be added during recording or playback manually or automatically. The marking information is stored as an ID3 tag (Ver 2) in MP3 file or chunk in WAVE file. Marks help you find specific points in the recording. •... -
Page 38: Additional Features
Additional Features Key Lock Slide the KEY LOCK switch to lock the keys. The key lock secures the PMD661 in the state it is in during recording, playback or stop. During Record and Rec-Pause mode, the POWER switch is always invalid. -
Page 39: Remote
Remote The PMD661 allows you to use an optional remote controller RC600PMD. (sold separately). The RC600PMD is designed for microphone interviews. It attaches to your microphone. The remote’s five feet cord with a four contact mini plug, plugs into the PMD661. The RC600PMD does not require any menu changes for use. -
Page 40: Extended Remote Jack
Extended Remote Jack The PLAY, FF and REW keys can be added to the remote control functions by using the equivalent circuit showing below. Circuit diagram: 3.9k 6.8k REC PLAY REW PAUSE Notes: • The PMD661 plays during closing and holding the PLAY switch, and skip back then pause at the point when It opened. -
Page 41: Display Control
Display Control Press the DISPLAY button to alternate information displays. Displays are slightly different in Stop, Record and Playback mode. During Stop mode: q Total Remain w Current Time/Date e Record Setup q Total Remain (Default display) Total remain time Number of files F1 function Current time... - Page 42 During Record mode: q Record Time w Total Remain Time e Record Level r Record Setup q Record Time (Default display) Record time File name F1 function Total remain time Input audio level Input source Rec format Quantization ALC icon Remaining space on the card Input source F2 function...
- Page 43 During Playback mode: q Elapsed Time w Remain Time e Output Level r File Properties q Elapsed Time (Default display) Elapsed time File name F1 function Remaining time Output audio level Created time Rec channel MP3 bitrate Current position on the file F2 function Sample rate Quantization...
-
Page 44: Usb Mode
USB Mode The PMD661 records directly onto SD cards. Recordings can then be transferred to your desktop or laptop computer by removing the SD card from the PMD661, or by connecting the PMD661 to your computer via the USB port. Audio recorded in the popular MP3 compression format is directly available for intranet or internet file sharing. -
Page 45: Diagram Of File Structure
• While USB is on, a set screen is displayed. • The SD card in the PMD661 appears as a removable device on your computer. Notes: • Check the operating system of your computer. Windows Me, 2000, XP, Vista, MAC OS 10 •... -
Page 46: Menu
Menu Menu Structure 1 Presets ...Preset-1 ... 1 Select 2 Display ...01 Brightness 3 Time/Date 4 Utility ...1 Record Timer 5 Language 2 Play Timer1 6 F/W Version 3 Play Timer2 4 Play Timer3 5 Load Settings 6 Save Settings 7 Card Format Preset-2 02 Timer... -
Page 47: Top Menu
Top Menu From Stop, press the (F1: MENU) button. • The menu list appears on the display. • The selected item is highlighted. • When the first item is selected, press the PITCH + button to jump to the last item. •... -
Page 48: Preset Menu
Preset Menu You can stores 3 detailed presets on the recorder for such settings as recording input, recording format, playback mode, etc. There are 20 setting items in the preset menu, and 3 presets can be set with the desired conditions. “Preset Select”... - Page 49 Preset Rename From Stop, press the (F1: MENU) button. Press the PITCH + or PITCH – button to select Preset Menu. Then press the 3/8/ENTER button to accept. Press the PITCH + or PITCH – button to select Preset 1, 2, 3 or renamed Preset.
- Page 50 Preset Menu List Display Input INT MIC / MIC/LINE / LINE2 / D.IN Rec Format MP3-320 / MP3-256 / MP3-192 / MP3-128 / MP3-64 / PCM-16 / PCM-24 Rec Channel Stereo / Mono / D.Mono Sample Rate 44.1k / 48k / 96k PreRecord On / Off Level Cont.
-
Page 51: Default Value List
Default Value List Display Input INT MIC Rec Format MP3-128 Rec Channel Stereo Sample Rate 44.1k PreRecord Level Cont. Auto Track Auto Mark Silent Skip 10 Mic Atten. 11 Low Cut 12 High Cut 13 Skip Back 3sec 14 Key Lock 15 Battery Alkaline 16 Auto Power Off... -
Page 52: General Procedure In The Edit Mode
General Procedure in the edit mode In the Preset Action Menu, press the PITCH + or PITCH – button to select “Edit” then press the 3/8/ENTER button. • Action Menu list appears on the display. Press the PITCH + or PITCH – button to select the menu item. Then press the 4 or ¢... -
Page 53: Sample Rate
4) Sample Rate The “Sample Rate” allows you to select the sampling frequency of the recording. Set Value Description 44.1k Sampling frequency for both PCM and MP3. Sampling frequency for both PCM and MP3. Sampling frequency for PCM. 5) PreRecord The “PreRecord”... - Page 54 9) Silent Skip The “Silent Skip” menu item allows you to turn the silent skip feature on and set the silent level or turn the silent skip feature Off. While the silent skip feature is on, the record is automatically paused when the input level is below the preset value –60, –54, –38 or –20 (dB) for more than 3 seconds.
-
Page 55: Auto Power Off
15) Battery The “Battery” menu item allows you to set the battery type. The PMD661 operates on 4 standard AA sizes Alkaline or Ni-MH batteries. The Battery setting is used for the battery remaining indicator in the display and "Low Battery" warning. If the setting does not match installed batteries the PMD661 will not show the appropriate battery status. -
Page 56: Play Mode
19) Play Mode The “Play Mode” menu item allows you to select the single playback mode or continuous playback mode. Set Value Description Single Single playback mode Cont. Continuous playback mode 20) Machine ID An audio file created by the PMD661 has Machine ID information. The information is included in the file name. -
Page 57: Display Menu
Display Menu You can store presets on the display menu for such settings as Brightness, Timer, LED, Time form, Date form and File sort. From Stop, press the (F1: MENU) button. • Menu list appears on the display. • The selected item is highlighted. •... - Page 58 1) Brightness The “Brightness” menu choice allows you to adjust the brightness of the OLED (Organic Light-Emitting Diode) display on the PMD661. Set Value Description 1, 2, 3, 4, 5, 6, 7, 8 (Dark) 1 – 8 (Bright) 2) Timer The “Timer”...
-
Page 59: Utility Menu
7) Default The “Default” menu item allows you to return the settings of the Display Menu to the default. See the table of Display Menu Functions. From Stop, press the (F1: MENU) button. Press the PITCH + or PITCH – button to select Display Menu. Then press the 3/8/ENTER button to accept. -
Page 60: Utility Functions
Utility Functions Display Set a start time and the duration for Record Timer recording. Play Timer 1 Set a start time of playback 1. Play Timer 2 Set a start time of playback 2. Play Timer 3 Set a start time of playback 3. Load Settings Load setting data from an SD card Save Settings... - Page 61 Set the start time. • While the “Start Time” is highlighted, press the 3/8/ENTER button. • Press the 4 or ¢ button to select the item. • Press the PITCH + or PITCH – button to select the value. • Press the ENTER button to finish setting the time. Set the duration.
-
Page 62: Load Settings
Set the start time. • While the “Start Time” is highlighted, press the 3/8/ENTER button. • Press the 4 or ¢ button to select AM/PM, hour or minute. • Press the 4 or ¢ button to select the item. • Press the PITCH + or PITCH – button to select the value. •... -
Page 63: Save Settings
From Stop, press the (F1: MENU) button. Press the PITCH + or PITCH – button to select “Utility”. Then press the 3/8/ENTER button to accept. Press the PITCH + or PITCH – button to select “Load Settings”. Press the 3/8/ENTER button. “Load?” message is displayed. •... -
Page 64: Card Format
7) Card Format From Stop, press the (F1: MENU) button. Press the PITCH + or PITCH – button to select “Utility”. Then press the 3/8/ENTER button. Press the PITCH + or PITCH – button to select “Card Format”. Then press the 3/8/ENTER button. •... -
Page 65: File List Menu
File List Menu The file list displays a list of file titles, MP3 and WAV in ‘MPGLANG1’ or other folders. The list can be used to play, rename or delete the selected file or check the information of the file. From Stop, press the (F2: LIST) button. - Page 66 1) Play The “Play” menu item allows you to play the selected file. In the file list menu, press the PITCH + or PITCH – button to select “Play”. Press the 3/8/ENTER button to start playback. • Press the STOP button to stop playback and return to File List. 2) Information The “Information”...
-
Page 67: File Rename
3) File Rename The “Rename” menu item allows you to change the file name of the selected file. In the file list menu, press the PITCH + or PITCH – button to select “Rename”. Press the 3/8/ENTER button to access the rename window. Rename the file title. -
Page 68: Folder List Menu
6) Move The “Move” menu item allows you to move a file from the current folder to another folder. In the file list menu, press the PITCH + or PITCH – button to select “Move”. Then press the 3/8/ENTER button. •... - Page 69 Press the PITCH + or PITCH – button to select the folder you want to access. Then press the 3/8/ENTER button or the MENU) button to enter the Folder list Menu. • Press the 4 or (F1: EXIT) button to return to the Folder list. •...
- Page 70 3) Rename In the folder list menu, press the PITCH + or PITCH – button to select “Rename”. Press the 3/8/ENTER button to access the rename window. Rename the file title. Refer to the procedure of the “Preset Rename” ( Press the 3/8/ENTER button to return to the folder list menu.
-
Page 71: Troubleshooting
Troubleshooting Should problems occur, it is often unnecessary to consult your dealer or technical service department. On the basis of the following checks, you may be able to rectify a number of conditions yourself without difficulty. If the condition cannot be remedied after the following check, please consult your dealer. -
Page 72: Error Message
Error Message Details of error processing Display No Card Card cannot be found Unformat Format other than FAT16/32, or card format error Full Card Memory is not enough Full 999 Number of files is already 999 (maximum) Full MARK Number of marks in the current file is already 30 (maximum) No File No file found Key Locked... -
Page 73: Specifications
Specifications Digital Audio System System ... Solid State Recorder Usable media ... SD/SDHC cards Recording format MP3 ...MPEG1 Layer III Compression WAV ...16/24 bit linear PCM Recording MP3 bit-rate ... 320/256/192/128/64 kbps Sample rate ... 44.1/48/96 kHz Number of channels... 2 (Stereo)/1 (Mono) Audio Performance Frequency response ... -
Page 74: Limited Warranty
Improper installation, removal or maintenance, or failure to follow supplied instructions. c) Repair or attempted repair by a non-Marantz authorized agent. d) Any shipment (claims must be presented to the carrier). e) Any cause other than a defect of manufacturing. - Page 75 This warranty is enforceable only in the United States and its possessions or territories. Marantz Professional products Sales Office Site: For inquiries or information on repair service of Marantz Professional Products, please contact our Sales Office or Tech Support Centre near you which are listed in D&M Professional website below.
- Page 76 M Holdings Inc. & PROFESSIONAL BUSINESS COMPANY Printed in Japan 2008/11 541510209003P ecmn-g...
Need help?
Do you have a question about the Professional PMD661 and is the answer not in the manual?
Questions and answers