CAB A3 Service Manual
Transfer printer
Hide thumbs
Also See for A3:
- Operator's manual (145 pages) ,
- Service manual (119 pages) ,
- Instructions for replacing (3 pages)

Related Manuals for CAB A3


Summary of Contents for CAB A3
- Page 1 Transferdrucker / Transfer Printer Serviceanleitung / Service Manual Ausgabe/Edition 3/02...
- Page 2 Telefax +49 (0) 721 / 66 26-249 Web : http://www.cabgmbh.com e-mail : info@cabgmbh.com copyright by cab / 900 8226 / M12 / 1 Technische Änderungen vorbehalten In accordance with our policy of continual product improvement, we reserve the right to alter specifications without notice...
-
Page 3: Table Of Contents
Inhaltsverzeichnis Table of Contents Einführung Introduction Hinweise für den Benutzer ........3 Scope of information ..........3 Wichtige Informationen ........... 3 Important information ..........3 Allgemeine Sicherheitshinweise ....... 4 General safety instructions ........4 Sicherheit beim Umgang mit Elektrizität ....5 Safe handling of electricity ........ - Page 4 Fehlersuche und Fehlerbeseitigung Trouble diagnosis and correction Fehler während des Druckbetriebs ......59 Errors during printing ..........59 Ausfall von Gerätefunktionen ........ 61 Failure of device functions ........61 Permanent angezeigte Hardwarefehler ....62 Permanently displayed hardware errors ....62 Anlagen Appendices: Ersatzteilliste ..............
-
Page 5: Hinweise Für Den Benutzer
Es beinhaltet technische Informationen, die sich auf die The technical information included relates to hardware and Hardware und den mechanischen Teil des Etikettendruckers mechanical parts of the A3 Label Printer. A3 beziehen. Informationen zur Bedienung des Druckers finden Sie in der Information related to the printer's operation will be found Bedienungsanleitung. -
Page 6: Allgemeine Sicherheitshinweise
Allgemeine Sicherheitshinweise 1.3 General safety instructions Beachten Sie die folgenden Regeln zur Follow the general safety rules below: allgemeinen Sicherheit: Keep the area around the device clean at all times! Halten Sie die Umgebung des Gerätes während und Avoid performing maintenance which might expose nach der Wartung sauber! persons to danger or make the device a source of Führen Sie keine Tätigkeiten aus, die Personen in... -
Page 7: Sicherheit Beim Umgang Mit Elektrizität
Sicherheit beim Umgang mit Safe handling of electricity Elektrizität Beachten Sie beim Umgang mit Elektrizität folgende Follow the additional instructions below when handling zusätzliche Regeln: electricity: Reparatur-, Prüf- und sonstige Arbeiten an elektrischen Repair, testing and other work on electrical Baugruppen dürfen nur durch eingewiesene und components may only be carried out by qualified and geschulte Elektrofachkräfte durchgeführt werden! -
Page 8: Leistungsmerkmale
- Leisten Sie gegebenenfalls Erste Hilfe. Leistungsmerkmale Features Der Etikettendrucker A3 ist ein Thermo-/Thermo- The A3 Label Printer is a direct thermal and thermal transfer transferdrucker mit folgenden Eigenschaften: printer offering the following features: langlebig, für den dauerhaften Industrieeinsatz konzi-... -
Page 9: Lieferumfang
Lieferumfang Package Contents Zum Standard-Lieferumfang des Etikettendruckers A3 As delivered, the A3 Label Printer standard package gehören: includes: - 1 Transferdrucker A3 - 1 A3 Label Printer incl. leerer Folienkern (montiert auf incl. empty cardboard core (mounted on Transferfolien-Aufwickler) und ribbon take up hub) and tear-off plate Abreißblech (montiert an Frontseite) -
Page 10: Teile Des Etikettendruckers
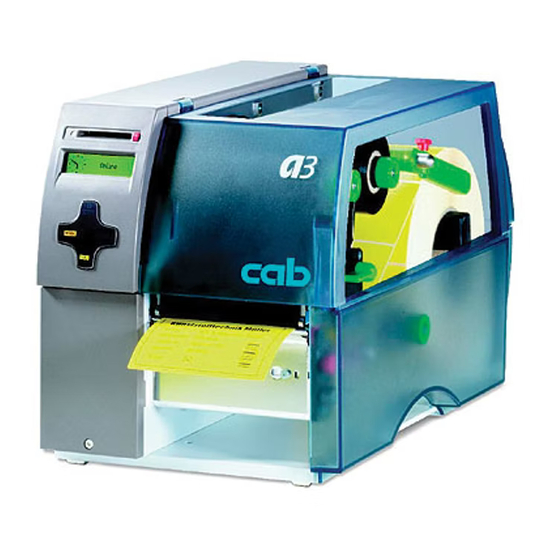
Printer Component Location Teile des Etikettendruckers Fig. 1 1 Cover Bild 1 1 Deckel 2 CompactFlash-Kartenschacht 2 CompactFlash slot 3 Display 3 Display 4 Transferfolienaufwickler 4 Ribbon take up hub 5 Navigatorpad mit Bedientasten 5 Navigator pad with keys 6 Transferfolienumlenkblech 6 Ribbon shield 7 Blende (Abdeckung für Peripherieanschluss) 7 Panel (cover for peripheral connector) -
Page 11: Optionen
25 Power supply socket 26 Rückwand 26 Rear side Optionen Optional features Zur Erweiterung der Einsatzmöglichkeiten des Etiketten- The features listed below are optionally available for the A3 druckers A3 stehen die folgenden Optionen zur Verfügung: Label Printer: Externer Aufwickler External rewinder Schneidemesser... -
Page 12: Technische Daten
1.10 Technical Specifications Druckkopf Printhead Druckprinzip: Thermo-/Thermotransferdruck Type: Thermal-/Thermal transfer printer Druckkopf: Dickschicht-Transferkopf Printhead: Thick film transfer head Druckkopf- A3/203: 203 dpi=8 Punkte/mm Printhead A3/203: 203 dpi=8 dots/mm auflösung: A3/300: 300 dpi=11,8 Punkte/mm resolution: A3/300: 300 dpi=11.8 dots/mm Anzahl der... - Page 13 Transferfolie Transfer ribbon Farbseite: innen oder außen Inked side: face-in or face-out on the roll Rollendurchmesser: bis 80 mm Supply roll diameter:up to 3.14" (80 mm) Kerndurchmesser: 25 mm Core diameter: 0.98" (25 mm) Breite: bis 114 mm Width: up to 4.48" (114 mm) Länge: bis 450 mm Length:...
- Page 14 Schriften Fonts Schriftarten: 5 Bitmap-Fonts inkl. Available fonts: 5 bitmap fonts incl. OCR-A und OCR-B, 3 Vektor-Fonts OCR-A and OCR-B, 3 vector fonts intern ladbare Speedo - und internally loadable Speedo True-Type -Fonts True-Type fonts Character Sets: Zeichensätze Windows: 1250, 1251, 1252, 1253, 1254, 1255, Windows: 1250, 1251, 1252, 1253, 1254, 1255, 1256, 1257...
- Page 15 Testeinrichtungen: Systemdiagnose beim Einschalten Testing facilities: System test during power up include a incl. Druckkopfprüfung, Kurzstatus- printhead test, short status display, anzeige, Statusausdruck, Schriften- status printout, font list, device list, liste, Geräteliste, Druckkopfprofil, printhead profile, label profile, test Etikettenprofil, Testgitter, grid, Monitormodus ASCII dump mode...
-
Page 16: Der Serviceschlüssel
Funktionen keine PIN-Abfrage, d.h. die Schutz- circumvented. funktion wird umgangen. Please ask your cab dealer about Über den Erhalt des Serviceschlüssels obtaining the service key. informieren Sie sich bitte bei Ihrem cab-Händler. -
Page 17: Erweiterte Funktionen Im Menü "Einstellungen
Erweiterte Funktionen im Menü Expanded functions in the "Einstellungen" "Setup" menu 2.2.1 Machine parameters 2.2.1 Geräteeinstellungen A series of hardware parameters can be set in the "Machine Im Untermenü "Geräteeinstellungen" können eine Reihe von parameters" sub menu. Hardware-Parametern eingestellt werden. This also includes the parameters for the optional Dies umfasst unter anderem auch die Parameter der optiona- components:... - Page 18 Protokollfehler Protocol error Der Parameter Protokollfehler steht in der Standardeinstel- The protocol error parameter is "ON" in the standard lung auf "EIN". Dies führt dazu, dass der Drucker beim setting. As a result, the error message "protocol error" is Empfang unbekannter oder fehlerhafter Daten die Fehler- displayed if the printer receives unknown or faulty data.
-
Page 19: Schnittstellen
*. nen lesen Sie bitte in der Bedienungsan- You will find all the information you need leitung zum A3 nach. Hier erhalten Sie alle there. You will find the information about notwendigen Informationen. Für alle... -
Page 20: Statusausdruck
2.3.1 Statusausdruck 2.3.1 Status print Der Statusausdruck zeigt Informationen über die Drucker- The status print contains information about the printer konfiguration und den Status. configuration and the status. Der Statusausdruck erfolgt mit der im Menü "Einstellungen" The "Status print" will be printed with the heat level and the festgelegten Heizenergie und Druckgeschwindigkeit. - Page 21 OPTION OPTION OPTION OPTION Service-Daten (nur mit Schlüssel) Service-Data (only with key) Bild 5 Statusausdruck Deutschland mit gestecktem Fig. 5 USA status printout with service key inserted Serviceschlüssel...
-
Page 22: Geräteliste
Please also refer to the Test Functions section of the lesen Sie bitte auch in der Bedienungsanleitung im Ab- A3 Label Printer Operating Manual for the printout of the schnitt Testfunktionen zum Etikettendrucker A3 nach. device list and further information. - Page 23 Bild 6 Geräteliste Fig. 6 Device list...
-
Page 24: Ereignisliste
2.3.3 Ereignisliste 2.3.3 Event list Der Etikettendrucker A3 speichert in der Ereignisliste The A3 Label Printer stores the following events in the folgende Ereignisse: event list: Hardwarefehler Hardware fault Druckkopftausch mit Änderung der Auflösung Printhead replacement with change of resolution... -
Page 25: Erweiterte Funktionen Im Menü "Service
Erweiterte Funktionen im Menü Expanded functions in the "Service" "Service" menu Im Menü "Service" ist dem Bediener nur die Funktion In the "Service" menu, the operator only has access to the "Firmware-Update" zugänglich. "Firmware update" function. Nach dem Stecken des Serviceschlüssels stehen folgende The following functions are available after the service key Funktionen zu Verfügung : has been inserted:... - Page 26 Gehen Sie zum Rücksetzen des Servicezählers wie folgt vor: The service counter is reset as follows: 1. Schalten Sie mit der Taste vom Zustand "Bereit" 1. Switch from "Online" mode to the Offline menu by in das Offline-Menü. pressing the key.
-
Page 27: Etikettenlichtschranke Abgleichen
2.4.2 Etikettenlichtschranke abgleichen 2.4.2 Adjusting the label edge sensor Diese Funktion ermöglicht es, die Etikettenlichtschranke This function enables the label edge sensor to be adjusted. abzugleichen. Dies wird nötig, wenn die Lichtschranke This is necessary when the label edge sensor itself or the selbst oder die Leiterplatte CPU gewechselt wurde. -
Page 28: Transferfolienlichtschranke Abgleichen
2.4.3 Transferfolienlichtschranke 2.4.3 Adjusting the transfer ribbon abgleichen sensor Diese Funktion ermöglicht es die Transferfolienlicht- This function enables the transfer ribbon sensor to be schranke abzugleichen. Dies wird nötig wenn der Transfer- aligned. This becomes necessary when the ribbon supply folienabwickler gewechselt bzw. -
Page 29: Nvram Sichern
2.4.4 NVRAM sichern 2.4.4 Saving on the NVRAM Die Funktion "Save NVRAM" dient der Sicherung einer The "Save NVRAM" function is used to save a printer Drucker-Konfiguration auf einer CompactFlash-Speicher- configuration on a CompactFlash memory module. karte. This function is only accessible with the service key Diese Funktion ist nur dem Service bei eingestecktem inserted and the CF card in the slot. -
Page 30: Nvram Laden
2.4.5 NVRAM laden 2.4.5 Loading the NVRAM Die Funktion "Load NVRAM" dient dem Zurückladen einer The "Load NVRAM" function is used to reload a previously zuvor gesicherten Drucker-Konfiguration von einer saved printer configuration from a CompactFlash memory CompactFlash-Speicherkarte. module. Diese Funktion ist nur dem Service bei eingestecktem This function is only accessible with the service key in- Serviceschlüssel zugänglich! serted. -
Page 31: Allgemeine Reinigung
Wartung Maintenance Trennen Sie den Drucker bei den Unplug the power cord from the power Wartungsarbeiten vom Netz! source before starting any maintenance work. Der Drucker erfordert nur sehr wenig Wartungsaufwand. The printer requires little maintenance. Wichtig ist die regelmäßige Säuberung des Thermodruck- It is important to clean the thermal printhead regularly. -
Page 32: Reinigen Der Druckwalze
Reinigen Sie den Druckkopf wie folgt: Clean the printhead as follows: 1. Trennen Sie den Drucker vom Netzanschluss! 1. Disconnect the printer from the mains connection. 2. Schwenken Sie den Druckkopf ab. 2. Open the printhead as far as possible. 3. - Page 33 Bild 14 Etikettenlichtschranke reinigen Fig. 14 Cleaning the label edge sensor 5. Reinigen Sie die Etikettenlichtschranke und insbeson- 5. Clean the label edge sensor and in particular the dere die Sensoren (3) mit einem Pinsel bzw. einem in sensors (3) with a soft brush or a cloth dipped in Alkohol getränkten Lappen.
-
Page 34: Liste Der Benötigten Werkzeuge
Liste der benötigten Werkzeuge List of recommended tools Für Servicearbeiten am A3 empfehlen wir folgenden Satz an For servicing the A3 printer, the following set of tools is Werkzeugen: recommended: 1. Sonderwerkzeuge (cab-Eigenfertigung): 1. cab special tools: - Prüfkörper (Art.-Nr. -
Page 35: Wechsel Des Druckkopfes
Bild 15 Deckel demontieren Fig. 15 Removing the cover Wechsel des Druckkopfes Replacing the printhead Der Drucker ist so konzipiert, dass ein The printer is designed so that the Druckkopfwechsel ohne jegliche Nach- printhead can be replaced without making justage am Gerät durchgeführt werden any readjustments to the device. - Page 36 Fig. 17 Printhead and locking screw Bild 17 Druckkopf und Feststellschraube 5. Schwenken Sie den Hebel (5, Bild 17) im Uhrzeiger- 5. Swing the lever (5, figure 17) clockwise as far as it will sinn bis zum Anschlag und heben Sie dadurch die go and in this way lift the printhead assembly up.
-
Page 37: Wechsel Der Druckwalze
Wechsel der Druckwalze Replacing the print roller Wechseln Sie die Druckwalze wie folgt: Replace the print roller as follows: 1. Trennen Sie den Drucker vom Netzanschluss! 1. Disconnect the printer from the mains connection. 2. Schwenken Sie den Druckkopf nach oben und entneh- 2. -
Page 38: Wechsel Der Rutschkupplungen
Wechsel der Rutschkupplungen Replacing the slipping clutches Lebensgefahr! Danger to life and limb Trennen Sie den Drucker vom Netz- Disconnect the printer from the mains anschluss sonst besteht u. U. Lebensge- connection, otherwise there is a risk to fahr durch spannungsführende Leiter im life and limb from the live wires inside the Innern des geöffneten Druckers! open printer. - Page 39 Bild 22 4 Rändelmutter Fig. 22 4 Knurled nut 5 Nabe 5 Hub 6 2 Gewindestifte 6 2 Threaded pins 7 Kupplungsscheiben 7 Clutch plates 8 Mitnehmer 8 Driver 9 6 Federn 9 6 Springs Replacing the clutch for the ribbon supply hub: Wechsel der Kupplung für den Abwickler Transferfolie: 5.
- Page 40 In diesem Zustand (vorgespannte Kupplung) sollen 3 Three conditions have to be fulfilled in this state (pre- Bedingungen erfüllt werden: tensioned clutch): Der Mitnehmer (8) soll einen Abstand von The driver (8) must be at a distance of ca. 0,5 mm von der Gussoberfläche (10) haben. about.
-
Page 41: Wechsel Der Etikettenlichtschranke
9. Stellen Sie die Kupplung gemäß Abschnitt 5.5 ein und 9. Set the clutch according to section 5.5, and refit the montieren Sie die Rückwand. rear cover of the printer. Bild 24 4 Rändelmutter Fig. 24 4 Knurled nut 6 Gewindestifte 6 Threaded pin 9 6 Springs 9 6 Federn... - Page 42 4. Slide the label edge sensor (1) as far as it will go in the schlag in Richtung Rückwand des A3. direction of the rear of the A3. 5. Ziehen Sie den Flexbandanschluss (4) aus dem 5. Pull the flexband connector (4) out of the connecting Anschlussstecker an der Etikettenlichtschranke (1).
-
Page 43: Wechsel Der Leiterplatte Cpu
Wechsel der Leiterplatte CPU Replacing the CPU PCB Lebensgefahr! Danger to life and limb Trennen Sie den Drucker vom Netz- Disconnect the printer from the mains anschluss sonst besteht Lebensgefahr connection, otherwise there is a risk to durch spannungsführende Leiter im life and limb from the live wires inside the Innern des geöffneten Druckers! open printer. - Page 44 Neue Leiterplatte CPU einbauen: Fitting a new CPU PCB: 1. Untere Steckverbinder (3 bis 6) in die Leiterplatte CPU 1. Insert the plugs (3 to 6) into the underside of the CPU einstecken. PCB. 2. Leiterplatte nach oben schwenken und mit 4 Schrauben 2.
-
Page 45: Wechsel Des Netzteils
Wechseln des Netzteils Replacing the power unit Lebensgefahr! Danger to life and limb Trennen Sie den Drucker vom Netz- Disconnect the printer from the mains anschluss sonst besteht Lebensgefahr connection, otherwise there is a risk to durch spannungsführende Leiter im life and limb from the live wires inside the Innern des geöffneten Druckers! open printer. -
Page 46: Nachrüsten Des Internen Aufwicklers
Aufwicklers rewinder Die Druckertypen A3/203 und A3/300 werden ohne inter- The A3/203 and A3/300 printer models are supplied without nen Aufwickler ausgeliefert. Allerdings sind die Geräte ab an internal rewinder. However, from serial no. 1001, the Serien-Nr. 1001 für die Nachrüstung eines internen Auf- devices are capable of being upgraded with an internal wicklers vorbereitet. - Page 47 Lebensgefahr! Danger to life and limb Trennen Sie den Drucker vom Netz- Disconnect the printer from the mains anschluss sonst besteht Lebensgefahr connection, otherwise there is a risk to durch spannungsführende Leiter im life and limb from the live wires inside the Innern des geöffneten Druckers! open printer.
- Page 48 7. Demontieren Sie den Zahnriemen (5) zwischen Druck- 7. Remove the toothed belt (5) between the print roller walze und Aufwickler Transferfolie. and the ribbon rewind hub. Bild 33 5 Zahnriemen 120.0 MXL Fig. 33 5 Toothed belt 120.0 MXL 8.
- Page 49 Bild 35 11 Riemenrad Aufwickler Transferfolie Fig. 35 11 Belt pulley of transfer ribbon rewinder 12 Zahnriemen 265 MXL 12 Toothed belt 265 MXL 13 Riemenrad Druckwalze 13 Belt pulley of print roller 14 Riemenrad interner Aufwickler 14 Belt pulley of internal rewinder...
-
Page 50: Justage Des Druckkopfes
Justagen, Einstellungen und Adjustments, Settings and Abgleiche Alignments Justage des Druckkopfes Adjusting the printhead Der Druckkopf ist am Aufnahmewinkel auf werksseitig The printhead is attached to the holding bracket by retaining genau ausgerichteten Haltestiften befestigt. pins which have been exactly aligned in the manufacturer’s works. -
Page 51: Einstellen Der Druckkopfabstützung
4. Druckkopf nach jedem Justageschritt öffnen und 4. Open and close the printhead after each adjustment schließen! Erst dann wird die Verstellung vollständig step. Only then does the adjustment become effective. wirksam! 5. Tighten the locking screw (1) (by hand). 5. - Page 52 2. Für breite Etiketten empfiehlt sich die Stellung 1. 2. Position 1 is recommended for wide labels. Hier ist die Druckkopfabstützung (2) vollkommen In this position, the printhead support (2) is completely deaktiviert. disabled. 3. Für schmale Etiketten lösen Sie die Rändelschraube (3) 3.
-
Page 53: Justage Des Druckkopfandrucks
Justage des Druckkopfandrucks Adjusting the printhead pressure Die Messung der Kopfandruckkraft muss The printhead pressure must be ohne Druckkopfabstützung erfolgen! measured without the printhead support. Messung des Druckkopfandrucks: Measuring the printhead pressure: Die Messung des Druckkopfandrucks erfolgt indirekt. The printhead pressure is measured indirectly. Dazu werden 2 Teflonband-Streifen, Artikel-Nr. -
Page 54: Justage Des Transferfolienlaufs
Justage des Transferfolienlaufs Adjusting the transfer ribbon Wenn im Lauf der Transferfolie (1) Faltenbildungen If wrinkles appear in the transfer ribbon (1) which cause an auftreten, die zu Druckbildfehlern führen, kann das inconsistent printed image, the ribbon shield (2) can be Transferfolienumlenkblech (2) zur Korrektur des Fehlers adjusted to remove the wrinkles. -
Page 55: Justage Der Wickelmomente
Justage der Wickelmomente Adjusting the hub torques Lebensgefahr! Danger to life and limb Trennen Sie den Drucker vom Netz- Disconnect the printer from the mains anschluss sonst besteht Lebensgefahr connection, otherwise there is a risk to durch spannungsführende Leiter im life and limb from the live wires inside the Innern des geöffneten Druckers! open printer. - Page 56 Zur Messung gehen Sie wie folgt vor: Measure as follows: 1. Trennen Sie den Drucker vom Netzanschluss! 1. Disconnect the printer from the mains connection. 2. Demontieren Sie die Rückwand. 2. Remove the rear cover of the printer. 3. Entnehmen Sie die Transferfolie aus dem Drucker. 3.
- Page 57 Set values: Sollwerte: Internal rewinder Interner Aufwickler = 28 - 32 Ncm = 14 - 16 N = 28 - 32 Ncm = 14 - 16 N. Zur Messung gehen Sie wie folgt vor: Measure as follows: 1. Trennen Sie den Drucker vom Netzanschluss! 1.
- Page 58 Gehen Sie zur Justage wie folgt vor: Make the adjustment as follows: 1. Drucker vom Netz trennen. 1. Unplug the power cable. 2. Rückwand demontieren. 2. Remove the rear cover. 3. Wickelmoment durch Drehen an der Rändelmutter der 3. Adjust the winding torque by turning the knurled nut of jeweiligen Kupplung (7, 8, 9) ändern: the corresponding clutch (7, 8, 9): - Drehung im Uhrzeigersinn - höheres Moment...
-
Page 59: Justage Kopfschalter
Justage Kopfschalter Adjusting the head switch Lebensgefahr! Danger to life and limb Trennen Sie den Drucker vom Netz- Disconnect the printer from the mains anschluss sonst besteht Lebensgefahr connection, otherwise there is a risk to durch spannungsführende Leiter im life and limb from the live wires inside the Innern des geöffneten Druckers! open printer. -
Page 60: Justage Riemenspannung Motor Hauptantrieb
Justage Riemenspannung Adjusting the belt tension Motor Hauptantrieb of the main motor drive Lebensgefahr! Danger to life and limb Trennen Sie den Drucker vom Netz- Disconnect the printer from the mains anschluss sonst besteht Lebensgefahr connection, otherwise there is a risk to durch spannungsführende Leiter im life and limb from the live wires inside the Innern des geöffneten Druckers! -
Page 61: Fehler Während Des Druckbetriebs
Fehlersuche und Fehler- Trouble diagnosis and beseitigung correction Fehler während des Druckbetriebs Errors during printing Symptom Ursache und Lösung Symptom Cause and solution 1. Transferfolienumlenkblech nicht Thermal transfer 1. Ribbon shield is not correctly Thermotransferfolie knittert korrekt justiert, Justage überprü- ribbon creased adjusted;... - Page 62 Symptom Ursache und Lösung Symptom Cause and solution Printer prints 1. Printer in monitor (ASCII Drucker druckt Folge 1. Drucker im Monitormodus; sequence of characters dump) mode; quit this mode von Zeichen anstelle Abbruch des Monitormodus instead of label format by pressing the key.
-
Page 63: Ausfall Von Gerätefunktionen
Ausfall von Gerätefunktionen Failure of device functions Fehler Mögliche Lösungen Error Possible Solutions No movement of 1. Mechanical check of the gears and keine Funktion 1. Getriebe mechanisch überprüfen material belts, replace damaged gears or belts Materialtransport 2. Wechsel der Leiterplatte CPU 2. -
Page 64: Permanent Angezeigte Hardwarefehler
Permanent angezeigte Hardware- Permanently displayed hardware fehler errors Fehlermeldung Ursache und Lösung Error Cause and Solution A/D-Wandler Fehler der Leiterplatte CPU, ADC malfunction Error of CPU PCB; defekt LP austauschen replace PCB dRAM defekt Fehler der Leiterplatte CPU, dRAM Error of CPU PCB; LP austauschen malfunction replace PCB... - Page 65 Fehlermeldung Ursache und Lösung Error Cause and Solution 5V ext. 5V am Centronicsanschluss zu 5V ext. 5V at the Centronics interface too low an niedrig; evtl. Schnittstellenwandler interface converter with a current mit zu hohem Stromverbrauch consumption which is too high may have angeschlossen;...
-
Page 67: Ersatzteilliste
Gültigkeit Application Diese Ersatzteilliste gilt für die Geräte ab Serien-Nr. 1001. The following spare parts list applies for the A3 printers starting from serial number 1001 . Die Ersatzteile für Geräte bis Serien-Nr. 999 finden Sie in The spare parts for the printers up to serial number 999 are der Ausgabe 12/01 der Ersatztteilliste A3. - Page 68 Description Pieces 5902241 Screw DIN7984-M4x10-galZn 5943009 Cover Plate 5901574 Cable Clamp ACC38-A 5902241 Screw DIN7984-M4x10-galZn 5550122 Main Board A3 (PCB CPU) 5943130 Bolt 5943182 Heat Conductor Foil 5902241 Screw DIN7984-M4x10-galZn 5943179 Light Conductor 5917429 Flex Cable 8-pin R1 100mm 5901583...
- Page 69 Index 2 02-02-15 ab Serien-Nr. 1001 from Serial No. 1001 Art.-Nr. Bezeichnung Stck. 5943107 Anschlusskabel 5902241 Zylinderschraube DIN7984-M4x10-galZn 5901509 Kabelhalter Nr. 7422770 5902241 Zylinderschraube DIN7984-M4x10-galZn 5943197 Abdeckblech 5902358 Zylinderschraube DIN7984-M4x6-8.8-galZn 5943106 Netzteil 5943112 Isolierplatte 5943105 Steckerblech mont. 5902241 Zylinderschraube DIN7984-M4x10-galZn 5902358 Zylinderschraube DIN7984-M4x6-8.8-galZn 5903011...
- Page 70 5905325 Druckfeder D-096 5946111 Druckstück 5904542 Gewindestift DIN914-M5x20 5903051 Passscheibe DIN988-4x8x0.2 5943155 Kopfschraube 5903525 Sicherungsscheibe DIN6799-4-galZn 5946100 Kopfbaugruppe A3/203 A3/203R A3/300 A3/300R Baugruppe Part.-No. Description Pieces 5942394 Printhead Cable 1 5942395 Printhead Cable 2 5942370 Printhead 203dpi Type 4203 1)2)
- Page 71 Index 2 02-02-15 ab Serien-Nr. 1001 from Serial No. 1001 Art.-Nr. Bezeichnung Stck. 5903521 Sicherungsring DIN471-A6 5943053 Kurve, mont. 5902399 EJOT-PT-Schraube KA22x12-WN1412-galZn 5942386 Schalter-Kopf, kpl. 5902241 Zylinderschraube DIN7984-M4x10-galZn 5943152 Zwischenträger Kopfschalter 5903521 Sicherungsring DIN471-A6 5534433 Kurbel, kpl. 5903521 Sicherungsring DIN471-A6 5902348 Zylinderschraube DIN7984-M4x16-8.8-galZn 5943192...
- Page 72 Rändelschraube M3x20-4.8-galZn 5946113 Schlüssel 5946115 Blende spenden, kpl. 5943186 LP Spendeelektronik, kpl. 5902025 EJOT-PT-Schraube KB30x6-WN1412-galZn 5943174 Spendekante, mont. A3/203R A3/300R Teil der Option "Spendelichtschranke PS1" Part.-No. Description Pieces 5917430 Flex Cable 6-pin R1 500mm 5902241 Screw DIN7984-M4x10-galZn 5902348 Screw DIN7984-M4x16-8.8-galZn...
- Page 73 5905649 Zahnriemen 106MXL037 5902241 Zylinderschraube DIN7984-M4x10-galZn 5942383 Motor Hauptantrieb 5530426 Riemenrad Hauptantrieb 5943125 Umlenkachse 5943024 Rollenhalter, kpl. 5902655 Rändelschraube M3x20-4.8-galZn 5903004 Scheibe DIN125-A3.2-galZn 5943021 Führung 5902505 Sechskantmutter DIN934-M3-8-galZn A3/203 A3/203R A3/300 A3/300R Part.-No. Description Pieces 5905196 Belt 120.0MXL 037 1)3)
- Page 74 Index 2 02-02-15 ab Serien-Nr. 1001 from Serial No. 1001 Art.-Nr. Bezeichnung Stck. 5943086 Bremse-Abwickler 5903035 Passscheibe DIN988-8x14x1.0 5943048 Drehfeder 5903516 Sicherungsring DIN471-8-galZn 5903038 Passscheibe DIN988-8x14x0.2 5533968 Vierscheibenkupplung 5943045 Riemenrad 42-12, kpl. 5903102 Kotflügelscheibe 30x8.4x1.25-galZn 5901090 Rillenkugellager DIN625-F608-ZZ 5943123 Bremsring, kpl. 5903516 Sicherungsring DIN471-8-galZn 5903020...
- Page 75 Scheibe DIN125-A4.3-galZn 2)4) 5902241 Zylinderschraube DIN7984-M4x10-galZn 2)4) 5902241 Zylinderschraube DIN7984-M4x10-galZn 2)4) 5943032 Abdeckkappe 1)3) 5943060 Interner Aufwickler IR1 A3/203 A3/203R A3/300 A3/300R Baugruppe Stückzahl nach Bedarf zur Minimierung des Lagerspiels Part.-No. Description Pieces 5533969 Eight-Disk Slipping Clutch, Part 1 2)4) 5943045...
-
Page 76: Ersatzteilregister
2)4) 5530426 Riemenrad Hauptantrieb 5530554 Spannrolle, kpl. 2)4) 5533968 Vierscheibenkupplung 5533969 Achtscheibenkupplung 2)4) 5534433 Kurbel, kpl. 5550122 Leiterplatte CPU A3, best. 5550611 Netzkabel 5901060 Nyliner 1320-506-00 5901082 Rillenkugellager DIN625-685-ZZ 5901090 Rillenkugellager DIN625-F608-ZZ 5901509 Kabelhalter Nr. 7422770 5901574 Kabelhalter ACC38-A 5901583... - Page 77 5902505 Sechskantmutter DIN934-M 3-8-galZn 5902520 Vierkantmutter DIN562-M 3 5902655 Rändelschraube M 3x20-4.8-galZn 5902658 Rändelschraube M 3x40-4.8-galZn 5903003 Scheibe DIN125-A4.3-galZn 2)4) 5903004 Scheibe DIN125-A3.2-galZn 5903011 Zahnscheibe DIN6797-A4.3-galZn 5903020 Passscheibe DIN988-8x14x0.5 2)4) 5903035 Passscheibe DIN988-8x14x1.0 5903038 Passscheibe DIN988-8x14x0.2 2)4) 5903051 Passscheibe DIN988-4x8x0.2 5903102 Kotflügelscheibe 30x8.4x1.25-galZn...
- Page 78 Flansch, kpl. 2)4) 5943081 Bedienfeld, mont. 5943082 Boden 5943086 Bremse-Abwickler 5943100 Schale 115mm, Dm 25.4 5943105 Steckerblech mont. 5943106 Netzteil A3 5943107 Anschlusskabel 5943112 Isolierplatte 5943113 Abdeckung oben 5943114 Lagerplatine oben 5943115 Lagerplatine unten 1) A3/203 3) A3/300 5) Teil der Option "Spendelichtschranke PS1"...
- Page 79 5946111 Druckstück 5946112 Profil oben 5946113 Schlüssel 5946115 Blende spenden, kpl. 9008199 Bedienungsanleitung A3, deutsch 9008200 Bedienungsanleitung A3, englisch (cab/Tharo) 9008214 A-Series Printer Accessories CD 9008215 Kurzanleitung deutsch/englisch 9008217 Bedienungsanleitung A3, englisch (cab) 9109135 Verpackung 1) A3/203 3) A3/300 5) Teil der Option "Spendelichtschranke PS1"...
-
Page 80: Spare Parts Register
2)4) 5533968 Four-Disk Slipping Clutch, Part 1 5533969 Eight-Disk Slipping Clutch, Part 1 2)4) 5534433 Plate, Swing Arm 5550122 M ain Board A3 (PCB CPU) 5550611 Power Cable 5901060 Nyliner 1320-506-00 5901082 Ball Bearing DIN625-685-ZZ 5901090 Ball Bearing DIN625-F608-ZZ 5901509 Cable Clamp No. - Page 81 Nut DIN934 M 3-8-galZn 5902520 Square Nut DIN562-M 3 5902655 Thumbscrew M 3x20-4.8-galZn 5902658 Thumbscrew M 3x40-4.8-galZn 5903003 Washer DIN125-A4.3-galZn 2)4) 5903004 Washer DIN125-A3.2-galZn 5903011 Toothed Washer DIN6797-A4.3-galZn 5903020 Washer DIN988-8x14x0.5 2)4) 5903035 Washer DIN988-8x14x1.0 5903038 Washer DIN988-8x14x0.2 2)4) 5903051 Washer DIN988-4x8x0.2...
- Page 82 Power Input M odule 5943106 Power Supply 5943107 Cable 5943112 Insulator Plate 5943113 Top Cover 5943114 Upper Side Plate 5943115 Lower Side Plate 1) A3/203 3) A3/300 5) Part of the optional "Present Sensor PS1" 2) A3/203R 4) A3/300R Assy Assembly...
- Page 83 Upper Profile 5946113 Allen Key 5946115 Cover Present Sensor Electronics 9008199 Operator's M anual A3, German 9008200 Operator's M anual A3, English (cab/Tharo) 9008214 A-Series Printer Accessories CD 9008215 Quick Operator's Guide German/English 9008217 Operator's M anual A3, English (cab) 9109135...
-
Page 84: Blockschaltbild
Index 02-01-23 Anlage B: Blockschaltbild Appendix B: Block Diagram... - Page 85 Index 02-01-23 Anlage C: Stromlaufplan Leiterplatte CPU : CPU, Takt, Uhr, BDM Appendix C: Circuit Diagram Mainboard (PCB CPU) : CPU, Clock Timer, Clock, BDM...
- Page 86 Index 02-01-23 Anlage C: Stromlaufplan Leiterplatte CPU : Centronics, Interface Slot, RS-232 Appendix C: Circuit Diagram Mainboard (PCB CPU) : Centronics, Interface Slot, RS-232...
- Page 87 Index 02-01-23 Anlage C: Stromlaufplan Leiterplatte CPU : dRAM, Flash Appendix C: Circuit Diagram Mainboard (PCB CPU) : dRAM, Flash...
- Page 88 Index 02-01-23 Anlage C: Stromlaufplan Leiterplatte CPU : Druckkopfanschluss Appendix C: Circuit Diagram Mainboard (PCB CPU) : Printhead Connection...
- Page 89 Index 02-01-23 Anlage C: Stromlaufplan Leiterplatte CPU : FPGA, History-RAM Appendix C: Circuit Diagram Mainboard (PCB CPU) : FPGA, History-RAM...
- Page 90 Index 02-01-23 Anlage C: Stromlaufplan Leiterplatte CPU : Netzteil, Antrieb Appendix C: Circuit Diagram Mainboard (PCB CPU) : Power Supply, Motor Driver...
- Page 91 Index 02-01-23 Anlage C: Stromlaufplan Leiterplatte CPU : Sensoren, AD-Wandler, Druckkopfverriegelung Appendix C: Circuit Diagram Mainboard (PCB CPU) : Sensors, AD Converter, Printhead Lock Sensor...
- Page 92 Index 02-01-23 Anlage C: Stromlaufplan Leiterplatte CPU : USB-Host Appendix C: Circuit Diagram Mainboard (PCB CPU) : USB-Host...
- Page 93 Index 02-01-23 Anlage C: Stromlaufplan Leiterplatte Bedienfeld 1 Appendix C: Circuit Diagram PCB Control Panel 1...
- Page 94 Index 02-01-23 Anlage C: Stromlaufplan Leiterplatte Bedienfeld 2 Appendix C: Circuit Diagram PCB Control Panel 2...
- Page 95 02-01-23 Anlage D: Belegungsplan Leiterplatte CPU : Bestückungsseite Appendix D: Layout Diagram Mainboard (PCB CPU) : Component's side...
- Page 96 02-01-23 Anlage D: Belegungsplan Leiterplatte CPU : Lötseite Appendix D: Layout Diagram Mainboard (PCB CPU) : Soldering side Wichtige Messpunkte Important Measuring Points 1 - 24 V 2 - GND 3 - V 4 - 24 V ext. (Peripherals) 5 - 3,3 V 6 - 5 V 7 - 2,5 V 8 - 5 V ext.
- Page 97 02-01-23 Anlage D: Belegungsplan Leiterplatte Bedienfeld 1 Anlage D: Belegungsplan Leiterplatte Bedienfeld 2 Appendix D: Layout Diagram PCB Control Panel 1 Appendix D: Layout Diagram PCB Control Panel 2 Bestückungsseite Component's side Bestückungsseite Component's side Lötseite Soldering side...
- Page 98 Stichwortverzeichnis Index Abgleich des Etikettensensors ......... 22 A3 parts ................8 Abgleich des Transferfoliesensors ........22 Adjust gap sensor ............. 23 Abgleich Etikettenlichtschranke ........23 Adjust ribbon sensor ............23 Abgleich Transferfolienlichtschranke ......23 Adjustments ..............48 Abgleiche ................48 Adjust label edge sensor ...........
- Page 99 Fehlerbeseitigung ............. 59 Hardware fault ............22, 62 Fehlersuche ............... 59 Head switch ..............57 Firmware-Updates ............22 Head switch, adjustment ..........57 FlashCard ................. 20 Hub torques, adjustment ........... 53 Fonts ................. 11 Hub, transfer ribbon ............37 Geräteeinstellungen ............15 Installed USB devices ............
- Page 100 Slipping clutches, replacement ........36 Special tools ..............32 Status messages: ............... 12 Technische Daten ............. 10 Status printout ............17, 18 Teile des A3 ................ 8 Testeinrichtungen ............. 12 Testgitter ................17 Technical Specifications ..........10 Transferfolie ..............10 Test grid ................
- Page 101 Index...
Need help?
Do you have a question about the A3 and is the answer not in the manual?
Questions and answers