
Related Manuals for Electrolux EOA5551AOX


Summary of Contents for Electrolux EOA5551AOX
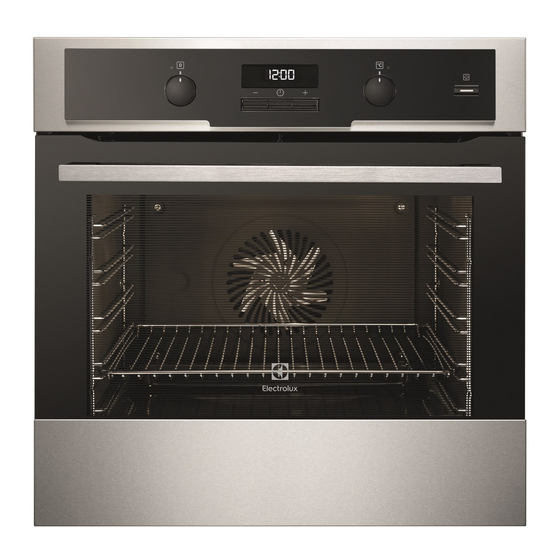
- Page 1 ..................... EOA5551AOX EN OVEN USER MANUAL RO CUPTOR MANUAL DE UTILIZARE...
-
Page 2: Table Of Contents
13. INSTALLATION ............25 WE’RE THINKING OF YOU Thank you for purchasing an Electrolux appliance. You’ve chosen a product that brings with it decades of professional experience and innovation. Ingenious and stylish, it has been designed with you in mind. -
Page 3: Safety Information
ENGLISH 1. SAFETY INFORMATION Before the installation and use of the appliance, carefully read the supplied instructions. The manufacturer is not responsible if an incorrect installation and use causes in- juries and damages. Always keep the instructions with the appliance for future reference. 1.1 Children and vulnerable people safety WARNING! Risk of suffocation, injury or permanent disability. -
Page 4: Safety Instructions
• Before maintenance cut the power supply. • Do not use harsh abrasive cleaners or sharp metal scrapers to clean the glass door since they can scratch the surface, which may result in shattering of the glass. • Only use the core temperature sensor recommended for this appliance. -
Page 5: Care And Cleaning
ENGLISH • Connect the mains plug to the mains • Do not put flammable products or items socket only at the end of the installa- that are wet with flammable products tion. Make sure that there is access to in, near or on the appliance. the mains plug after the installation. -
Page 6: Product Description
• If you use an oven spray, obey the safe- • Only use lamps with the same specifi- ty instructions on the packaging. cations. • Do not clean the catalytic enamel (if ap- plicable) with any kind of detergent. -
Page 7: Daily Use
ENGLISH 4.1 Initial cleaning To change the time, press again and again until the indicator • Remove all accessories and removable for the Time of Day function flash- shelf supports (if applicable). es. You must not set the Duration • Clean the appliance before first use. or End function at the same time. -
Page 8: Oven Functions
5.2 Oven functions Oven function Application Off position The appliance is off. Light To activate the oven lamp without a cooking function. Conventional To bake and roast on one oven level. The top and Cooking bottom heating elements operate at the same time. -
Page 9: Clock Functions
ENGLISH 6. CLOCK FUNCTIONS 6.1 Electronic programmer Function indicators Time and temperature display Function indicator Indicator for the core temperature sensor hr min Button Selection button Button Clock function Application Time of day To set, change or check the time of day. Minute Minder To set a countdown time. -
Page 10: Using The Accessories
10 www.electrolux.com Press and hold the button -. 6.3 Cancelling the clock functions The clock function goes out after some seconds. Press the Selection button again and again until the necessary function in- dicator flashes. 7. USING THE ACCESSORIES WARNING! Put the core temperature sensor plug Refer to the Safety chapters. -
Page 11: Additional Functions
ENGLISH 7.2 Telescopic runners Pull out the right and left hand tele- scopic runners. °C Put the wire shelf on the telescopic runners and carefully push them into °C the appliance. Make sure you push back the tele- scopic runners fully in the appliance before you close the oven door. -
Page 12: Helpful Hints And Tips
12 www.electrolux.com 9. HELPFUL HINTS AND TIPS um foil on the components when you 9.1 Inner side of the door cook. This can change the baking re- In some models, on the inner side of sults and cause damage to the enamel. - Page 13 ENGLISH Conventional True Fan Cook- Cooking Cooking TYPE OF time Notes DISH Shelf Temp Shelf po- Temp [min] position [°C] sition [°C] Buttermilk 60 - 80 In a 26 cm cheesecake cake mould Apple cake 2 (left and 80 - 100 In two 20 cm (Apple pie) right)
- Page 14 14 www.electrolux.com Conventional True Fan Cook- Cooking Cooking TYPE OF time Notes DISH Shelf Temp Shelf po- Temp [min] position [°C] sition [°C] Buns 12 - 20 In a baking tray Eclairs - one 25 - 35 In a baking...
- Page 15 ENGLISH Conventional True Fan Cook- Cooking Cooking TYPE OF time Notes DISH Shelf Temp Shelf po- Temp [min] position [°C] sition [°C] Vegetable 45 - 60 In a mould flan Quiches 50 - 60 In a mould Lasagne 180 - 180 - 25 - 40 In a mould...
- Page 16 16 www.electrolux.com Conventional True Fan Cook- Cooking Cooking TYPE OF time Notes DISH Shelf Temp Shelf po- Temp [min] position [°C] sition [°C] Goose 150 - Whole Rabbit 60 - 80 Cut in pieces Hare 150 - Cut in pieces...
-
Page 17: Turbo Grilling
ENGLISH 9.7 Turbo Grilling Beef Shelf posi- Tempera- TYPE OF DISH Quantity Time [min] tion ture [°C] Roast beef or fil- per cm of 1 or 2 5 - 6 190 - 200 let, rare thickness Roast beef or fil- per cm of 1 or 2 6 - 8... - Page 18 18 www.electrolux.com TYPE OF Quantity Shelf posi- Temperature Time [min] DISH tion [°C] Chicken , half 400 - 500 g 1 or 2 190 - 210 35 - 50 each Chicken, pou- 1 - 1.5 kg 1 or 2 190 - 210...
-
Page 19: Care And Cleaning
ENGLISH VEGETABLES Shelf position TYPE OF Temperature Time [hr] DISH [°C] 1 level 2 levels Beans 60 - 70 6 - 8 Peppers 60 - 70 5 - 6 Vegetables for 60 - 70 5 - 6 soup Mushrooms 50 - 60 6 - 8 Herbs 40 - 50... -
Page 20: Removing The Side Rails
20 www.electrolux.com • To clean metal surfaces use a usual frame of the oven cavity. Do not use the cleaning agent. appliance if the door gasket is dam- aged. Contact the Service Centre. • Clean the oven interior after each use. -
Page 21: Installing The Shelf Supports
ENGLISH Installing the shelf supports 10.4 Oven lamp Install the shelf supports in the opposite WARNING! sequence. Be careful when you change the oven lamp. There is a risk of elec- The rounded ends of the shelf trical shock. supports must point to the front. Before you change the oven lamp: 10.3 Catalytic walls •... - Page 22 22 www.electrolux.com Removing the oven door and the glass panel Fully open the door and identify the hinge to the right side of the door. Push the tightening component until it pulls back. Hold the pushed component with one hand. Use a screwdriver with the other hand to lift and turn the right side hinge lever.
- Page 23 ENGLISH Lift and turn the lever on the left hinge. Close the oven door to the first open- ing position (halfway). Then pull for- ward and remove the door from its seat. Put the door on a soft cloth on a sta- ble surface.
-
Page 24: What To Do If
24 www.electrolux.com Turn the two fasteners by 90° and re- move them from their seats. 90° Carefully lift (step 1) and remove (step 2) the glass panels one by one. Start from the top panel. Clean the glass panels with water and soap. -
Page 25: Technical Data
ENGLISH Problem Possible cause Remedy The oven does not heat The clock is not set. Set the clock. The oven does not heat The necessary settings Make sure that the set- are not set. tings are correct. The oven does not heat The fuse in the fuse box Do a check of the fuse. - Page 26 26 www.electrolux.com 13.1 Building In 13.2 Electrical installation WARNING! Only a qualified person must do the electrical installation. The manufacturer is not responsi- ble if you do not follow the safety precautions from the chapter "Safety Information". This appliance is supplied with a main plug and a main cable.
-
Page 27: Environment Concerns
ENGLISH 14. ENVIRONMENT CONCERNS Recycle the materials with the symbol and electronic appliances. Do not dispose . Put the packaging in applicable appliances marked with the symbol containers to recycle it. with the household waste. Return the Help protect the environment and human product to your local recycling facility or health and to recycle waste of electrical contact your municipal office.
Need help?
Do you have a question about the EOA5551AOX and is the answer not in the manual?
Questions and answers