Table of Contents
Advertisement
Quick Links
Advertisement
Table of Contents

Subscribe to Our Youtube Channel
Related Manuals for Electrolux EOA5750AOX


Summary of Contents for Electrolux EOA5750AOX
- Page 1 EOA5750AOX Oven User Manual...
-
Page 2: Table Of Contents
15. ENERGY EFFICIENCY.................. 36 WE’RE THINKING OF YOU Thank you for purchasing an Electrolux appliance. You’ve chosen a product that brings with it decades of professional experience and innovation. Ingenious and stylish, it has been designed with you in mind. So whenever you use it, you can be safe in the knowledge that you’ll get great results every time. -
Page 3: Safety Information
ENGLISH SAFETY INFORMATION Before the installation and use of the appliance, carefully read the supplied instructions. The manufacturer is not responsible for any injuries or damage that are the result of incorrect installation or usage. Always keep the instructions in a safe and accessible location for future reference. -
Page 4: Safety Instructions
WARNING: The appliance and its accessible parts • become hot during use. Care should be taken to avoid touching heating elements. Always use oven gloves to remove or put in • accessories or ovenware. Before carrying out any maintenance, disconnect the •... - Page 5 ENGLISH • Do not use multi-plug adapters and extension cables. Cabinet minimum 590 (600) mm • Make sure not to cause damage to height (Cabinet un‐ the mains plug and to the mains der the worktop cable. Should the mains cable need to minimum height) be replaced, this must be carried out Cabinet width...
- Page 6 – do not put aluminium foil directly on the bottom of cavity of the Total power (W) Section of the ca‐ appliance. ble (mm²) – do not put water directly into the maximum 3680 3 x 1.5 hot appliance.
-
Page 7: Installation
ENGLISH 2.6 Service • Clean the appliance with a moist soft cloth. Only use neutral detergents. Do • To repair the appliance contact the not use any abrasive products, Authorised Service Centre. abrasive cleaning pads, solvents or • Use original spare parts only. metal objects. - Page 8 550 min. 560 3.2 Securing the oven to the cabinet...
-
Page 9: Product Description
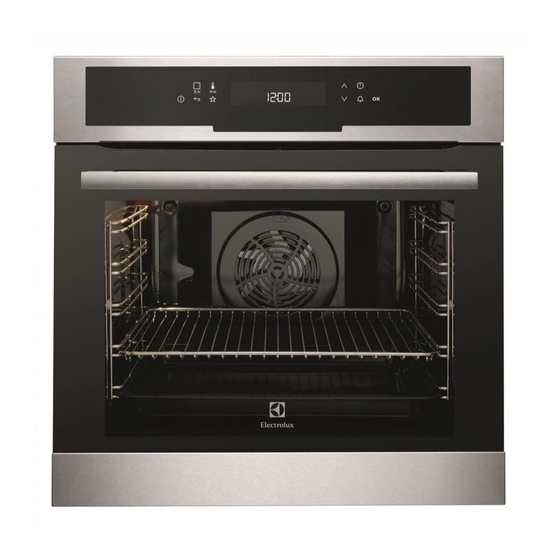
ENGLISH 4. PRODUCT DESCRIPTION 4.1 General overview Control panel Electronic programmer Heating element Lamp Shelf support, removable Shelf positions 4.2 Accessories • Extra deep pan To make a moussaka. • Wire shelf • Telescopic runners For cookware, cake tins, roasts. For shelves and trays. - Page 10 Sensor Function Description Field TEMPERATURE / To set and examine the cavity temperature or FAST HEAT UP the core temperature sensor temperature (if present). If you press it and hold for three seconds, it turns the Fast heat up function ON and OFF.
-
Page 11: Before First Use
ENGLISH Symbol Name Description Heat-up / residual heat indi‐ Shows the temperature level of the cator oven. Temperature / fast heat up The function works. Temperature You can examine or change the tem‐ perature. Minute minder The minute minder function works. 5.3 Heat up indicator When the oven is at the set temperature, the bars go off the display. - Page 12 7.1 Heating functions Oven func‐ Application tion Oven func‐ Application tion This function is de‐ signed to save energy To bake on up to three during cooking. For the shelf positions at the Moist Fan cooking instructions re‐ same time and to dry Baking fer to "Hints and tips"...
-
Page 13: Clock Functions
ENGLISH When the oven is at the set temperature a signal sounds and the Heat up Oven func‐ Application indicator disappears. tion 7.4 Checking the temperature To grill flat food in large quantities and to toast You can check the current temperature bread. - Page 14 Clock function Application MINUTE MINDER To set a countdown time. This function has no effect on the operation of the oven. You can set the MI‐ NUTE MINDER at any time and also when the oven is off. 00:00 COUNT UP TIMER To set the count up, which shows how long the oven works.
-
Page 15: Automatic Programmes
ENGLISH stops at the set END time. When the set 2. Press to switch between options. time ends, the signal sounds for 2 First you set the seconds, then the minutes. The display shows flashing minutes and the hours. and the time setting . The oven turns off 3. -
Page 16: Using The Accessories
The display shows the number of the 1. Activate the appliance. automatic programme (1 – 9). 2. Touch 3. Touch to choose the 3. Touch to set the weight automatic programme. programme. 4. Touch or wait five seconds until... -
Page 17: Additional Functions
ENGLISH 2. Put the wire shelf on the telescopic Small indentation at the top runners and carefully push them into increase safety. The the oven. indentations are also anti-tip devices. The high rim around the shelf prevents °C cookware from slipping of the shelf. - Page 18 11.2 Using the Child Lock 1. To turn on the function turn on the oven. The Child Lock prevents an accidental 2. Turn on an oven function or setting. operation of the oven. 3. Touch and hold at the 1.
-
Page 19: Hints And Tips
ENGLISH the Minute Minder function ends, The Automatic switch-off the display goes back to the night does not work with the brightness. functions: Light, Slow Cooking, Duration, End, 11.7 Cooling fan Time delay. When the oven operates, the cooling fan 11.6 Brightness of the display turns on automatically to keep the surfaces of the oven cool. - Page 20 Cooking times setting, cooking time, etc.) for your Cooking times depend on the type of cookware, recipes and quantities when food, its consistency, and volume. you use this appliance. Initially, monitor the performance when you cook. Find the best settings (heat 12.2 Baking and roasting...
- Page 21 ENGLISH CAKES Conventional True Fan Cooking Cooking (min) (°C) (°C) Eclairs, two 2 and 4 35 - 45 Baking tray levels Plate tarts 45 - 70 Cake mould, Ø 20 cm Rich fruit 110 - Cake mould, Ø 24 cm cake Victoria 30 - 50...
- Page 22 FLANS Conventional Cook‐ True Fan Cooking (min) (°C) (°C) Pasta flan, preheating is 40 - 50 not needed Vegetable flan, preheating 45 - 60 is not needed Quiches 50 - 60 Lasagne 180 - 190 180 - 190 25 - 40...
- Page 23 ENGLISH MEAT Conventional Cook‐ True Fan Cooking (min) (°C) (°C) Pork shoulder, with rind 120 - 150 Pork shin, 2 pieces 100 - 120 Leg of lamb 110 - 130 Whole chicken 70 - 85 Whole turkey 210 - 240 Whole duck 120 - 150 Whole goose...
- Page 24 GRILL (kg) (min) (min) 1st side 2nd side Fillet steaks, 4 pieces 12 - 15 12 - 14 Beef steak, 4 pieces 10 - 12 6 - 8 Sausages, 8 12 - 15 10 - 12 Pork chops, 4 pieces...
- Page 25 ENGLISH VEAL POULTRY (°C) (min) (°C) (min) Roast veal, 1 kg 160 - 180 90 - 120 Goose, 3.5 - 5 160 - 180 120 - 180 Veal knuckle, 1.5 160 - 180 120 - 150 - 2 kg Turkey, 2.5 - 3.5 160 - 180 120 - 150 Turkey, 4 - 6 kg 140 - 160 150 - 240...
- Page 26 Set the temperature to 120 °C. (kg) (min) Steaks 0.2 - 0.3 20 - 40 Fillet of beef 1 - 1.5 90 - 150 Roast beef 1 - 1.5 120 - 150 Roast veal 1 - 1.5 120 - 150 12.6 Defrost...
- Page 27 ENGLISH 12.8 Drying - True Fan Cooking or decrease the temperature to 100 °C (see the table). Cover trays with grease proof paper or Set the temperature to 160 - 170 °C. baking parchment. For a better result, stop the oven halfway through the drying time, open the door SOFT FRUIT and let it cool down for one night to...
- Page 28 Ramekins Pizza pan Baking dish Flan base tin Ceramic Dark, non-reflective Dark, non-reflective 8 cm diame‐ Dark, non-reflective 28 cm diameter 26 cm diameter ter, 5 cm 28 cm diameter height 12.10 Moist Fan Baking For the best results follow suggestions listed in the table below.
- Page 29 ENGLISH (°C) (min) Shashlik, 0.5 kg baking tray or dripping 25 - 30 Cookies, 16 baking tray or dripping 20 - 30 pieces Macaroons, 24 baking tray or dripping 25 - 35 pieces Muffins, 12 baking tray or dripping 30 - 40 pieces Savory pastry, baking tray or dripping...
- Page 30 (°C) (min) Small True Fan Baking 2 and 150 - 20 - 35 cakes, Cooking tray 20 per tray Apple Conven‐ Wire 70 - 90 pie, 2 tional Cook‐ shelf tins Ø20 Apple True Fan Wire 70 - 90...
-
Page 31: Care And Cleaning
ENGLISH (°C) (min) Beef bur‐ Grilling Wire max. 20 - 30 Put the wire shelf ger, 6 shelf and on the fourth lev‐ pieces, dripping el and the drip‐ 0.6 kg ping pan on the third level of the oven. Turn the food halfway through the cooking time. - Page 32 13.3 Cleaning the door gasket 13.5 Catalytic fan cover Regularly do a check of the door gasket. CAUTION! The door gasket is around the frame of Do not clean the catalytic the oven cavity. Do not use the oven if surface with oven sprays, the door gasket is damaged.
- Page 33 ENGLISH 3. Find the hinge to the left side of the 6. Put the door on a soft cloth on a door. stable surface. 7. Hold the door trim (B) on the top edge of the door at the two sides and push inwards to release the clip seal.
-
Page 34: Troubleshooting
13.7 Replacing the lamp Check for the symbol / printing on the side of the glass panel, each of the glass panels looks different to make the WARNING! disassembly and assembly easier. Risk of electric shock. The lamp can be hot. - Page 35 ENGLISH Problem Possible cause Remedy The oven does not heat The necessary settings are Make sure that the settings not set. are correct. The oven does not heat The automatic switch-off is Refer to "Automatic switch- activated. off". The oven does not heat The Child Lock is on.
-
Page 36: Energy Efficiency
......... 15. ENERGY EFFICIENCY 15.1 Product Information Sheet Product information according to EU 65-66/2014 Supplier's name Electrolux Model identification EOA5750AOX 949497501 Energy Efficiency Index 81.2 Energy efficiency class Energy consumption with a standard load, con‐ 0.93 kWh/cycle ventional mode Energy consumption with a standard load, fan- 0.69 kWh/cycle... - Page 37 ENGLISH shows the residual heat. You can use Moist Fan Baking that heat to keep the food warm. Function designed to save energy during cooking. When the cooking duration is longer than 30 minutes, reduce the oven temperature When you use this function the lamp to minimum 3 - 10 minutes before the automatically turns off after 30 seconds.
- Page 38 www.electrolux.com...
- Page 39 ENGLISH...
- Page 40 www.electrolux.com/shop...
Need help?
Do you have a question about the EOA5750AOX and is the answer not in the manual?
Questions and answers