Table of Contents
Advertisement
Quick Links
Advertisement
Table of Contents

Related Manuals for Doro PhoneEasy 620


Summary of Contents for Doro PhoneEasy 620
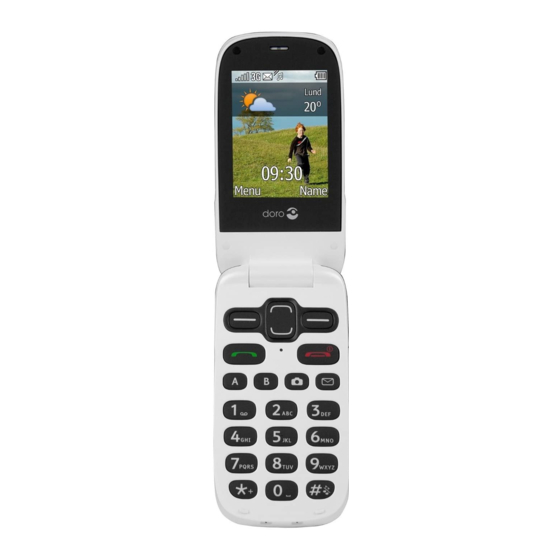
- Page 1 Doro PhoneEasy ® English (US)
-
Page 2: Product View
English Earpiece 15. Charging socket 16. Headset socket Display Arrow buttons 17. Assistance button 18. Camera lens Left selection button Call button 19. Flash 20. External display Speed dial Voice mail 21. Loudspeaker Input method/Silent 22. Green light = New message / Missed call Camera shortcut 23. -
Page 4: Table Of Contents
English (US) Contents Installation ..................... 1 Install the SIM card, memory card and the battery ......1 Charging......................2 Get to know your phone ................2 Assistive functions................. 2 Turn the phone on and off ..............3 Phone indicators ................... 3 External display .................. - Page 5 English (US) Call log......................19 Retrieve and dial .................19 Camera......................19 Camera adjustments................20 Image viewer....................20 Connecting the phone to a computer ............21 Drag and drop content between phone and a computer ....21 Disconnect the USB cable safely............21 Settings ......................22 General....................22 Sound ....................25 Display....................
- Page 6 English (US) Disclaimer and Limitation of Liability............58 FCC/Industry Canada notice ..............59 Care and maintenance ................60 Battery disposal and recycling information ..........61 Warranty....................... 61 Support ......................62 Specifications ....................62...
-
Page 7: Installation
English (US) Installation IMPORTANT! Turn off the phone and disconnect the charger before removing the battery cover. Install the SIM card, memory card and the battery The SIM and memory card holders are located inside the battery compartment. Remove the battery cover and the battery if it is already installed. Optional: Insert the memory card into the slot under the SIM card holder. -
Page 8: Charging
English (US) Charging CAUTION Only use batteries, charger and accessories that have been approved for use with this particular model. Connecting other accessories may be dangerous and may invalidate the phones type approval and guarantee. When the battery is running low, is displayed and a warning signal is heard. -
Page 9: Turn The Phone On And Off
English (US) Turn the phone on and off Press and hold the red button on the phone to turn it on/off. Con- firm with Yes to power off. If the SIM card is valid but protected with a PIN code (Personal Identifica- tion Number), PIN is displayed. -
Page 10: External Display
OK. Example: • Press Menu Phonebook -New contact- Add. ® To perform the example on your Doro PhoneEasy 620 you should do the following: Press Menu, scroll to Phonebook and press OK. Select -New contact- and press Add. -
Page 11: Entering Text
English (US) Entering text Entering text manually Select character • Press a numerical key repeatedly until the desired character is shown. Wait a few seconds before entering the next character. Special characters Press * for a list of special characters. Select the desired character with and press OK to confirm. - Page 12 English (US) Input mode Press # to change input mode. The icon on the top left of the display in- dicates the input mode. Sentence case with predictive text UPPER CASE with predictive text lower case with predictive text Sentence case UPPER CASE lower case Numerals...
-
Page 13: Display Status Symbols
English (US) Display status symbols Signal strength No network coverage Ring only Unread message in Inbox Ring + vibration Alarm active Vibration only Battery level Silent Call divert activated Bluetooth on, visible to Roaming (in other network) others Bluetooth on, invisible to Missed call others Headset connected... -
Page 14: Call Functions
English (US) Emergency call Call on-hold vCard message SOS calls only Processing, please wait Volume control Call functions Make a call Enter the phone number including the area code. Delete with Clear. Press to dial. Press Cancel to cancel dialling. Press to end the call. -
Page 15: Volume Control
English (US) Volume control Use the side buttons +/– to adjust the sound volume during a call. The volume level is indicated on the display. If you use a hearing aid or have hearing difficulties when using the telephone in noisy environment, you can customize the phone's audio settings, see Audio setup , p.25. -
Page 16: Call Information
English (US) Call information During a call, the outgoing or incoming phone number and the elapsed call time is displayed. If the identity of the caller is withheld, Unknown is displayed. Speed dial Use A – B , 0 and 2 – 9 to speed dial an entry from standby. •... - Page 17 English (US) CAUTION When an assistance call is activated the phone is pre-set to handsfree/ speakerphone mode. Do not hold the device near your ear when the handsfree mode is in use, because the volume may be extremely loud. The assistance button allows easy access to contact your predefined help numbers (Number list) should you need help.
-
Page 18: Phonebook
English (US) IMPORTANT! Information to the receiver of an assistance call, when Confirm with "0" is activated: • After receiving the assistance message, each number in the Number list will be called sequentially. • To confirm the assistance call, the receiver needs to press 0 . •... -
Page 19: Manage Phonebook Contacts
English (US) the event of a trauma, it is critical to have this information as early as possible which can increase the chances of survival. All fields are option- al, but the more information provided the better. See ICE (In Case of Emergency) , p.15 on how to configure your ICE information. - Page 20 English (US) • Send vCard Send by MMS to send the selected phonebook contact as a vCard via picture message (MMS). Write your mes- sage and press Options to Add subject or Add picture. Add re- cipients with To and Send when ready. •...
-
Page 21: Ice (In Case Of Emergency)
English (US) ICE (In Case of Emergency) First responders can access additional information such as medical infor- mation from the victim's phone in case of emergency. In the event of a trauma, it is critical to have this information as early as possible to in- crease the chances of survival. -
Page 22: Messages
English (US) Messages You can create and send text messages (SMS), picture messages (MMS) and voice messages using the Messages menu. Create and send text messages (SMS) Note! Before you can send any text messages (SMS), you need to save your message centre number. -
Page 23: Create And Send A Voice Message
English (US) Write your message, see Entering text , p.5. Press Options Add picture: • My pictures to select a file. The picture size must be less than 600kB. • Take picture to use the camera to take a picture. You can also Add sound using the Options menu. -
Page 24: Inbox, Outbox And Sent
English (US) Inbox, Outbox and Sent Text message (SMS)/Picture Text message (SMS)/Pic- message (MMS) unread ture message (MMS) sent Text message (SMS)/Pic- Text message (SMS)/Picture ture message (MMS) message (MMS) read unsent Press Menu Messages. Select Inbox, Outbox or Sent. Select a message and press View. -
Page 25: Call Log
English (US) Call log Received, missed and dialled calls are saved in a combined call log. 20 calls of each type can be stored in the log. For multiple calls related to the same number, only the most recent call is saved. Retrieve and dial Press Alternatively, press Menu... -
Page 26: Camera Adjustments
English (US) • Wallpaper to save as display background. • Phonebook picture to save as phonebook contact. Press Back to take a new photo. If you do not make any selection the picture is saved. Camera adjustments • to zoom in and out. •... -
Page 27: Connecting The Phone To A Computer
English (US) Connecting the phone to a computer Connect the phone to a computer and start transferring pictures, music and other file types. All you have to do is connect a USB cable between the phone and computer. From your computer's file explorer, you can drag and drop content between your phone and the computer. -
Page 28: Settings
Computer instructions may vary depending on your operating system. See the documentation of your computer's operating system for more information. Settings ® Use the Settings menu to personalise your Doro PhoneEasy 620. General Time & date Set the time and date Press Menu Settings General. - Page 29 English (US) Language The default language for the phone menus, messages etc. is determined by the SIM card. You can change this to any other language supported by the phone. Press Menu Settings General Language. to select a language. Press OK to confirm. Start-up wizard Use the Start-up wizard to set some basic settings.
- Page 30 English (US) • Select network to view available network, a list of available net- work operators is displayed (after a short delay). Select desired operator. • Network mode to select another network. Select Automatic to select network automatically or Manual to select network man- ually.
-
Page 31: Sound
English (US) Note! The flashlight will drain the battery very quickly. Remember to turn it off after use. Phonebook storage Press Menu Settings General. Select Phonebook storage: • SIM to save 1 phone number per contact. Number and length of the phone numbers/contacts that can be stored will vary de- pending on SIM card/service provider preferences. - Page 32 English (US) • HAC mode for use with hearing aid in the T position. Press OK to confirm. Tone setup Press Menu Settings Sound. Select Tone setup Ringtone. to select one of the available melodies, the melody will be played. Press OK to confirm or Back to discard changes.
-
Page 33: Display
English (US) Extra tone Warning and error tones are used to alert you of low battery power, phone and SIM card errors etc. Press Menu Settings Sound Extra tone. Select Warning On/Off to enable/disable. Select Error On/Off to enable/disable. Press Done to save. Display Wallpaper You can select different display backgrounds. -
Page 34: Calls
English (US) LCD backlight Select the delay time for the display backlight. Press Menu Settings Display. Select LCD backlight: • 15 sec. • 30 sec. • 1 min Press OK to confirm. Brightness You can customise the phones brightness settings. Press Menu Settings Display... - Page 35 English (US) Tip: Press and hold shortcut button 1 to call your voice mail. If activated reminder in the Messages settings, a reminder signal will be heard after 10 minutes if not listening to new voice mail messages. Speed dial A , B , 0 and 2 –...
- Page 36 English (US) Call time During a call, the duration of the call is shown. You can check the dura- tion of your calls. Press Menu Settings Calls. Select Call time: • Last call to show the elapsed time of the most recent call. •...
- Page 37 English (US) You can handle more than one call at a time. An alert tone will be heard if there is an incoming call while talking. To put the current call on hold and answer the incoming call, press Options Answer.
-
Page 38: Messages
English (US) • Int. except home unable to call international numbers except to the country associated with the SIM card. Press OK to confirm. Select Incoming calls: • All calls to dial out but not receive incoming calls. • When roaming unable to receive incoming calls while roaming (operating in other networks). - Page 39 English (US) Storage Press Menu Settings Messages SMS settings. Select Storage: • SIM (default) to store messages on the SIM card. • Phone to store messages in the phone memory. Press OK to confirm. Profile set The Profile set number is needed to use the message function. The num- ber to your service centre is supplied by your service provider and is usu- ally set on the SIM card.
- Page 40 English (US) Select Memory status to displays the percentage of memory space used in the phone memory. Press Back to return. Storage Picture messages (MMS) are saved by default in the phone memory. When the memory becomes full you will need to either delete a picture message (see Inbox, Outbox and Sent, p.18) or select to save your picture messages on the memory card.
-
Page 41: Camera
English (US) Note! If Alert type is set to Ring only the phone will not vibrate. Delivery report You can select if you want the phone to notify you when your text mes- sage (SMS) or picture message (MMS) has reached the receiver. Press Menu Settings Messages. - Page 42 English (US) • On Normal to activate by pressing and holding the button for approximately 3 seconds, or press it twice within 1 second. • On (3) to activate by pressing the button 3 times within 1 second. • Off to disable the assistance button. Press OK to confirm.
-
Page 43: Bluetooth
English (US) Confirm with "0" When the assistance function is activated the phone dials the first num- ber on the list. If the call is not answered within 25 seconds, the next number is dialled. Dialling is repeated 3 times or until the call is an- swered, or until is pressed by the user. - Page 44 English (US) Function on/off Press Menu Settings Bluetooth. Select Function on/off On/Off to enable/disable Bluetooth. Press OK to confirm. Visibility Press Menu Settings Bluetooth. Select Visibility On/Off to make your phone visible/invisible to other devices. Press OK to confirm. Note! To prevent other devices from finding your device, select Off. Even if you select Off, paired devices can still detect your device.
- Page 45 English (US) Press OK to confirm. Audio path Press Menu Settings Bluetooth. Select Audio path: • Phone to answer incoming calls with the phone • Forward BT to forward incoming calls to the Bluetooth device. Press OK to confirm.
-
Page 46: Security
Remote configuration Allow persons that you trust, usually a family member or friend, to send ® information to your Doro PhoneEasy 620. You can receive phonebook contacts and contacts for speed dial keys, calendar tasks and settings for the assistance button. When activated, you don’t have to do anything, it’s the other person that sends information to you. - Page 47 English (US) Press OK to confirm. Number list You need to add the name and number of the people who are allowed to ® send information from their phone to your Doro PhoneEasy 620. Press Menu Settings Security Remote config.
-
Page 48: File Manager
English (US) Enter the current code and confirm with OK. Enter a new code and confirm with OK. Enter the new code again and confirm with OK. Master reset Press Menu Settings Security. Select Master reset to reset the phone settings. All the changes that you have made to the phone settings will be reset to default settings. -
Page 49: Additional Functions
English (US) • Sort by Name/Time. • Copy/Move Phone/Memory card Options Open. Se- lect a folder, eg Photos and press Options Paste. Press OK to confirm. Supported formats: • Picture format: BMP/GIF/JPG/PNG. Photos taken with the built in camera are saved as JPG. •... - Page 50 English (US) Calendar View Press Menu Organizer Calendar. Press Options View to show tasks for the selected date. Press OK to confirm. Add task Press Menu Organizer Calendar Add task. Enter date for the task, then press Enter time for the task, then press Enter subject.
- Page 51 English (US) Note! The reminder will work even when the phone is switched off. Do not press Yes to power on if wireless phone use is prohibited or when it may cause interference or danger. When the alarm goes off a signal will sound. Press Stop to turn off the alarm or press Snooze to repeat the alarm after 9 minutes.
- Page 52 English (US) Connect the headset to the headset socket Press Menu FM radio. The radio is turned on. The tuned fre- quency is displayed. . Use the side keys +/- to adjust the Select channel using volume. Tip: Press to return to standby mode. The radio will continue to play. Volume Press Menu FM radio.
- Page 53 English (US) Manual input (changing search mode) Press Menu FM radio Options. Select Manual input: • Fine tune to tune manually with • Auto search to use automatic station search with Press OK to confirm. Auto save Note! This will overwrite all previously saved channels! Press Menu FM radio Options.
- Page 54 Instructions for the REMOTE USER Send remote control commands by text message (SMS) Make sure activation is set to On and that the remote user is saved ® in the Number list on the Doro PhoneEasy 620. Press Menu Settings Security Remote config.
- Page 55 Example: Send Jeff Jackson’s mobile number, home number and his of- ® fice number to Doro PhoneEasy 620. The mobile number is: 0700-393939. Home number: 046-280 50 11. Office number: 046-280 50 83. • *#phonebook#Jeff...
- Page 56 English (US) alert Text message max. length= 0=Off 1=On alert confirm with 0=Off “0” 1=On alert 0/1/2 signal type 0=High 1=Low 2=Silent Example: Activate the assistance function. • *#alert#a#1# Example: Store Jeff Jackson in Number list as position one (1) with phone number: 0700-393939.
- Page 57 English (US) Example: Set Jeff Jackson’s mobile number in memory key A in Doro ® PhoneEasy 620 and Martha Thomson in memory key B. • *#memorykey#a#Jeff Jackson#0700393939# • *#memorykey#b#Martha Thomson#0768991014# Add task to calendar Command note task yyyymmdd hhmm description of task.
-
Page 58: Troubleshooting
English (US) Troubleshooting Phone cannot be switched on Battery charge low Connect the power adapter and charge the bat- tery for 3 hours. Full battery capacity is reached after the battery has been charged 3–4 times. Battery incorrectly Check the installation of the battery. installed Failure to charge the battery Battery or charger... -
Page 59: Safety Instructions
English (US) SIM card error SIM card damaged Check the condition of the SIM card. If it is dam- aged, contact your service provider. SIM card incorrectly Check the installation of the SIM card. Remove installed the card and reinstall it. SIM card dirty or damp Wipe the contact surfaces of the SIM card with a clean cloth. -
Page 60: Network Services And Costs
English (US) Network services and costs Your device is approved for use on the WCDMA 850/1900 MHz, GSM 850/1800/1900 MHz networks. To use the device, you need a subscription with a service provider. Using network services may result in traffic costs. Some product features require sup- port from the network, and you may need to subscribe to them. -
Page 61: Areas With Explosion Risk
English (US) Areas with explosion risk Always turn off the unit when you are in an area where there is a risk of explosion. Fol- low all signs and instructions. There is a risk of explosion in places that include areas where you are normally requested to turn off your car engine. -
Page 62: Driving Safely
English (US) It is prohibited to use the unit in flight. Turn off the unit before you board a plane. Using wireless telecom units inside a plane can pose risks to air safety and interfere with tele- communications. It may also be illegal. Driving safely ®... -
Page 63: Hearing Aid Compatibility
English (US) • Let the person you are speaking with know you are driving. If necessary, suspend the call in heavy traffic or hazardous weather conditions. Driving in rain, sleet, snow, ice, fog, and even heavy traffic can be hazardous. •... -
Page 64: Disclaimer And Limitation Of Liability
Doro AB and its affiliates, licensees and retailers assume no responsibility for any dam- age or loss resulting from the use of this guide. Doro AB and its affiliates, licensees and retailers assume no responsibility for any loss or claims by third parties that may arise through the use of this software. -
Page 65: Fcc/Industry Canada Notice
The FCC or Industry Canada can require you to stop using your unit if such interference cannot be eliminated. Doro has not approved any changes or modifications to this device by the user. Any changes or modifications could void the user’s authority to operate the equipment. -
Page 66: Care And Maintenance
La FCC ou Industrie Canada peut vous obliger à arrêter d'utiliser votre appareil si une telle interférence ne peut pas être éliminée. Doro n'a pas approuvé les changements ou modifications apportés à cet appareil par l'usager. Tous les changements ou modifications apportés peuvent entraîner la révoca- tion de l'autorisation d'utilisation de l'appareil. -
Page 67: Battery Disposal And Recycling Information
English (US) • Do not modify or remanufacture, attempt to insert foreign objects into the battery, immerse or expose to water or other liquids, expose to fire, explosion or other hazard. • Only use the battery for the system for which it is specified. •... -
Page 68: Support
Except as required by applicable law, batteries are consumables and are not included in any guarantee. This guarantee does not apply if batteries other than DORO original batteries are used. EXCEPT FOR THE WARRANTY EXPRESSLY SET FORTH HEREIN, DORO AB DISCLAIMES... - Page 72 PhoneEasy 620 (1011) FCC ID: WS5DORO620 IC ID: 8175A-DORO620 LAST PAGE English (US) Version 1.1 ©2013 Doro AB. All rights reserved. www.doro.com REV 9358 — STR 20130326...
Need help?
Do you have a question about the PhoneEasy 620 and is the answer not in the manual?
Questions and answers