Table of Contents
Advertisement
Quick Links
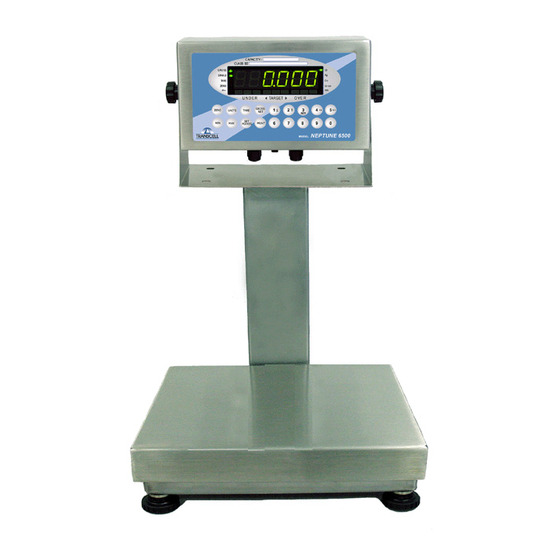
NEPTUNE -6500
Series
CHECK WEIGHING SCALE
Operation Manual
Revision 2.6
8-6-03
ã 2003 Transcell Technology, Inc.
Contents subject to change without notice.
Transcell Technology, Inc.
975 Deerfield Parkway
Buffalo Grove, IL 60089
Tel (847) 419-9180
Fax (847) 419-1515
E-mail:
transcell@transcell.net
Web:
www.transcell.net
Neptune 6500
Advertisement
Table of Contents

Related Manuals for Transcell Technology Neptune-6500 Series


Summary of Contents for Transcell Technology Neptune-6500 Series
- Page 1 NEPTUNE -6500 Series CHECK WEIGHING SCALE Operation Manual Revision 2.6 8-6-03 ã 2003 Transcell Technology, Inc. Contents subject to change without notice. Transcell Technology, Inc. 975 Deerfield Parkway Buffalo Grove, IL 60089 Tel (847) 419-9180 Fax (847) 419-1515 E-mail: transcell@transcell.net Web: www.transcell.net...
- Page 2 Operation of this equipment in a residential area is likely to cause harmful interference in which case the user will be required to correct the interference at his/her own expense. ã 2003 Transcell Technology, Inc. Contents subject to change without notice. Transcell Technology, Inc.
-
Page 3: Table Of Contents
TABLE OF CONTENTS Page Chapter 1: Introduction to the Transcell NEPTUNE-6500 Series Check Weighing Scale ..... 5 Chapter 2: Getting Started......................6 Installation........................6 2.1.1 Stainless steel enclosure (NEPTUNE 6500) ............... 6 Connecting the weigh platform to the indicator ............7 Connecting the Serial printer, remote display or computer .......... - Page 4 LIST OF FIGURES NEPTUNE-6500 Series Front Panel ..................5 NEPTUNE-6500 Main Circuit Board ..................7 Load cell connections......................7 Pin assignments for load cell ....................7 NEPTUNE-6500 Keyboard Detail................... 9 Display detail .......................... 11 LIST OF TABLES NEPTUNE-6500 Series Product Matrix.................. 5 Keypad function ........................
- Page 5 CHAPTER 1: INTRODUCTION TO THE TRANSCELL NEPTUNE 6500 SERIES CHECK- WEIGHER The Transcell Model NEPTUNE 6500 Series Checkweigher is an easy to use high speed, wash down, stainless steel bench scale. The main function of the NEPTUNE 6500 is to compare programmed weight readings to pre-set tolerance limits that define an ACCEPTABLE range.
-
Page 6: Chapter 2: Getting Started
NEPTUNE 6500-20 20lb (10kg) 12"W x 12" L NEPTUNE 6500-100 100lb (50kg) 18”W x 18” L NEPTUNE 6500-50 50lb (25kg) 12"W x 12" L NEPTUNE 6500-200 200lb (100kg) 18”W x 18” L TABLE 1-1: Product Matrix CHAPTER 2: GETTING STARTED Step 1. -
Page 7: Connecting The Weigh Platform To The Indicator
CONNECTING THE WEIGH PLATFORM TO THE INDICATOR 1. Connect your shielded load cell cable (not included) to terminal on the main board. Connection assignments for the Load Cell Terminal are shown in Figure 2-2. Figure 2-2: Connection assignments for the Load Cell Terminal Color Wire Name +Excitation... -
Page 8: Connecting The Serial Printer, Remote Display Or Computer
CONNECTING THE SERIAL PRINTER, REMOTE DISPLAY OR COMPUTER The NEPTUNE 6500 series indicator comes standard with a serial port, designated COM1 and a second port specified for the TTL outputs designated as COM2. COM1 is a full duplex, RS-232 port designed for connection to either a PC or a serial printer. -
Page 9: Chapter 3: Basics Of Operation
CHAPTER 3: BASICS OF OPERATION 3.1 DISPLAY The Model NEPTUNE 6500 scale utilizes a 1” High, Bright Red LED (Light Emitting Diode Display) capable of being viewed from up to 50’ away in brightly or darkly lit areas. 3.1.1 LIGHT EMITTING DIODE DISPLAY (LED) Figure below shows the display detail of the NEPTUNE 6500 Series. - Page 10 TABLE 2-1: KEYPAD FUNCTIONS KEYS MEANING The ZERO key sets the current Gross weight to Zero, provided the amount of weight to be ZERO removed is within the specified Zero range and the scale is not in motion. The UNITS key switches the weight display to an alternate unit. The alternate units can be Lb, UNITS Kg, Oz, Lb-Oz, Gross, Tare.
- Page 11 Figure 3.2: ANNUCIATOR DETAIL Table 3-1: ANNUNCIATOR DEFINITIONS MEANING Annunciators GROSS Indicates the scale is displaying the Gross weight. STABLE Indicates that the scale is in a stable weight mode condition, and therefore seeing no motion. Indicates that a tare has been established in the system. TARE C-ZERO Indicates that the current displayed weight reading is+/- 0.25% displayed division of...
-
Page 12: General Scale Operation
3.3 GENERAL SCALE OPERATION 3.3.1 WEIGHING AN ITEM If necessary, press the Zero soft key to obtain a weight reading of zero. Place the object to be weighed on the scale’s platter and allow the weight indication to stabilize. If the item weight exceeds the scale’s weight capacity, it displays “000000”. - Page 13 3.3.6 ENTERING A SINGLE TARGET VALUE 1. Press the MIN key. Enter the single target value. The under lights are on when the weight is less than the min value, the target (accept) lights are on when the weight is equal to the target value and the over lights are on when the weight is greater than the target value.
-
Page 14: Chapter 4: Advanced Features And Operation
CHAPTER 4: ADVANCED FEATURES AND OPERATION ITEM ID STORAGE Your scale can store UNDER/OVER//TARE/UNIT information for up to 100 items. These items are stored and retrieved under a Product ID number. The ID numbers are assigned by the scale operator. Each ID record may contain: ·... -
Page 15: Setpoint Outputs
TTL SET POINT OUTPUTS This function works utilizing three 5Volt TTL outputs and allows your scale to work within a specialized system. This is useful if you are filling individual containers to a pre-determined TARGET weight value, or if you are check weighing individual portions, you can utilize the set points to activate an internal buzzer that will sound when the TARGET set point is reached. -
Page 16: Chapter 5: Calibration
CHAPTER 5: CALIBRATION CALIBRATION OVERVIEW The indicator is calibrated by following the procedures embedded in F16 (Zero) and F17 (Span) of the Setup Menu. Each procedure enters a value into the indicator's non-volatile memory - F16 the zero value (deadweight) and F17 the span value (test weight). The minimum test weight that can be used is 1% of full-scale capacity. -
Page 17: View Calibration
6. If the calibration was not successful, one of the error messages below will appear. Take the indicated action to correct the problem, then perform a new calibration. "Err0" - The calibration test weight or the adjusted keyed-in weight is larger than the full capacity of the scale. -
Page 18: Key-In Calibration
KEY-IN SPAN CALIBRATION VALUE (F20) Note: This procedure is intended for emergency use only in the case of non-volatile memory loss. A valid span calibration value, obtained from a successful F17 calibration procedure, must be used. KEY-IN CALIBRATION VALUE (F20) Note: This procedure is intended for emergency use only in the case of non-volatile memory loss. -
Page 19: Chapter 6 Configuration Overview
CHAPTER 6: CONFIGURATION CONFIGURATION OVERVIEW The indicator contains two main setup menus: The Setup (“F”) menu which configures the indicator to your weigh platform and the User (“A”) menu which configures the serial communication port and enables some user options. The Setup and User menus consist of several menu selections, each with its own sub-menu of choices. - Page 20 Figure 6-1: “F” CONFIGURATION MENU Zero Range Grads Span Gain Zero Track Mot Band Dig Filter Ovld Limit Cal Unit 0.5D 100% 1.9% 1000 1500 2000 2500 3000 3500 4000 5000 10000 12000 20000 30000 40000 50000 Disp Div Dec Point Enter 0.00 0.000...
- Page 21 Figure 6-2: “F” CONFIGURATION MENU NAME/CODE DESCRIPTION CODE/VALUE Specifies number of full-scale graduations. Value should be 1,000 Graduations consistent with legal requirements and environmental limits on the 1,500 2,000 useful system resolution. 2,500 3,000 5,000Ö Ö 4,000 6,000 8,000 10,000 12,000 20,000 30,000 40,000 50,000...
- Page 22 0Ö Ö Allows user to set time delay in 1/10s of a second to cause SP 2 to alternate high and low when SP2 condition is met. A 0 (zero) value is Setpoint 2 always on. Enter value delay time Places indicator into the zero calibration routine.
- Page 23 Figure 6-3: “A” USER MENU COM 1 Baud Rate Data bits, Parity Display Check 1200 2400 4800 9600 Operator ID Time Entry Time Format Date Entry Down arrow key to Down arrow key to begin begin Print Item ID Date format Set Com Port Delete ID List List...
- Page 24 6.4 USER MENU DESCRIPTIONS NAME/CODE DESCRIPTION CODE/VALUE Selects the baud rate for data transmission through serial port. 1200 2400 9600Ö Ö Baud Rate 4800 8nÖ Ö Selects the number of data bits and parity of serial transmission. Data Bits and "8n"...
- Page 25 Actuates the function that PRINTS all existing stored ID's to dot Down arrow key to Print ID List matrix printer begin Pressing the Down arrow key automatically starts the print process BPÖ Ö bar code prntr Allows operator to set communications port to either printer or Set Com Prot computer.
- Page 26 APPENDIX A: SPECIFICATIONS ANALOG SPECIFICATIONS Full Scale Input Signal 30mV, including dead load Input Impedance 30MW, typical Internal Resolution – Neptune 6500 Approximately 260,000 counts Display Resolution 50,000 display division max Measurement Rate 10 Meas/sec, nominal System Linearity Within 0.02% of FS Calibration Method Software Calibration, with long term storage in EEPROM Excitation Voltage –...
- Page 27 APPENDIX B: SERIAL PORT INFORMATION SERIAL PORT MODES B.1.1 FULL DUPLEX MODE The Full Duplex Mode provides a Demand serial transmission mode and is selected by setting A3 to “d” and A16 to “PC”. The Demand mode allows control from a host device, usually a PC.
- Page 28 B.1.1.1 RECOGNIZED HOST COMMANDS “P” - This command is sent to the indicator to print the indicated display. The indicator will not respond if the scale is in motion, positive overload or negative overload. “Z” - This command is sent to the indicator to zero the scale. The indicator will not respond if the scale is in motion, positive overload or negative overload.
- Page 29 B.1.3 SIMPLEX MODE The Simplex Mode provides a continuous serial transmission mode and is selected by setting A3 to “C” and A16 to “PC”. The Continuous mode is used to interface to computers, scoreboards, and other remote devices requiring constant data updating.
- Page 30 Seller or its duly authorized repair agents. Transcell Technology, Inc. will have a reasonable time to repair or replace such goods. THESE WARRANTIES EXCLUDE ALL OTHER WARRANTIES, EXPRESS OR IMPLIED, ORAL OR WRITTEN, INCLUDING WITHOUT LIMITATION WARRANTIES OF MERCHANTABILITY OR FITNESS FOR A PARTICULAR PURPOSE.
- Page 31 Neptune 6500...
Need help?
Do you have a question about the Neptune-6500 Series and is the answer not in the manual?
Questions and answers