Table of Contents
Advertisement
Advertisement
Table of Contents

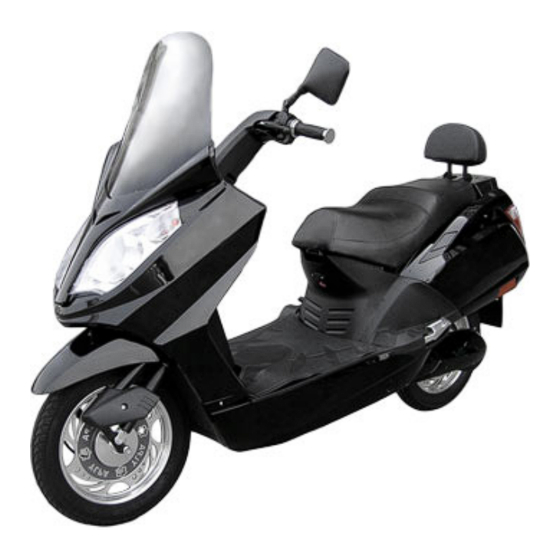
Summary of Contents for EMMO The X
- Page 1 USER GUIDE Read this manual completely before riding your electric bicycle...
-
Page 2: Table Of Contents
Contents Riding Safety ………………………………………………………..3 · Safety Basics …………………………………………. ….4 · Wet Weather Riding ……………………………….……..5 · Night Riding …………………………………………. …5 · Other Reminders ……………………………………………6 Specifications …………………………………………………..….7 Wire diagram……………………………..…………..….8 Specifications……………………………………..….….8 Operation……………………………………………………..…….9 Battery Care and Maintenance…………………………………….10 Remove battery box …………………………………..…….10 Battery charging………………………………………..……11 Maintenance…………………………………………………...12 Assembly and Setup …………………………………………….. -
Page 3: Riding Safety
RIDING SAFETY Like any sport, biking carries the risk of injury and damage. By choosing to ride the electric bicycle, you assume all responsibility for these risks. Thus, you need to know and practice the rules of safe and responsible riding. YOUR INSURANCE POLICIES MAY NOT PROVIDE COVERAGE FOR ACCIDENTS INVOLVING THE USE OF THIS ELECTRIC BICYCLE. -
Page 4: Safety Basics
Safety Basics: Do’s and Don’ts The Do’s Always conduct a Safety Check before you ride your electric bicycle. Be thoroughly familiar with the controls of your electric bicycle. Always wear an approved helmet when riding your electric bicycle. Follow the helmet manufacturer’s instructions for fit, use and care of your helmet. -
Page 5: Wet Weather Riding
Ride defensively. To other road users, you may be hard to see. Concentrate on the path ahead. Avoid potholes, gravel, dirt, wet road, oil, curbs, speed bumps, drain grates and other obstacles. Be alert for unexpected events, such as opening car doors or cars backing out of concealed driveways. -
Page 6: Other Reminders
Other Important Reminders The battery does NOT require deep discharging. If your electric bicycle is put into storage, re-charge its battery at least once every 30 days. Do not store your electric bicycle in direct sunlight for an extended time. Store your electric bicycle in a dry place. - Page 7 Product features...
-
Page 8: Specifications
Product Specifications 1. Wire diagram 2. Specifications Battery Voltage 48Volt Dc,20Ah Motor Wattage 500W Wheel Size 16 inch Top Speed 32km/h Charging Time 6-8h Distance of full charge 60 km Battery charging cycles < 300 times Max rider weight 100kgs Two rider Left and Right Indicators Rear View mirrors... -
Page 9: Operation
Operation Your new Electric Bicycle/scooter is a revolutionary new transport product using many lightweight high-powered Lithium batteries and a super high efficiency electric hub motor designed to ASSIST in the propulsion of you and your bicycle. It is important to note the following riding guidelines to ensure you get the best possible experience from your electric bicycle. -
Page 10: Battery Care And Maintenance
Battery Care and Maintenance Removing the battery box Removing the battery is useful to transport the Bicycle to reduce lifting weight or to charge in a location where the bicycle may not fit etc. 1. To remove the battery box from the bike, uncover the foot pad from the bike.see figure 1-1 figure1-1 2. -
Page 11: Battery Charging
2. Insert the power plug on the battery charger into power outlet While charging, the light on the battery charger will illuminate Red. 4. When fully charged, the light will illuminate Green. ONLY CONNECT THE BATTERY CHARGER LEAD TO THE BIKE. NEVER CONNECT ANY OTHER POWER SOURCE TO THE BIKE. -
Page 12: Maintenance
Maintenance ----Basic 1. There are two fuses in the bike. A 30Amp located in the battery box. The second fuse is a sealed fuse on the controller. 2. Clean Chain Regularly. 3. Ensure Tires are inflated to 35 PSI. 4. Adjust Brake tension via adjusting screws located at Brake lever or on Brake control lever. -
Page 13: Assembly And Setup
Rear Wheel Assembly Instructions 1. First, remove the two screws that hold the plastic plates on both sides of rear wheel. See figure 1-5: figure 1-5 2. Remove the screw from the end of Brake Cable, and then pull the cable out. See figure 1-6: figure 1-6 3. - Page 14 4. Remove the two nuts on both sides of the rear wheel. See figure 1-9 figure 1-9 5. Slide the wheel forward to allow slack in the chain. 6. Now slide the chain over the rear flywheel and remove the wheel from the bicycle.
-
Page 15: Steps To Startup
Front Wheel Removal Instructions 1. Remove the two nuts from both sides of the front wheel. See figure 1-10 figure 1-10 2. Remove the screw from the end of Brake Cable, and then pull the cable out. Then remove the axle and spacer as shown below in figure 1-12 &... -
Page 16: Other Helpful Instructions
Other Helpful Instructions Pedals 1. Use a pedal wrench of 16mm spanner to tighten pedals. 2. Check and tighten pedal crank bolts with 14mm socket. Tires 1. Inflate tire using a pump to 30-35psi. Remember lower tire pressures will negatively impact performance by causing too much resistance. - Page 17 Windshield 1. Locate the 5 pieces needed for this windshield. First find the small gold clip(as shown in figure 1-13. Install it as shown in figure 1-13. figure 1-13 2. Place the windshield correctly. 3. Use the five screws and tighten them lightly. Final Check 1.


Need help?
Do you have a question about the The X and is the answer not in the manual?
Questions and answers