Table of Contents
Advertisement
Advertisement
Table of Contents

Related Manuals for EMMO Vovo


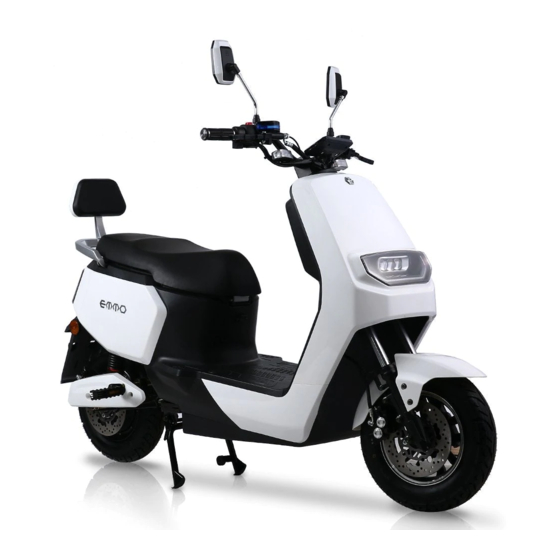
Summary of Contents for EMMO Vovo
- Page 1 USER’S MANUAL EMMOM Monta 2019 EMMO Vovo...
- Page 2 © 2020 Emmo Inc. All rights reserved. No texts, details, or illustrations from this manual may be reproduced or distributed, or become the subject of unauthorized use for commercial purposes. Should you discover any errors,...
- Page 3 Do not use this product with standard bike trailers, stands, vehicle racks, or accessories that have not been tested for safety and compatibility and verified as safe and compati- ble with the bike by EMMO E-Bikes. Contact us if you have any question or concern. Extreme riding: E-Bikes and e-bike parts have strength and integrity limitations.
-
Page 4: Table Of Contents
MENU About EMMO Rules and Regulations of Riding an E-Bike Parts Overview 7, 8 Switches 9, 10 Throttle Lights & Signals 12, 13 Speedometer Kickstand & Centre Stand 15, 16 Rear View Mirrors 17, 18 How to turn on the bike with the key... -
Page 5: About Emmo
ABOUT EMMO Established in 2009, Emmo Inc. is a proud Canadian venture that is focused on creating a more sustainable future by providing high quality electric bicycles. We offer a wide variety of e-bikes that are suitable for leading a greener, and more stylish, way of living. Emmo e-bikes are priced competitively with other green solutions. -
Page 6: Rules And Regulations Of Riding An E-Bike
RULES and REGULATIONS of riding an e-bike According to Canada’s Motor Vehicle Safety Regulations ( MVSR ). A qualified e-bike (defined as Power Assist Bicycle) must meet the following requirements: • The e-bike must have operable pedals • Upper wattage limit for the motor is 500W. •... -
Page 7: Parts Overview
1. PARTS OVERVIEW... - Page 8 1. PARTS OVERVIEW...
-
Page 9: Switches
2. SWITCHES The switch housings on the handlebar hold these switches that control the lights, signals, horn and etc.. They are also equipped with an LED light to light up the unit when the bike is on. - Page 10 2. SWITCHES...
-
Page 11: Throttle
3. THROTTLE The throttle controls the speed of the e-bike. As shown below, twist the throttle towards you to operate. With the help of the speed mode switch, you can also change the speed setting. Warning: • DO NOT turn the throttle if you are not ready to ride. -
Page 12: Lights & Signals
4. LIGHTS & SIGNALS The headlight assembly has multiple operation modes - high beam, low beam and daytime running light, to accommodate your needs under different conditions. Note: Refer to Page 9-10 for instuctions on how to turn on the high/low beam. - Page 13 4. LIGHTS & SIGNALS Tail light and brake light play an important role in signaling people behind. With the help of the turn- ing signal lights, it is also easier for other road users to anticipate your intended route. Front turning signal lights are located under the handle bar. Tail light, brake light and reflectors add to the visibility of you and the vehicle during the night time.
-
Page 14: Speedometer
5. SPEEDOMETER The speedometer let you know the working status of the bike. It provides information including the current speed, total travel distance, battery strength, and speed mode (3=high speed mode, 2=me- dium speed mode, 1=low speed mode). -
Page 15: Kickstand & Centre Stand
6. KICKSTAND & CENTRE STAND The bike is equipped with a side kickstand and a centre stand, The side kickstand is easier to use. By contrast, to use the centre stand requires some techniques and practice, but the bike is more stable on the centre stand. - Page 16 • Both side kickstand and centre stand should be kicked up before you ride the bike. • Be careful when putting the bike on the centre stand.If you find it difficult to use the centre stand, visit your EMMO dealer for a more detailed demonstration on how to use the centre stand.
-
Page 17: Rear View Mirrors
7. REAR VIEW MIRRORS Rear view mirrors make it safer for you to check the traffic condition behind you. Please make sure the rear view mirrors are adjusted and secured properly. Check the rear view mirrors and your blind spots before you make a turn or overtake other vehicles. •... - Page 18 7. REAR VIEW MIRRORS -Adjustment • Tool needed: a 14mm wrench. • In order to adjust the mirror, the nut that • The nut is covered by the plastic cap. Lift up fixed the mirror should be loosened first. the cap to expose the nut. •...
-
Page 19: How To Turn On The Bike With The Key
8. HOW TO TURN ON THE BIKE via key ignition The main ignition is used to: • Turn on/ off the bike. • Lock/ Unlock the steering. • Open the seat. • One press quick start. • Insert the key. •... -
Page 20: How To Turn On The Bike With The Remote
9. HOW TO TURN ON THE BIKE via remote Reminder: • If the alarm system is on, please cancel the alarm before you turn on the bike. -
Page 21: How To Lock The Steering
10. HOW TO LOCK THE STEERING For the safety of your bike, it is highly recommended to lock the steering when you park your bike in public spaces. 1. Turn the ignition off. 2. Turn the handlebar to the left. 4. - Page 22 10. HOW TO LOCK THE STEERING • Unlock the steering 2. Push the key in and turn it clockwise. 1. Insert the key. 3. When unlocked, the steering can be...
-
Page 23: How To Turn On/Off The Circuit Breaker
11. CIRCUIT BREAKER location & instructions Located in the storage compartment under the seat, the circuit breaker is the main switch of the bike. When it is turned off, the battery will be disconnected from the system and you will not able to use the bike, nor will you be able to charge the bike. - Page 24 • Pay attention to the location of the U shape latch under the seat. That is the pushing point when you lock the seat. Warning: • The wires inserted into circuit breaker could have high voltage output. DO NOT touch any bare wires. If you have any concern, contact your EMMO dealer for assistance.
-
Page 25: How To Charge
12. HOW TO CHARGE Charge the battery before the battery strength drops down to 20%. Before charging the bike, make sure you are using a compatible charger*. Failure to use a compatible charger will lead to danger. • There are two cables coming out from the charger. One cable goes to the charging port on the bike, and the other goes to the regular 110V wall outlet. - Page 26 12. HOW TO CHARGE • The charging port is below the front of the • Open the charging port lid and plug in the seat. charger. • Plug the charger into a regular 110V wall • Once fully charged*, unplug the charger outlet.
-
Page 27: How To Ride
13. HOW TO RIDE THE BIKE • Get the bike off the centre stand / side kickstand (refer to page 15). • Sit on the bike. Put on the helmet or any protective equipment required. • With your feet still on the floor, turn the bike on (refer to page 19). -
Page 28: Safety Instructions
14. SAFETY INSTRUCTIONS To ensure the safety of you and others, • Do not ride after you take medications which may affect your riding ability, drink alcohol, or when you are unwell. • Please make sure you are familiar with your local bylaw regarding e-bikes. •... -
Page 29: Maintenance
15. MAINTENANCE Regular maintenance is required to keep the bike in its best working conditions. CLEAN Please use clean water and neutral detergent to clean the bike. Use soft cloths or sponges to clean the surfaces. Please do not use metal brushes, sandpaper or any other abrasive material to avoid scratches or physical damage. -
Page 30: E-Bike Registration Form
Invoice Number: __________________________ Store Location: _______________________________________________ Customer Name: __________________________ Address: ___________________________________________________ Phone Number: ____________________________ E-mail:______________________________ Survey: How did you find out about Emmo Inc.? (Please select the options that apply) □ Returning Customer □Family/Friend □Passing by Store □Kijiji □TERA □Google □Yelp... -
Page 31: Appendix 1(How To Charge A Lithium Battery)
APPENDIX 1 How to Charge a Lithium E-Bike Most of the time, a lithium e-bike share the same look as a regular Gel Lead-Acid one. However, you will notice that the lithium battery is smaller in size and lighter in weight. The lithium charger is also different from ordinary Gel Lead-Acid chargers. -
Page 32: Appendix 2(Charger Indicators)
APPENDIX 2 Charger Indicators Usually, there is only one indiactor on Gel Lead-Acid chargers. The indicator has only two colors - Red and Green. Red light means that the charger is charging the bike, while green light can show up when the battery is fully charged or when the charger is not connected to the bike properly. - Page 33 72V / 4.5A Lithium Charger Indicators...
Need help?
Do you have a question about the Vovo and is the answer not in the manual?
Questions and answers
How do I replace the batteries in my emmo Volvo the manual doesn’t show use, nor does it show us how to remove the battery case in order to change them out for new batteries
To replace the battery in an EMMO Vovo, follow these steps:
1. Turn off the circuit breaker and remove the existing battery.
2. If upgrading from a lead-acid battery to a lithium battery, ensure the new battery is compatible.
3. Special modifications and a compatible lithium charger are required for the upgrade.
4. Install the new battery according to the bike’s specifications.
5. For more details or assistance, contact your Emmo dealer.
Note: Always store and handle batteries in a clean, dry, ventilated place and avoid freezing temperatures.
This answer is automatically generated
Bonjour je voudrais savoir si vous pouvez m'envoyer un image pour savoir comment bien connecter 6 batterie 12 Volt 20 ampères pour mon emmo vovo 2022