Table of Contents
Advertisement
Advertisement
Table of Contents

Subscribe to Our Youtube Channel
Related Manuals for EMMO Soho


Summary of Contents for EMMO Soho
- Page 1 P a g e Emmo Soho Owner’s Manual T. Lac V 1.0...
-
Page 2: Table Of Contents
Table of Contents P a g e E-bike MTO Label……………………………………………………………………………………………………..3 Specifications…………………………………………………………………………………..……………………….4 Charging Your E-bike……………………………………………………………………………….……………5-6 Brakes……………………………………………………………………………………………………………………...7 Kickstand………………………………………….……………………………………………………………………..8 Pedals………………………………………………………………………………………………………………………9 Greasing Bike Chain and Rear Drum Brakes………………………..…….………………………..…10 Front Drum Brakes and Tubeless Tires……………………….…………………………………………11 Circuit Breaker…………………………………………………………………………………………….………...12 Ignition and Seat Lock……………………………………………………………………..……………………..13 Remote Controller………………………………………...……………………………………………………….14 Right and Left Side of the Handlebar and Throttle………………………...……………...….15-16 Dashboard……………………………………….………………………………………………….…………………17 MP3 System and USB port….. -
Page 3: E-Bike Mto Label
E-bike MTO Label P a g e WARNING! Please make sure this MTO label is on your e-bike. If this label is not present, please ask your dealer to put one on. All electric bicycles are required to have this sticker on the bike for it to be a legal vehicle. -
Page 4: Specifications
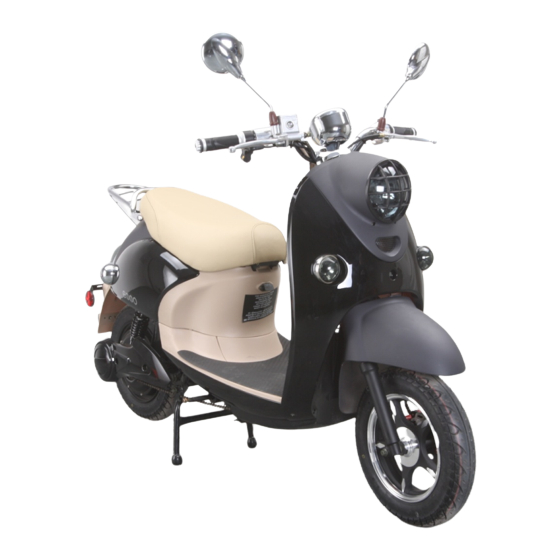
Specifications P a g e Black, Blue, Pink Color: Dimension (LxWxH): 178cm x 75cm x 114.5 cm 10″/3.0″ Tubeless Wheel Size: 95 kg Net Weight: 32 km/h Maximum Speed: Travel Range: 60-70km Charging Time: 3 – 8 Hours 25 Degrees Climbing Angle: Load Capacity: 250kg... -
Page 5: Charging Your E-Bike
Charging the Bike (Type of Battery) P a g e There are two different plugs on your charger: one end that goes into an 110V power outlet (male end), and the other into the charger port(female end). 1. Take one end of the charger(female end) and plug it into the charger port located on the bike (Please make sure that it is fully plugged in) 2. - Page 6 Lead Acid Battery Charger P a g e WARNING! *CHARGING THE E-BIKE SHOULD TAKE A MAXIMUM OF 8 HOURS. *DO NOT CHARGE THE E-BIKE FOR MORE THAN 12 HOURS. OVERCHARGING WILL OVERHEAT THE BATTERY, CAUSING DAMAGE TO THE BATTERY. *MAKE SURE TO FULLY CHARGE THE E-BIKE ONCE A MONTH DURING LONG PERIODS OF INACTIVITY (i.e.
-
Page 7: Brakes
P a g e Rear Brake Front Brake To activate the rear brake, the rider can pull this lever. To activate the front brake, the rider can pull this lever. Note: When either brake is activated, all power to the motor will be disconnected. Always use the back brake first, then the front brakes. -
Page 8: Kickstand
P a g e Side Stand Centre Stand The side stand is similar to other bicycles – flick it The centre kick stand is better used for all situations. In downwards such that it sticks out, as shown in the picture, order to engage the kickstand, apply pressure with your then lean it to the left. -
Page 9: Pedals
P a g e Foldable Bike Pedals To fold the bike pedals, push the pedal inwards and lift up.(change if necessary WARNING! The law requires all e-bikes to have pedals installed. If the pedals are off, these vehicle will be considered a motorcycle which does not follow the same regulations as e-bikes. -
Page 10: Greasing Bike Chain And Rear Drum Brakes
10 | P a g e Drum Brakes (Rear) Note: Remember to grease the chains and sprocket once a month. Turning this nut tightens or loosens the brake. Clockwise tightens the brakes while counter Please also make sure that the back wheel is not clockwise loosens the brakes. -
Page 11: Front Drum Brakes And Tubeless Tires
Disc Brakes (front) and Tubeless Tires The Emmo Soho is assembled with front disc brakes, as opposed to drum brakes, and tubeless tires. These brakes are virtually maintenance free; the only maintenance required is the replacement of the fluid every 10,000km. They are also stronger, more resistant to wear and tear, and last longer than the opposing drum brakes. -
Page 12: Circuit Breaker
12 | P a g e Circuit Breaker The circuit breaker controls the power running through the bike from the battery. When the switch is flicked on, power flows throughout the bike and all functions work. When the switch is flicked off, power does NOT flow through the bike, and none of the electrical aspects will work on the bike. -
Page 13: Ignition And Seat Lock
13 | P a g e Key Positions in Ignition 1. This is the handlebar lock position. This position is reached when the key is pushed in, and then turn to the counter clockwise, from the off position. This locks the handlebar when it is turned half way to the left. -
Page 14: Remote Controller
14 | P a g e Note: If the bike is turned on using the remote start, it can only be turned off using the ‘unlock’ button on the remote. Lock Unlock This button arms the bike. When the bike is This button unlocks the bike. -
Page 15: Right And Left Side Of The Handlebar And Throttle
15 | P a g e Speed Control Light Switch This button controls and limits This switch controls the amount of lightning the speed of your bike. 3 is the on your bike. When the switch is pushed to fastest speed, 1 is the slowest the right, no extra lights are turned on. - Page 16 16 | P a g e High/Low Beam Switch Pushing the switch up activates the high beams for the front headlights, pushing it down deactivate the high beams (make sure the light switch is on first). Turning Signals Horn Pushing the switch to either the left or Pushing this button sounds the right positions will turn on the horn.
-
Page 17: Dashboard
17 | P a g e Power Gauge Odometer Speedometer High Beam indicator This meter demonstrates the This counter keep track This shows the speed This light turns on when remaining amount of electricity of how many kilometres you are going at once the high beam for the head available in your battery. -
Page 18: Mp3 System And Usb Port
18 | P a g e On/Off Power Light Pushing this button This light indicates whether or not turns the speakers the speakers are on. The light is on on or off. when the speaker is on and the light is off when the speaker is off Mp3/FM Volume Control... -
Page 19: Registration/ Contact Information
Motor Number: E-bike Model and Colour: Store Location: Customer Name: Home Address: Phone Number: E-mail: Survey: How did you find out about Emmo Inc.? (Please select the options that apply) □ Returning Customer □Family/Friend □Passing by Store □Kijiji □TERA □Google □Yelp... - Page 20 P a g e Thank you for Choosing Connect With Us! Stay tuned for updates regarding new e-bike models, special deals and more! Official Website: www.emmo.ca www.facebook.com/EmmoCanada info@emmo.ca Any laws/regulations regarding “E-bikes” can be found on the Ministry of Transportation website: www.mto.gov.on.ca...
Need help?
Do you have a question about the Soho and is the answer not in the manual?
Questions and answers