Table of Contents
Advertisement
GENERAL INFORMATION
INTRODUCTION
Congratulations! You have invested in the latest
generation of the most technologically advanced
instrument available for speed detection and other law
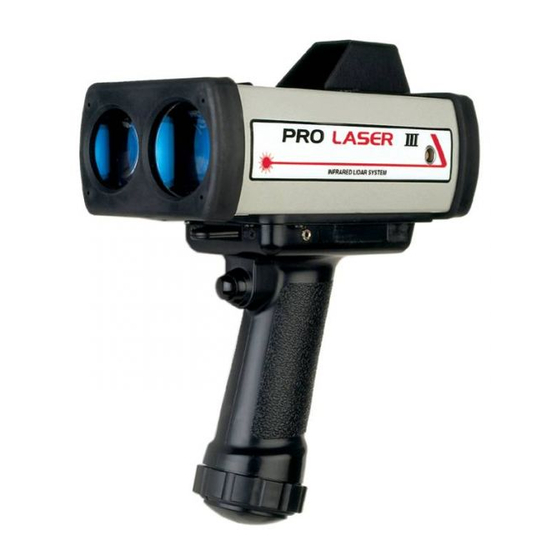
enforcement applications. In a compact, handheld
package, the ProLaser III offers the versatility of direct
range and speed measurement. The unit offers a number
of improved operating features and specifications, which
make it easier to use and service, and easier to train
personnel in its use. These improvements include:
•
Improved range accuracy and resolution
•
Reduced size and weight
•
Waterproof to IP 67 and NEMA 6
•
Optional self-contained, removable long-life battery
pack
•
Improved power management features with a low
voltage warning and a "sleep" mode to conserve
battery power
•
Square reticle to define the laser beam size
•
Inclement weather operating mode that improves
performance in fog, rain, snow, and dust.
•
Rubber bumpers to protect the unit's critical areas
•
Ergonomically designed handle for reduced arm
and wrist fatigue
•
Backlit LCD for unit set-up, control and operator
displays
ProLaser III Operator's Manual
Page 1
Advertisement
Table of Contents

Related Manuals for Kustom Signals ProLaser III


Summary of Contents for Kustom Signals ProLaser III
-
Page 1: General Information
In a compact, handheld package, the ProLaser III offers the versatility of direct range and speed measurement. The unit offers a number of improved operating features and specifications, which make it easier to use and service, and easier to train personnel in its use. -
Page 2: Unpacking
UNPACKING When you first receive your ProLaser III carefully inspect the shipping carton for signs of damage. Any damage evident should be immediately reported to the carrier. -
Page 3: Functional Description
(or focused) into an extremely narrow beam for absolute target identification. The signal transmitted by the ProLaser III travels in a straight line of sight, as opposed to the "fringing" effect that is characteristic of microwave emissions. -
Page 4: Control Locations
ProLaser III Operator's Manual CONTROL LOCATIONS Operation of the ProLaser III primarily involves using the integrated LCD/keypad located on the back panel of the unit. The only function not controlled by the LCD/ keypad is the trigger used to fire the device. Figure 1 illustrates the external controls that are used to operate the instrument. - Page 5 ProLaser III Operator's Manual Figure 1 Page 5...
-
Page 6: Control Descriptions
Power The power (“PWR”) switch located on the back panel is used to turn off and on primary power to the ProLaser III. Press once to turn the unit on. Press and hold for one second to turn the unit off.. -
Page 7: Brt/Vol/Arrow
ProLaser III Operator's Manual BRT/VOL/ARROW This is a dual function switch. On the initial push of the switch, a set-up menu for the unit’s displays and audio alerts will appear on the unit’s LCD. When in Menu Screen, this switch functions as the “down” selector. -
Page 8: Heads-Up-Display
ProLaser III Operator's Manual HEADS-UP-DISPLAY The Heads-Up-Display, or HUD, performs two critical functions in the operation of the ProLaser III. First, it provides the aiming reticle by which the instrument is aimed at the desired target. Secondly, it displays the... -
Page 9: Status Displays
STATUS DISPLAYS The ProLaser III provides user alerts on the LCD back panel. They are listed below- • Low Voltage Alert- if internal battery voltage falls below 9.2 volts. -
Page 10: Operation
There are several factors to be taken into account when setting up to make speed or distance measurements with the ProLaser III. They have to do with the location of the instrument relative to the roadway upon which traffic is moving, and with the actual setup in or around the patrol car. - Page 11 It will also assist in setup if you select a location where minimum movement of the ProLaser III is required in order to keep it aimed on the desired target. Page 11...
- Page 12 ProLaser III Operator's Manual Visibility conditions also affect the performance of the ProLaser III. Although the laser emissions used by the device are not in the visible spectrum, they are close enough in wavelength that atmospheric or climatic conditions that impair vision also adversely affect the operation.
-
Page 13: Power-On Sequence
ProLaser III Operator's Manual POWER-ON SEQUENCE Test Messages Upon power up of the unit or a user-initiated self-test, the unit will run self-test. This self-test consists of the following text messages: Self Test Int RAM = PASS Screen 1 Self Test... - Page 14 ProLaser III Operator's Manual Self Test TIMER = PASS Screen 4 Accuracy Test: performs a comparison between two independent timing circuits to verify that the range and speed determination circuits are operating properly. Self Test Checksum = PASS Screen 5 Program Memory Test: Checks unit’s programmable...
- Page 15 ProLaser III Operator's Manual Units of Measure In addition to the self-test displays the unit presents upon power up, the unit briefly flashes the units of measure before entering the default operating mode. The screen is displayed below. Units Feet/MPH The displays will indicate “Feet/MPH"...
-
Page 16: Mode/Option Selection
ProLaser III Operator's Manual MODE/OPTION SELECTION Mode/Arrow The Mode/Arrow pushbutton switch is used to toggle between Speed and Range Mode. The default mode is Speed Mode. To select this option, no action is required. NOTE: It is not necessary to depress the... -
Page 17: Brightness
HUD Brightness Avoid using excessively bright settings for lower level ambient light conditions as this will make target identification more difficult. Upon being powered up, the ProLaser III will automatically default to the brightness level set at the factory. Page 17... -
Page 18: Volume
Audio Volume The audible tone provides feedback to assist the operator in aiming the ProLaser III. The aiming tone is activated when the trigger is pulled and a staccato or chirping tone is heard when no valid target is in range, such as aiming the unit at the sky. -
Page 19: Backlight
ProLaser III Operator's Manual Backlight The LCD backlight (BKLIT) selection is used during night operations and enables users to operate the device as they would during daylight. This function illuminates the LCD and the menu to select this option appears as... -
Page 20: Distance
ProLaser III Operator's Manual Minimum and Maximum Distance/Range (DIST) The distance control sets the minimum and maximum ranges at which target vehicle speeds will be displayed. When the DIST menu selection is activated, the input screen appears as: Set Range... -
Page 21: Direction
It is also possible to set the MAX range value by actually using the ProLaser III to range to a target. At the Set Max Range display, aim the unit at a stationary target and pull the trigger until a range is displayed. The range can be remeasured as many times as desired. -
Page 22: Weather
Note that a continuous, audible tone will still be emitted when a vehicle speed is determined in a direction opposite that of the direction mode selected. If “Both” is selected, the ProLaser III will display speeds for all vehicles. Weather (WTHR) Menu The weather feature is used to improve the unit’s... -
Page 23: Stopwatch
(Listening to the audio “chirp” indicating reflection of laser pulses is helpful when using overhead wires.) Rotate the ProLaser III so that it is at right angles to its normal operating position, (positioned on its side) and repeat the process to verify vertical alignment. - Page 24 The target separation should be at least 10 feet. Mount the ProLaser III on a tripod (available as on option from KSI) so that the front face of the unit is precisely placed at the zero foot point.
- Page 25 For example, if the targets were placed at exactly 79 feet and 39 feet, with a final separation of 40 feet, the final speed reading on the ProLaser III must be 79, 80, or 81. If the ProLaser III does not pass the test, recheck the target mounts, distances and aiming and repeat the test.
-
Page 26: Operating Procedures
"+" sign (in the rear panel display) or no sign (in the HUD) if the target is approaching. As long as the trigger is pulled, the ProLaser III will continue to update the displayed target speed with the most recently determined value. -
Page 27: Range Mode
Range Mode When the ProLaser III is first powered up, the HUD is programmed to display target speeds. For applications where the operator is primarily interested in range... -
Page 28: Stopwatch Mode
Keep in mind that when making range measurements, the instrument does not measure distances shorter than 10 feet. Aiming the ProLaser III at objects closer than 10 feet will not produce a range or speed display. Stopwatch Mode The stopwatch mode of the ProLaser III is used to calculate average speed based on the elapsed time taken by a vehicle to travel a predetermined distance. - Page 29 ProLaser III Operator's Manual Stopwatch Enter Mode The ENTER selection is used to enter the unit of measure to be used in the stopwatch mode (Option 3). The ENTER screen is depicted below- STPW Distance (FEET) YARDS Use either of the blue arrow switches to choose the unit of measure to be used in the stopwatch mode.
- Page 30 ProLaser III Operator's Manual This screen allows the user to enable or disable the audio alert prompts during the stopwatch function. Use either blue arrow switch to make the selection and press ENTER. The “stopwatch ready” screen will appear. It is...
- Page 31 Dist2 If the second point is where the operator is standing, simply press ENTER and the ProLaser III will use Dist1 as the total distance. The operator obtains a second range by aiming the unit at a target and pulling the trigger. The range will appear in the area next to “Dist2”.
-
Page 32: External Output Signal
HUD. EXTERNAL OUTPUT SIGNAL The I/O connector on the left side of the ProLaser III provides a means to connect an external computer, data storage or Giant Display device to the instrument. In a typical application, this might be used to display or store speed readings from the ProLaser III. -
Page 33: Cordless Operation
(the Low Voltage Alert or Low Voltage Warning will appear on the display), unscrew from the handle of the ProLaser III and recharge by inserting it into the charger and attaching it the same way as is done in the handle. -
Page 34: Care And Maintenance
ProLaser III Operator's Manual CARE AND MAINTENANCE The ProLaser III is designed and constructed so that only a minimal amount of normal maintenance is required. Maintenance consists of periodic cleaning of the external optical surfaces. This should be done only when... -
Page 35: Troubleshooting Procedures
If all these appear satisfactory, and the ProLaser III still does not perform properly, it should be returned to the Kustom Signals factory for service. The instrument should be returned in its original... -
Page 36: Regulatory Compliance
Center for Devices and Radiological Health (or CDRH), and the Federal Communications Commission. The following sections describe the requirements of these two agencies, and the manner in which the ProLaser III complies with their regulations. EYE SAFETY CDRH is an agency of the federal Food and Drug Administration that has the responsibility of ensuring the safety of all laser products sold in the US. - Page 37 ProLaser III Operator's Manual While the ProLaser III is certified as a Class I laser device and is inherently eyesafe, certain reasonable precautions should be taken in its operation. As in the case of a movie projector, a person should not stare directly into the beam for extended periods of time.
-
Page 38: Fcc Information
ProLaser III Operator's Manual FCC INFORMATION Since the ProLaser III is not designed to transmit RF (radio frequency) radiation, an FCC station license is not required for operation of the device. However, the ProLaser III does employ internal high frequency digital... -
Page 39: Specifications
ProLaser III Operator's Manual SPECIFICATIONS GENERAL Operating Voltage 8.6 - 16.5 VDC Nominal Power Reqm’ts Voltage (VDC) Current (ma) Speed mode, laser firing 13.6 Range mode, laser firing, backlight on 13.6 Idle 13.6 Sleep 13.6 Power Down 13.6 ALERT! (Low voltage) 9.2 VDC nom... - Page 40 ProLaser III Operator's Manual OPERATIONAL Speed Range 5 to 200 mph (8 to 320 km/h) Speed Display Accuracy +/- 1 mph (+/- 2 km/h) Target Range 10 feet min., up to 6000 feet Wavelength 904 nm +/- 10 nm Range Resolution 0.1 foot/0.1 m...
-
Page 41: Warranty
Owner or Lessee. • This Warranty applies only to the original registered Owner or Lessee on file at Kustom Signals, Inc., and cannot be assigned or transferred to a third party. • The Owner or Lessee shall use the Equipment in accordance with the manufacturer’s operational... - Page 42 • The liability of Kustom Signals, Inc., if any, with respect to the equipment, shall be limited as provided in this Warranty. Kustom Signals, Inc. disclaims any obligation or liability for the loss of use of the...
- Page 43 ProLaser III Operator's Manual Equipment Supplied with Consumable Items Items such as tires, non-rechargeable batteries, light bulbs, transmitter carrying pouch, and microphone cables w/microphone and windscreen are considered consumable items and as such are not covered by this warranty. SMART Radar SMART system radar units are warranted for two years, subject to the warranty terms listed above.
-
Page 45: Table Of Contents
TABLE OF CONTENTS General Information ..........1 Introduction ............1 Unpacking............2 Functional Description ..........3 Control Locations ..........4 Control Descriptions...........6 Power ............6 Trigger............6 TEST/ENTER ..........6 BRT/VOL/Arrow ........7 MODE/Arrow ..........7 MENU/ESC ..........7 Displays and Indicators ........7 Heads-Up-Display ..........8 Status Displays ..........9 Operation ............10 Setup ...............10 Power-On Sequence..........13 Mode/Option Selection........16... - Page 46 Kustom Signals, Inc., 9325 Pflumm, Lenexa KS 66215-3347. Customer Service (800)835-0156 Sales Department (800)4-KUSTOM...
- Page 47 PRO LASER III REFERENCE MANUAL 1010 W Chestnut/P.O. Box 947 KPN 006-0605-00 Chanute, KS 66720 Rev. 3...
Need help?
Do you have a question about the ProLaser III and is the answer not in the manual?
Questions and answers