Dedicated Micros 2060 Operation Manual
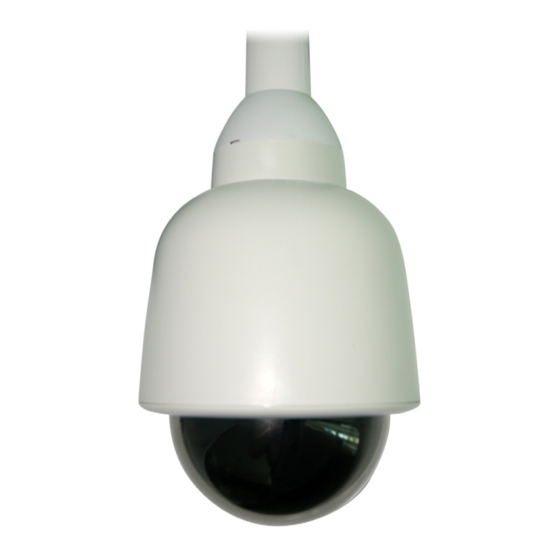
Dome camera
Hide thumbs
Also See for 2060:
- Operation manual (102 pages) ,
- Installation manual (36 pages) ,
- Quick start manual (32 pages)

Related Manuals for Dedicated Micros 2060


Summary of Contents for Dedicated Micros 2060
- Page 1 2060 Dome Camera Operation & Programming Manual Weatherproof and Indoor versions www.dedicatedmicros.com...
-
Page 2: Table Of Contents
Menu Flow Charts ..........20 Alternative Controllers ........22 Troubleshooting ..........25 Whilst every attempt is made to ensure these manuals are accurate and current, Dedicated Micros reserve the right to alter or modify the specification of the machine described herein without prejudice. Dedicated Micros ©2009... -
Page 3: Introduction
Introduction The Dedicated Micros 2060 camera is a precision unit, offering a wide variable speed range, together with a large pre-set memory for positions, tours and alarm responses. There are sensitive day/night camera versions with a switchable infra-red filter and with 36 times or 18 times optical zoom lenses plus 12 times digital enhancement suitable for outdoor use, or a colour/mono camera with 18 times optical zoom and 12 times digital enhancement suitable for indoor applications. -
Page 4: Programmable Features
Real Time Clock The Dedicated Micros 2060/N dome camera is fitted with a real time clock to provide time and date marks for the operator and the recording system if required. A range of selectable formats can provide time and date displays and the unit is able to use the information to provide enhanced alarm functions where the reaction to an alarm can be modified depending on the time of day or the day of the week. -
Page 5: Error Reporting
The size of the patch overlaid is the size of the monitor view at whatever zoom setting is used. When zooming out, the patch reduces in size so that it only covers the original area. International The 2060 Dome menus can be displayed in different languages: • The Standard Dome has menus in English, Dutch, French, Italian and Spanish •... -
Page 6: Operation
Camera Telemetry and Serial Port Settings. If the Dome is configured for ‘up the coax’ telemetry (ie with the address switches set to ‘FD‘, refer to 2060 Dome Camera - Installation and Operation Guide) then the camera telemetry on the DVR should be set to ‘Dennard-C‘. -
Page 7: Main Menu
Preset number 1 and Tour number 1 should be allocated to the most common or important views. These values are the ones to which the dome automatically returns following a power cut if no operator is in attendance, refer to Enable/Disable options->power fail. Dedicated Micros ©2009... -
Page 8: Accept Entry
TO PREVENT UNAUTHORIZED CHANGES BEING MADE TO SETTINGS OR STORED CAMERA POSITIONS, IT IS ADVISED THAT PIN NUMBERS ARE KEPT IN A SAFE PLACE. To gain access to the Supervisor Menu, enter PIN as ‘1111’ To gain access to the Technician Menu, enter PIN ‘9999’ Dedicated Micros ©2009... -
Page 9: Return
│ Edit Preset Text - │ │ │ │ │ │ │ │ │ │ │ │ │ │ Select ‘No’ to use the default names or ‘Yes’ to enter a new name through the following screen. Dedicated Micros ©2009... -
Page 10: Store/Edit Tour
2 seconds dwell time and 3 seconds travel time. When all characters are completed and then accepted, the display clears the entry ready to receive the next position information and the ‘Item’ counter is incremented. When all entries are complete, select the ‘Store Tour’ option. Dedicated Micros ©2009... -
Page 11: Alarm Setup
Alarms are inputs into the dome which require the dome to undertake a specific action. They may come from a number of external sources, such as door entry systems or PIR motion sensors. The Dedicated Micros 2060 dome has a clock function that enables the supervisor to select different actions depending on the time of day or the day of the week. -
Page 12: Mask Alarms
A number of functions are grouped under the Supervisor Options category. Most of these alter the way in which text and information is presented to the operator but there are some camera settings which can be altered to suit the installation requirements. Selecting the options menu brings up the following screen: Dedicated Micros ©2009... -
Page 13: Set User Time-Out
Accepting the entry will return the supervisor to the Options menu and the time selected will be displayed on the screen. If a time-out of zero is selected, the display will show ‘none’ and the dome will wait indefinitely for the next operator action. Dedicated Micros ©2009... -
Page 14: Set Date/Time/Language
Set Date/Time/Language The Dedicated Micros 2060 dome has a Real Time Clock which must be set up on installation. The unit may also contain other language options and an ability to select and change the format for the time display. -
Page 15: Privacy Zone Setup
To clear a privacy zone, the camera must be positioned over the zone before selecting the ‘Clear’ facility or the “Clear all privacy zones” feature selected. The dome will immediately return to normal operation after the zone(s) has been deleted. Dedicated Micros ©2009... -
Page 16: Technician Menu
Alternately the shutter speed may be selected but the image quality may suffer in low light. When HyperD mode is on the dynamic range of the camera is extended to provide better quality images in high brightness/contrast scenes. Note HyperD mode is not available on 18X colour mono camera. Dedicated Micros ©2009... -
Page 17: Head Info Disp
Control Panel and transferred to the dome within the Dedicated Micros serial protocol. The ‘Head info’ option enables text to be displayed, in the top corner of the screen, indicating the current configuration of the dome and information on some of its current actions. -
Page 18: Miscellaneous Services
NOTE: Reload factory defaults’ should not be used unless directed to do so by a trained technician. It will reload all the default settings and delete all stored data such as preset positions, time and date etc. Dedicated Micros ©2009... -
Page 19: Clear Entry
│ │ │ Accept Entry │ │ Clear Entry │ │ Cancel Key in the new PIN (password) and accept the entry. Make a note of the new PIN number and keep it in a safe place Dedicated Micros ©2009... -
Page 20: Menu Flow Charts
..............______________________________ Return ..............______________________________ Exit ..............Reset Head ..............Change PIN ..........Enter New PIN ..............0 1 2 3 4 5 6 7 8 9 ..............Accept Entry ..............Clear Entry ..............Return without Change Return Exit Dedicated Micros ©2009... -
Page 21: Back
..............0 1 2 3 4 5 6 7 8 9 ..............Accept Entry ..............Clear Entry ..............Return without Change Privacy Zone Settings ..............Define single zone ..............Clear single zone ..............Define multiple zones ..............Clear all privacy zones ..............Return ..............Exit Return Exit Dedicated Micros ©2009... -
Page 22: Alternative Controllers
Alternative Controllers It is possible to control the Dedicated Micros 2060 dome from a wide range of controller devices. Always refer to the controller manual to identify the correct operating procedures. The following pages describe the settings and key sequences to control the domes from some of the most common controllers. However, subsequent changes in controller and keyboard design and operation may mean that these notes become incorrect. -
Page 23: Dome Menu Structure With Bbv Controllers
2060 domes can be operated on Philips/Bosch systems using 9600 baud, RS232 control only. They are not compatible with BiPhase systems. 2060 domes require the PTZ commands to be in RS485 format so a suitable RS232 to RS485 converter (e.g. BBV TXLD) will be required at the dome connection. -
Page 24: Shot" 94 "Enter
Some menu settings require pan left or pan right commands from the joystick to scroll through optional values. Pressing “Shot” 01 “Enter” when the cursor is on an ‘Exit’ command line take the dome out the menus and restore normal joystick control. Dedicated Micros ©2009... -
Page 25: Troubleshooting
To check the version of software installed in the dome; Open the Technician Menu (refer to the Operation and Programming manual for details on accessing the menus). Select ‘Maintenance Services’. Select ‘Software Version’. The OSD will display the version of software installed in the dome. Dedicated Micros ©2009... -
Page 26: Camera Version
The single letter in the middle of the reference indicates the supported camera, refer to the table below for more information. Letter Camera Model Resolution Format 36x Day/Night 530TVL 36x Day/Night 530TVL NTSC 18x Colour/Mono 460TVL 18x Colour/Mono 470TVL NTSC 18x Day/Night 530TVL 18x Day/Night 530TVL NTSC Dedicated Micros ©2009... - Page 27 No Control .............25 36X zoom day/night camera module .......3 No Picture ..............25 95 “Preset” .............23 NVM Services ............18 Accessing 2060 Menus from DV-IP DVRs ....6 Operation ..............6 Activity light..............5 Outline Specification: ..........3 Alarm Action Setup ..........11 Pelco P, 4800 ............23 Alarm Response ............4...
- Page 28 Dedicated Micros Benelux 14434 Albemarle Point Place, Suite 100, Joseph Chantraineplantsoen 1, Chantilly, Virginia 20151 USA 3070 Kortenberg, Belgium Dedicated Micros Europe Dedicated Micros, Australia PTY. Hamtorstraße 9, 5/3 Packard Avenue, Castle Hill, 41460 Neuss, Germany NSW 2154, Australia Dedicated Micros France...
Need help?
Do you have a question about the 2060 and is the answer not in the manual?
Questions and answers