Sign In
Upload
Download
Table of Contents
Contents
Add to my manuals
Delete from my manuals
Share
URL of this page:
HTML Link:
Bookmark this page
Add
Manual will be automatically added to "My Manuals"
Print this page
×
Bookmark added
×
Added to my manuals
Manuals
Brands
SonicWALL Manuals
Firewall
NSA 2600
Getting started manual
SonicWALL NSA 2600 Getting Started Manual
Hide thumbs
Also See for NSA 2600
:
Upgrade manual
(15 pages)
1
2
3
4
5
6
7
8
9
10
11
12
13
14
15
16
17
18
19
20
21
22
23
24
25
26
27
28
29
30
31
32
33
34
35
36
37
38
39
40
41
42
43
44
45
46
47
48
49
50
51
52
53
54
55
56
57
58
59
60
61
62
63
Table Of Contents
64
page
of
64
Go
/
64
Contents
Table of Contents
Troubleshooting
Bookmarks
Table of Contents
In this Guide
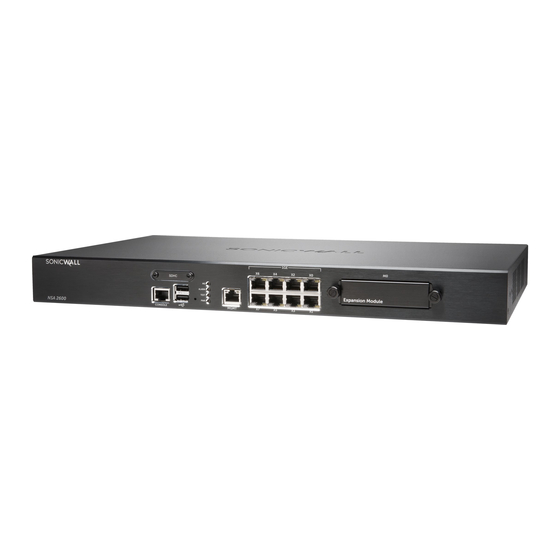
Hardware Overview
Initial Setup
Determining the WAN Type
System Requirements
Recording Configuration Information
Registration Information
Initial Configuration
Using the Setup Wizard
Connecting to the Internet
Connecting the LAN Port
Connecting the WAN Port
Testing Your Internet Connection
Troubleshooting Connections
Registering, Licensing, and Upgrading
Using Mysonicwall
Creating a Mysonicwall Account
Registration Overview
Registering in Sonicos
Alternative Registration Options
Licensing Security Services
Upgrading Firmware
Support and Training Options
Customer Support
User Forums
Knowledge Base
Related Documentation
Additionally Supported Languages
Product Safety and Regulatory Information
Safety Instructions
Installation Requirements
Lithium Battery Warning
Cable Connections
Hinweis zur Lithiumbatterie
Declaration of Conformity
Warranty Information
Advertisement
Quick Links
1
In this Guide
2
Hardware Overview
3
Initial Setup
4
Initial Configuration
Download this manual
SonicWall™ NSA 2600/3600/4600/5600/6600
Getting Started Guide
Regulatory Model Numbers:
1RK29‐0A9 – NSA 2600
1RK26‐0A2 – NSA 3600
1RK26‐0A3 – NSA 4600
1RK26‐0A4 – NSA 5600
1RK27‐0A5 – NSA 6600
Table of
Contents
Previous
Page
Next
Page
1
2
3
4
5
Advertisement
Table of Contents
Need help?
Do you have a question about the NSA 2600 and is the answer not in the manual?
Ask a question
Questions and answers
Subscribe to Our Youtube Channel
Related Manuals for SonicWALL NSA 2600
Firewall SonicWALL NSA 2600 Upgrade Manual
Sonicos 6.2 upgrade (15 pages)
Network Hardware SonicWALL SuperMassive 9200 Getting Started Manual
(74 pages)
Network Hardware SonicWALL NSA 5600 Safety And Regulatory Information Manual
(55 pages)
Network Hardware SonicWALL NSA 6600 Safety And Regulatory Information Manual
(55 pages)
Network Hardware SonicWALL NSA 3600 Safety And Regulatory Information Manual
(55 pages)
Firewall SonicWALL SuperMassive 9000 Series Installation Manual
Ac power supply (2 pages)
Computer Hardware SonicWALL SuperMassive 9200 Installation Manual
System fan module (2 pages)
Firewall SonicWALL NSA E6500 Getting Started Manual
(78 pages)
Firewall SonicWALL NSa Series Getting Started Manual
(39 pages)
Firewall SonicWALL NSA Series Getting Started Manual
(62 pages)
SonicWALL NSa / NSsp Series Manual
(article)
Firewall SonicWALL NSA 2650 Getting Started Manual
High availability firewall (60 pages)
Firewall SonicWALL NSA 2400 Getting Started Manual
Network security appliances (71 pages)
Firewall SonicWALL NSA 240 Getting Started Manual
Network security appliances (90 pages)
Firewall SonicWALL NSa 6700 Quick Start Manual
(2 pages)
Firewall SonicWALL NSa 5700 Quick Start Manual
(2 pages)
This manual is also suitable for:
Nsa 6600
Nsa 3600
Nsa 4600
Nsa 5600
Supermassive 9400
Supermassive 9200
...
Show all
Supermassive 9600
Table of Contents
Print
Rename the bookmark
Delete bookmark?
Delete from my manuals?
Login
Sign In
OR
Sign in with Facebook
Sign in with Google
Upload manual
Upload from disk
Upload from URL


Need help?
Do you have a question about the NSA 2600 and is the answer not in the manual?
Questions and answers