
Related Manuals for Britax Agile Plus


Summary of Contents for Britax Agile Plus
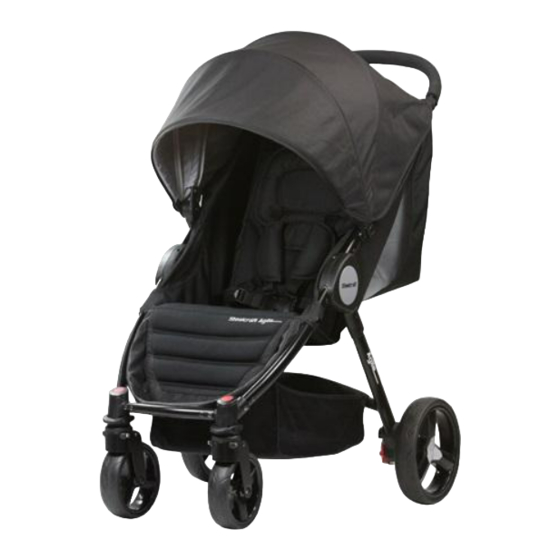
- Page 1 4 Wheel Travel System Stroller SUITABLE FOR USE WITH THE STEELCRAFT INFANT CARRIER (SOLD SEPARATELY) IMPORTANT: KEEP THIS BOOKLET IN A SAFE PLACE FOR FUTURE REFERENCE. Serial No. SH908...
-
Page 2: Table Of Contents
14. To Use The Stroller................21 15. To Fold The Stroller................22 16. To Fit The Reversible Seat..............24 17. To Fit The Bootcover............... 24 18. Install The Infant Carrier (Sold Separately)........25 19. To Release The Infant Carrier............29 Care and Maintenance .................31 www.britax.com.au... -
Page 3: Warnings
• NEVER LET GO OF THE STROLLER WHEN PARKED ON AN INCLINE BECAUSE IT MAY SLIDE OR TIP OVER. ALWAYS PARK ON A FLAT SURFACE. • REMOVE THE CHILD FROM THE STROLLER BEFORE GOING UP OR DOWN STAIRS OR ESCALATORS. www.britax.com.au... - Page 4 • It is unsafe to use accessories other than those tested and approved by Britax. For maximum safety only use accessories designed for this stroller. • Do not place more than 4kg in the basket, or 1kg in any Canopy pocket (if supplied) or 1kg in the parent organiser (if supplied).
- Page 5 THE SUN. The canopy or hood on this product will not give your child total protection from the harmful rays of the sun. WARNING • The footrest is not designed to carry excess weight. DO NOT ALLOW CHILDREN TO STAND OR SIT ON THE FOOTREST. IT WILL DISENGAGE. www.britax.com.au...
-
Page 6: Parts List
PARTS LIST 1 x Stroller Frame, Seat & Basket Accessories 1 x Canopy 2 x Infant Carrier Adaptors 2 x Rear Wheels Child Tray 2 x Front Wheels Seat Insert Bootcover Raincover www.britax.com.au... -
Page 7: Assembled Stroller Parts List
Front canopy tube Upper seat Child Centre Tray Shoulder Pads Harness Lower seat Sure Lock release button Leg rest Rear leg tube Front leg tube Front Wheel release button Basket Front Wheel swivel lock Canopy window Canopy window cover www.britax.com.au... -
Page 8: To Open Stroller
‘click’ which indicates the wheel is locked in. Check the wheel assembly is fully locked by pulling against it. To remove the front swivel wheels, locate and press in the red button on the top of the wheel moulding. www.britax.com.au... -
Page 9: To Fit And Remove The Rear Wheels
Press the swivel lock down to lock the swivel wheels. Push the swivel wheel lock up to allow the wheels to swivel. Note: Always lock the swivel wheels when using the stroller on rough surfaces as it will minimise wheel wobble. www.britax.com.au... -
Page 10: To Attach And Use The Canopy
Attach the snaps located on the straps on the sides of the canopy to the top of the handle tubes, then fold the strap up under the canopy back flap and secure strap with hook and loop to the underneath of the canopy. www.britax.com.au... - Page 11 Attach the hook strip on the inside edge of the canopy to the loop strip on the side of the stroller. To remove the canopy, press in the button on the canopy moulding and pull out of the frame mouldings. The button on the canopy moulding www.britax.com.au...
- Page 12 Canopy window Canopy window flap Canopy back flap zipper For additional air circulation the back flap of the canopy can be removed by opening the zipper. To reattach the back flap to the main canopy secure with the zipper. www.britax.com.au...
-
Page 13: To Attach And Use The Child Tray
Push on the adaptor until you hear a ‘click which indicates the adaptor has locked in. Pull up on each adaptor to check they have fully locked in. Align the child tray onto the adapters and lower the child tray until you hear a click Child Adapter Tray www.britax.com.au... -
Page 14: To Adjust The Backrest
To lower the backrest, support the backrest with one hand and with the other hand pull down the on the backrest adjuster button and lower the backrest to the desired position. Main adjuster Backrest adjuster moulding button Plastic rings www.britax.com.au... -
Page 15: To Use The Brakes
WARNING: FOOTREST IS NOT DESIGNED TO SUPPORT EXTRA WEIGHT. DO NOT ALLOW CHILDREN TO STAND OR SIT ON THE FOOTREST. IT WILL DISENGAGE IF EXTRA WEIGHT IS APPLIED. IF FOOTREST DISENGAGES SIMPLY LIFT UP AGAIN TO RESET LEG/ FOOTREST MODE. www.britax.com.au... -
Page 16: To Adjust The Pivot Handle
A five point harness is provided to restrain your child. Buckle tongues separate for added safety. To reconnect buckle tongues and to secure the child in the harness please follow the steps below carefully. www.britax.com.au... - Page 17 Buckle tongues lock into position. housing Waist strap Crotch strap Tighten or loosen shoulder and crotch straps by sliding 3 bar 3 bar up and down the 3 bar slider slider sliders. Waist strap 3 bar slider Crotch strap www.britax.com.au...
- Page 18 3 bar slider up or down to adjust to the desired fit. Always adjust the harness strap when changing the seating position of the child. CAUTION: DO NOT SLIDE 3 BAR SLIDER OVER THE SEWN TAB ON SHOULDER HARNESS www.britax.com.au...
- Page 19 The stroller seat has *2 or 3 sets of harness slots at different heights to accommodate the child. To change the shoulder harness height, push the shoulder harness tongue out of the current harness slot and through the back of the seat. * Depending on the model www.britax.com.au...
-
Page 20: To Use The Teether Strap
13. TO FIT THE RAIN COVER Pull the rain cover over extended canopy and push the back flap of rain cover through the handle opening. www.britax.com.au... -
Page 21: To Use The Stroller
• Caution is required when pushing the stroller on a steep slope as the stroller may become unstable. Always hold the handles firmly. • Whenever you stop, always apply the brakes before you leave the stroller. www.britax.com.au... -
Page 22: To Fold The Stroller
15. TO FOLD THE STROLLER Tuck the bottom of the canopy backflap into small mesh pocket. Close canopy. Canopy back flap Before folding stroller ensure footrest is in the lowest postion. Ensure the pivitol handle is in the highest postion. www.britax.com.au... - Page 23 Lock the frame together with the storage latch. A carry handle is supplied for ease of transport when stroller is fully folded. Only use the handle to carry the stroller. Storage latch Once folded the stroller stands in an upright position. www.britax.com.au...
-
Page 24: To Fit The Reversible Seat
17. TO FIT BOOTCOVER Raise leg support, hook bootcover product under the leg support and pull bootcover under the child tray. Connect the hook and loop around stroller frame. www.britax.com.au... -
Page 25: Install The Infant Carrier (Sold Separately)
Please Note: These Instructions are for installing and removing the Infant Carrier on the stroller only. For installing and proper care of the Infant Carrier in the car please follow the Instruction book that is included with the Infant Carrier. www.britax.com.au... - Page 26 Face the feet end of the Infant Carrier towards the stroller backrest. With the Infant Carrier handle in the upright position locate the Infant Carrier handle mouldings over the adaptors on either side. Notice the indicator is GREEN. Handle latch Indicator www.britax.com.au...
- Page 27 The Infant Carrier now needs to be locked securely into the adaptors. Squeeze in and hold the latches on either side of the handle, rotate the handle backwards. The GREEN indicator will now turn to RED. Handle latch Indicator www.britax.com.au...
- Page 28 Please Note: The Infant carrier has been fitted with a hood when using the stroller. The hood can also be used in the car. Refer to the Infant Carrier instructions regarding placing and securing your baby in the Infant Carrier. www.britax.com.au...
-
Page 29: To Release The Infant Carrier
To remove the Infant Carrier, squeeze both handle latches in to release the locks. The indicator will now be RED. Indicator Handle latch Continue to rotate the handle forward until it returns to the upright position. Release the latches, the indicator should now be GREEN. Handle latch Indicator www.britax.com.au... - Page 30 19. TO RELEASE THE INFANT CARRIER Lift and remove the Infant Carrier away from the stroller. To remove the adaptors, press the red button in on the inside of the adaptor and pull the adaptor up. Adapter Red Button www.britax.com.au...
-
Page 31: Care And Maintenance
• Always check parts regularly for tightness of screws, nuts, and other fasteners - tighten if required. To maintain the safety of your nursery product, seek prompt repairs for bent, torn, worn or broken parts. THIS PRODUCT IS NOT INTENDED FOR COMMERCIAL USE. www.britax.com.au... - Page 32 99 Derby Road, Sunshine, Victoria, 3020, Australia Phone: (03) 9288 7288 Fax: (03) 9311 5798 Due to our continuing program of development, Britax Reserves the right to alter these specifications, colour or design without any further notice. The Steelcraft trademark is the property of Britax Childcare Pty. Ltd - Australia.
Need help?
Do you have a question about the Agile Plus and is the answer not in the manual?
Questions and answers