Table of Contents
Advertisement
Quick Links
Advertisement
Table of Contents

Related Manuals for Bunn JDF Silver Series


Summary of Contents for Bunn JDF Silver Series
- Page 1 BUNN TECHNICAL TRAINING ® JDF Silver Series...
-
Page 2: Table Of Contents
Unit 4: Preventive Maintenance Tools Required ........................19 PM Steps ..........................19 Unit 5: Troubleshooting LED Indicator Chart ......................23 Accessing the LED’s ......................23 Mechanical or Refrigeration Failure ................. 24 © 2011 Bunn-O-Matic Corporation. All Rights Reserved Rev. B... -
Page 3: Unit 1: Installation
nstallation Unit Objectives Given a realistic scenario depicting a new site install, the learner will be able to install and setup the dispenser for customer turnover without error. Given a new machine, all the necessary tools and safety equipment, the learner will be able to install the dispenser without error. -
Page 4: Site Requirements
Water Supply Install Step 1: Flush water lines. Step 2: Attach to the fitting at the rear of the machine. Step 3: Turn on water and check for any kinks or leaks in the line. Install the Air Filter Step 1: Locate the filter and the Velcro strips supplied. Step 2: Place Velcro strips on the filter and on the coils at the rear of the machine. Step 3: Secure the filter to the machine using the Velcro. After you have install the air filter verify that the refrigeration switch is in the off position. JDF Silver Series Training Manual... -
Page 5: Initial Fill
Step 12. It will take several hours to create the ice bank required for full dispenser performance. During this time, some further trickling from the water bath is expected due to expansion caused by ice bank formation. While the refrigeration system is creating the ice bank, the dispenser may be readied for use as described in Loading, Bunn-O-Matic Corporation... -
Page 6: Unit 2: Setup
etup Unit Objectives Given a realistic scenario depicting a new site install, the learner will be able to install and setup the dispens- er for customer turnover without error. Given an installed machine, all the necessary tools and safety equipment, the learner will be able to set the machine up for initial operation. -
Page 7: Product Preparation
Step 2: Press and hold the dispense button, (“Stop/Plus” button if using portion control option), until concentrate dispenses from the dispense nozzle. Ambient Conversion Kit (Optional) The ambient conversion kit, (BUNN P/N: 33699.0001), allows remotely located ambient concentrate products to be used in place of dispenser mounted frozen concentrate products. One kit is required for each dispense station. -
Page 8: Calibration Process
Water Flow Testing and Adjustment Tools Required: • 64 ounce pitcher (BUNN P/N: 04238.0000) or graduated measuring cup (BUNN P/N: 33095.0000). Step 1: Place a graduated measuring cup or the large chamber of the empty brixing cup (BUNN-O-MATIC part number 33095.0000) under the appropriate dispense nozzle. Place the Program switch in the ON position. -
Page 9: Pump Speed Adjustment
Total Dispense Ratio Set Up Procedure Tools Required: • 64 ounce pitcher (BUNN P/N: 04238.0000) or graduated measuring cup (BUNN P/N: 33095.0000). Step 1: Reference recorded total dispense water for each dispense station. Step 2: Place the Program switch in the ON position. - Page 10 4.88 4.85 4.82 4.80 4.75 7.13 6.33 5.94 5.70 5.54 5.43 5.34 5.28 5.23 5.18 5.15 5.12 5.09 5.07 6.67 6.25 6.00 5.83 5.71 5.63 5.56 5.50 5.45 5.42 5.38 5.36 5.33 Dispensed Product (oz.) JDF Silver Series Training Manual...
-
Page 11: Unit 3: Machine Composition
achine oMposition Unit Objectives Given a realistic scenario in which the learner has access to the machine’s internal components the learner will understand the composition and functions of the dispenser. Given a realistic scenario requiring the learner to access the internal components of the machine the learner will be able to remove panels. -
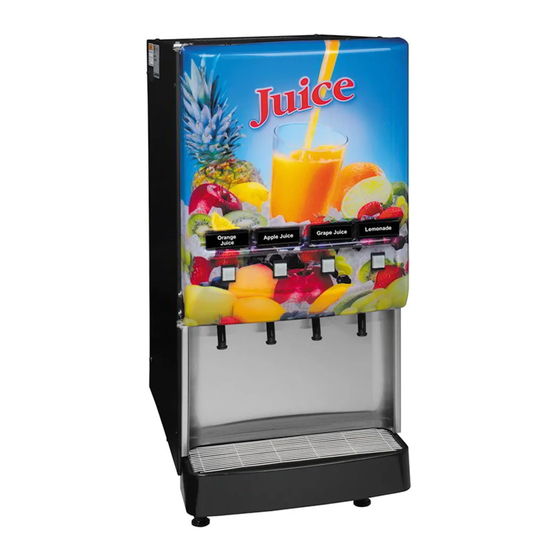
Page 12: Exterior Overview
This houses the product and keeps it cool by maintaining a cabinet temperature range of 35º to 41º F. If the customer wishes to use ambient concentrates you will have to install the optional Ambient Concentrate Conversion Kit. JDF Silver Series Training Manual... -
Page 13: Accessing The Inside Of The Machine
The bottom step down transformer connects to the J-6 connector, marked “Power” on the control board. The transformer is responsi- ble for the main power for the control board, machine and dispense stations 1 and 2 known as left and left middle. Bunn-O-Matic Corporation... - Page 14 J-12: Right power for stations 3 and 4 (Transformer A) Left Middle Left Middle Right Right Station Station Station Station J-13: Pump motor 3 and 4 and water valves 3 and 4 J-15: Not used JDF Silver Series Training Manual...
-
Page 15: Door Assembly
Door Assembly The door gasket is mounted and foamed in place to the inner door. Early models with fluorescent lamps may contain one or two ballasts mounted on the inner door panel or the latest version being LED lighting. See BUNN service bulletin 175 about converting fluorescent lighting to LED lighting. The switch circuit board, which communicates with the main CBA, is isolated and mounted to the inner door panel. The portion control switch membranes connect to the switch board in logic order from left to right. -
Page 16: Refrigeration System
50º F. A thermistor can also be used to detect rise in temperature for a period of time and signal a fault status. The nominal cabinet holding temperature is expected to be at or below 41º F. JDF Silver Series Training Manual... -
Page 17: Water Tank Assembly
The concentrate and water mixes in the High Intensity dispense valve and is being delivered out the quick stop nozzle. The optional cold water dispense is only available on the JDF-4S. Water Coil Dispense Valve Bunn-O-Matic Corporation... -
Page 18: Dispense Platform
Water In Motor Dispense Valve Product Out Pump Assembly Platform High Intensity Dispense Valve The water entering the rear of the dispense valve is coil activated or energized (24VDC) to let the regulated water flow travel down the stem and out the narrow slot as the concentrate enters the valve body and the High Intensity mixing technology takes place. The mixed product travels down the valve ramp and out the dispense nozzle. JDF Silver Series Training Manual... -
Page 19: Unit 4: Preventive Maintenance
reventive aintenance Unit Objectives Given a realistic scenario depicting a machine requiring a preventive maintenance, the learner will be able to identify which elements of a component need to be serviced without error. Given a machine, all the necessary tools and safety equipment, the learner will be able to identify the components that need to be serviced for the PM. -
Page 20: Tools Required
Preventive Maintenance In order to maintain proper operation and long service life BUNN recommends performing the preventive mainte- nance every 6 months. Individual customers will vary with some customers choosing not to receive preventive main- tenance. Some of the PM items may require more frequent maintenance depending on the site conditions. - Page 21 Step 3: Press and release the appropriate dispense button, (“Stop/Plus” button if using portion control option). The machine will dispense water from the dispense nozzle for 3 seconds. Step 4: Measure the water dispensed. Step 5: Adjust the water flow if needed, (see water flow chart in the “Installation and Operating Guide”). Clockwise will increase flow rate and counterclockwise will decrease the flow rate. Step 6: Mark the quantity of water dispensed on the total dispense ratio chart. Bunn-O-Matic Corporation...
- Page 22 %. Step 7: Adjust the pump speed (down to decrease the brix %; up to increase the brix %) to achieve the correct brix % as described in Pump Speed Adjustment. Step 11: If customer has a BUNN water filtration system installed before the dispenser, replace the filter or filter car- tridge. JDF Silver Series Training Manual...
-
Page 23: Unit 5: Troubleshooting
roubleshooting Unit Objectives Given a realistic scenario depicting a broken machine, the learner will be able to effectively diagnosis, troubleshoot, and repair the problem returning the machine to normal operation. Given a dispenser having a fault condition, all the necessary tools and safety equipment, the learner will be able to diagnose the symptom to the actual problem. -
Page 24: Led Indicator Chart
Step 2: Remove the two standard screws securing the lower splash panel. Slide the splash panel down and outward away from the dispenser. Step 3: Locate the LED’s at the bottom of the CBA. JDF 4S JDF 2S JDF Silver Series Training Manual... -
Page 25: Mechanical Or Refrigeration Failure
Install voltmeter across K1 relay coil and plug in unit, monitor 6 minute delay before 120VAC is present across K1 relay coil. Ultimately if steps 1 thru 3 check out good you will be replacing main control board as a last result step before step 5. Step 5: You can have the same symptoms of a frozen bath if the product coil has shifted in the bath tank and is too close to the ice block which freezes the water in the product coil. Bunn-O-Matic Corporation... - Page 26 Step 4: Compressor overload protector or start (ptc) relay is open circuit. Allow overload protector to cool and reset, check for continuity. Replace overload protector if no continuity is present after cool down. Start (ptc) relay- 4.70 ohms at 70º F. across PTC or less. No continuity, replace start (ptc) relay. JDF Silver Series Training Manual...
- Page 27 1.481 0.3965 0.1312 7.797 1.428 0.3849 0.1279 7.439 1.382 0.3736 0.1247 7.101 1.328 0.3626 0.1215 6.780 1.281 0.3521 0.1185 6.475 1.236 0.3419 0.1155 6.185 1.194 0.3320 0.1127 5.911 1.152 0.3225 0.1099 5.650 Customer: BUNN-O-MATIC CORPORATION 27246-0000 Rev. E Bunn-O-Matic Corporation...
- Page 28 5826.00 5674.00 5980.00 0.02 2.27 1.16 101.00 5696.00 5545.00 5848.00 0.02 2.26 1.18 102.00 5569.00 5420.00 5719.00 0.02 2.24 1.20 103.00 5446.00 5299.00 5593.00 0.02 2.24 1.20 104.00 5325.00 5180.00 5471.00 0.02 2.23 1.22 28891C.SAM JDF Silver Series Training Manual...
- Page 29 1.82 2.41 179.00 1190.00 1138.00 1243.00 0.04 1.81 2.44 180.00 1169.00 1118.00 1221.00 0.04 1.75 2.51 181.00 1149.00 1098.00 1200.00 0.04 1.74 2.55 182.00 1129.00 1078.00 1179.00 0.04 1.77 2.53 183.00 1109.00 1059.00 1159.00 0.04 1.80 2.50 28891C.SAM Bunn-O-Matic Corporation...
- Page 30 724.00 689.00 760.00 0.04 1.59 3.09 209.00 713.00 677.00 748.00 0.05 1.61 3.09 210.00 701.00 666.00 736.00 0.05 1.64 3.04 211.00 690.00 655.00 724.00 0.05 1.67 3.00 212.00 678.00 643.00 713.00 0.05 1.62 3.18 28891C.SAM JDF Silver Series Training Manual...
Need help?
Do you have a question about the JDF Silver Series and is the answer not in the manual?
Questions and answers