Table of Contents
Advertisement
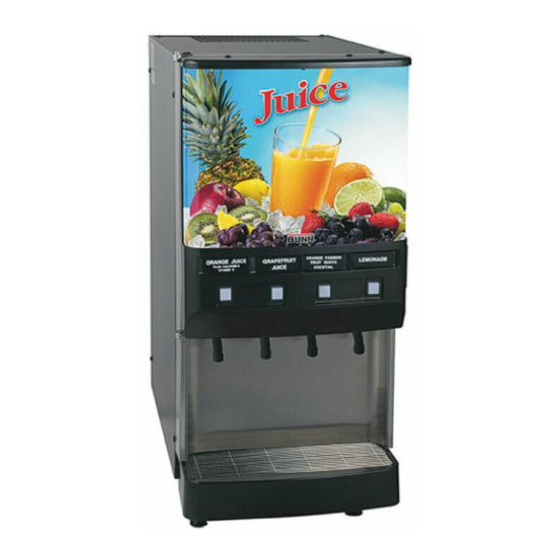
JDF-2S, JDF-4S
Silver Series
®
JDF-2S & JDF-4S PH or PC with Non LIT or LIT Graphic Door
JDF-2S & JDF-4S PH or PC with LIT Segment Door
SERVICE & REPAIR MANUAL
Bunn-O-Matic Corporation
Post Office Box 3227, Springfield, Illinois 62708-3227
Phone (217) 529-6601 | Fax (217) 529-6644
49179.0000 G 10/19 © 2013 Bunn-O-Matic Corporation
Advertisement
Chapters
Table of Contents

Related Manuals for Bunn Silver Series


Summary of Contents for Bunn Silver Series
- Page 1 JDF-2S & JDF-4S PH or PC with Non LIT or LIT Graphic Door JDF-2S & JDF-4S PH or PC with LIT Segment Door SERVICE & REPAIR MANUAL Bunn-O-Matic Corporation Post Office Box 3227, Springfield, Illinois 62708-3227 Phone (217) 529-6601 | Fax (217) 529-6644 49179.0000 G 10/19 © 2013 Bunn-O-Matic Corporation...
-
Page 2: Warranty
AS SPECIFIED HEREIN, TO REPAIR, REPLACEMENT OR REFUND. In no event shall BUNN be liable for any other damage or loss, including, but not limited to, lost profits, lost sales, loss of use of equipment, claims of Buyer’s customers, cost of capital, cost of down time, cost of substitute equipment, facilities or services, or any other special, incidental or consequential damages. -
Page 3: Table Of Contents
INTRODUCTION Safety first! To avoid electrical shock, unplug dispenser from power source before servicing inside. Basic Maintenance In order to maintain proper machine operation, a Preventative Maintenance schedule must be performed on a regular basis. The following procedures pretain to all versions in the JDF family of machines unless otherwise noted. CONTENTS Warranty ...........................2 User Notices ..........................3... -
Page 4: Recommended Daily Cleaning
Recommended Daily Cleaning Instructions The use of a damp cloth rinsed in any mild, non-abrasive, liquid detergent is recommended for cleaning all surfaces on Bunn-O-Matic equipment. Do NOT clean this equipment with a water jet device. 1. Open dispenser door. Lift up on 2. -
Page 5: Preventive Maintenance Schedule
REQUIRED REGULAR MAINTENANCE: When performing Daily-Weekly Cleaning procedures, inspect o-rings, seals, and bushings for signs of wear or damage and replace immediately. Check and/or replace every 6 months or as required: 39690.0000 Pump Tube Replacement Kit (Includes items indented below) 28755.1011 Tube, Norprene .25"... -
Page 6: Troubleshooting
TROUBLESHOOTING A troubleshooting guide is provided to suggest probable causes and remedies for the most likely problems encountered. If the problem remains after exhausting the troubleshooting steps, contact the Bunn-O-Matic Technical Service Department. • Inspection, testing, and repair of electrical equipment should be performed only by qualified service person- nel. - Page 7 TROUBLESHOOTING (Continued) PROBLEM PROBABLE CAUSE REMEDY Refrigeration 1. Compressor ON/OFF switch. Check for "ON" position or no continu- Dispense stations not working. ity - replace switch. Note: Cooling failure or excessive bath and cabinet temperatures for 2. Dirty condenser filter or fins. Clean filter and fins or replace con- more than 4 hours will result in dis- denser filter.
- Page 8 TROUBLESHOOTING (Continued) PROBLEM PROBABLE CAUSE REMEDY Dispense station not working 1. Dispense Lockout switch set to Place switch in ON position. OFF position. 2. Dispense switch failed Check switch and harness for proper continuity. All stations dispense concentrate only Main water supply Check for ON position.
- Page 9 TROUBLESHOOTING (Continued) PROBLEM PROBABLE CAUSE REMEDY Dispense station Water solenoid Replace solenoid (24vdc) or check concentrate only wire connection between water valve and main control board. Dispense station Concentrate out Replace refill concentrate container water only or BIB Product pump not pumping Check for proper counterclockwise rotation of pump rollers.
- Page 10 TROUBLESHOOTING (Continued) PROBLEM PROBABLE CAUSE REMEDY Water leak filling drip tray or around 1. Initial fill/setup Some expansion normal. May fill drip dispense deck area tray during initial ice block formation Inspect or replace fittings clamps, 2. Dispense deck o-rings, solenoids and quick discon- nect fittings.
- Page 11 TROUBLESHOOTING (Continued) PROBLEM PROBABLE CAUSE REMEDY Unit is not working 1. Step-down transformer. Check for 120/24 or 230/24 vac. If no 24vac reading, replace step-down transformer. 2. Main control board. If 24 vac present and no LED’s lit, replace control board.. Difficulty brixing and/or weak bever- 1.
-
Page 12: Service
SERVICE This section provides procedures for testing and replacing various major components used in this dispenser should service become necessary. Refer to Troubleshooting for assistance in determining the cause of any problem. WARNING - Inspection, testing, and repair of electrical equipment should be performed only by qualified service personnel. -
Page 13: Access Panels
SERVICE(CONT.) ACCESS PANELS Location: All access panels are similar through the whole JDF family (JDF-4S shown). Before removing panels, make sure power is OFF to the machine and water is disconnected accept where indicated in testing procedures. Retain all screws and other attaching hardware for re-assembly. JDF-4S shown FIG. -
Page 14: Dispense Platform Removal
SERVICE(CONT.) DISPENSE PLATFORM REMOVAL 1. Remove concentrate dispense tips by turning 1/4 turn to the left, then pull straight down. 2. Lift and remove product shelf to access dispense platform(s). 3. Remove front thumb screw holding dispense platform(s). 4. Disconnect 12 pin connector above dispense platform in rear. 5. -
Page 15: Ballast
SERVICE (CONT.) 5. Remove the wire to the ballast from the back of Ballast (JDF-2S,4S) each bracket. 6. To disengage the ballast wire from the bracket, push JDF-2S shown a 1/16” allen wrench (or equivalent tool) into the front hole that lines up with the wire in the back. Pull the wire out. -
Page 16: Cabinet Fan
SERVICE (CONT.) Cabinet Fan (all Models) 1. Disconnect the dispenser from the power source. JDF-2S shown 2. Remove the four screws attaching the fan and cover assembly. 3. Gently pull the cover forward and disconnect the 2-pin connector from the main wiring harness. 4. -
Page 17: Compressor
SERVICE (CONT.) LG Compressor (JDF-2S,4S,4D) Test Procedures: JDF-4S shown Compressor Relay: Refer to FIG. 8 1. Disconnect the dispenser from the power source. 2. Remove compressor terminal cover retainer (1). 3. Connect a voltmeter across the white wire and the blue/black wire. - Page 18 SERVICE (CONT.) Compressor (Cont.) Removal and Replacement: Compressor Relay: Refer to FIG. 8 1. Remove the terminal cover (1) 2. Disconnect the white wire from the compressor relay. 3. Pull relay (2) off of the compressor pins and discard. 4. Push new relay onto the compressor pins. 5.
- Page 19 SERVICE (CONT.) GD Compressor (JDF-2S,4S,4D) Test Procedures: JDF-4S shown Compressor Start Relay: Refer to FIG. 12 WARNING: The compressor capacitor must be properly discharged before proceeding. This is most commonly done on low voltage capacitors by shorting across the terminals with a screwdriver. 1.
- Page 20 SERVICE (CONT.) Compressor (Cont.) Removal and Replacement: BLU/BLK Compressor Start Relay: Refer to FIG. 12 1. Remove the terminal cover (4) 2. Disconnect the wires from the compressor start relay. 3. Pull relay (1) off of the compressor pins and discard. 4.
- Page 21 SERVICE (CONT.) Compressor (JDF-4SB) Test Procedures: Compressor Start Relay: Refer to FIG. 16 WARNING: The compressor capacitor must be properly discharged before proceeding. This is most commonly done on low voltage capacitors by shorting across the terminals with a screwdriver. 1.
- Page 22 SERVICE (CONT.) Compressor (Cont.) Removal and Replacement: BLU/BLK Compressor Start Relay: Refer to FIG. 16 1. Remove the terminal cover (4) 2. Disconnect the wires from the compressor start relay. 3. Pull relay (1) off of the compressor pins and discard. 4.
-
Page 23: Compressor Switch
SERVICE (CONT.) Compressor Switch (all Models) Removal and Replacement: JDF-4S shown 1. Disconnect the dispenser from the power source. 2. Remove the cover or splash panel to gain access to the switch. 3. Gently disconnect the wiring harness from the switch. -
Page 24: Condenser Fan
SERVICE (CONT.) Condenser Fan (all Models) 1. Disconnect the dispenser from the power source. JDF-4S shown 2. Remove the four screws attaching the fan and cover assembly to the refrigeration cabinet. 3. Gently pull the cover assembly forward and discon- nect the 2-pin connector from the fan to the main harness. -
Page 25: Control Board (Main)
SERVICE (CONT.) Removal and Replacement: Control Board, Main (all Models) 1. Remove the four #6-32 screws securing the control JDF-4S shown board to the component bracket. 2. Disconnect all the plugs on the main wiring harness from the connectors on the control board. 3. -
Page 26: Control Board (Portion Control Models)
SERVICE (CONT.) Portion Control Board (JDF-2S,4S) Removal and Replacement: 1. Remove the five screws securing the door cover to the door frame. 2. Carefully pull the cover forward and disconnect all switch harnesses from the connectors on the control board. 3. - Page 27 SERVICE (CONT.) Push Button Control Board (JDF-4D) Removal and Replacement: 1. Remove the five screws securing the door cover to the door frame. 2. Carefully pull the cover forward and disconnect all switch harnesses from the connectors on the control board. 3.
- Page 28 SERVICE (CONT.) Portion Control Board (JDF-4D) Removal and Replacement: 1. Remove the five screws securing the door cover to the door frame. 2. Carefully pull the cover forward and disconnect all switch harnesses from the connectors on the control board. 3.
-
Page 29: Circulation Pump
SERVICE (CONT.) Circulation Pump (all Models) Removal and Replacement: Note: The dispenser will require to be unplugged from power for 48 hours to allow a completely frozen water bath to thaw before recirculation pump can be replaced 1. Remove dispense platform(s) for ease of taking out recirculating pump. -
Page 30: Dispense Platform Switch
SERVICE (CONT.) Dispense Platform Switch (all Models) Removal and Replacement: JDF-2S shown 1. Disconnect the dispenser from the power source. 2. Loosen the two #8-32 screws securing the com- ponent mounting bracket to the dispenser base. 3. Disconnect the two black wires from the switch. 4. -
Page 31: Dispense Pump
SERVICE (CONT.) Dispense Pump (all Models except JDF-4D) 5. Install the new pump tube around the rotor and position into the rear housing with the clamp rest- ing on the top edge. 6. Install the front housing to be flush with the rear housing. -
Page 32: Dispense Motor
SERVICE (CONT.) Dispense Motor (all Models) Removal and Replacement: 1. Disconnect the two wires from the dispense motor. 2. Loosen the four #8-32 screws securing the motor to the platform assembly and remove the motor. 3. Inspect the gasket and rubber bushings for signs of wear and replace if necessary. -
Page 33: Dispense Valve
SERVICE (CONT.) Dispense Valve (all Models) Removal and Replacement: 1. Disconnect the two wires from the dispense valve. 2. Remove the #6-32 screw and plate securing the water manifold tube to the valve. 3. Loosen the two #6-32 screws securing the valve to the platform assembly and remove the valve. -
Page 34: Dispense Switches
SERVICE (CONT.) Dispense Switches (JDF-2S, JDF-4S) 1. Disconnect the dispenser from the power source. 2. Remove the five screws attaching the dispenser door cover to the door and move the door cover to gain access to the switches. 3. Disconnect the wires on the dispense switch to be removed from the door wiring harness. -
Page 35: Cold Water Dispense Switch
SERVICE (CONT.) Cold Water Dispense Switch (JDF-4S only) 1. Disconnect the dispenser from the power source. 2. Remove the five screws attaching the dispenser door cover to the door and move the door cover to gain access to the switches. 3. -
Page 36: Dispense Membrane Switches
SERVICE (CONT.) Dispense Membrane Switch (all Models) 1. Disconnect the dispenser from the power source. 2. Open the dispenser door. 3. Remove the four #8-32 screws securing the lower door panel and remove the panel. 4. Disconnect the six pin harness from the switch board. - Page 37 SERVICE (CONT.) Cold Water Dispense Membrane Switch (all Models) 1. Disconnect the dispenser from the power source. 2. Open the dispenser door. 3. Remove the four #8-32 screws securing the lower door panel and remove the panel. 4. Disconnect the three pin harness from the switch board.
- Page 38 SERVICE (CONT.) PH or PC Membrane Switches (without Bezel) Removal and Replacement: 1. Disconnect the dispenser from the power source. 2. Remove the 5 outter screws securing the door cover. 4. Disconnect the membrane switch connector from the switch board. 5.
-
Page 39: Cold Water Membrane Switch
SERVICE (CONT.) Cold Water Membrane Switch (without Bezel) Removal and Replacement: 1. Disconnect the dispenser from the power source. 2. Remove the 5 outter screws securing the door cover. 4. Disconnect the membrane switch connector from the switch board. 5. Carefully peel the membrane switch from the front of the door cover. -
Page 40: Emi Filter
SERVICE (CONT.) EMI Filter (all Models) Removal and Replacement: JDF-4S shown 1. Disconnect the wires from the EMI Filter. 2. Remove the two #8-32 screws and nuts securing the EMI Filter. 3. Remove and discard EMI Filter. 4. Install new EMI Filter using two #8-32 screws and nuts to secure EMI Filter to its former location. -
Page 41: Lamp
SERVICE (CONT.) Lamps, Holders and Ballast(s) (Early Models) 1. Disconnect the dispenser from the power source. 2. Remove the five #10-32 screws securing the door cover to the door and move the cover aside to gain access to the light panel. 3. -
Page 42: Led Lamp
SERVICE (CONT.) LED Lamps (JDF-2S, JDF-4S) Removal and Replacement: 1. Disconnect power from the dispenser. 2. Remove the five #6-32 screws securing the door cover to the door. LED regulator board 3. Carefully lower the door cover and disconnect the lamp terminals from the LED regulator board. -
Page 43: Rectifier
SERVICE (CONT.) Rectifier (JDF-2S, JDF-4S) Removal and Replacement: Disconnect the wires from the rectifier. Remove the #10-32 screw securing the rectifier. Remove the rectifier and discard. Secure new rectifier with #10-32 screw. Refer to Fig. 56 and reconnect the wires. BLU from Door Harness (+) WHI/GRN to Transformer (~ AC) WHI/BLK to Transformer (~ AC) -
Page 44: Relay
SERVICE (CONT.) Relay (all Models) 4. Disconnect the blue/black wire and the red/black wires from relay terminals #4 and #6. 5. Connect the dispenser to the power source. 6. Turn on power and check for continuity across terminals on relay. If continuity is present as described, disconnect the dispenser from power source and reconnect wires to terminals #4 and #6, the relay is working. -
Page 45: Resistor
SERVICE (CONT.) Resistor (all 230V Models) Removal and Replacement: 1. Disconnect the dispenser from the power source. 2. Disconnect the resistor from the relay and discard. 3. Install new resistor to the relay as shown below. 4. Return power to the dispenser. FIG. -
Page 46: Solenoid (Cold Water)
SERVICE (CONT.) Solenoid - Cold Water (JDF-4S only) 6. Check the solenoid valve for coil action. Connect the dispenser to the power source. Press the Cold Water dispense switch and listen carefully in the vicinity of the solenoid valve for a “clicking” sound as the coil magnet attracts. - Page 47 SERVICE (CONT.) Solenoid - Inlet (all Models) age in the water line before the solenoid valve or, the solenoid valve may require inspection for wear, and removal of waterborne particles. If the sound is not heard as described, replace the solenoid valve.
-
Page 48: Temperature Probe (Water Bath Thermistor)
SERVICE (CONT.) Temperature Probe (all Models) (Also known as Water Bath Thermistor) JDF S Bath Thermistor Calibration: Recalibration of the bath thermistor should be con- ducted anytime the main circuit board or the bath thermistor is being replaced. Recalibration procedure: Step 1: Remove the front splash panel so you can see the LED’s on the main circuit board. - Page 49 SERVICE (CONT.) Removal and Replacement: 1. Disconnect the dispenser from the power source. 2. Remove the top rear cover. 3. Disconnect the two pin connector from the dis- penser main wiring harness. 4. Remove the temperature probe by firmly pulling- up on the tube at the tank lid.
-
Page 50: Electrical Schematics
SERVICE (CONT.) Temperature Sensor (all Models) Removal and Replacement: 1. Remove the left side housing panel. 2. Disconnect the plug on the temperature sensor leads from the connector on the dispenser main harness. 3. Open the cabinet door and remove the product containers. -
Page 51: Transformer
SERVICE (CONT.) Transformer (all Models) Removal and Replacement: 1. Loosen the two #8-32 screws securing the com- ponent bracket to the dispenser housing base. 2. Pull component bracket out the front of the dispenser far enough so the transformer can be disconnected from the main wiring harness. -
Page 52: Transformer-Lited Doors
SERVICE (CONT.) Transformer - Lited Doors (JDF-2S, JDF-4S) Removal and Replacement: 1. Loosen the two #8-32 screws securing the com- ponent bracket to the dispenser housing base. 2. Pull component bracket out the front of the dispenser far enough so the transformer connector can be disconnected from the main wiring harness. - Page 53 Triac Map 1. Compressor Relay Q25 2. Station 2 Water Q27 3. Station 1 Water Q28 4. Station 1 Concentrate Q23 5. Station 2 Concentrate Q18 6. Station 3 Concentrate Q17 7. Station 4 Concentrate Q13 8. Station 3 Water Q7 9.
- Page 54 ELECTRICAL SCHEMATIC DIAGRAM for JDF-2S (Models with LED Lited Doors) 120V 220-230V MODELS MODELS SCHEMATIC WIRING DIAGRAM JDF-2S FILTER Models with Dual Dispense Option TRANSFORMER WHI/BLU TRANSFORMER WHI/BLU COMPRESSOR ASSY BLU/BLK COMPRESSOR MOTOR LIMIT THERM. WHI/BLK CONDENSOR FAN ASSY BLU/BLK MOTOR BLU/BLK RED/BLK...
- Page 55 ELECTRICAL SCHEMATIC DIAGRAM for JDF-2S (Models with Flourescent Lited Doors) 49179 110613...
- Page 56 J15-1 WHI/BLU J12-1 J12-3 J15-4 J5-1 J11-1 J5-4 J8-1 J11-5 PROGRAM SWITCH 120 VOLTS AC Chassis Door DISPENSE 220-230 VOLTS AC Ground Ground Chassis LOCKOUT 2 WIRE SWITCH Ground SINGLE PHASE 44745.0002 A 11/18 © 2011 BUNN-O-MATIC CORPORATION 49179 011619...
- Page 57 SWITCH Ground Models with P/C Membrane Switches AUXILLARY Portion Control CONTROL BOARD Connector 120 VOLTS AC STATIC STATIC SHIELD SHIELD 220-230 VOLTS AC 2 WIRE DISPENSE DISPENSE SINGLE PHASE STATION STATION 44745.0001 A 11/18 © 2011 BUNN-O-MATIC CORPORATION 49179 011619...
- Page 58 ELECTRICAL SCHEMATIC DIAGRAM for JDF-4S (Models with LED Lited Doors) 120V 220-230V SCHEMATIC WIRING DIAGRAM JDF-4S MODELS MODELS FILTER TRANSFORMER WHI/BLU TRANSFORMER WHI/BLU COMPRESSOR ASSY BLU/BLK COMPRESSOR MOTOR LIMIT COLD WATER THERM. WHI/BLK VALVE WHI/VIO ASSY BLU/BLK MOTOR REFRIGERATION SWITCH CONDENSOR FAN BLU/BLK RED/BLK...
- Page 59 ELECTRICAL SCHEMATIC DIAGRAM for JDF-4S (Models with Flourescent Lited Doors) 49179 110613...
- Page 60 J6-3 WHI/BLU J12-1 J15-4 J12-3 J5-1 J11-1 J5-4 J11-5 J8-1 PROGRAM SWITCH Chassis Door DISPENSE 120 VOLTS AC Ground Ground Chassis LOCKOUT SWITCH Ground 220-230 VOLTS AC 2 WIRE SINGLE PHASE 44746.0002 A 11/18 © 2011 BUNN-O-MATIC CORPORATION 49179 011619...
- Page 61 120 VOLTS AC STATIC STATIC STATIC STATIC STATIC 220-230 VOLTS AC SHIELD SHIELD SHIELD SHIELD SHIELD 2 WIRE SINGLE PHASE DISPENSE DISPENSE DISPENSE COLD DISPENSE STATION STATION STATION WATER STATION SWITCH 44746.0003 A 11/18 © 2011 BUNN-O-MATIC CORPORATION 49179 011619...
- Page 62 POWER COOLING SHIELD DISPENSE DISPENSE DISPENSE DISPENSE SWITCH SWITCH SWITCH SWITCH DISPENSE DISPENSE DISPENSE DISPENSE NOZZLE NOZZLE NOZZLE NOZZLE 120 VOLTS AC 230 VOLTS AC WHI/VIO 2 WIRE WHI/ORN SINGLE PHASE 41649.0000B 03/09 © 2009 BUNN-O-MATIC CORPORATION WHI/GRN 49179 110613...
- Page 63 DISPENSE DISPENSE DISPENSE COLD DISPENSE STATION STATION STATION WATER STATION SWITCH DISPENSE DISPENSE DISPENSE DISPENSE NOZZLE NOZZLE NOZZLE NOZZLE 120 VOLTS AC 220-230 VOLTS AC WHI/VIO 2 WIRE WHI/ORN SINGLE PHASE 41649.0001A 02/13 © 2013 BUNN-O-MATIC CORPORATION WHI/GRN 49179 110613...
- Page 64 J15-4 J6-3 J5-1 STATIC WHI/BLU J12-1 SHIELD DISPENSE J12-3 J5-4 STATION J11-1 DISPENSE 120 VOLTS AC J11-5 230 VOLTS AC STATIC SHIELD 2 WIRE DISPENSE SINGLE PHASE 44746.0001A 06/11 © 2011 BUNN-O-MATIC CORPORATION STATION DISPENSE LOCKOUT DISPENSE SWITCH 49179 110613...
- Page 65 J6-3 WHI/BLU J12-1 J15-4 J12-3 J5-1 J11-1 J5-4 J11-5 J8-1 PROGRAM SWITCH 120 VOLTS AC 220-230 VOLTS AC Chassis Door DISPENSE 2 WIRE Chassis Ground Ground LOCKOUT SWITCH Ground SINGLE PHASE 44746.0004 A 11/18 © 2011 BUNN-O-MATIC CORPORATION 49179 011619...
Need help?
Do you have a question about the Silver Series and is the answer not in the manual?
Questions and answers