Bunn JDF-4S Installation & Operating Manual
Cold beverage dispenser with tap handles
Hide thumbs
Also See for JDF-4S:
- Installation & operating manual (54 pages) ,
- Service & repair manual (65 pages) ,
- Service & repair manual (58 pages)
Table of Contents
Advertisement
Quick Links
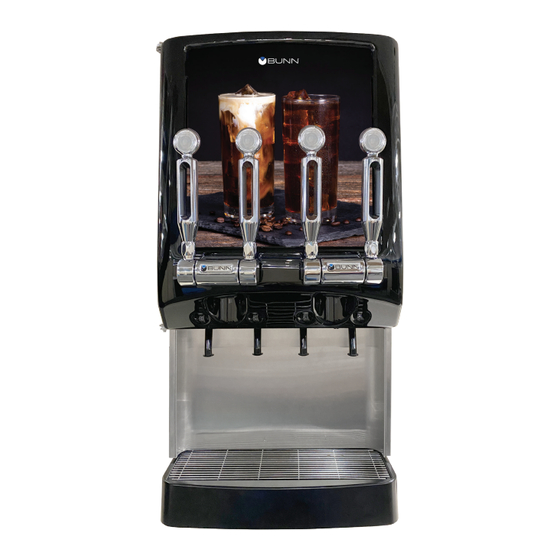
JDF-4S
Cold Beverage Dispenser with Tap Handles
INSTALLATION & OPERATING GUIDE
For Technical Service, contact Bunn-O-Matic Corporation at 1-800-286-6070.
Bunn-O-Matic Corporation
Post Office Box 3227, Springfield, Illinois 62708-3227
Phone (217) 529-6601 | Fax (217) 529-6644
44744.0004 A 02/24 © 2024 Bunn-O-Matic Corporation
www.bunn.com
Advertisement
Table of Contents

Subscribe to Our Youtube Channel
Related Manuals for Bunn JDF-4S


Summary of Contents for Bunn JDF-4S
- Page 1 JDF-4S Cold Beverage Dispenser with Tap Handles INSTALLATION & OPERATING GUIDE For Technical Service, contact Bunn-O-Matic Corporation at 1-800-286-6070. Bunn-O-Matic Corporation Post Office Box 3227, Springfield, Illinois 62708-3227 Phone (217) 529-6601 | Fax (217) 529-6644 44744.0004 A 02/24 © 2024 Bunn-O-Matic Corporation...
-
Page 2: Bunn-O-Matic Commercial Product Warranty
BUNN’S SOLE OPTION AS SPECIFIED HEREIN, TO REPAIR, REPLACEMENT OR REFUND. In no event shall BUNN be liable for any other damage or loss, including, but not limited to, lost profits, lost sales, loss of use of equipment, claims of Buyer’s customers, cost of capital, cost of down time, cost of substitute equipment,... -
Page 3: Table Of Contents
CONTENTS BUNN-O-MATIC COMMERCIAL PRODUCT WARRANTY ..................2 USER NOTICES ................................4 NORTH AMERICAN REQUIREMENTS ........................5 CE REQUIREMENTS ..............................5 INITIAL SETUP .................................6 ELECTRICAL REQUIREMENTS ..........................6 PLUMBING REQUIREMENTS ..........................6 OPERATING CONTROLS ............................7 Compressor Switch .............................7 Tap Handle ................................7 Dispense Lockout Switch ............................7 Program Switch ..............................7 Dispenser Operation ............................8... -
Page 4: User Notices
Contains fluorinated greenhouse gases covered Contains fluorinated greenhouse gases covered USING THIS PRODUCT by the Kyoto Protocol. Hermetically sealed system. by the Kyoto Protocol. Hermetically sealed system. 00986.0000M 10/14 ©1994 Bunn-O-Matic Corporation 33461.0012 JDF-2S 220-230V 33461.0014 JDF-4S 220-230V 00986.0000 HAZARDOUS... -
Page 5: North American Requirements
NORTH AMERICAN REQUIREMENTS • This appliance must be installed in locations where it can be overseen by trained personnel. • For proper operation, this appliance must be installed where the temperature is between 41°F to 95°F (5°C to 35°C). • Appliance shall not be tilted more than 10° for safe operation. •... -
Page 6: Initial Setup
BUNN-O-MATIC (part number 34325.10_ _ [see Illustrated Parts Catalog for complete part number.]) BUNN-O-MATIC does not recommend the use of saddle valves to install the dispenser. The size and shape of the hole(s) made in the supply line(s) by saddle valves may restrict water flow. -
Page 7: Operating Controls
OPERATING CONTROLS Compressor Switch Located on the Electrical Panel of the dispenser near the Circuit Board. This switch controls power to the water bath pump and relay contacts for the compressor and condenser fan motor. Tap Handle Pull and hold a Tap Handle to initiate product flow from respective nozzle. -
Page 8: Dispenser Operation
OPERATING CONTROLS Dispenser Operation Pull and Hold Dispensing: 1. Place a cup on the drip tray beneath the desired dispensing nozzle. 2. Pull and hold the Tap Handle until the beverage reaches the desired level, then release. Temperature LEDs See FUNCTION LIST in this manual for explanation of what LED lights mean. -
Page 9: Door Cover Installation
DOOR COVER INSTALLATION Screw 1. Install Handle Body Bracket (PN 53212.0001) The slotted Hex Screws go in the corners as shown. using 4 provided Hex Screws (PN 01330.0000). 2. Confirm Left and Right Handle Body wire 3. Connect the LEDs from the door into the harnesses are connected to the control board. - Page 10 DOOR COVER INSTALLATION 6. Connect wiring from Handle Body Assemblies (PN 53210.0001) to wire harneses through left and right openings in door. Left Side Handle Body Connect top switch on the body to the RED/WHITE wire for the Right handle. Connect bottom switch on the body to the BLUE/WHITE wire for the Left handle.
- Page 11 DOOR COVER INSTALLATION 9. Tighten the Handle Body Assemblies to the NOTE: Access the screws through the circular Handle Bracket (PN 53212.0001). Use 2 opening under the Handle Body. provided slotted Hex Screws (PN 01330.0000) Confirm screws are securely tightened. for each of the handles.
-
Page 12: Plumbing Hookup
PLUMBING HOOKUP The plumbing connection is located on the rear of the dispenser. A 3/8" (9.52 mm) male flare adapter fitting is supplied, installed on the rear of the dispenser. Use provided Plastic Flare Washer located in drip tray when shipped. NOTE: Water pipe connections and fixtures directly connected to a potable water supply shall be sized, installed and maintained in accordance with federal, state Plastic Flare Washer... - Page 13 INITIAL FILL (continued) 6. Connect the Fill Tube to the dispense nozzle furthest to the right. 7. Set the Program Switch located next to the Control Board to the ON position. 8. Set the Dispense Switch located on the inside of the door in the upper right corner to the ON position.
- Page 14 INITIAL FILL (continued) 10. Pull and hold the Tap Handle in line with the dispense station that the tube is connected to for 10 seconds. Keep pulling until you hear the water valve turn on. 11. Press the Compressor Switch near the main control board to the ON position.
- Page 15 INITIAL FILL 14. Disconnect the Fill Tube and allow excess water to drain into the drip tray. 15. Replace the plug in the end of the fill tube and store back into the dispenser. 16. Set the Program Switch to the OFF position. 17.
-
Page 16: Adjustments And Optional Settings
Purge all dispense stations to remove air from water line before making initial adjustments. 1. Place a graduated measuring cup or the large chamber of the empty brixing cup (Bunn-O-Matic PN 33095.0000) under the appropriate dispense nozzle. Place the Program switch in the ON position. -
Page 17: Ambient Concentrates
ADJUSTMENTS AND OPTIONAL SETTINGS Ambient Concentrates (Optional) 1. Install an Ambient Concentrate Conversion Kit (BUNN-O-MATIC part number 33699.0002) per the instructions provided in the kit. 2. Attach the concentrate product hose to the appropriate concentrate line located at the rear of the dispenser. -
Page 18: Brix Adjustment
ADJUSTMENTS AND OPTIONAL SETTINGS Brix Adjustment 1. Adjust the water flow as described in Water Flow Testing and Adjustment. Record water output setting for later reference on each dispense head. Suggested target is 3 ounces. 2. Place the Program switch in the ON position. 3. -
Page 19: Product Adjustment
ADJUSTMENTS AND OPTIONAL SETTINGS Product Adjustment 1. Adjust the water flow as described in Water Flow Testing and Adjustment. 2. Place an empty container under the appropriate dispense nozzle. 3. Pull and hold the Product Tap Handle until water and concentrate begin flowing freely from the dispense nozzle. -
Page 20: Cleaning & Preventive Maintenance
CLEANING & PREVENTIVE MAINTENANCE Daily: Rinse Procedure Tools required: 32 oz. (946 ml) minimum empty container 1. Open dispenser door. Lift up on product containers to disengage fitting. 2. Close the door, place an empty container under the dispensing nozzle. 3. -
Page 21: Semi-Automatic Sanitizing
CLEANING & PREVENTIVE MAINTENANCE Semi-Automatic Sanitizing: EFFECTIVE S/N JDF0016500 AND UP: 15. Press the Program Switch to the ON position. Pull the left most (station 1) handle 2 times, then the left center (station 2) handle 2 times. The cycle will start with only one of the dispense stations dispensing. -
Page 22: Weekly: Clean Condenser Coils And Filter
Annually: Check water level in ice bath Top off if needed. Annually: Replace Pump Tubing 39690.0000 Tube Kit JDF-2S & JDF-4S 39688.0000 Tube Assembly 1. Open dispenser door. 2. Remove all product containers and place them in a refrigerated (35-40 degrees F [1.6-4.4 degrees C]) environment. -
Page 23: Function List
FUNCTION LIST Circuit Board LED Indicators LED # LED Color Illuminates: 1 Bath When bath temperature is above 34 degrees F. Flashes slowly when compressor is in a 6 minute delay period. Open bath thermistor circuit will flash #1 and #2 LED’s 1 time every 3 seconds. -
Page 24: Troubleshooting
TROUBLESHOOTING A troubleshooting guide is provided to suggest probable causes and remedies for the most likely problems encountered. If the problem remains after exhausting the troubleshooting steps, contact the Bunn-O-Matic Technical Service Department. • Inspection, testing, and repair of electrical equipment should be performed only by qualified service personnel. -
Page 25: Refrigeration
TROUBLESHOOTING PROBLEM REMEDY PROBABLE CAUSE Refrigeration 1. Compressor ON/OFF switch. Check for "ON" position or no continuity - replace switch. Dispense stations not working. NOTE: Cooling failure or excessive 2. Dirty condenser filter or fins. Clean filter and fins or replace bath and cabinet temperatures for condenser filter. - Page 26 TROUBLESHOOTING PROBLEM PROBABLE CAUSE REMEDY Dispense station not working 1. Dispense Lockout switch set to Place switch in ON position. OFF position. 2. Dispense switch failed Check switch and harness for proper continuity. All stations dispense Main water supply Check for ON position. concentrate only Frozen bath A) Compressor relay/contacts...
- Page 27 TROUBLESHOOTING PROBLEM PROBABLE CAUSE REMEDY Water leak filling drip tray or 1. Initial fill/setup Some expansion normal. May fill around dispense deck area drip tray during initial ice block formation 2. Dispense deck Inspect or replace fittings clamps, o-rings, solenoids and quick disconnect fittings.
- Page 28 TROUBLESHOOTING PROBLEM PROBABLE CAUSE REMEDY Unit is not working 1. Step-down transformer. Check for 120/24 or 230/24 vac. If no 24vac reading, replace step- down transformer. 2. Main control board. If 24 vac present and no LED’s lit, replace control board.. Difficulty brixing and/or weak 1.
Need help?
Do you have a question about the JDF-4S and is the answer not in the manual?
Questions and answers