Bunn Ultra NX Programming Manual
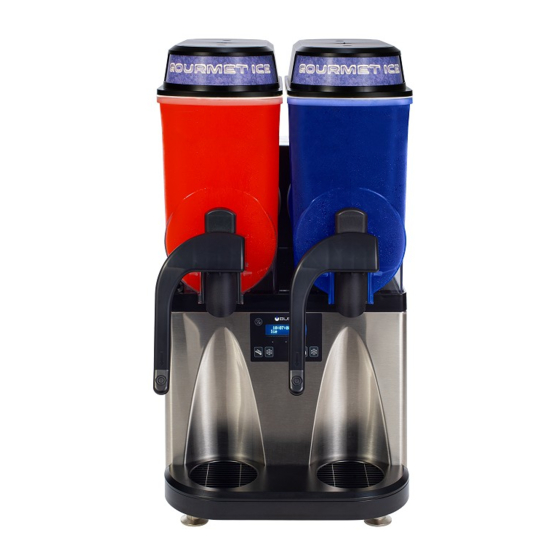
Frozen beverage dispensers
Hide thumbs
Also See for Ultra NX:
- Service & repair manual (68 pages) ,
- Installation & operating manual (48 pages) ,
- Maintenance & troubleshooting manual (2 pages)
Table of Contents
Advertisement
Quick Links
Ultra
NX
®
Frozen Beverage Dispensers
PROGRAMMING MANUAL
For Technical Service, contact Bunn-O-Matic Corporation at 1-800-286-6070.
Bunn-O-Matic Corporation
Post Office Box 3227, Springfield, Illinois 62708-3227
Phone (217) 529-6601 | Fax (217) 529-6644
www.bunn.com
58040.0000 A 2/22 © 2022 Bunn-O-Matic Corporation
Advertisement
Table of Contents

Related Manuals for Bunn Ultra NX


Summary of Contents for Bunn Ultra NX
- Page 1 Ultra ® Frozen Beverage Dispensers PROGRAMMING MANUAL For Technical Service, contact Bunn-O-Matic Corporation at 1-800-286-6070. Bunn-O-Matic Corporation Post Office Box 3227, Springfield, Illinois 62708-3227 Phone (217) 529-6601 | Fax (217) 529-6644 www.bunn.com 58040.0000 A 2/22 © 2022 Bunn-O-Matic Corporation...
- Page 2 LIMITED, AT BUNN’S SOLE OPTION AS SPECIFIED HEREIN, TO REPAIR, REPLACEMENT OR REFUND. In no event shall BUNN be liable for any other damage or loss, including, but not limited to, lost profits, lost sales, loss of use of equipment, claims of Buyer’s customers, cost of capital, cost of down time, cost of substitute equipment, facilities or services, or any other special, incidental or consequential damages.
-
Page 3: Table Of Contents
CONTENTS Operating Controls ...................4 Software Main Menus ..................6 Daily Operations ....................7 Cleaning Guide ..................7 Set Thickness .....................8 Test Augers ....................8 Set Date/Time ....................8 Password ......................9 Settings ......................9 Defrost Mode....................10 Set Night/Day Time ..................11 Defrost Begin ...................11 Low Level Detect ..................11 Low Level to Chill ..................12 Refill Threshold ..................12 Auto Refill .......................13... -
Page 4: Operating Controls
OPERATING CONTROLS There are five of these switches that will be used for the operation of the dispenser. 1. Switch - Upper left corner of the control pad: This switch is the ON/OFF toggle switch which powers up the dispenser and the LCD display. When ON the Date and Time toggle back and forth continously except during programming. - Page 5 PROGRAMMING Using the menu-driven display on the front of the dispenser, the operator has the ability to alter or modify various parameters such as beverage consistency and set day/night “ON/OFF” times. The operator is also prompted to check a variety of periodic service functions or even a step-by-step cleaning routine. There is also the opportunity to return all changes back to factory default settings.
-
Page 6: Software Main Menus
PROGRAMMING HOME SCREEN During normal operations, TIME, DATE, and SERIAL NUMBER toggle back and forth continuously. 10:45:30 AM JAN. 25, 2019 ULTR027930 AN000001 SOFTWARE MAIN MENUS The following function screens are in the order they appear when programming mode is accessed (press and hold the center hidden switch for 5 seconds). -
Page 7: Daily Operations
PROGRAMMING DAILY OPERATIONS The following software screens are contained within the Daily Operations menu. Press to enter. DAILY OPERATIONS Hold for 10 seconds to view the serial number. CLEANING GUIDE ? Press the right hidden switch to enter the Cleaning Guide. See below and the next page for more information about this menu. -
Page 8: Set Thickness
PROGRAMMING DAILY OPERATIONS (continued) CLEANING GUIDE WASH DRIP TRAY INSTALL AUGERS INSTALL HOPPER HOPPERS & SEALS PROBES & LIDS Exits program mode menu. REFILL WITH FINISH NOTE: THERE WILL BE A 5 SECOND PRODUCT NEXT COUNTDOWN BEFORE AUTO- EXITING SET THICKNESS This function adjusts the ice consistency, or torque of each auger when answered YES (ICE). -
Page 9: Password
PROGRAMMING PASSWORD From this screen, the operator must know the password before moving on to the remaining functions. The range is from 0 - 9999 with the factory default being 0000. PASSWORD SETTINGS NEXT (-) minus (+) plus Press when password is entered SETTINGS... -
Page 10: Defrost Mode
PROGRAMMING SETTINGS (continued) LOW LEVEL DETECT Press the left or right hidden switch to set Low Level Detect. See page ( - ) ( + ) 11 for more information about this menu. LowLevelTo Chill Press the left or right hidden switch to adjust Low Level to Chill. See ( - ) 90 min ( + ) -
Page 11: Set Night/Day Time
PROGRAMMING SETTINGS (continued) SET NIGHT TIME / SET DAY TIME The bottom corners displaying “ICE” will change to “CHILL” during the night mode. During night mode, the product will be kept chilled to below 35°F. “ICE” reading will return after night mode elapses. With “OFF” repre- senting 12:00 AM, the operator can scroll to the times desired for the night time mode to begin and end. -
Page 12: Low Level To Chill
PROGRAMMING SETTINGS (continued) LOW LEVEL TO CHILL This feature is only available if Low Level Detect is enabled. It allows the operator to set a chill time for when product is low in the hopper(s). After the set amount of time the product would switch from ICE to CHILL if left low in the hopper(s). -
Page 13: Auto Refill
PROGRAMMING AUTO REFILL The auto refill feature will only appear for CFV and LAF models. The following software screens are con- tained within the Auto Refill menu. AUTO REFILL? DELAYED REFILL Press the left or right hidden switch to set Delayed Refill. See page ( - ) ( + ) 14 for more information about this menu. -
Page 14: Delayed Refill
PROGRAMMING AUTO REFILL (continued) TEST REFILL Press left or right hidden switch to enter and test the refill valves. See page 16 for more information about this menu. DELAYED REFILL This feature is used to fill the hoppers in small increments until product touches the level probe. Between increments, there is a delay time that can be adjusted in programming. -
Page 15: Advanced Settings
PROGRAMMING ADVANCED SETTINGS The following software screens are contained within the Advanced Settings menu. ADVANCED SETTINGS? SET LANGUAGE? Press the right hidden switch to enter Set Language. See page 16 for more information about this menu. DAYS TO CLEAN Press left or right hidden switch to adjust Days to Clean. See page 16 ( - ) ( + ) for more information about this menu. -
Page 16: Set Language
PROGRAMMING ADVANCED SETTINGS (continued) SET LANGUAGE This feature allows the operator to scroll through a list of languages stored in the software and select one for the display messages. SET LANGUAGE? ARE YOU SURE? SET LANGUAGE? ( - ) ENGLISH ( + ) Y E S toggle toggle... -
Page 17: Thick Adjust
PROGRAMMING ADVANCED SETTINGS (continued) THICK ADJUST This feature will lockout the ability to change settings for “SET THICKNESS” within Daily Operations sub- menus. The operator will need to enter the password before returning to Daily Operations for adjustments. NO THICK ADJUST THICK ADJUST ( - ) N E X T ( + ) ( - ) NEXT ( + ) -
Page 18: Set Password 0
PROGRAMMING ADVANCED SETTINGS (continued) SET PASSWR 0000 This is the function to set the password using a range of 0 to 9999 (the factory default is 0). When the password is set, the operator can only access the first four functions: Cleaning Guide, Set Consistency, Test Augersand Set Date &... -
Page 19: Service Settings
PROGRAMMING SERVICE SETTINGS The following software screens are contained within the Service Settings menu. SERVICE SETTINGS? PM COMPLETE? Press the right hidden switch to set PM Complete. See page 20 for more information about this menu. 12 MONTH PM Press the left or right hidden switch to set 12 Month PM. See page 20 ( - ) ( + ) for more information about this menu. -
Page 20: Preventive Maintenance
PROGRAMMING SERVICE SETTINGS (continued) USB FUNCTIONS? Press the right hidden switch to enter USB Functions. See page 22 for more information about this menu. EVENT LOG Press the right hidden switch to view Event Log. See page 22 for more PREV EXIT NEXT information about this menu. -
Page 21: Service Phone Number
PROGRAMMING SERVICE SETTINGS (continued) SERVICE PHONE # This feature allows the operator to record the Service Phone Number for quick reference. Default is set to DISABLE. Pressing (-) or (+) sets to ENABLE. MODIFY SERVICE? SCROL THRU ALPHA SERVICE PHONE # NEXT-NEXT LETTER ( - ) ENABLE ( + ) SAVE ? -
Page 22: Software Version
PROGRAMMING SERVICE SETTINGS (continued) SOFTWARE VERSION This screen will display the current software version installed on the machine. Additional information such as bootloader, application, serial #, current up time, lifetime power and machine # can be viewed when scrolling through. SOFTWARE VERSION USB FUNCTIONS This features provides detailed statistics and logs that can be exported to an external USB device. -
Page 23: Service Tools
PROGRAMMING SERVICE TOOLS The following software screens are contained within the Service Tools menu. SERVICE TOOLS? TEST OUTPUTS? Press the right hidden switch to set PM Complete. See page 23 for more information about this menu. TEST SWITCHES? Press the left or right hidden switch to set 12 Month PM. See page 24 ( - ) ( + ) for more information about this menu. -
Page 24: Install Date
Time is recorded when the dispenser is powered on for the first 100 hours. The Install Date and Time cannot be reset and is stored in permanent memory. JAN. 25, 2019 BUNN ULTRA NX INSTALL DATE VERSION #_._ 3:55:25 PM... -
Page 25: Temp And Torque
PROGRAMMING Temp and Torque Press and hold the left and right hidden buttons for 5 seconds to display the TEMP & TORQUE. The tem- perature of each cooling drum and the hot gas temperature will toggle back and forth. The auger torque is displayed continuously. -
Page 26: Update Software
11. Power off the machine and remove the USB device. 12. Reinstall the front panel and connect the membrane switch. 13. Reinstall the side panels and drip tray. 14. Software update is complete. fig 4 BOOTING PROGRAMMING 0% BUNN ULTRA(R)NX PLEASE WAIT ULTRA_NX_00_00 VERSION C00.00 fig 5...
Need help?
Do you have a question about the Ultra NX and is the answer not in the manual?
Questions and answers