
Related Manuals for Acson A5ACV 30 CR

Summary of Contents for Acson A5ACV 30 CR
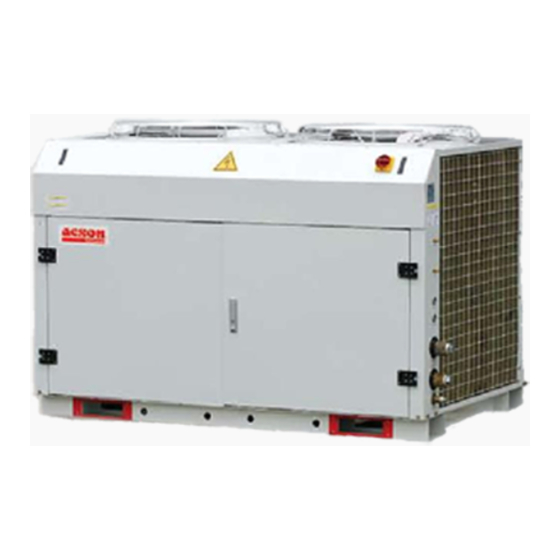
- Page 1 Models: A5ACV 30 CR A5ACV 55 CR A5ACV 75 CR A5ACV 100 CR A5ACV 135 CR A5ACV 210 CR Air-Cooled Chiller (R410A Inverter Series) A5ACV - 2007...
-
Page 2: Table Of Contents
TABLE OF CONTENTS 1. NOMENCLATURE ......................1 - PRODUCT LINE UP 2. FEATURES ........................3 3. APPLICATION INFORMATION ..................4 - REFRIGERANT CIRCUIT DIAGRAM - CHILLER PANEL CONTROLLER - PRECAUTIONS AND INSTALLATION 4. SOUND DATA ......................49 5. SELECTION PROCESS ..................... 50 - WATER PRESSURE DROP VS FLOW RATE - GLYCOL 6. -
Page 3: Nomenclature
A : 220-240V/1Ph/50Hz F : 380-415V/3Ph/50Hz Model Type R : heatpump Omitted if cooling Series C : C series Capacity 100 : 100,000 Btu/h Type Inverter Model Name AC : Air cooled mini chiller Refrigerant 5 : R410A Brand Acson... - Page 4 PRODUCT LINE UP A5ACV PRODUCT LINE-UP Classification 30CR AXAA 55CR FXAA 75CR FXAA A5ACV 100CR FXAA 135CR FXAA 210CR FXAA...
- Page 5 2. FEATURES TRUE DUAL CIRCUITS BPHE The true dual BPHE puts the secondary circuit (water) in contact with 2 primary circuits (refrigerant). So even if one primary circuit is shut off, each secondary channel is still in contact with a primary channel. INVERTER COMPRESSOR Inverter compressor is programmed to run at the optimum speed, which is regulated by the input frequency as it can varies according to the heat load requirement.
-
Page 6: Application Information
3. APPLICATION INFORMATION REFRIGERANT CIRCUIT DIAGRAM MODEL : A5ACV 30CR A5ACV 30CR Water / Refrigerant Circuit Diagram FILTER DRIER BPHE WATER CHARGE COMPENSAT A A OR COMPRESSOR W W TER SUCTION ACCUMULAT A A OR W W TER PUMP EXPANSION T MODEL : A5ACV 55 / 75CR A5ACV 55CR Water / Refrigerant Circuit Diagram... - Page 7 MODEL : A5ACV 100CR FIN TUBE FIN TUBE HEA T EXCHANGER HEA T EXCHANGER A5ACV 100CR (SYSTEM 2) (SYSTEM 1) Refrigerant Circuit Diagram HEA TING CHECK VA LV E 4-W AY V ALV E 4-W AY V ALV E TUBE FIL TER FIL TER DRIER...
- Page 8 MODEL : A5ACV 210CR A5ACV 210CR FIN TUBE FIN TUBE Refrigerant Circuit Diagram FIN TUBE FIN TUBE HEAT EXCHANGER HEAT EXCHANGER HEAT EXCHANGER HEAT EXCHANGER (SYSTEM 1) (SYSTEM 2) (SYSTEM 1) (SYSTEM 2) FILTER FILTER 4-WAY VALVE 4-WAY VALVE 4-WAY VALVE FILTER FILTER DRIER...
- Page 9 CHILLER PANEL CONTROLLER 1. SAFETY CONSIDERATION Only specially trained and technicians and installers are authorized to install and service this equipment. 1.1 General Installation Recommendations • Only supply DC voltage (9-17V, typically 12V, maximum current 200mA) as a power source to the device.
- Page 10 3. HARDWARE DESCRIPTION Legend Navigation key 1 & 2 Execute instruction key Cancel instruction key Switching to heat mode shortcut key Switching to cool mode shortcut key Toggle ON/OFF shortcut key Show alarm key Graphical LCD display ON/OFF indicator Legend Chiller terminal unit connection 1 &...
- Page 11 4. INSTALLATION 4.1 Chiller Bus Supported up to 50 units of Chiller Chiller 0 Chiller 1 Chiller 2 5 way wire (CN8) Chiller Communication bus Chiller Panel 0 Chiller Panel 1 (Master) (Slave) Chiller Network Chiller panel needs to be energized with +12Vdc. The 5 way wires that provided is once on the easiest solution to establish a communication between the panel and chiller main board (CN8-JP13).
- Page 12 4.2 Others Configuration • JH2 in chiller panel should let it open (put the jumper header on one pin only) all the time unless user need to do CMOS reset to that particular panel. • JH3 should let it open (put the jumper header on one pin only) all the time as well. •...
- Page 13 5. SOFTWARE DESCRIPTION 5.1 Introduction The Chiller Panel Controller can be used to control / display the status of Chiller. Status viewing: • ON/OFF status • Mode (Cooling / Heating/ Boiling) • Mode set temperature • Compressor status (ON/OFF/ DEFROST) •...
- Page 14 5.2 Menu Structures Status Mode Cool Set Operation Menu General Heat Set Regulator Manual Defrost Compressor Set Parameter [#] Defrost Change Password [#] Antifreeze Main Menu Settings Menu Panel Option Inverter Set Panel ID Alarm and Summary Pages Contact Clock Setting Unit Selection Menu Date Setting...
- Page 15 5.3 Chiller Menu Structure 5.3.1 Summary Pages There are 4 pages in [Summary Pages]. Press UP or DOWN for page scrolling. Press ENTER to go to [Main Menu]. Time and date are shown on top of each page. Beside that, the bottom of each page shows current control unit of the Chiller.
- Page 16 5.3.2 Main Menu Press ENTER in [Summary Pages] to go into this menu MAIN MENU Operating Menu Setting Menu Timer Menu Alarm Menu Display Menu There are 5 sub menus in [Main Menu]. Press UP or DOWN to select sub menus, ENTER to enter into the sub menu or press ESC to exit to [Summary Pages] 5.3.2.1 OPERATION MENU Select [Operation Menu] in [Main Menu] and press ENTER to go into this menu.
- Page 17 5.3.2.2 Settings Menu Select [Settings Menu] in [Main Menu] and press ENTER to go into this menu. SETTINGS MENU Set Parameter Change Passw ord Panel Option Set Panel ID Some advance settings can be found here. Press UP or DOWN to select settings, ENTER to start the setting or press ESC here to exit to [Main Menu].
- Page 18 5.3.2.2.3 Panel Option Select [Panel Option] in [Setting Menu] and Press ENTER to go into this menu. Backlight : Norm al Buzzer : On Screen Saver : Disable Timeout : 5m Contrast : 50% Brightness : Medium Temp Unit : ° C User can do some miscellaneous for the panel.
- Page 19 5.3.2.3 Timer Menu Select [Timer Menu] in [Main Menu] and press ENTER to go into this menu. TIMER MENU Clock Setting Date Setting Time Schedule Timer : Disable All the timer/ schedule settings are included in this menu. Press UP or DOWN to select each settings. ENTER to start the setting or press ESC here to exit to [Main Menu].
- Page 20 5.3.2.3.2 Set Date Select [Date Setting] in [Timer Menu] and press ENTER to go into this menu. Set Date : yyyy mm dd 2000 / 01 / 01 User can set the date in this menu. The date is set according to sequence below: (year) / (month) / (day) Press [ESC] to exit to [Timer Menu].
- Page 21 5.3.2.4.1 Show Alarms Select [Show Alarms] in [Alarm Menu] and press ENTER to go into this menu. [Ch 0] Alarm 1 Comp 1 overload 01/ 01/ 00 12:00am User can view all the fault/ alarm records in this menu. The record shows - Alarm type - Alarm occurred date - Alarm occurred time...
- Page 22 5.3.2.5.1 Defrost Sensor Select [Defrost Sensor] in [Display Menu] and press ENTER to go into this menu. Defrost Sensor Comp 1 : 12.8°C User can view the defrost sensor temperature for each compressor in the Chiller. Press [ESC] to exit to [Display Menu] 5.3.2.5.2 Discharge Sensor Select [Discharge Sensor] in [Display Menu] and press ENTER to go into this menu.
- Page 23 6. OPERATION USER MANUAL 6.1 Starting Chiller panel can be set as Master or Slave panel unit. When the Panel ID is set to ‘0’, it acts like a Master panel, whereas it is Slave panel if Panel ID is set to others number (1-50). Chiller panel can control the Chiller if both ID no.
- Page 24 6.2 CHILLER OPERATION CONTROL 6.2.1 STARTING During power on for the Chiller Panel, it needs to take several times to collect information from the Chiller. At this time, all the status will show “--”. Please ensure the particular Chiller exists in the network. When the process is completed, user can start to control the Chiller using the panel.
- Page 25 6.2.3 Switching On/Off There are several ways to switch ON/OFF for the Chiller. i) [Summary Pages] Press and hold ON/OFF button (hold 1 second). Please note that the ON/OFF button will only function in [Summary Pages]. ii) [Operation Menu] <ENTER> <ENTER>...
- Page 26 6.2.4 Switching Mode There are several ways to switch the mode for the Chiller. Please take note that some mode cannot be set due to current Chiller model settings. Mode Chiller Model ¥ Cooling Heating Boiling - Allow to set ¥...
- Page 27 6.2.5 Changing Mode Set Temperature There are 2 ways to change the mode set temperature for the Chiller. i) [Operation Menu] <ENTER> <ENTER> Summary Pages Main Menu Operation Menu <ESC> <ESC> OPERATION MENU Status : ON In [Operation Menu], select “Cool Temp” / “Heat Mode : Cooling Cool Temperature...
- Page 28 6.2.6 Manual Defrost User can choose which compressor will go into manual defrost cycle by using the Chiller Panel, as long as the condition is fulfilled with defrost condition. This can be done in [Operation Menu]. <ENTER> <ENTER> Summary Pages Main Menu Operation Menu <ESC>...
- Page 29 6.2.7 Advance Parameter Settings The Chiller Panel provide user a lot of advance parameter settings for the Chiller. The parameters are divided into 7 groups. There all are stored in [Set Parameter] menu and it is password-protected layer in the panel. * CAUTION : INPROPER SETTINGS WILL CAUSE PERMANENT DAMAGE TO THE CHILLER !!! <ENTER>...
- Page 30 3) Compressor C1 Min Run : 12s C2 Min Stop : 240s C3 2On Interval : 360s C4 2Cp ON Dly : 15s C5 P-Cp ON Dly : 60s C6 Cp-P OFF Dly: 40°C C7 Cp Cut Off : 120°C 4) Condenser Defrost D1 Start Temp : -3°C...
- Page 31 6.2.8 Changing Password For security purpose, some places in the panel are password-proctected. User can change the password at anytime. <ENTER> <ENTER> Summary Pages Main Menu Settings Menu <ESC> <ESC> <ENTER> <ESC> Change Password User needs to enter the old password in order to change Please enter the Old password ----------- the password.
- Page 32 6.2.9 Clock Setting User can set the clock for the panel. <ENTER> <ENTER> Summary Pages Main Menu Timer Menu <ESC> <ESC> <ENTER> <ESC> Set Time UP or DOWN to change ‘hour’. ENTER to set ‘minute’ Set Time : or ESC to exit to [Timer Menu]. hh mm UP or DOWN to change ‘minute’.
- Page 33 6.2.11 7 Days Programmable Setting The are 2 ON/OFF events in one day for the schedule. This schedule is applicable to all the chillers in the network. <ENTER> <ENTER> Summary Pages Main Menu Timer Menu <ESC> <ESC> <ENTER> <ESC> Set Schedule Timer 1 Timer 2 ON OFF...
- Page 34 6.2.12 Viewing Alarm / Erase Alarm Record Whenever a new fault/ alarm is occurred, there will be a message pop up to show the fault/ alarm. Backlight will blinking with beeping sound (if “Alarm Buzzer” is set ON). If the fault/ alarm has not been dissolved from the Chiller, a sign [A] will be shown in the [Summary Pages].(from pop up menu) automatically if the fault/ alarms have been dissolved.
- Page 35 6.2.13 Viewing Defrost Sensor Temperature The Chiller Panel displays defrost sensor temperature for each compressor in [Defrost Sensor] in [Display Menu]. Defrost Sensor Press ESC to exit to [Display Menu] Comp 1 : 12.8°C 6.2.14 Viewing Compressor Discharge Temperature The Chiller Panel displays compressor discharge temperature for each compressor in [Discharge Sensor] in [Display Menu].
- Page 36 6.2.15 Viewing / Clear Compressor Run Time User can view/ clear the compressor run time for the Chiller in [Comp Run Time] in [Display Menu]. Comp Run Time Press UP or DOWN to select the compressor. ENTER to start clear the run time, or ESC to exit to [Display Comp 1 : 13579h Menu].
- Page 37 Parameter Value Description Normal Turn ON backlight for 30s via key press Backlight Always Always ON backlight Enable beeping sound when fault/ alarm occurred Buzzer Disable beeping sound when fault/ alarm occurred Enable Show screen saver when timeout *Screen Saver Disable No screen save *Timeout...
- Page 38 7. PROBLEM AND TROUBLESHOOTING Symptoms Possible Cause Troubleshooting 1 Panel gets hot - Wiring fault in 12VDC supply - Change a new panel module and turn ON the unit again abnormally after the verification 2 The LCD no display - Wiring fault in 12VDC supply - Correct the wiring problem (blank screen) - No power supply...
- Page 39 8. APPENDIX General Unit Default Resolution Model Flag 0=Chiller (Chiller+Boiler) 1=Heat pump, 2=Chiller/ Boiler, 3=Heat pump/ Boiler, 4=Chiller+Boiler 5=Heat pump+Boiller Number of compressor Flag 1=1 compressor, 2=2 compressor, 3=3 compressor, 4=4 compressor On/Off input Flag 0 (disable) 0=disable, 1=enable Coo/ Heat input Flag 0 (disable) 0=disable, 1=enable...
- Page 40 COOL MODE ANTIFREEZE Unit Default Resolution Antifreeze heater set-point °C (F) 5 (41) -40 (-40) 40 (104) Antifreeze heater differential °C (F) 2 (3.6) 0.4 (0.7) 10 (18) Antifreeze sensor select Flag 0=Leaving water, 1=Entering water (leaving) Antifreeze alarm set-point °C (F) 3 (37) -40 (-40)
- Page 41 SPECIAL PRECAUTIONS WHEN DEALING WITH REFRIGERANT R410A UNIT 1) WHAT IS NEW REFRIGERANT R410A? R410A is a new HFC refrigerant which does not damage the ozone layer. The working pressure of this new refrigerant is 1.6 times higher than conventional refrigerant (R22), thus proper installation / servicing is essential.
- Page 42 d) When charging R410A, ensure that only liquid is being withdrawn from the cylinder or can. This is to ensure that only the original composition of R410A is being delivered into the system. The liquid composition can be different from the vapor composition. Dip-pipe Invert cylinder without dip-pipe...
- Page 43 INSTALLATION A5ACV 30/ 55/ 75CR...
- Page 44 A5ACV 30CR A5ACV 55CR / 75CR...
- Page 45 A5ACV 100 / 135 / 210CR 1100 SAFETY PRECAUTIONS Before installing the air conditioner unit, please read the following safety precautions carefully Warning • Installation and maintenance should be performed by qualified persons who are familiar with local code and regulation, and experienced with this type of appliance. •...
-
Page 46: Installation Location
Caution Please take note of the following important points when installing. • Do not install the unit where leakage of flammable gas may occur. If gas leaks and accumulates around the unit, it may cause fire ignition. • Ensure that the drainage piping is connected properly. If the drainage piping is not connected properly, it may cause water leakage which will dampen the furniture. - Page 47 A5ACV 30 / 55 / 75CR A5ACV 30 CR AIR VENT (INST ALL HIGHEST POSITION) PRESSURE GAUGE GA TE GA TE VA LV E VA LV E GA TE BALANCING THERMOMETER VA LV E VA LV E FAN COIL UNIT/AIR HANDLING UNIT...
- Page 48 A5ACV 100 / 135 / 210CR AIRVENT (INSTALL HIGHEST POSITION) PRESSURE GAUGE GATE GATE VALVE VALVE GATE BALANCING THERMOMETER VALVE VALVE FAN COIL UNIT/AIR HANDLING UNIT PRESSURE FLEXIBLE DIFFERENTIAL GATE BALANCING GATE THERMOMETER VALVE VALVE VALVE VALVE STRAINER FLEXIBLE GATE VALVE CHECK (LOWER POSITION VALVE...
-
Page 49: Refrigerant Circuit
WARNING • All terminals and connection must be tightened. • Avoid any wires from touching the refrigerant pipe. Apply insulation if necessary. • Avoid any wires from touching the moving components such as, fan motor, pump & compressor. WATER PIPING SYSTEM SETUP •... - Page 50 CONTROL OPERATION GUIDE The unit is equipped with a microprocessor controller board. The microprocessor contorller is provided to give temperature control for the system by accurately measuring and controlling the water entering and water leaving temperature. The temperature setting in the unit is preset in the factory. It is not recommended to change the setting unless necessary.
-
Page 51: Sound Data
4. SOUND DATA SOUND PRESSURE LEVEL 1/1 Octave Sound Pressure Level (dB, ref 20PPa) Overall Model 125Hz 250Hz 500Hz 1kHz 2kHz 4kHz 8kHz (dBA) A5ACV30CR 55.9 59.6 59.0 53.4 47.9 43.3 38.0 59.1 A5ACV55CR 59.5 63.4 60.5 56.1 51.9 45.5 41.5 61.9 A5ACV75CR... -
Page 52: Selection Process
5. SELECTION PROCESS WATER PRESSURE DROP VS FLOW RATE MODEL : A5ACV 30CR - COOLING Water Flow Pump Head System Head Available Head Presure 1.26 109.00 26.56 82.44 1.30 108.40 26.59 81.81 1.32 108.20 28.94 79.26 1.36 108.00 31.54 76.46 1.39 107.20 31.39... - Page 53 MODEL : A5ACV 75CR - COOLING / HEATING Water Flow Pump Head System Head Available Head Presure 2.20 315.00 21.78 293.22 2.60 300.00 31.81 268.19 3.00 285.00 41.17 243.83 3.40 275.00 52.17 222.83 3.80 265.00 65.60 199.40 MODEL : A5ACV100CR - COOLING Water Flow Pump Head System Head...
- Page 54 CORRECTION FACTORS WITH GLYCOL USE CAPACITY FACTOR GLYCOL LWT/ deg C 0.89 0.87 0.77 -3.9 0.876 0.781 -1.1 0.925 0.925 0.892 0.796 0.945 0.938 0.906 0.809 0.956 0.949 0.918 0.82 0.965 0.958 0.927 0.829 0.962 0.957 0.926 0.828 WATER PRESSURE GLYCOL % FLOW DROP...
- Page 55 6. ENGINEERING AND PHYSICAL DATA GENERAL DATA - HEAT PUMP R410A INVERTER MODEL A5ACV 30CR A5ACV 55CR Btu/h 27000 50000 NOMINAL COOLING CAPACITY 7913 14654 Btu/h 33000 55000 NOMINAL HEATING CAPACITY 9663 16119 COOLING 5279 7600 NOMINAL TOTAL INPUT POWER HEATING 4418 6100...
- Page 56 GENERAL DATA - HEAT PUMP R410A INVERTER MODEL A5ACV75CR Btu/h 70000 NOMINAL COOLING CAPACITY 20515 Btu/h 75000 NOMINAL HEATING CAPACITY 21980 COOLING 9050 NOMINAL TOTAL INPUT POWER HEATING 7900 COOLING 16.6 NOMINAL RUNNING CURRENT HEATING 15.4 POWER SOURCE V/Ph/Hz 380-415 / 3 / 50 REFRIGERANT TYPE R410A CONTROL...
- Page 57 GENERAL DATA - HEAT PUMP R410A INVERTER MODEL A5ACV100CR A5ACV135CR Btu/h 95000 131500 NOMINAL COOLING CAPACITY 27800 38540 Btu/h 100000 141500 NOMINAL HEATING CAPACITY 29300 41470 COOLING 12000 15750 NOMINAL TOTAL INPUT POWER HEATING 11400 16250 COOLING 24.4 30.0 NOMINAL RUNNING CURRENT HEATING 23.9 31.4...
- Page 58 GENERAL DATA - HEAT PUMP R410A INVERTER MODEL A5ACV210CR Btu/h 200000 NOMINAL COOLING CAPACITY 58562 Btu/h 210000 NOMINAL HEATING CAPACITY 61490 COOLING 22300 NOMINAL TOTAL INPUT POWER HEATING 21800 COOLING 44.6 NOMINAL RUNNING CURRENT HEATING 44.6 POWER SOURCE V/Ph/Hz 380-415 / 3 / 50 REFRIGERANT TYPE R410A CONTROL...
- Page 59 COMPONENTS DATA MODEL A5ACV 30CR A5ACV 55CR TYPE PROPELLER Q'TY CONDENSER MATERIAL ALUMINIUM DRIVE DIRECT DIAMETER 457.2 / 18 mm/in TYPE INDUCTION CONDENSER Q'TY FAN MOTOR INDEX OF PROTECTION (IP) TYPE AC INVERTER SCROLL OIL TYPE COMPRESSOR INVERTER 1700 / 57.5 2300 / 77.8 / fl.oz.
- Page 60 COMPONENTS DATA MODEL A5ACV100CR A5ACV135CR TYPE PROPELLER Q'TY CONDENSER MATERIAL ALUMINIUM DRIVE DIRECT DIAMETER mm/in 609.6 / 24 660.4 / 26 TYPE INDUCTION CONDENSER Q'TY FAN MOTOR INDEX OF PROTECTION (IP) TYPE SCROLL + AC INVERTER SCROLL OIL TYPE COMPRESSOR SCROLL 1700 / 57.5 3250 / 110...
- Page 61 COMPONENTS DATA MODEL A5ACV210CR TYPE PROPELLER Q'TY CONDENSER MATERIAL ALUMINIUM DRIVE DIRECT DIAMETER mm/in 812.8 / 32 TYPE INDUCTION CONDENSER Q'TY FAN MOTOR INDEX OF PROTECTION (IP) TYPE AC INVERTER SCROLL OIL TYPE COMPRESSOR INVERTER 2300 / 77.8 / fl.oz. AMOUNT SCROLL TYPE...
- Page 62 SAFETY DEVIES MODEL A5ACV 30CR A5ACV 55CR TYPE HIGH PRESSURE OPEN Pa / psi SWITCH CLOSE Pa / psi TYPE LOW PRESSURE OPEN Pa / psi SWITCH CLOSE Pa / psi PHASE PROTECTION BUILT IN ON BOARD BUILT IN ON BOARD SAFETY DEVICE DIFFERENTIAL PRESSURE SWITCH ANTI-FREEZE PROTECTION SENSOR...
- Page 63 MODEL A5ACV210CR TYPE HIGH PRESSURE OPEN Pa / psi SWITCH CLOSE Pa / psi TYPE LOW PRESSURE OPEN Pa / psi SWITCH CLOSE Pa / psi PHASE PROTECTION BUILT IN ON BOARD SAFETY DEVICE DIFFERENTIAL PRESSURE SWITCH ANTI-FREEZE PROTECTION SENSOR DISCH.
- Page 64 7. PERFORMANCE DATA MODEL : A5ACV 30CR / 55CR - COOLING AMBIENT TEMPERATURE ON CONDENSOR (°C) WATER AVAIL. PUMP PUMP MODEL COOL POWER COOL POWER COOL POWER COOL POWER FLOW HEAD INPUT INPUT CAP. INPUT CAP. INPUT CAP. INPUT CAP. INPUT RATE PRESS.
- Page 65 MODEL : A5ACV75CR - COOLING AMBIENT TEMPERATURE ON CONDENSOR (°C) MODEL WATER AVAIL. PUMP PUMP COOL POWER COOL POWER COOL POWER COOL POWER FLOW HEAD INPUT INPUT CAP. INPUT CAP. INPUT CAP. INPUT CAP. INPUT RATE PRESS. POWER 22.22 6770.82 22.11 6899.09 20.48...
- Page 66 MODEL : A5ACV100 / 135CR - COOLING AMBIENT TEMPERATURE ON CONDENSOR (°C) MODEL WATER AVAIL. PUMP PUMP COOL POWER COOL POWER COOL POWER COOL POWER FLOW HEAD INPUT INPUT CAP. INPUT CAP. INPUT CAP. INPUT CAP. INPUT RATE PRESS. POWER 30.76 8.99 30.29...
- Page 67 MODEL : A5ACV 210CR - COOLING AMBIENT TEMPERATURE ON CONDENSOR (°C) WATER AVAIL. PUMP PUMP MODEL COOL POWER RUNNING COOL POWER RUNNING COOL POWER RUNNING COOL POWER RUNNING FLOW HEAD INPUT INPUT CAP. INPUT CURRENT CAP. INPUT CURRENT CAP. INPUT CURRENT CAP. INPUT CURRENT RATE PRESS.
- Page 68 MODEL : A5ACV 30 / 55CR - HEATING AMBIENT TEMPERATURE ON CONDENSOR (°C) MODEL WATER AVAIL. PUMP PUMP HEAT POWER HEAT POWER HEAT POWER FLOW HEAD INPUT INPUT CAP. INPUT CAP. INPUT CAP. INPUT RATE PRESS. POWER 3.82 3.77 5.04 3.80 7.82 3.83...
- Page 69 MODEL : A5ACV 75CR - HEATING AMBIENT TEMPERATURE ON CONDENSOR (°C) MODEL WATER AVAIL. PUMP PUMP HEAT POWER HEAT POWER HEAT POWER FLOW HEAD INPUT INPUT CAP. INPUT CAP. INPUT CAP. INPUT RATE PRESS. POWER 16.52 6499.45 16.92 6508.30 20.10 6530.41 3.85 201.36...
- Page 70 MODEL : A5ACV100 / 135CR - HEATING AMBIENT TEMPERATURE ON CONDENSOR (°C) MODEL WATER AVAIL. PUMP PUMP HEAT POWER HEAT POWER HEAT POWER FLOW HEAD INPUT INPUT CAP. INPUT CAP. INPUT CAP. INPUT RATE PRESS. POWER 28.34 9.48 29.27 9.52 31.59 9.64 6.31...
- Page 71 MODEL : A5ACV 210CR - HEATING AMBIENT TEMPERATURE ON CONDENSOR (°C) MODEL WATER AVAIL. PUMP PUMP HEAT POWER RUNNING HEAT POWER RUNNING HEAT POWER RUNNING FLOW HEAD INPUT INPUT CAP. INPUT CURRENT CAP. INPUT CURRENT CAP. INPUT CURRENT RATE PRESS. POWER 46.10 18.96 31.45...
-
Page 72: Dimensional Data
8. DIMENSIONAL DATA MODEL : A5ACV 30CR 1051,6 10,0 10,0 1010,0 WAT E R OUT LE T WAT E R INLE T 22,3 22,3 147,3 94,2 All Dimensions are in mm MODEL : A5ACV 55CR 15,0 1029,0 15,0 406,5 85,0 70,5 WATE R OUT WAT E R IN... - Page 73 MODEL : A5ACV 75CR 205,8 741,4 205,8 84,0 210,0 553,0 1153,0 244,0 WAT E R OUT AIR V E NT WAT E R IN E LE C TR IC AL C AB LE 265,2 510,7 All Dimensions are in mm...
- Page 74 MODEL : A5ACV100 / 135CR WATER OUTLET WATER INLET All Dimensions are in mm Model Base Leg Hole A5ACV100CR 1500 1245 1190 297.5 307.5 1446 A5ACV135CR 1800 1150 1245 1190 347.5 1766 Model A5ACV100CR A5ACV135CR DETAIL A WATER OUTLET WATER INLET 1998.4 2092.5 1199.2...
-
Page 75: Electrical Data
9. ELECTRICAL DATA ELECTRICAL DATA - HEAT PUMP R410A INVERTER MODEL A5ACV 30CR A5ACV 55CR INSULATION GRADE POWER SOURCE V/Ph/Hz 220 - 240 / 1 / 50 RATED INPUT POWER CONDENSER FAN MOTOR RATED RUNNING CURRENT MOTOR OUTPUT POLES INSULATION GRADE POWER SOURCE V/Ph/Hz 220 - 240 / 1 / 50... - Page 76 ELECTRICAL DATA - HEAT PUMP R410A INVERTER MODEL A5ACV100CR A5ACV135CR INSULATION GRADE 220 - 240 / 1 / 50 POWER SOURCE V/Ph/Hz 1430 RATED INPUT POWER CONDENSER FAN MOTOR RATED RUNNING CURRENT 200 x2 450 x2 MOTOR OUTPUT POLES INSULATION GRADE 380 - 415 / 3 / 50 POWER SOURCE V/Ph/Hz...
- Page 77 ELECTRICAL DATA - HEAT PUMP R410A INVERTER MODEL A5ACV210CR INSULATION GRADE POWER SOURCE V/Ph/Hz 220 - 240 / 1 / 50 RATED INPUT POWER 820 x2 CONDENSER FAN MOTOR RATED RUNNING CURRENT 3.6 x2 MOTOR OUTPUT 550 x2 POLES INSULATION GRADE POWER SOURCE V/Ph/Hz 380 - 415 / 3 / 50...
-
Page 78: Wiring Diagrams
10. WIRING DIAGRAMS MODEL : A5ACV 30CR... - Page 79 MODEL : A5ACV 55CR...
- Page 80 MODEL : A5ACV 75CR...
- Page 81 MODEL : A5ACV 100/135CR...
- Page 82 MODEL : A5ACV 210CR N’ C’ B’ A’ C’ B’ A’...
-
Page 83: Servicing And Maintenance
12. SERVICING AND MAINTENANCE SERVICING Servicing or maintenance of these unit must be carried out by experienced personnel with specific training in refrigeration. Repeated check the safety devices and continuous cycling of control components must be analyzed and corrected before being reset. The simple design of the refrigeration circuit totally eliminates potential problems during normal unit operation. -
Page 84: Troubleshooting
13. TROUBLESHOOTING When a malfunction of the unit is detected, immediately switch off the main power supply before proceeding with the following troubleshooting procedures. The following are common fault conditions and simple troubleshooting tips. If any other fault conditions that are not listed occur, contact your nearest local dealer. - Page 85 Diagnostic flow chart : Faulty : Check : Cause : Remedy No response after power-on Is LED main Input conditions faulty To check & rectify board lit? Is R,S,T Input Incorrect Input power supply To check & rectify voltage normal? Is Power board DC-IN voltage Incorrect DC rectifier circuit...
- Page 86 LED on main board normal, but no output. Is output Incorrect output condition To check & rectify condition ok? Is load ok? Incorrect load. (exam: air trap ) To check & rectify Is Main board ‘s Fuse blown To replace fuse fuse ok? Main board faulty To replace Main board...
- Page 87 Water flow error Short JK4 on main board Is water flow error Flow switch faulty or pump stopped To check & rectify persists? Main board faulty To replace Main board Over voltage protection (OV/UN Voltage) Is Power supply Power supply failure To rectify >...
- Page 88 Under voltage protection (OV/UN Voltage) Is Power supply Power supply failure To rectify < 310VAC? Is Power supply > 340VAC? Power board faulty To replace Power board Pump overload Is voltage of 97, 98 on heat relay VDC= 0 V ? Remove * JK8, 97 Main board faulty &...
- Page 89 Phase missing Is voltage Incorrect incoming supply To check & rectify between R,S,T 415VAC±20% Is J-RST on Main Main board faulty To replace Main board board 415VAC±20%? Disconnect power, Main board faulty remove J-RST, is To replace Main board voltage of socket 415VAC±20%? EMI filter faulty To check &...
- Page 90 IPM Error IPM faulty Is IPM ok? To replace IPM Is current at rated Compressor faulty To check & rectify frequency ok? Is IPM Error Normal persists? Is heat sink Heat sink condition improper To rectify temperature >100°C? Is IPM temperature Main board faulty or wrong signal To rectify / replace >100°C?
- Page 91 Variable drive high pressure (High pressure 1) Is high pressure High pressure switch faulty To replace switch ok? Check the Air- System high pressure Cond. system for To rectify high pressure Variable drive low pressure (Low pressure 1) Is low pressure Low pressure switch faulty To replace switch ok?
- Page 92 Variable compressor high discharge temperature (Comp 1 discharge overheat) Compressor stops To check & rectify > 110°C? Is Temp. sensor Sensor faulty To replace sensor ok? (<100°C?) Check the Air- System high discharge pressure Cond. system for To rectify high discharge temp.
-
Page 93: Exploded View And Part List
13. EXPLODED VIEW AND PART LISTS MODEL : A5ACV 30CR Description Part no Description Part no ASSY, BASE PAN R50 01 4 079444 COMPENSATOR AFB-11 R02 16 4 036982 ASSY, PANEL PARTITION R50 01 4 079447 INS. COMPENSATOR BODY ASSY, COIL R50 02 4 082968 WATER PUMP UPS25-125 R04 13 9 018353... - Page 94 MODEL : A5ACV 55CR Description Part no Description Part no ASSY, TERMINAL BOX ASSY, PANEL BASE R50 01 4 079682 R50 04 4 082048 MAIN ASSY, COVER CONTROL ASSY, PANEL PARTITION R50 01 4 080005 R01 01 4 082049 ASSY, STRUCTURE FRONT ASSY, COIL R50 02 4 079683 R50 01 4 082086...
- Page 95 MODEL : A5ACV 75CR Description Part no Description Part no ASSY, BASE PAN R50 01 4 078737 STRUCTURE REAR RIGHT R01 01 4 078641 ASSY, PANEL PARTITION R50 01 4 078744 COIL GUARD, BACK R01 02 4 078750 ASSY, COIL R50 02 4 078902 COIL GUARD RIGHT R01 02 4 078751...
- Page 96 MODEL : A5ACV100CR DESCRIPTIONS PART NO DESCRIPTIONS PART NO ASSY, PANEL BASE MAIN R50 01 4 077857 PANEL, ORIFICE LEFT R01 01 4 054979 COIL SUPPORT R01 01 4 077862 HINGE, DOOR R01 02 9 016097 ASSY, COIL RIGHT R50 01 4 077891 BRACKET, MOTOR R01 01 4 055742 ASSY, COIL LEFT...
- Page 97 MODEL : A5ACV135CR DESCRIPTIONS PART NO DESCRIPTIONS PART NO ASSY, PANEL BASE MAIN R50 01 4 079125 PANEL, RIGHT ORIFICE R01 01 4 054720 ASSY, PARTITION PANEL R50 01 4 079128 PANEL, LEFT ORIFICE R01 01 4 054719 RIGHT PANEL R01 01 4 066628 FRONT PANEL MAIN R01 01 4 079590...
- Page 98 MODEL : A5ACV210CR DESCRIPTION PART NO DESCRIPTION PART NO ASSY, PANEL BASE MAIN R50 01 4 084901 ASSY, CONTROL BOX R50 04 4 089239 PANEL, COIL SUPPORT R01 01 4 083984 ASSY, COVER TERMINAL BOX R01 01 4 084609 ASSY, PANEL PARTITION R50 01 4 083980 ASSY, PANEL CENTER R50 01 4 084213...
- Page 99 While upmost care is taken in ensuring that all details in the publication are correct at time of going to press, we are constantly striving for improvement and therefore reserve the rights to alter model specifications and equipment without prior notice. Details of specifications and equipment are also subject to change to suit local conditions and equipments and not all models are available in every market.
Need help?
Do you have a question about the A5ACV 30 CR and is the answer not in the manual?
Questions and answers