Matrox RT.X2 Installation Manual
Hardware
Hide thumbs
Also See for RT.X2:
- User manual (224 pages) ,
- Installation manual (48 pages) ,
- Quick installation manual (12 pages)
Table of Contents
Advertisement
Quick Links
Download this manual
See also:
User Manual
Advertisement
Table of Contents

Related Manuals for Matrox RT.X2


Summary of Contents for Matrox RT.X2
- Page 1 Matrox RT.X2 Installation Manual January 8, 2010 Y10978-101-0420...
- Page 2 Unauthorized recording or use of broadcast television programming, video tape, or other copyrighted material may violate copyright laws. Matrox Electronic Systems Ltd. assumes no responsibility for the illegal duplication, use, or other acts that infringe on the rights of copyright owners.
- Page 3 Electronic Systems Ltd. All rights are reserved. You are granted a license to use the Software only, subject to the following restrictions and limitations: 1 The license is to you the original purchaser only, and is not transferable without written permission of Matrox. 2 You may use the Software on a single computer owned or leased by you.
- Page 4 WHICH PROVE TO BE DEFECTIVE DURING THE WARRANTY PERIOD, PROVIDED THAT THEY ARE RETURNED TO MATROX, SUBJECT TO THE FOLLOWING LIMITATIONS: Matrox's limited warranty covers only those defects which arise as a result of normal use of the hardware and does not apply to any: improper or inadequate maintenance;...
- Page 5 G. Indemnification disclaimer Matrox disclaims and shall have no obligation to indemnify or defend you or any third party in respect of any actual or alleged infringement of any actual or pending patents, copyright or other intellectual property rights. Matrox shall have no liability arising out of any such actual or alleged intellectual property infringement.
- Page 6 This will speed up processing. Each individual, returned unit or group of units MUST have an RMA number issued by Matrox. Matrox must authorize the number of units grouped under one RMA number. Any units received without prior approval by Matrox will be returned to you freight collect.
-
Page 7: Table Of Contents
Providing adequate ventilation ...............6 Format your A/V drives using NTFS ............8 About the PCI retainer bracket ..............9 Preparing the internal power supply cable on your RT.X2 card .....9 Installing your Matrox RT.X2 card ..........10 Before restarting your computer ........... 10 Chapter 3 Connecting External Devices to Matrox RT.X2... - Page 8 Installing Adobe Premiere Pro ............23 Installing other third-party programs..........23 Installing Matrox Mx.tools ............. 24 Adding the Matrox WYSIWYG plug-in to NewTek LightWave 3D .. 25 Installing additional Matrox effect patterns or removing unneeded patterns ............26 Installing additional Matrox WYSIWYG plug-ins or removing unneeded plug-ins ............
- Page 9 Appendix B Matrox RT.X2 Customer Support Getting the most support ...............34 Registration ..................34 Keep up to date with our website............34 Contacting us ..................34 Index ..................35 Contents...
- Page 10 viii Your notes Contents...
-
Page 11: Welcome To Matrox Rt.x2
Cha pter Welcome to Matrox RT.X2 This chapter provides an overview of the Matrox RT.X2 documentation, and lists the contents of your RT.X2 kit and the RT.X2 system requirements. -
Page 12: About This Manual
About this manual This manual provides you with information about installing your Matrox RT.X2 hardware and software. For information on how to use Matrox RT.X2 with Adobe Premiere Pro and other supported programs, see your Matrox RT.X2 User Guide. ¦ Note Throughout the Matrox RT.X2 documentation, the term “RT.X2”... -
Page 13: Hardware Supplied
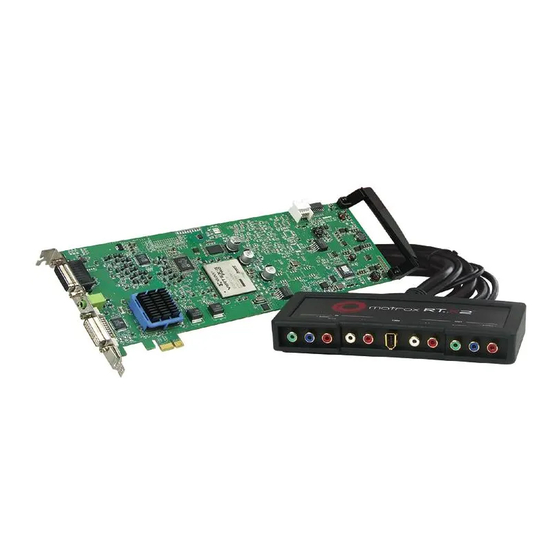
Your Matrox RT.X2 kit includes the following hardware: • RT.X2 card with internal power supply cable, and two small screws for securing the card to your computer frame. (RT.X2 LE and RT.X2 SD do not have an internal power supply cable.) •... - Page 14 Your notes Chapter 1, Welcome to Matrox RT.X2...
-
Page 15: Installing Your Matrox Rt.x2 Hardware
Cha pter Installing Your Matrox RT.X2 Hardware This chapter describes how to install your Matrox RT.X2 card. -
Page 16: Before You Install Your Matrox Rt.x2 Card
To avoid damage, please observe the following precautions: • Do not remove your Matrox RT.X2 card from its antistatic bag until you’re ready to install it. Before removing the card, place the package within easy reach of the area where you intend to perform the installation. - Page 17 To provide as much airflow as possible over the card, it’s recommended that you install a fan as explained below: • Position a fan directly facing the back of the Matrox RT.X2 card. You should make sure the fan directs air over the card. When installed, this fan works in conjunction with your computer’s fan to blow warmed air away from your...
-
Page 18: Format Your A/V Drives Using Ntfs
Format your A/V drives using NTFS Your A/V drives must be formatted using NTFS for use with Matrox RT.X2 because NTFS overcomes FAT32 file size limitations. When a hard drive is formatted using FAT32, files saved to this drive cannot exceed 4 gigabytes in size. -
Page 19: About The Pci Retainer Bracket
About the PCI retainer bracket Many computers contain card guides at the front end of the computer chassis. These help to stabilize cards. If your RT.X2 card is equipped with a PCI retainer bracket, the following diagram depicts the retainer bracket’s use: RT.X2 card... -
Page 20: Installing Your Matrox Rt.x2 Card
Installing your Matrox RT.X2 card Your Matrox RT.X2 card is designed to operate in a PCI Express (PCIe) slot in your computer. If the slot in which you’ll be installing your RT.X2 card already contains another card, either move it to an unused slot or remove it completely. - Page 21 Cha pter Connecting External Devices to Matrox RT.X2 This chapter shows you how to connect external devices to Matrox RT.X2.
-
Page 22: Connecting External Devices To Matrox Rt.x2
To connect your computer speakers, simply plug the connector into the RT.X2 socket labeled AUDIO. Connect the 1394 cable from the back of the RT.X2 breakout box to the 1394 port on your computer. The following illustration shows the TO AUDIO CARD IN cable connected to the LINE IN of the sound card. - Page 23 This connector is not available on RT.X2 LE/SD Onboard sound card and 1394 TO AUDIO TO AUDIO CARD IN CARD OUT RT.X2 card bracket To computer speakers (cable not supplied) RT.X2 breakout box Connecting your RT.X2 breakout box to your computer...
-
Page 24: Connecting A Dvi Video Monitor
Connecting a DVI video monitor ¦ Note RT.X2 LE and RT.X2 SD do not have a DVI connector for connecting a DVI video monitor. In order to preview the video output from your Matrox RT.X2 system, the Matrox RT.X2 card has a DVI connector that’s used to connect a DVI monitor that accepts digital input, such as a digital flat-panel LCD monitor. -
Page 25: Using The Rt.x2 S-Video Adapter Cables
Using the RT.X2 S-Video adapter cables To support S-Video (Y/C) connections to your RT.X2 breakout box, your RT.X2 kit includes two S-Video adapter cables (one for S-Video input and one for S-Video output). ¦ Note When you connect an S-Video device to the RT.X2 breakout box, you won’t be able to connect an analog component device at the same time. -
Page 26: Typical Matrox Rt.x2 Connections
RT.X2 card as explained on page 12). DV-1394 connections To RT.X2 card DV-1394 device Computer speakers DVI monitor To DVI connector To AUDIO on RT.X2 card connector on (not available on RT.X2 card RT.X2 LE/SD) Chapter 3, Connecting External Devices to Matrox RT.X2... -
Page 27: Analog Component Connections Using Same Device For Capture And Export To Tape
Analog component connections using same device for capture and export to tape To RT.X2 card Source/Recorder Computer speakers DVI monitor To AUDIO To DVI connector connector on on RT.X2 card RT.X2 card (not available on RT.X2 LE/SD) Typical Matrox RT.X2 connections... -
Page 28: S-Video Connections Using Same Device For Capture And Export To Tape
The RT.X2 breakout box does not have standard S-Video connectors, however, you can still connect S-Video devices to your RT.X2 breakout box by using the two supplied RT.X2 S-Video adapter cables (see “Using the RT.X2 S-Video adapter cables”... -
Page 29: Composite Connections Using Separate Source And Record Devices
Composite connections using separate source and record devices To RT.X2 card Source Recorder Computer speakers DVI monitor To DVI connector To AUDIO on RT.X2 card connector on (not available on RT.X2 card RT.X2 LE/SD) Typical Matrox RT.X2 connections... - Page 30 Your notes Chapter 3, Connecting External Devices to Matrox RT.X2...
-
Page 31: Installing Your Matrox Rt.x2 Software
Cha pter Installing Your Matrox RT.X2 Software This chapter explains how to install the software required to use your Matrox RT.X2 system. -
Page 32: Overview Of The Software Installation
Important—sleep mode is not supported in Windows 7 and Vista On a Windows 7 or Vista system with Matrox RT.X2, sleep and hibernate modes will cause your system to become unstable. Therefore, you must disable the Windows sleep and hibernate functions as follows: Choose Start >... -
Page 33: Installing Adobe Premiere Pro
Matrox Mx.tools. Installing other third-party programs There are a number of programs for which you can choose to install a Matrox WYSIWYG (What You See Is What You Get) plug-in that lets you see your work directly on your video monitor. For example, the Matrox WYSIWYG plug-in for... -
Page 34: Installing Matrox Mx.tools
Windows automatically starts the Matrox RT.X2 menu. From the Matrox RT.X2 menu, choose Install Matrox Mx.tools . If your Matrox RT.X2 card needs a firmware update, the updater will be launched automatically at this point. Once completed, the Mx.tools installation will continue. -
Page 35: Adding The Matrox Wysiwyg Plug-In To Newtek Lightwave 3D
¦ Note Matrox Mx.tools installs the Matrox GPU Performance Analyzer, which is a diagnostic tool that you may be asked to run by Matrox Customer Support. If requested, you can run this program by choosing Start > All Programs >... -
Page 36: Installing Additional Matrox Effect Patterns Or Removing Unneeded Patterns
RT.X2-compatible .avi files in your Video for Windows programs without having the Matrox RT.X2 hardware installed in your computer. Remarks • If you have the Matrox RT.X2 hardware, you do not need to install the VFW software codecs because Matrox Mx.tools installs all the required Matrox codecs on your system. -
Page 37: Removing Your Matrox Rt.x2 Software
Start > All Programs > Matrox Mx.tools > Uninstall Matrox WYSIWYG Plug-ins • To remove the Matrox VFW software codecs from a computer without the Matrox RT.X2 hardware, choose Start > All Programs > Matrox VFW Software Codecs > Uninstall Matrox VFW Software Codecs... - Page 38 Your notes Chapter 4, Installing Your Matrox RT.X2 Software...
-
Page 39: Matrox Rt.x2 Specifications
Appendix Matrox RT.X2 Specifications This appendix provides specifications for the Matrox RT.X2, RT.X2 LE, and RT.X2 SD cards. -
Page 40: Rt.x2, Rt.x2 Le, And Rt.x2 Sd Cards
RT.X2, RT.X2 LE, and RT.X2 SD cards General PCI interface RT.X2: Full-size PCI Express card RT.X2 LE/SD: 3/4-size PCI Express card Regulatory compliance FCC Class B, CE Mark Class B, ACMA Class B, VCCI Class B, RoHS Directive 2002/95/EC RT.X2 and RT.X2 LE: NTSC, PAL, NTSC-EIAJ,... -
Page 41: Video Input Signals
(B-Y, R-Y) 75 Ω NTSC: 0.700 V at 75% color bar 75 Ω NTSC-EIAJ: 0.757 V at 75% color 75 Ω HD: 0.700 V at 100% color bar (not supported on RT.X2 SD) RT.X2, RT.X2 LE, and RT.X2 SD cards... -
Page 42: Video Output Signals
• Storage humidity: 5 to 95% relative humidity (non-condensing) ¡ Important To avoid damage to your Matrox RT.X2 components and/or computer system, make sure that you don’t operate your RT.X2 card at or near the maximum operating temperature for a prolonged period of time. -
Page 43: Matrox Rt.x2 Customer Support
Appendix Matrox RT.X2 Customer Support This appendix explains how you can register your Matrox RT.X2 and obtain customer support. -
Page 44: Getting The Most Support
Getting the most support If you have a problem that you’re unable to solve by referring to your Matrox RT.X2 documentation, please contact your Matrox RT.X2 representative. He or she should be able to help you quickly correct any installation or system configuration problem. -
Page 45: Index
Installation Audio connections to computer Matrox RT.X2 card Matrox RT.X2 software Internal power supply cable Breakout box Internet, Matrox WWW site See Matrox RT.X2 breakout box License agreement Card installation Matrox RT.X2 card safety precautions Matrox Composite connections contacting us... - Page 46 S-Video connections RT.X2 LE card using RT.X2 S-Video adapter cables See Matrox RT.X2 card Matrox RT.X2 card RT.X2 SD card before you install See Matrox RT.X2 card installing specifications Service, returns Matrox RT.X2 LE card Sleep mode See Matrox RT.X2 card on Windows 7 and Vista Matrox RT.X2 SD card...
- Page 47 FCC Compliance Statement Remark for the Matrox hardware products supported by this guide These devices have been tested and found to comply with the limits for a Class B digital device, pursuant to Part 15 of the FCC Rules. These limits are designed to provide reasonable protection against harmful interference in a residential installation. This equipment generates, uses and can radiate radio frequency energy and, if not installed and used in accordance with the instructions, may cause harmful interference to radio communications.
- Page 48 www.matrox.com/video...
Need help?
Do you have a question about the RT.X2 and is the answer not in the manual?
Questions and answers