Table of Contents
Advertisement
7.1ch Home Theater System
HT-S780
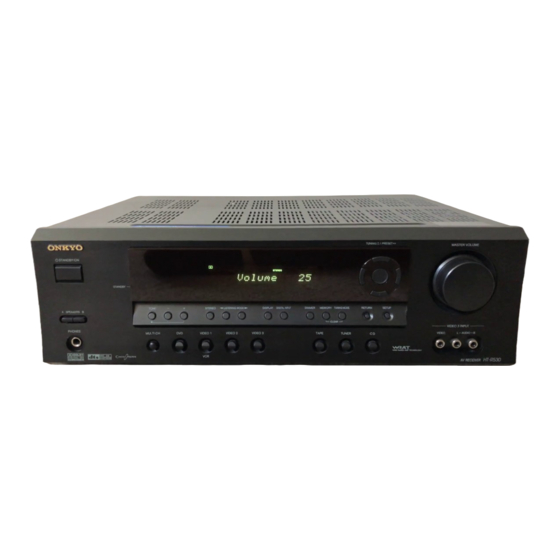
AV Receiver (HT-R530)
Front Speaker (SKF-530F)
Center Speaker (SKC-530C)
Surround Speaker (SKM-530S)
Surround Back Speaker (SKB-530)
Powered Subwoofer (SKW-530)
Instruction Manual
Thank you for purchasing an Onkyo 7.1ch Home
Theater System. Please read this manual thoroughly
before making connections and plugging in the unit.
Following the instructions in this manual will enable
you to obtain optimum performance and listening
enjoyment from your new 7.1ch Home Theater Sys-
tem.
Please retain this manual for future reference.
Contents
Introduction ..................................... 2
Connection .................................... 18
Turning On & First Time Setup..... 32
Basic Operation
Playing your AV components ....... 34
Using the Tuner............................ 36
Enjoying the Listening Modes ..... 40
Advanced Operation ..................... 44
Troubleshooting ............................ 55
E
n
Advertisement
Chapters
Table of Contents

Subscribe to Our Youtube Channel
Related Manuals for Onkyo HT-S780


Summary of Contents for Onkyo HT-S780
- Page 1 Instruction Manual Using the Tuner......36 Enjoying the Listening Modes ..40 Thank you for purchasing an Onkyo 7.1ch Home Theater System. Please read this manual thoroughly before making connections and plugging in the unit. Following the instructions in this manual will enable you to obtain optimum performance and listening enjoyment from your new 7.1ch Home Theater Sys-...
-
Page 2: Important Safety Instructions
WARNING: WARNING AVIS TO REDUCE THE RISK OF FIRE OR ELECTRIC RISK OF ELECTRIC SHOCK RISQUE DE CHOC ELECTRIQUE DO NOT OPEN NE PAS OUVRIR SHOCK, DO NOT EXPOSE THIS APPARATUS TO RAIN OR MOISTURE. The lightning flash with arrowhead symbol, within an equilateral triangle, is intended to alert the user to the CAUTION: presence of uninsulated “dangerous voltage”... -
Page 3: Precautions
If water or any other liquid gets one or more of the following measures: inside this unit, have it checked by your Onkyo • Reorient or relocate the receiving antenna. dealer. -
Page 4: Speaker Precautions
Speaker Precautions Precautions Placement For Canadian Models NOTE: • The speaker cabinets are made out of wood and are THIS CLASS B DIGITAL APPARATUS therefore sensitive to extreme temperatures and COMPLIES WITH CANADIAN ICES-003. humidity, do not put them in locations subject to direct For models having a power cord with a polarized plug: sunlight or in humid places, such as near an air condi- CAUTION:... -
Page 5: Supplied Accessories
Supplied Accessories Make sure you have the following accessories: TUNING / PRESET MASTER VOLUME STANDBY/ON ENTER STANDBY RETURN SETUP A SPEAKERS B TONE STEREO LISTENING MODE DISPLAY DIGITAL INPUT RT/PTY/TP MEMORY TUNING MODE CLEAR VIDEO 3 INPUT PHONES VIDEO AUDIO PURE AUDIO MULTl CH VIDEO 1... -
Page 6: Features
• Color-coded multichannel input for use with Super Audio CD and DVD-Audio • A/B speaker drive • Color-coded speaker terminal posts *1. OptiResponse and OR-EQ are trademarks of Onkyo Cor- poration. *2. Manufactured under license from Dolby Laboratories. “Dolby”, “Pro Logic” and the double-D symbol are regis- tered trademarks of Dolby Laboratories. -
Page 7: Table Of Contents
Connecting a CD Player or Turntable..29 Controlling Other Components ....52 Connecting a Cassette, CDR, MiniDisc, Entering Remote Control Codes ....52 or DAT Recorder ........30 Remote Control Codes for Onkyo Connecting the Power Cord of Another Components Connected via .... 53 Component..........30 Resetting the REMOTE MODE Buttons .. -
Page 8: Front & Rear Panels
Front & Rear Panels Front Panel North American Model 7 8 9 J K TUNING / PRESET MASTER VOLUME STANDBY/ON ENTER STANDBY RETURN SETUP A SPEAKERS B TONE STEREO LISTENING MODE DISPLAY DIGITAL INPUT DIMMER MEMORY TUNING MODE CLEAR VIDEO 3 INPUT PHONES AUDIO VIDEO... - Page 9 Front & Rear Panels TUNING MODE button (36) Input selector buttons (34) This button is used to select the Auto or Manual tun- These buttons are used to select from the following ing mode. input sources: MULTI CH, DVD, VIDEO 1, VIDEO 2, VIDEO 3, TAPE, TUNER, or CD.
-
Page 10: Rear Panel
The connector type depends on the country in which you purchased Note: your AV receiver. can only be used with Onkyo components. CD IN These analog inputs can be used to connect a CD player with analog outputs. - Page 11 Front & Rear Panels Subwoofer (SKW-530) For detailed information, see the pages in parentheses. STANDBY/ON indicator ■ Front Red: Subwoofer in standby mode Green: Subwoofer on With the Auto Standby function, the SKW-530 automatically turns on when an input signal is detected in Standby mode.
-
Page 12: Remote Controller
■ RECEIVER/TAPE Mode RECEIVER STANDBY REMOTE MODE In RECEIVER/TAPE mode, you can control RECEIVER the AV receiver and an Onkyo cassette TAPE/AMP INPUT SELECTOR recorder connected via ■ DVD & CD/MD/CDR Modes With these modes, you can control a DVD MULTI CH player and CD/MD/CDR player/recorder. - Page 13 Remote Controller For detailed information, see the pages in parentheses. REMOTE MODE buttons (12) These buttons are used to select the remote control- ler modes. When you press a button on the remote STANDBY button (32) controller, the REMOTE MODE button for the cur- This button is used to set the AV receiver to rently selected mode lights up.
-
Page 14: Dvd Mode
Remote Controller STANDBY button DVD Mode This button sets the DVD player to Standby. To set the remote controller to DVD mode, press the ON button [DVD] REMOTE MODE button. This button is used to turn on the DVD player. Number buttons Before selecting DVD mode and starting play- These buttons are used to enter title, chapter, and... - Page 15 This button sets the CD player or MD/CD recorder By default, the AV receiver is configured to control an to Standby. Onkyo CD player. ON button This button is used to set the CD player or MD/CD To set the remote controller to CD/MD/CDR mode, recorder to On or Standby.
- Page 16 Remote Controller TAPE Mode TV Control Buttons TAPE mode is used to control an Onkyo cassette The remote controller has dedicated buttons for control- recorder connected to the AV receiver via ling a TV, which can be used regardless of which remote controller mode is currently selected.
-
Page 17: Before Using The Av Receiver
Before Using the AV receiver Installing the Batteries Using the Remote Controller To use the remote controller, point it at the AV receiver’s To open the battery compartment, press remote control sensor, as shown below. the small hollow and slide open the cover. Remote control sensor AV receiver STANDBY indicator... -
Page 18: Connecting Speakers
Connecting Speakers Enjoying Home Theater You can use two sets of speakers with the AV receiver: speaker set A and speaker set B. Speaker set A (supplied speakers and subwoofer) should be installed in your main listening room and can be used with Dolby Digital and DTS surround material. -
Page 19: Speaker Connection Precautions
Connecting Speakers Speaker Connection Precautions Connecting Speaker Set A Read the following before connecting your speakers: The AV receiver’s positive (+) speaker terminals and speaker’s positive (+) terminals are color-coded for ease • You can connect speakers with an impedance of of identification. -
Page 20: Connecting Antenna
Connecting Antenna This section explains how to connect the supplied indoor Connecting the AM Loop Antenna FM antenna and AM loop antenna, and how to connect commercially available outdoor FM and AM antennas. The supplied indoor AM loop antenna is for indoor use only. -
Page 21: Connecting An Outdoor Fm Antenna
Connecting Antenna Connecting an Outdoor FM Antenna Connecting an Outdoor AM Antenna If you cannot achieve good reception with the supplied If good reception cannot be achieved using the supplied indoor FM antenna, try a commercially available out- AM loop antenna, an outdoor AM antenna can be used in door FM antenna instead. -
Page 22: Connecting Your Components
Connecting Your Components AV Connection Color Coding About AV Connections RCA-type AV connections are usually color coded: red, • Before making any AV connections, read the manuals white, and yellow. Use red plugs to connect right-chan- supplied with your other AV components. nel audio inputs and outputs (typically labeled “R”). -
Page 23: Connecting Both Audio & Video
Connecting Your Components Connecting Both Audio & Video By connecting both the audio and video outputs of your DVD player and other AV components to the AV receiver, you can select both the audio and video simultaneously simply by selecting the appropriate input source on the AV receiver. : Signal Flow Video Video... -
Page 24: Connecting A Tv Or Projector
Connecting Your Components Connecting a TV or Projector Step 1: Video Connection Choose a connection type ( , , or ) that matches the TV, and then make the connection. COMPONENT VIDEO MONITOR MONITOR COMPONENT VIDEO S VIDEO IN TV, projector, etc. -
Page 25: Connecting A Dvd Player
Connecting Your Components Connecting a DVD player Step 1: Video Connection Choose a connection type ( , , or that matches the DVD player, and then make the connection. COMPONENT VIDEO DVD IN The TV must be con- nected to the AV receiver with the same type of connection. -
Page 26: Connecting A Vcr Or Dvd Recorder For Playback
Connecting Your Components Connecting a VCR or DVD Recorder for Playback In addition to video playback, with this hookup example, you can use the VCR’s tuner to listen to the sound of your favorite TV programs via the AV receiver. This is useful if the TV has no audio outputs. Step 1: Video Connection Choose a connection type ( , , or... -
Page 27: Connecting A Vcr Or Dvd Recorder For Recording
Connecting Your Components Connecting a VCR or DVD Recorder for Recording Step 1: Choose a video connection type ( ) that matches the VCR/DVD recorder, and make the connection. The video source that you want to record must be connected to the AV receiver with the same type of connection. Step 2: Make audio connection VIDEO 1 VIDEO 1... -
Page 28: Connecting A Satellite, Cable, Set-Top Box, Or Other Video Source
Connecting Your Components Connecting a Satellite, Cable, Set-top box, or Other Video Source Step 1: Video Connection Choose a connection type ( , , or that matches the video source, and then make the connection. VIDEO 2 COMPONENT VIDEO VIDEO 2 IN The TV must be con- VIDEO 2 nected to the AV... -
Page 29: Connecting A Cd Player Or Turntable
Connecting Your Components Connecting a CD Player or Turntable ■ CD Player, or Turntable with Built-in Phono Preamp Step 1: Choose a connection type ( , , or ) that matches the CD player, or choose for a turntable with a built-in phono preamp, and then make the connection. -
Page 30: Connecting A Cassette, Cdr, Minidisc, Or Dat Recorder
• Make sure that the capacity of the component that you connect to the AC OUTLET does not exceed the stated capacity (e.g., 100 W). Notes: • Onkyo components with jacks should be con- nected directly to wall outlets, not the AV receiver’s AC OUTLET. -
Page 31: Connecting Onkyo Components
Connecting Your Components Connecting Onkyo Components Step 1: Be sure that the Onkyo component is connected to the AV receiver with an analog audio cable (RCA). Step 2: Make the connection. With (Remote Interactive) you can use the following special... -
Page 32: Turning On
If you have, see “Assigning Digital Inputs to Input Sources” on page 33. COAX OPT1 ■ Have you connected an Onkyo MD recorder or CD recorder to the TAPE IN/OUT jacks? If you have, see “Changing the TAPE/MD/CDR Display” on page 33. CD recorder / MD recorder... -
Page 33: First Time Setup
Assigning Digital Inputs to Input Changing the TAPE/MD/CDR Display Sources If you connect an -compatible Onkyo MiniDisc recorder or CD recorder to the TAPE IN/OUT jacks, for 2, 3 to work properly, you must change this setting. This setting can only be changed on the AV receiver. -
Page 34: Playing Your Av Components
Playing Your AV Components Basic AV Receiver Operation STANDBY DISPLAY REMOTE MODE Subwoofer’s RECEIVER TAPE/AMP rear panel INPUT SELECTOR TUNING / PRESET MASTER VOLUME STANDBY/ON MULTI CH ENTER STANDBY TAPE TUNER RETURN SETUP A SPEAKERS B TONE STEREO LISTENING MODE DISPLAY DIGITAL INPUT RT/PTY/TP MEMORY TUNING MODE + 10... -
Page 35: Using The Multichannel Input
Playing Your AV Components Displaying Source Information STANDBY You can display various information about the current REMOTE MODE RECEIVER RECEIVER input source as follows. TAPE/AMP INPUT SELECTOR Press the [RECEIVER] button, MULTI CH and then press the [DISPLAY] MULTI CH button repeatedly to cycle TAPE TUNER... -
Page 36: Using The Tuner
Using the Tuner Listening to the Radio Tuning into Radio Stations ■ Auto Tuning Mode TUNING MODE TUNING Press the [TUNING MODE] button TUNING MODE so that the AUTO indicator TUNING / PRESET MASTER VOLUME appears on the display. STANDBY/ON ENTER STANDBY RETURN... - Page 37 Using the Tuner Presetting Radio Stations Deleting Presets 2, 4 TUNING / PRESET TUNING / PRESET MASTER VOLUME MASTER VOLUME STANDBY/ON STANDBY/ON ENTER ENTER STANDBY STANDBY A SPEAKERS B RETURN SETUP A SPEAKERS B RETURN SETUP TONE STEREO LISTENING MODE DISPLAY DIGITAL INPUT RT/PTY/TP MEMORY TUNING MODE TONE...
-
Page 38: Common Functions
Common Functions This chapter explains functions that can be used with any Adjusting the Bass & Treble input source. You can adjust the bass or treble for the front speakers except when the Direct or Pure Audio (not North Amer- STANDBY REMOTE MODE Press... -
Page 39: Using The Sleep Timer
Common Functions Using the Sleep Timer Adjusting Speaker Levels With the sleep timer, you can set the AV receiver so that You can adjust the level of each speaker in speaker set A it automatically turns off after a set period. while listening to an input source. -
Page 40: Using The Listening Modes
Using the Listening Modes Selecting with the Remote Controller Selecting Listening Modes See “About the Listening Modes” on page 42 for DISC INPUT detailed information about the listening modes. GUIDE PREVIOUS TOP MENU MENU SP A / B MUTING • The Dolby Digital and DTS listening modes ENTER can only be selected if your DVD player is connected to the AV receiver with a digital... - Page 41 ✔ DTS, DTS 96/24 ✔ DTS-ES Discrete ✔ DTS-ES Matrix DTS+Neo:6 ✔ DTS+Dolby EX DTS+PLIIx Music ✔ DTS+PLIIx Movie Mono Movie Orchestra Onkyo Unplugged ✔ ✔ ✔ ✔ ✔ ✔ ✔ ✔ Original Studio-Mix TV Logic All Ch Stereo Full Mono *1.
-
Page 42: About The Listening Modes
Using the Listening Modes About the Listening Modes Dolby Pro Logic IIx If you’ve connected surround back speakers to the AV With its built-in surround-sound decoders and DSP pro- receiver, Dolby Pro Logic IIx allows you to enjoy 7.1- grams, the AV receiver can transform your home listen- channel playback from 2-channel or 5.1-channel music ing room into a movie theater or concert hall. - Page 43 Using the Listening Modes Onkyo Original DSP Modes DTS-ES Matrix This is DTS with an added surround back Mono Movie channel for 6.1 surround sound. Use it to This mode is suitable for use with old movies and other provide 6.1 channel surround playback mono sound sources.
-
Page 44: Adjusting The Listening Modes
Adjusting the Listening Modes Using the CinemaFILTER STANDBY With the CinemaFILTER, you can soften overly bright REMOTE MODE RECEIVER RECEIVER movie soundtracks, which are typically mixed for repro- TAPE/AMP INPUT SELECTOR duction in a movie theater. CinemaFILTER can be used with the following listening modes: Dolby Digital, Dolby Digital EX, Dolby Pro MULTI CH Logic II Movie, Dolby Pro Logic IIx Movie, DTS,... - Page 45 Adjusting the Listening Modes If the stereo image feels too wide, or there’s too much Use the Left and Right [ surround sound, move the sound field forward to buttons to change the settings. improve the balance. Conversely, if the stereo image Press the Down [ ] button to feels like it’s in mono, or there’s not enough surround select the next setting.
-
Page 46: Advanced Setup
Advanced Setup Advanced Speaker Settings Use the Up and Down [ buttons to select “2. Sp Dis- tance,” and then press the The advanced speaker settings cannot be [ENTER] button. changed while headphones are connected, Speaker set B is on, or the multichannel input is being used. - Page 47 Advanced Setup Speaker Levels Press the [SETUP] button. With this function, you can adjust the volume of each Setup closes. speaker so that all speakers can be heard equally at the Don’t forget to turn down the volume if listening position. you turned it up while setting the levels.
- Page 48 Advanced Setup Use the Down [ ] button to Speaker Configuration, Crossover Frequency, select “Front,” and then use the and Double Bass settings only need to be Left and Right [ ] buttons to changed if you’re not using the speakers in select Small or Large.
- Page 49 Advanced Setup Use the Down [ ] button to Speaker cone Crossover select “Surr Back,” and use the diameter frequency Left and Right [ ] buttons to Over 8 in. select Small, Large, or None. 60Hz (20 cm) Small: Select if the surround back 6-1/2 to 8 in.
-
Page 50: Digital Input Signal Formats
Advanced Setup Digital Input Signal Formats The following table shows the display indicators for each supported digital signal format. Format Display Dolby Digital Normally, the AV receiver detects the signal format auto- matically. However, if you experience either of the fol- lowing issues when playing PCM or DTS material, you can manually set the signal format to PCM or DTS: •... -
Page 51: Recording
Recording This chapter explains how to record the selected input Recording from Different AV Sources source to an AV component with recording capability, and how to record audio and video from two different With this function, you can record audio and video from sources. -
Page 52: Controlling Other Components
Controlling Other Components You can use the AV receiver’s remote controller While holding down the REMOTE (RC-608M) to control your other components, including MODE button that you want to those made by other manufacturers. This chapter set, press the [DISPLAY] button explains how to enter the necessary remote control code for 3 seconds. -
Page 53: Remote Control Codes For Onkyo Components Connected Via
AV receiver, and operate the component. The [DVD] and [CD] REMOTE If you want to control an Onkyo component by pointing MODE buttons are preprogrammed the remote controller directly at it, or you want to control with remote control codes for control- an Onkyo component that’s not connected via... -
Page 54: Controlling A Tv
Controlling Other Components To control another component, point the remote controller at it and use the buttons explained below. (You must select the appropriate remote control mode first.) Controlling a TV Controlling a VCR Controlling a Satellite/ Cable Receiver STANDBY STANDBY REMOTE MODE REMOTE MODE... -
Page 55: Troubleshooting
If you can’t nect an MC head amp, or an MC transformer and a resolve the issue yourself, contact your Onkyo dealer. phono preamp. • Specify the speaker distances and adjust the individual Power speaker levels (pages 46, 47). - Page 56 Troubleshooting The subwoofer produces no sound? ing mode and the DTS indicator remains on. This is to • The level of the input signal was too low so the sub- prevent noise when you use the pause, fast forward, or woofer entered Standby mode.
- Page 57 • The wrong remote control code has been entered. • The entered remote control code may not be correct. If Onkyo is not responsible for damages (such as CD more than one code is listed, try each one. rental fees) due to unsuccessful recordings caused by •...
-
Page 58: Specification
Specification ■ AV Receiver (HT-R530) Amplifier Section General Power Output Power Supply North American: AC 120 V, 60 Hz 2 channel driven: North American: Australian: AC 230-240 V, 50 Hz 110 W + 110 W (8Ω, 1 kHz, FTC) Power Consumption North American: 6.3 A European: Others: 650 W... - Page 59 Specification ■ Speaker ■ Powered Subwoofer (SKW-530) ■ Center Speaker (SKC-530C) Type: Bass-reflex Type: 2 Way Bass-reflex 8 Ω Input Impedance: sensitivity/impedance: 330 mV / 100 kΩ Maximum input power: 110 W Maximum output power: 230 W (Dynamic Power) Output sound pressure Frequency response: 25 Hz–150 Hz level:...
- Page 60 Units 2102-2107, Metroplaza Tower I, 223 Hing Fong Road, Kwai Chung, N.T., HONG KONG Tel: 852-2429-3118 Fax: 852-2428-9039 http://www.ch.onkyo.com/ I0503-1 SN 29343939 (C) Copyright 2005 ONKYO CORPORATION Japan. All rights reserved. * 2 9 3 4 3 9 3 9 *...
- Page 76 Powering Up & Setting Up the DV-CP702 ........20 Basic Playback ........ 21 Thank you for purchasing an Onkyo DV-CP702 DVD Advanced Playback ......31 Changer. Read this manual carefully before using your new DVD Changer. A good understanding of its features and operation will allow you to achieve optimum perfor- Configuring the DV-CP702 .....
- Page 77 Contents Important Safety Instructions ......3 Advanced Playback ........... 31 Locating Specific Points in Time ...... 31 Precautions ............4 Repeat Playback ..........31 A–B Repeat Playback ........32 Introduction ............6 Random Playback ..........32 Supplied Accessories.........6 Memory Playback..........33 DV-CP702 Features...........6 Selecting Camera Angles.........
-
Page 78: Important Safety Instructions
WARNING: WARNING AVIS TO REDUCE THE RISK OF FIRE OR ELECTRIC SHOCK, RISK OF ELECTRIC SHOCK RISQUE DE CHOC ELECTRIQUE DO NOT OPEN NE PAS OUVRIR DO NOT EXPOSE THIS APPARATUS TO RAIN OR MOISTURE. The lightning flash with arrowhead symbol, within an equilateral triangle, is intended to alert the user to the presence of uninsulated CAUTION: “dangerous voltage”... - Page 79 Precautions DANGER: FCC INFORMATION FOR USER VISIBLE AND INVISIBLE LASER RADIATION WHEN CAUTION: OPEN AND INTERLOCK FAILED OR DEFEATED. DO NOT The user changes or modifications not expressly approved by the STARE INTO BEAM. party responsible for compliance could void the user’s authority to operate the equipment.
-
Page 80: Precautions
WARNING (cleaning or worn part replacement) every 1,000 hours of use BEFORE PLUGGING IN THE UNIT FOR THE FIRST TIME, depending on the operating environment. Contact your Onkyo READ THE FOLLOWING SECTION CAREFULLY. dealer for details. AC outlet voltages vary from country to country. Make sure that 11. -
Page 81: Introduction
Introduction Supplied Accessories DV-CP702 Features Make sure you have the following accessories: Highlights • Dolby Digital and DTS • Holds up to six discs • Chain mode for successive disc playback • DVD-Video playback • Video CD playback • Audio CD playback Remote controller (RC-542DV) &... -
Page 82: Disc Notes
Introduction— DVD Region Numbers Disc Notes The North American DV-CP702 supports only Region 1 Supported Discs DVD-Video discs bearing this logo. The DV-CP702 supports the following discs. The Australian DV-CP702 supports only Region 4 DVD-Video discs bearing this logo. Disc Logo Format or file type If you attempt to play a disc intended for another region, the... - Page 83 Introduction— ■ Audio CD Format ■ MP3 Audio CDs contain tracks. • MP3 files must be MPEG1 Audio Layer 3 format, 44.1 or 48 kHz, fixed bit-rate. Track 1 Track 2 Track 3 Track 4 Track 5 • MP3 files must have a “.mp3” or “.MP3” filename extension. •...
-
Page 84: Dv-Cp702-Related Terminology
Introduction— ■ DVD-RW (DVD rewritable): Storing Discs A type of DVD disc that can be recorded many times. Can be used to make DVD-Video discs or • Don’t store discs in places subject to direct sunlight, or near to store computer data. heat sources. -
Page 85: Controls & Connectors
Controls & Connectors Front Panel DV-CP702 H I J K M NO P Q R S For detailed information, refer to the pages in parenthesis. DISPLAY button (37) This button is used to display information about the cur- STANDBY/ON button (20) rent disc, title, chapter, or track, including the elapsed This button is used to set the DV-CP702 to On or time, remaining time, total time, and so on. - Page 86 Controls & Connectors Display 4 5 6 7 8 9 0 A B CHAIN MODE DISC TITLE TRACK PRGV LAST TOTAL REMAIN VCDVD For detailed information, refer to the pages in parenthesis. Disc indicators 1–6 (21) These indicators show how many discs are loaded. The CHAIN MODE, ALL, DVD &...
- Page 87 These RCA/phono connectors can be connected to ana- log audio inputs on a hi-fi amp, AV receiver, or surround sound decoder (Dolby Pro Logic). REMOTE CONTROL (19) These (Remote Interactive) connectors can be con- nected to the connectors on your other Onkyo AV components for interactive control.
- Page 88 Controls & Connectors For detailed information, refer to the pages in parenthesis. Remote Controller STANDBY button (20) This button is used to set the DV-CP702 to Standby. ON button (20) This button is used to turn on the DV-CP702. Don’t turn on the DV-CP702 until you’ve completed, and double checked all connections (page 16).
- Page 89 Controls & Connectors REPEAT button (31) This button is used to set the Repeat Playback functions. A–B button (32) This button is used to set the A–B Repeat Playback func- tion. RANDOM button (32) This button is used with the Random Playback function. DISPLAY button (37) This button is used to display information about the cur- rent disc, title, chapter, or track, including the elapsed...
-
Page 90: Before Using The Dv-Cp702
Before Using the DV-CP702 Installing the Remote Controller’s Using the Remote Controller Batteries To use the remote controller, point it at the DV-CP702’s remote control sensor, as shown below. Open the battery compartment, as shown. Remote control sensor DV-CP702 Insert the two supplied batteries (AA) in 30˚... -
Page 91: Connecting The Dv-Cp702
Connecting the DV-CP702 RCA/phono AV Connection Color Coding This chapter explains how to connect the DV-CP702 to your other AV components. RCA/phono AV connections are usually color coded: red, white, and yellow. Use red plugs to connect right-channel Before Making Any Connections audio inputs and outputs (typically labeled “R”). -
Page 92: Connecting Your Tv Or Projector
Connecting the DV-CP702 Connecting Your TV or Projector This section explains how to connect the DV-CP702 to your S-Video offers better picture quality than composite video, TV or projector. so if your TV supports it, use the supplied S-Video cable to connect the DV-CP702’s S VIDEO output to an S-Video In this hookup example, the TV handles the audio and video. -
Page 93: Connecting Your Hi-Fi Amp
Connecting the DV-CP702 Notes: Connecting Your Hi-Fi Amp • Be sure to set the Digital Out–>Dolby Digital setting to This section explains how to connect the DV-CP702 to a ste- “Dolby Digital>PCM” (see page 41). Otherwise an reo hi-fi amp or receiver for better sound quality than that of unpleasant digital noise may be heard, which may damage most TVs. -
Page 94: -Compatible Av Components
CP702 and other -compatible Onkyo AV components Standby, all other AV components connected via enter together. With some Onkyo AV receivers you can use one Standby as well. remote controller to control all your Onkyo components, and use the following special functions: ■... -
Page 95: Powering Up & Setting Up The Dv-Cp702
Powering Up & Setting Up the DV-CP702 Here you need to specify the size of your TV (standard 4:3 or widescreen 16:9), select a language for the onscreen setup STANDBY/ON STANDBY menus, and configure the digital audio output. You can change these settings later by using the onscreen setup menus STANDBY (see page 38). -
Page 96: Basic Playback
Basic Playback Notes: DISC OPEN/ • You can load up to six discs. You don’t have to load all six DISC SKIP SELECT CLOSE discs every time. STANDBY OPEN/ CLOSE SEARCH LAST M MEMORY CHAIN MODE • When the disc tray is closed, all of the disc indicators REPEAT appear until the DV-CP702 has checked each bay for the presence of a disc. -
Page 97: Starting, Pausing & Stopping Playback
Basic Playback Starting, Pausing & Stopping Playback TOP MENU MENU DISC SKIP DISC SELECT ENTER RETURN SETUP This section explains how to start, pause, and stop playback. AUDIO ANGLE SUBTITLE ■ Start To start playback, press the Play DISC 1 DISC 2 DISC 3 STEP/SLOW... - Page 98 Basic Playback • Prolonged display of the same picture or menu may cause irreparable damage to your TV screen called screen burn- in. To prevent this, don’t keep playback paused for too long and always press the Stop [ ] button when you’ve finished playing a DVD-Video disc or Video CD.
-
Page 99: Navigating Disc Menus
Basic Playback Use the remote controller’s naviga- tion [ ], [ ], [ ], [ ] buttons to Remote controller select items on the menu, and use the [ENTER] button to confirm your selection. ENTER DV-CP702 If you select a playback option (e.g., sub- titles), another menu of options will typi- PLAY/ENTER cally appear, in which case you use the... -
Page 100: Selecting Titles & Chapters By Number
Basic Playback Use the number buttons to specify a chapter or title. STANDBY OPEN/ Remote controller To enter, for example, “2,” press the [2] CLOSE SEARCH LAST M MEMORY CHAIN MODE SEARCH button. REPEAT Number buttons RANDOM Disc Navigator disc DISPLAY Search CLEAR... -
Page 101: Using The Disc Navigator
0.00 – – MODE Folder Track Press the Stop [ ] button to stop ROOT 002.RUN 001.OVER_T ~ 1 001.ONKYO playback. 002.SONG_F ~ 1 002.RUN 003.DONT_L ~ 1 004.MOST_I ~ 1 005.WELCOM ~ 1 006.GO_AHE ~ 1 007.STILL Remote controller 008.GOOD_D ~ 1... -
Page 102: Memory Playback In The Disc Navigator
Basic Playback Memory Playback in the Disc Navigator JPEG You can compile a playlist of tracks and folders in the Disc Navigator as follows. With the Disc Navigator open, press the [MEMORY] button. Remote controller The playlist appears in place of the file MEMORY information. -
Page 103: Selecting Tracks By Number
Basic Playback Press the Play [ ] button to start playback of the specified track. STANDBY OPEN/ You can also select tracks while the DV- CLOSE SEARCH LAST M MEMORY CHAIN MODE SEARCH CP702 is during playback by using the REPEAT Number Next [... -
Page 104: Adjusting The Display Brightness
• With some discs, the picture may shake when using back- Notes: ward frame-by-frame playback. • When the display brightness on another Onkyo AV compo- nent connected via is changed, the “disc tray light off” • No sound is output during frame-by-frame playback. -
Page 105: Using Jpeg Cds
Basic Playback To stop the slideshow, press the [STOP] or [MENU] button. STANDBY OPEN/ CLOSE Depending on the type of JPEG disc, SEARCH LAST M MEMORY CHAIN MODE CHAIN REPEAT either the first nine pictures appear in MODE thumbnail-size or the Disc Navigator win- MENU RANDOM dow appears. -
Page 106: Advanced Playback
Advanced Playback Notes: • The Time Search function works only within the currently playing title (DVD-Video) or track (Video CD, audio CD). For example, if the current title is one hour long and you enter the time 1 hour, 30 minutes, nothing will happen. DV-CP702 •... -
Page 107: A–B Repeat Playback
Advanced Playback Select a disc. See page 22. STANDBY OPEN/ CLOSE SEARCH LAST M MEMORY CHAIN MODE SEARCH Press the [RANDOM] button REPEAT repeatedly to select a random Remote controller RANDOM option. RANDOM RANDOM DISPLAY CLEAR The currently selected random option DV-CP702 CLEAR TOP MENU... -
Page 108: Memory Playback
Advanced Playback Repeat steps 2 and 3 to add more items to the memory list. STANDBY OPEN/ New items will be added to the memory CLOSE SEARCH LAST M MEMORY CHAIN MODE MEMORY list as steps 02, 03, and so on. REPEAT Number buttons... -
Page 109: Selecting Camera Angles
Advanced Playback Selecting Camera Angles To edit a step, use the Left/Right [ ]/[ ] buttons to select the list, use Remote controller the Up/Down [ ]/[ ] buttons to Some DVD-Video discs feature multiple camera angles that select the step, and then use the allows you to view scenes from different angles. -
Page 110: Selecting Subtitles
Advanced Playback During playback, press the [SUBTI- Remote controller TLE] button repeatedly to cycle SUBTITLE STANDBY through the available subtitles. OPEN/ CLOSE SEARCH LAST M MEMORY CHAIN MODE The name of the selected subtitle appears REPEAT onscreen for several seconds. RANDOM To turn off subtitles, use the [SUBTITLE] DISPLAY... -
Page 111: Using Last Memory
Advanced Playback To resume playback from last mem- ory point, select “Yes,” and then Remote controller press [ENTER]. ENTER To start playback from the beginning, DV-CP702 select “No,” and then press [ENTER]. To start playback from the beginning and DISPLAY STOP delete the last memory point, select LAST MEMORY... -
Page 112: Displaying Information
Advanced Playback Displaying Information You can display various information about the current disc, title, chapter, or track as follows. During playback, press the [DIS- PLAY] button. Various information appears onscreen. The operating status (e.g., Stop, Play, Resume), disc number, and disc type information is displayed along the top of Remote controller the screen. -
Page 113: Configuring The Dv-Cp702
Configuring the DV-CP702 This chapter explains the various functions and settings of The following table lists all the functions and settings, with a the onscreen setup menus. brief description and page number where you can find full details. Functions and settings are arranged into six menus: Picture, Audio, Language, Display, Operation Setting, and Initial. -
Page 114: Picture Menu
Configuring the DV-CP702 Picture Menu RANDOM TV Shape DISPLAY CLEAR TOP MENU MENU ENTER With this setting you can select a picture format to match the ENTER RETURN SETUP SETUP aspect ratio of your TV. AUDIO ANGLE SUBTITLE Choose this option if you have 4:3 Letter box (default): a standard TV (4:3 aspect ratio). - Page 115 Configuring the DV-CP702 There are three memories (1, 2, 3) for storing your favorite settings. You could, for example, use one for daytime view- RANDOM ing (e.g., sun shining through window) and one for nighttime DISPLAY CLEAR TOP MENU MENU viewing (e.g., curtains drawn, lights down).
-
Page 116: Audio Menu
Configuring the DV-CP702 ■ Digital Out Audio Menu With this setting you can turn the coaxial and optical digital Digital Out audio outputs on or off. With these settings you can specify how the DV-CP702 out- Depending on how you connect the DV-CP702 to your other puts digital audio signals. -
Page 117: Display Menu
Configuring the DV-CP702 Disc Menu Language Subtitle With this setting you can select your preferred language for With this setting you can select your preferred language for disc menus. When you play a DVD-Video disc with multiple subtitles. When you play a DVD-Video disc with multiple language disc menus, your preferred language will be language subtitles, your preferred language will be selected selected automatically. -
Page 118: Operation Setting Menu
Configuring the DV-CP702 Screen Saver Use the Up/Down [ ]/[ ] buttons to specify the parental lock level from JPEG Remote controller 1 through 8, and then press With the Screen Saver function you can protect your TV [ENTER]. against screen burn-in, which can occur when the same ENTER image or menu is displayed for a long time. -
Page 119: Language Code List
Configuring the DV-CP702 Auto Power Off Language Code List JPEG Use this list when specifying other languages. With the Auto Power Off function the DV-CP702 will turn Language Code Language Code itself off automatically if about 20 minutes have elapsed Japanese Kirghiz without any operation after stopping playback. - Page 120 Troubleshooting Symptom Possible cause Remedy Connect the power cord to a suitable wall outlet The power cord is not connected. (page 20). Can’t turn on the DV- Turn off the DV-CP702, wait five seconds, then try CP702? External interference is affecting the DV- turning it on again.
- Page 121 Troubleshooting Symptom Possible cause Remedy The message “NO PLAY” appears on the The disc is dirty. Remove the disc and clean it (page 8). display? Turn off the DV-CP702, wait five seconds, then Buttons on the DV- Power supply voltage fluctuations and other turn it on again.
- Page 122 Specifications Video system Standard NTSC (U.S. model), PAL/AUTO (Australian model) Region code 1 (U.S. model), 4 (Australian model) Laser Semiconductor laser, wavelength 650 nm (DVD), 780 nm (CD) 4 Hz–22 kHz @ 48 kHz sampling rate DVD linear audio 4 Hz–44 kHz @ 96 kHz sampling rate Frequency response CD audio 4 Hz–20 kHz...
- Page 123 Tel: +49-8142-4401-0 Fax: +49-8142-4401-555 http://www.onkyo.net ONKYO CHINA LIMITED Units 2102-2107, Metroplaza Tower I, 223 Hing Fong Road, Kwai Chung, HOMEPAGE http://www.onkyo.co.jp/ N.T., HONG KONG Tel: 852-2429-3118 Fax: 852-2428-9039 SN 29343662 (C) Copyright 2004 ONKYO CORPORATION Japan. All rights reserved. I0402-1...
Need help?
Do you have a question about the HT-S780 and is the answer not in the manual?
Questions and answers