
Related Manuals for Z Corporation Spectrum Z 510


Summary of Contents for Z Corporation Spectrum Z 510
-
Page 1: Hardware Manual
™ Spectrum Z 3D Printer Hardware Manual Rev J; Part Number 09537; August 2007 www.3dpuser.com All Rights Reserved 10/2/07... -
Page 2: Table Of Contents
Spectrum Z™510 3D Printer Hardware Manual TABLE OF CONTENTS 1 Overview......................1 1.1 Use Of Equipment ..................1 1.2 Manual Sections ..................1 2 What's New....................... 3 3 Introduction ....................... 4 3.1 How It Works .................... 4 3.2 System Components ................7 3.3 Printer Components.................. - Page 3 8.2 Change Print Heads ................. 43 8.3 Purge Print Head ..................47 8.4 Check Powder Level................. 47 8.5 Drop Feed Piston..................47 8.6 Fill Bed...................... 47 8.7 Preheat Printer..................47 8.8 Maintenance ..................... 47 8.8.1 Fast Axis Lubrication ................ 48 8.8.2 Slow Axis Lubrication................
-
Page 4: Overview
You agree to indemnify, defend and hold Z Corporation and its officers, directors and employees harmless from and against any and all claims, losses, damages, costs and expenses resulting from any use of the Equipment other than for the production of early-stage appearance models and prototypes. - Page 5 It will also explain how to use the most common infiltrants available from Z Corporation. For information on other infiltrants or applications, visit the 3DP User Website at www.3dpusers.com.
-
Page 6: What's New
Spectrum Z™510 3D Printer Hardware Manual What's New 2 What's New This section briefly describes what’s new in this version of the Spectrum Z510 3D Printer Hardware Man- ual. • New firmware installation instructions. The function of firmware is to test and check certain diag- nostics related to printer cleaning/lubrication maintenance prior to each build. -
Page 7: Introduction
Spectrum Z™510 3D Printer Hardware Manual Introduction 3 Introduction 3.1 How It Works The 3D Printer System is based on the Massachusetts Institute of Technology's patented 3DP™ (3D Print- ing) technology. The software first converts a three-dimensional design built using 3D CAD into cross sections or slices that are between 0.0035"... - Page 8 Spectrum Z™510 3D Printer Hardware Manual Introduction Step 4: As the gantry Step 5: The feed piston traverses right to left, the moves up one layer, the print head prints the part build piston moves down cross-section. one layer, and the pro- cess is repeated.
- Page 9 Spectrum Z™510 3D Printer Hardware Manual Introduction axis (the print heads’ direction of travel), bands across the x or the "slow" axis (the gantry direction of travel) and laminated layers along the z-axis. This discussion only applies to untreated parts; once parts are infiltrated, they uniformly take on the strength characteristics of the infiltrating mate- rial.
-
Page 10: System Components
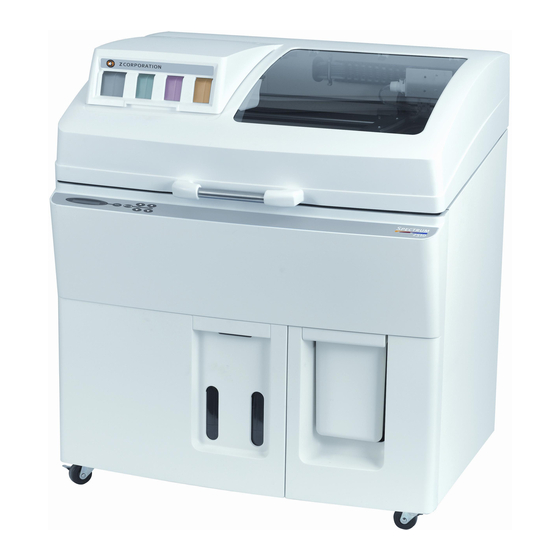
Spectrum Z™510 3D Printer Hardware Manual Introduction 3.2 System Components Z510 3D Printer ZD5 Powder Recycling System 3.3 Printer Components www.3dpuser.com 10/2/07 All Rights Reserved... -
Page 11: Printer Control Panel
Spectrum Z™510 3D Printer Hardware Manual Introduction 3.4 Printer Control Panel 3.5 Internal, Printer Assembly and Service Station Components Internal Components www.3dpuser.com 10/2/07 All Rights Reserved... - Page 12 Spectrum Z™510 3D Printer Hardware Manual Introduction Printer Assembly with Carriage Insert Service Station www.3dpuser.com 10/2/07 All Rights Reserved...
-
Page 13: Zd5 Powder Recycling System
Spectrum Z™510 3D Printer Hardware Manual Introduction 3.6 ZD5 Powder Recycling System Click ZD5 Depowder Unit to see the User Manual for this unit and other accessories available for your Printers. www.3dpuser.com 10/2/07 All Rights Reserved... -
Page 14: Z510 Powders, Accessories And Tools
Spectrum Z™510 3D Printer Hardware Manual Introduction 3.7 Z510 Powders, Accessories and Tools Refer to the following table regarding powder types available for use with the Z510 Printer. Click Applica- tions for additional information regarding high performance, casting, specialty materials, and infiltrants. Click MSDS to see information about material storage and safety precautions on the 3DP™... - Page 15 Spectrum Z™510 3D Printer Hardware Manual Introduction zp®140 High Performance Plus Powder zp140 is a multi-purpose material system that offers significantly easier post-processing and exceptional color performance. The "Plus" in our High Performance powder is the new Water Cure process. •...
-
Page 16: New Accessories Available For 3D Printers
10. Small Philips Screwdriver 11. Grease Gun Nozzle 12. L-Hex Key Set 3.8 New Accessories Available for 3D Printers To order, contact Z Corporation. • New Overflow Bin Cover - minimizes airborne powder from the overflow bin during a build. www.3dpuser.com... -
Page 17: Zprint Software Installation
Spectrum Z™510 3D Printer Hardware Manual Introduction • New Vacuum Attachment - fits the Z510 3D Printer vacuum hose and attaches to the side of the feed box to capture airborne powder when powder is being added to the feed box. 3.9 ZPrint Software Installation The ZPrint Software is the file processing tool that sends information from the user's workstation to the 3D Printer. -
Page 18: Quick Start Guide
Spectrum Z™510 3D Printer Hardware Manual Quick Start Guide 4 Quick Start Guide This section is a short step-by-step process of how to get a print job running on your printer. For a more detailed explanation, see Routine Operations, Using the ZPrint Firmware and Software, and Post Process- ing the... - Page 19 Spectrum Z™510 3D Printer Hardware Manual Quick Start Guide 4. Check the binder bottles. Fill if necessary. 5. Check the wash fluid and the waste fluid. Fill the wash fluid and dispose of the waste fluid. 6. Put printer online by pressing the Online button on the control panel. Technical Tip LEAVE THE PRINTER ON! This allows the printer to perform a periodic self maintenance.
-
Page 20: Preparing The Build In Zprint Software
Spectrum Z™510 3D Printer Hardware Manual Quick Start Guide 4.2 Preparing the Build in ZPrint Software 1. Launch ZPrint and open or import your file(s). 2. Orient and scale the file, if needed. www.3dpuser.com 10/2/07 All Rights Reserved... -
Page 21: Removing The Part
Spectrum Z™510 3D Printer Hardware Manual Quick Start Guide 3. Open the File menu and select 3D Print Setup. In the 3D Print Setup dialog, select your Printer, Powder Type, and Layer Thickness options. 4. Select 3D Print on the File Menu or click the 3D icon on the Toolbar. - Page 22 Spectrum Z™510 3D Printer Hardware Manual Quick Start Guide 3. Fine depowder part and post-process as needed. www.3dpuser.com 10/2/07 All Rights Reserved...
-
Page 23: Routine Operations
The routine maintenance tasks described in this chapter should be performed before every build. 5.1 Preparing the Build Area IMPORTANT Use only powder supplied by Z Corporation. Use of any other material may impact the performance and/or safety of your 3D Printer System and will void warranty of equip- ment. - Page 24 Spectrum Z™510 3D Printer Hardware Manual Routine Operations 6. Hold the Build UP button until the build piston raises. The build piston will expose the build plate hold- ers. 7. Place build plate on top of holders. Make sure build plate is secure. Press any button on the control panel to lower the build piston.
-
Page 25: Cleaning The Service Station
Spectrum Z™510 3D Printer Hardware Manual Routine Operations 10. Close the top cover of the printer. Fill the build area with powder by pressing and holding the Spread button on the control panel for four complete spreads. This will initiate the Fill Bed mode. The LCD will display "Filling bed;... - Page 26 Spectrum Z™510 3D Printer Hardware Manual Routine Operations 2. With the Service Station exposed, rinse rubber Parking Cap with distilled water (If needed, remove rubber Parking Caps and rinse under running water). Wipe dry with paper towel. PLEASE NOTE: Make sure the Parking Caps are sitting flat in their holders. 3.
-
Page 27: Checking Fluid Levels
Spectrum Z™510 3D Printer Hardware Manual Routine Operations 5. Wipe metal spit cover with damp paper towel. 6. Close top cover and press OK to repark on the software. 5.3 Checking Fluid Levels 1. Open front cabinet tray. 2. Check wash fluid level. If it is less than half full, refill wash fluid bottle. www.3dpuser.com 10/2/07 All Rights Reserved... - Page 28 3D Printer will clog the fluid system. Use only binder and wash fluid supplied by Z Corporation. Use of any other material may impact the performance and safety of your 3D Printer System and will void the warranty.
- Page 29 Spectrum Z™510 3D Printer Hardware Manual Routine Operations Refer to the following links to learn about other periodic maintenance tasks. The following tasks should only be performed when prompted to by ZPrint or when you see a message on your 3D Printer LCD. Fast Axis Lubrication Slow Axis Lubrication Piston Screws Lubrication...
-
Page 30: Using The Zprint Firmware And Software
Spectrum Z™510 3D Printer Hardware Manual Using the ZPrint Firmware and Software 6 Using the ZPrint Firmware and Software This chapter will briefly describe firmware and how to install it from the 3DP User Website, how to set up a build, check the build settings, and print. -
Page 31: Open Or Import The File(S)
Spectrum Z™510 3D Printer Hardware Manual Using the ZPrint Firmware and Software • Orient parts so delicate features are supported in the z-axis, i.e. keep the attaching feature directly below the fragile features. If a delicate feature is only supported by unprinted powder the chances of breaking that small feature during depowdering is greatly increased. -
Page 32: Part Orientation
Spectrum Z™510 3D Printer Hardware Manual Using the ZPrint Firmware and Software 6.5 Part Orientation 6.5.1 Parts Containing an Opening or Hollow Area If the part has an opening or is hollow, place the opening or hollow side up. This will allow for the removal of powder during the depowdering process. -
Page 33: Printing The Build
Spectrum Z™510 3D Printer Hardware Manual Using the ZPrint Firmware and Software • Slice viewing allows you to view the cross sections of the part to identify any errors in the file. • Collision detection will scan through the slices and report the layer in which part overlapping is found. Follow the steps below to check your build settings. - Page 34 Spectrum Z™510 3D Printer Hardware Manual Using the ZPrint Firmware and Software www.3dpuser.com 10/2/07 All Rights Reserved...
-
Page 35: Post-Processing The Part
Spectrum Z™510 3D Printer Hardware Manual Post-Processing the Part 7 Post-Processing the Part 7.1 Tips on Gross and Fine Depowdering • For additional information regarding post-processing, click Applications to go to the 3DP™ User web- site, or Knowledge Base to use our searchable knowledge base on the website. •... - Page 36 Spectrum Z™510 3D Printer Hardware Manual Post-Processing the Part Soft Horsehair Brush: This brush has very soft bristles and assists the user with the gross depowdering process. Brushing pow- der away from the part is a useful technique prior to the vacuuming step. Stiff Detailing Brush: This brush has very stiff bristles, which is useful for scrubbing caked powder out of tight areas of a part.
-
Page 37: Removing The Finished Part
Spectrum Z™510 3D Printer Hardware Manual Post-Processing the Part 7.3 Removing the Finished Part After the build is complete, remove the finished parts from the build box as follows: 1. Leave the part in the bed for approximately 30-60 minutes. Take a moment to look at the computer screen and determine exactly where parts lie in the build box. - Page 38 Spectrum Z™510 3D Printer Hardware Manual Post-Processing the Part 6. To gain access to the sides of the parts, raise the build piston by holding down the Build UP button. 7. When finished, you may remove the part by hand or press the Build UP button on the control panel. When it stops moving, press Build UP one more time to initiate the unload feature.
-
Page 39: Depowdering The Part
Spectrum Z™510 3D Printer Hardware Manual Post-Processing the Part 7.4 Depowdering the Part 1. Place parts inside the depowdering station. 2. Turn on the vacuum cleaner. 3. Turn on the air compressor. 4. Change the air pressure as needed and check the pressure with your hand before applying air on the part. -
Page 40: Drying The Part
Spectrum Z™510 3D Printer Hardware Manual Post-Processing the Part 7.5 Drying the Part Although the part can be handled when it is not completely dried, the part reaches full strength when dried. ° ° Placing the part in an oven at temperatures less than 200 F (93 C) for 2-4 hours will dramatically increase the strength of the part. -
Page 41: Using Paraplast X-Tra Wax
Spectrum Z™510 3D Printer Hardware Manual Post-Processing the Part 7.6.1 Using Paraplast X-TRA Wax Paraplast X-TRA is a low viscosity, general purpose, infiltration wax formulated to melt at very low temper- ° ° atures (122 F or 50 C) and strengthen parts. This material cures rapidly and enhances the vibrancy of color parts. -
Page 42: Using Z-Max™ Epoxy
Spectrum Z™510 3D Printer Hardware Manual Post-Processing the Part • Label disposal materials. • Wear dust mask when sanding finished parts. General Application Notes • Part should be fully dried before applying resin. Resin reacts with water and produces heat. If the part is not dried, it will heat up the part and produce gas that may be an irritant to the mucous membranes. - Page 43 Spectrum Z™510 3D Printer Hardware Manual Post-Processing the Part • Label disposal materials. • Wear dust mask when sanding finished parts. • Read the Material Safety Data Sheet for Z-Max prior to the use of this material. Mixing Instructions • When using the 250 gm Z-Max kit simply pour the entire contents of the Z-Max Hardener container into the Z-Max Resin container and mix the two parts thoroughly for two minutes prior to applica- tion.
- Page 44 Spectrum Z™510 3D Printer Hardware Manual Post-Processing the Part • When finished, remove the disposable liner and clean sprayer with ethyl alcohol or acetone. • Remove the tip and thoroughly clean by hand to avoid resin buildup. (Cleanup takes approxi- mately 15 minutes).
- Page 45 Spectrum Z™510 3D Printer Hardware Manual Post-Processing the Part Creating High Finsh Color Parts Painting Powder Management RTV Molding Thermoforming Tough Durable Parts Water Transfer Water Transfer High-Strength Parts www.3dpuser.com 10/2/07 All Rights Reserved...
-
Page 46: Service Menu And Other Maintenance
Spectrum Z™510 3D Printer Hardware Manual Service Menu and Other Maintenance 8 Service Menu and Other Maintenance The ZPrint Service menu is the primary interface from the desktop when performing routine maintenance on the Spectrum Z™510 3D Printer. 8.1 Unpark Unpark moves the Carriage from its parked position at the Service Station to the opposite side of the Fast Axis to allow easy access for routine cleaning. - Page 47 Spectrum Z™510 3D Printer Hardware Manual Service Menu and Other Maintenance 4. Open printer top cover and then open the Carriage cover. 5. Remove the print head(s) you need to change. 6. Take an alcohol swab and clean the pogo pins. www.3dpuser.com 10/2/07 All Rights Reserved...
- Page 48 Spectrum Z™510 3D Printer Hardware Manual Service Menu and Other Maintenance 7. Re-insert a new print head(s) and press down. Press firmly on both ends of the print head to secure into place. 8. Close the Carriage cover. 9. Using a moist paper towel, wipe the alignment window located on the bottom, left side of the Carriage. Dry off with a dry paper towel and close the printer top cover.
- Page 49 Spectrum Z™510 3D Printer Hardware Manual Service Menu and Other Maintenance 12. When purging is completed, return to the Service menu and select Auto Alignment. 13. The printer will print out an alignment pattern. The first several layers will be gray-based and then the color alignment pattern is printed.
-
Page 50: Purge Print Head
Spectrum Z™510 3D Printer Hardware Manual Service Menu and Other Maintenance 8.3 Purge Print Head Always purge a new print head immediately after replacing an expired print head. When you initiate a purge cycle, there are two options to choose from - Purge All Print Heads and Purge New Print Head. Purge All Print Heads will initiate a purge cycle for all print heads regardless of whether they are new or not. -
Page 51: Fast Axis Lubrication
Spectrum Z™510 3D Printer Hardware Manual Service Menu and Other Maintenance While lubrication of the Fast and Slow Axis is very important, it is equally important not to over-grease the bearings when lubricating. Only a very small amount of grease is required to keep these parts working opti- mally. - Page 52 Spectrum Z™510 3D Printer Hardware Manual Service Menu and Other Maintenance 5. Place the grease gun on the grease fitting on the Carriage and squeeze once. 6. Wipe the excess grease off with a dry paper towel. 7. Move the Carriage back and forth manually to distribute the grease. When finished, close the printer top cover.
-
Page 53: Slow Axis Lubrication
Spectrum Z™510 3D Printer Hardware Manual Service Menu and Other Maintenance 8.8.2 Slow Axis Lubrication 1. Assemble the grease gun as instructed on its packaging. 2. Select Service > Unpark. 3. Open the printer top cover. 4. Wipe off the slow axis rail with a dry paper towel. 5. -
Page 54: Piston Screws Lubrication
Spectrum Z™510 3D Printer Hardware Manual Service Menu and Other Maintenance 8. With the printer offline, press the Spread button on the control panel to distribute the grease. 8.8.3 Piston Screws Lubrication 1. Lower both the feed and build pistons all the way down. 2. -
Page 55: Cleaning The Fast Axis Rails And Bumpers
Spectrum Z™510 3D Printer Hardware Manual Service Menu and Other Maintenance 5. Raise and lower both the feed and build pistons a couple of times to evenly distribute the grease. Any excess grease should be wiped off with a paper towel. 8.8.4 Cleaning the Fast Axis Rails and Bumpers 1. -
Page 56: Bleed Air
Spectrum Z™510 3D Printer Hardware Manual Service Menu and Other Maintenance 5. Check that there is no grease buildup on the Carriage as well. Check both sides of the Carriage where the axis rails and the Carriage join. 6. When finished, close the printer top cover and place the printer back Online. 7. - Page 57 Spectrum Z™510 3D Printer Hardware Manual Service Menu and Other Maintenance • Visually inspect the lines where they connect to the Carriage to see if air bubbles are present. Follow the procedure below if you see air in one or more of the binder lines. 1.
- Page 58 Spectrum Z™510 3D Printer Hardware Manual Service Menu and Other Maintenance 4. Attach the syringe tubing to the tip of the syringe and ensure the plunger is pushed all the way down. 5. Place the syringe tube fitting over a printhead septum and slowly pull the syringe plunger to draw binder through the tubing and into the syringe.
- Page 59 Spectrum Z™510 3D Printer Hardware Manual Service Menu and Other Maintenance 6. Have a paper towel ready as you lift the syringe tube fitting off of the septum to prevent binder from dripping onto the print head contacts or into the print head housing. 7.
-
Page 60: Service Print Heads
8.12 Stripe Test Authorized Z CORPORATION service personnel use Stripe Test to aid in troubleshooting. 8.13 Cleaning the Spreader Roller / Toggle Roller 1. Open the top cover of the printer. -
Page 61: Check Status
8.15 Report Capabilities Report Capabilities is a tool used by authorized Z Corporation service providers to evaluate the logical state of your 3D Printer. -
Page 62: Print Head Report
There is no proprietary information about printed parts in the Printer Log. 8.18 Other Service Menu Items The other Service menu items are to be used only under the direction of an authorized Z Corporation ser- vice provider. Incorrect usage of these items will result in an inoperable machine. -
Page 63: Best Practices For Powder Management
Good powder management promotes a clean work environ- ment and will keep your printer optimally running so you can be productive. Z Corporation recommends all users go to the Z Corporation 3DP™ User Website... -
Page 64: Troubleshooting
Spectrum Z™510 3D Printer Hardware Manual Troubleshooting Troubleshooting 9.1 The binder solution is being applied in erratic stripes If the binder appears to be applied in fragmented stripes, check the following: 1. Rinse the squeegee clear of any debris. 2. Make sure binder supply is full. If this does not correct the problem, your print heads may be worn out. -
Page 65: Parts Are Unusually Weak Or Crumbly
If your parts are unusually crumbly, check to make sure your saturation levels are not set too low for this type of part. Return to working with the default saturation values for the material type. If this does not work, please contact your authorized Z Corporation Service Provider. -
Page 66: Air Has Entered Into The Wash Fluid Line
Spectrum Z™510 3D Printer Hardware Manual Troubleshooting 9.8 Air has Entered into the Wash Fluid Line You will need to use the Prime Wash Fluid feature when there is no wash fluid or air has entered the wash fluid line. This can occur in a few instances such as when first installing the Printer, when running out of wash fluid, or when the connection to the fluid line has been disconnected. -
Page 67: Communication Errors Between Print Head And Printer
Spectrum Z™510 3D Printer Hardware Manual Troubleshooting 9.9 Communication Errors Between Print Head and Printer In general, clean the pogo pins whenever you replace or remove a printhead. Doing this will greatly reduce errors in communication between the printhead and printer. To clean the pogo pins, follow these instruc- tions: 1. -
Page 68: Printer System Details
PLEASE NOTE: This battery is not in a user accessible area and is not user replace- able. The expected lifetime of the battery is in excess of five years. Replacement will be handled by your Z Corporation Customer Service Representative. -
Page 69: Symbols Used
PC compatible computer. The connection to the Windows computer running the software requires a 9 pin to 9 pin null modem cable (also known as a 'laplink' cable). This cable is supplied with your 3D Printer System; if a replacement is required, order Z Corporation part #10267. - Page 70 Spectrum Z™510 3D Printer Hardware Manual 3D Printer System Details Material Storage Precautions Review the Material Safety Data Sheets (MSDS) carefully before using any Z Corporation materials. Material Storage Usage Powder Store powder on pallets in a cool, dry, ventilated...
-
Page 71: Appendix
Spectrum Z™510 3D Printer Hardware Manual Appendix 11 Appendix 11.1 Restoring Network and Firmware Settings Configuration mode is obtained by pressing and holding the ONLINE key on the printer control panel. Configuration mode is indicated when the LCD displays: NETWORK SETTINGS The Configuration menu consists of these 5 choices: NETWORK SETTINGS RESTORE FIRMWARE... - Page 72 Spectrum Z™510 3D Printer Hardware Manual Appendix Press the < Feed UP > key to move the cursor to the right. Press the < Feed DN > key to move the cursor to the left. Press the < Build UP > or < Build DN > keys to change the value at the current cursor position.
-
Page 73: Error Codes
Spectrum Z™510 3D Printer Hardware Manual Appendix Selecting SAVE AND EXIT displays: SAVE AND EXIT Press the < Feed UP > key to save your changes and terminate the Configuration menu. Selecting DISCARD AND EXIT displays: DISCARD AND EXIT Press the < Feed UP > key to terminate the Configuration menu. Your changes for the current session will not be saved. - Page 74 Spectrum Z™510 3D Printer Hardware Manual Numerics Diagram Of Interior And Exterior Saturation, Drop Feed Piston Command, 3D Print Setup Dialog, Empty The Powder From The Overflow Bin, Air In The Binder Fluid Lines, Error Codes Table, Air In The Wash Fluid Line, Ethernet Connector, Air Pressure When Depowdering, Excess Powder,...
- Page 75 Spectrum Z™510 3D Printer Hardware Manual New Vacuum Attachment Image, Removing The Finished Part, Removing The Part, Replace Fluid Lines With Distilled Water, Offline Mode, Report Capabilities, Online Mode, Restoring Network And Firmware Settings, Open Or Hollow Area Of Part, Rinse Rubber Parking Cap, Open Or Import Files, Rinse Rubber Wiper Blade,...
- Page 76 Spectrum Z™510 3D Printer Hardware Manual Wide Blade Utility Scraper, Wipe Metal Spit Cover, z®Cast Description, Z510 3D Printer Image, Z510 Powders, Accessories And Tools, Z510 Toolkit Tools, Z-Bond Application Notes, Z-Bond Curing Information, Z-Bond Safety Precautions, ZD5 Depowder Unit, Z-Max Application Notes, Z-Max Curing Information, Z-Max Mixing Instructions,...
Need help?
Do you have a question about the Spectrum Z 510 and is the answer not in the manual?
Questions and answers