Table of Contents
Advertisement
Advertisement
Table of Contents

Related Manuals for Z Corporation zprinter 450


Summary of Contents for Z Corporation zprinter 450
- Page 1 ZPRINTER ® ZPRINTER ® QUICK START GUIDE Part Number 09569 Rev. D 9/25/09...
-
Page 2: Guide Assumes That
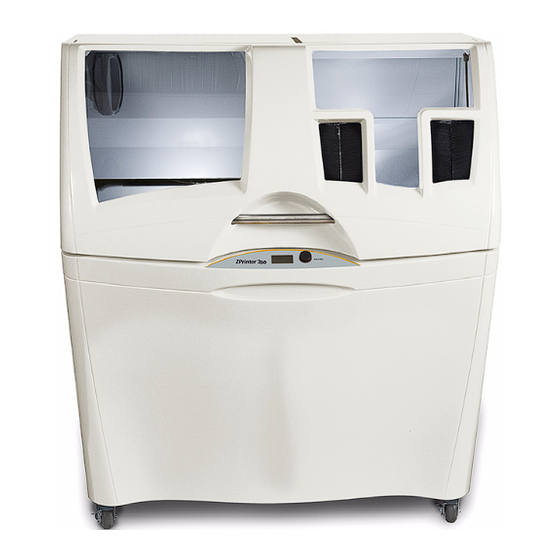
Overview - ZPrinter 350/ZPrinter 450 Build Fine Powder Chamber Removal Chamber Debris Separator Arm Holes Top Cover Binder Cartridge Glove Box Heater (450 only) (450 only) Vacuum Hose Fast Axis Air Wand Build Bed Parking Caps (450 only) Deck Service Station... -
Page 3: The Zprinter Is Properly Installed And Running, And That No Errors Are Displayed On The Zprinter Control Panel
Rear View External Connections External Connections Power Switch Power Cord Network Connection Connection (Ethernet RJ-45) Nameplate (Serial Number) Push the Control Knob once to: • Bring up the printer menu. • Select a menu command. • Start/Stop/Cancel a menu function. Turn the Control Knob left/right to highlight menu items. -
Page 4: Table Of Contents
Z-Bond For more details, please refer to the ZPrinter 350 Hardware Replace a Print Head Manual or the ZPrinter 450 Hardware Manual. The Manual is included on the installation CD with your ZPrint software. Where To Go For More We encourage all customers to logon to our 3DP User Web site at Information zcentral.zcorp.com... -
Page 5: Manual
2. Check The Printer Check for loose powder in or around the Build Bed, Fast Axis, and Deck. If you need to clean these areas, follow the Before you start your print job, it’s important that you check the steps in Section 6.1, “Vacuum Up Excess Powder”. -
Page 6: Setup Your Build And Print
ZPrint, and select your printing parameters. cate features, deselect the option for Empty Build Piston Open your file in ZPrint. After Printing (ZPrinter 450 only). Click Print to start your build. Select File > 3D Print Setup, or click on the Toolbar.,... -
Page 7: Gross Powder Removal
When the build is finished, the printer starts an automatic drying turn the air compressor off. cycle (heated on the ZPrinter 450; unheated on the ZPrinter Return the Air Wand to its clip. 350). A counter on the printer LCD counts down the time remaining before the part is dry. -
Page 8: Routine Cleaning After
4. Return the empty Debris Separator to its holder. Be sure to push the Separator flat • Clean the Parking Caps (ZPrinter 450 only) against the panel for a secure fit. 6.1 Vacuum Up Excess Powder 6.3 Clean The Rails and Carriage Vacuum the Build Bed, the Fast Axis, and the Deck. - Page 9 6.4 Clean The Service Station Pull the Service Station wiper lever all the way forward until the rubber squeegees are fully exposed. Hold the lever in Before you begin: this position while you clean the squeegees. • Get several dry paper towels and a cotton swab. Squeegees •...
-
Page 10: Clean The Parking Caps
6.5 Clean the Parking Caps (ZPrinter 450 only) Before you begin: • Get several dry paper towels and a cotton swab. • Get the squirt bottle filled with distilled water. • Wear disposable gloves. • Get the Pick and Syringe from the Accessories Kit. -
Page 11: Post-Processing With Z-Bond
7. Post-Processing With Z-Bond Gently submerge your part into the liquid for several seconds. For complete instructions, refer to the Hardware Manual for Remove the part and quickly and your printer, or to our 3D User Web site at zcentral.zcorp.com. thoroughly wipe off any excess liquid. -
Page 12: Replace A Print Head
8. Replace a Print Head 7. Insert the new printhead. Press down firmly on the top of For more details on performing these steps, refer to the Addi- the printhead, on the same side tional Operations section of the Hardware Manual for your as the pogo pins, to securely fit printer. -
Page 13: Where To Go For More Information
Where To Go For More Information About Materials and Consumables Learn more about the various powders and binders that are About Your Printer compatible with your printer on the Materials section of our Web site at zcentral.zcorp.com. For additional information, consult the ZPrinter® 350 (or 450) Hardware Manual. - Page 14 Notices Copyright © Z Corporation 1995-2009. All rights reserved. The information in this document may not be duplicated or transmitted in any way without the express written consent of Z Corporation. The information contained herein is for the use of Z Corporation customers, who are permitted to create brief excerpts for the purposes of training and review.
- Page 15 Z Corporation Contact Information: If you have any questions about your 3D Printer or the ZPrint/ZEdit Software, please contact your local Reseller/ Service Provider. If they are unable to help, contact us directly. Japan/ Hong Kong United States (Corporate Headquarters)
- Page 16 Z Corporation, © 2009 All Rights Reserved...
Need help?
Do you have a question about the zprinter 450 and is the answer not in the manual?
Questions and answers