Table of Contents
Advertisement
Quick Links
Download this manual
See also:
Quick Manual
FEATURES:
• 1/2.9" Sony® CMOS
• 2.1 MegaPixel With full 1080p/720p HD-SDI Output (SMPTE 292M)
• MegaPixel IR Corrected 3-9mm (VTC-HOCRAZ39) /9-22mm (VTC-HOCRAZ922)
Varifocal Lens
• Mechanical IR Cut Filter (True Day/Night)
• 16:9 Video format
• On-board Intelligence (OBI Technology) delivers Auto-Focus-Zoom by tracking
motion, then optically zooming in to that area of the frame
• Fully programmable advanced WDR
• Two (2) High Power 850nm IR LEDs with up to 80' foot range
• Integrated Cooling Fan
• Advanced OSD Functions: Motion Activated Pointing Zoom, Defog, Dynamic IR,
BLC/HLC, Motion Deblur, Pixel Defect Compensation, Title Set, Mirror, Flip
• 100% Pure Digital Transmission of video data
• Up to 700' HD Transmission Range (Depending on cable
characteristics and integrity)
• Heavy Duty IP68 rated weather/vandal resistant aluminum
construction
• 12VDC / 24VAC Dual Voltage Operation
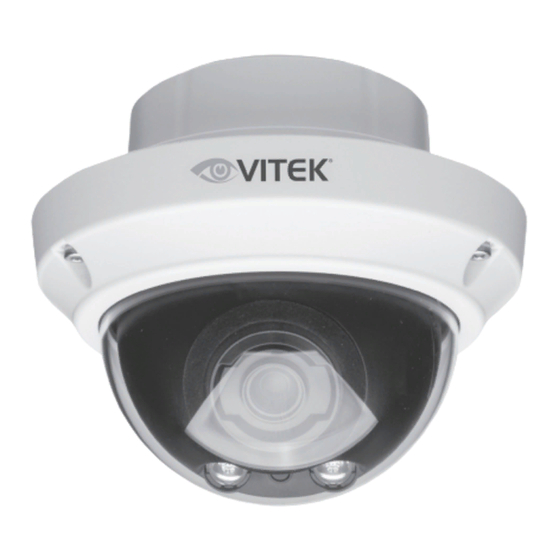
VTC-HOCRAZ39/922
2.1MP HD-SDI Compact Indoor/Outdoor
WDR True Day/Night Dome Camera
Advertisement
Table of Contents

Related Manuals for Vitek VTC-HOCRAZ39


Summary of Contents for Vitek VTC-HOCRAZ39
- Page 1 WDR True Day/Night Dome Camera FEATURES: • 1/2.9” Sony® CMOS • 2.1 MegaPixel With full 1080p/720p HD-SDI Output (SMPTE 292M) • MegaPixel IR Corrected 3-9mm (VTC-HOCRAZ39) /9-22mm (VTC-HOCRAZ922) Varifocal Lens • Mechanical IR Cut Filter (True Day/Night) • 16:9 Video format •...
-
Page 2: Safety Precaution
Safety Precaution To prevent fire or shock hazard, do not expose the unit to rain or moisture. To prevent electric shocks and risk of fire hazards, do NOT use other than specific power source. CAUTION: TO REDUCE THE RISK OF ELECTRIC SHOCK, DO NOT REMOVE COVER (OR BACK). - Page 3 Safety Precaution NOTICE The image used in this instruction manual are processed to help comprehension and may differ from actual video of the camera. Avoid installing in areas where shock or vibration may occur. Pay attention to safety when installing the connection cable and observe that the cable is not subjected to heavy leads, kinks or damage and no moisture can get in.
-
Page 4: Table Of Contents
Contents p. 02 - 03 Safety Precaution Optional Dome Mounts p. 04 Contents p. 05 - 06 Features p. 02- 03 Package Includes p. 07 Dimensions p. 09 Part Names p. 09 - 11 Installation Instructions p. 12 - 25 Operating Instructions p. -
Page 5: Features
Features Key Features ¥ Full HD, 2Mega Pixel HD-SDI CAMERA, 1920x1080(30p/25p) ¥ True WDR(Wide Dynamic Range) Improved Noise reduction with the enhanced 3D-NR ¥ VTD-HOCRAZ39: f=3~9mm, F1.2~F2.1 Day&Night zoom lens (Optical 3x Auto focus zoom / Digital 32x zoom) VTD-HOCRAZ922: f=9~22mm, F1.6~F2.3 Day&Night zoom lens (Optical 2.4x Auto focus zoom / Digital 32x zoom) ¥... -
Page 6: General Description
Features General Description This camera realizes the natural and crisp image as you see the scene in front of you by adopting Auto Focus Full HD(1920x1080p) camera module. • With ICR mechanism, - Enhances its sensitivity about 10x at night time - Can Accept Infared light •... -
Page 7: Dimensions
Dimensions (unit: inches) See Optional Dome Mounts (pg. 3) PCD 4.7 3-0.17... -
Page 8: Part Names
Part Names CONDUIT SPACER (Option) CONDUIT HOLE CAP POWER AND VIDEO CABLE (Option) SURFACE MOUNT (Option) OSD CONTROL FLUSH MOUNT JOY STICK 3-AXIS GIMBAL ZOOM LENS SAFTY WIRE DOME COVER BUBBLE DOME... -
Page 9: Installation Instructions
Installation Instructions 1. Locate the mounting template at the installation position and drill the ceiling or wall if needed. 2. Open the dome cover by loosening screws(4x12mm). Use the torque wrench supplied. A. Flush mount type: See Optional Dome Mounts (pg. 3) - Place the dome base unit on pre-drilled position and attach using mount- ing screws (4x30mm). - Page 10 Installation Instructions Limit of pan & tilt 1) Pan limit: Pan is limited to +/- 165°. Do NOT force the gimbal over the limit, this will prevent internal damage. 2) Tilt limit: Tilt is limited to 15° min ~ 90° max. with reference to the ceiling when the inclination of camera module is 0°, that is, the image is aligned horizontally.
- Page 11 Installation Instructions Power Supply Connections Make sure the power is removed before installation. Camera can work with either 24VAC or 12VDC, dual voltage power. Primary and secondary grounds are completely isolated to avoid the possible ground-loop problems. In case that HD-SDI Inputs are not supported by Monitor, please use HD-S DI Converter to connect HD-SDI cable with Monitor Some computer monitors or TVs may not support 30p/25p.
-
Page 12: Operating Instructions
Operating Instructions Using OSD controller Setup menu can be accessed and controlled by OSD control joy stick on the side of camera unit. Five commands are available with the joy stick. The design of OSD could be different according to the Model. OSD control Joy Stick Video Sub-out Connector... -
Page 13: Direct Control Menu
Operating Instructions OSD menu Start up (OSD menu SET key) down to access the setup menu mode. Press Lens Initializing is strongly recommended at the first stage of setup menu control. ZOOM/FOCUS > LENS INIT > Press the joystick straight down for about 2 seconds. - Page 14 Operating Instructions BLC — Improves the visibility of dark objects caused by bright back SCENE NORMAL light. Outside area of BLC window can over saturate. ENHANCE BLC has a target window for compensation and its size and position can be set by H-POS, V-POS, H-SIZE and V-SIZE. HLC —...
- Page 15 Operating Instructions 1. ZOOM/FOCUS ZOOM / FOCUS ZOOM PUSH FOCUS MODE D-ZOOM LENS REFRESH LENS INIT. RETURN 1-1. FOCUS MODE (default: ZOOM PUSH) : ZOOM PUSH, AUTO and MANUAL modes are available for focusing. 1-2. D-ZOOM (default: OFF) : D-ZOOM(Digital zoom) is available up to 32x. D-ZOOM starts working when the optical zoom reaches its maximum tele-position.
- Page 16 Operating Instructions CAUTION • It is necessary to execute LENS INIT in cases below; 1) At the final step of installation. 2) When out of focus due to shock or vibration. 2. EXPOSURE EXPOSURE AUTO MODE |:::::::|::::::| 10 BRIGHTNESS SENS-UP |:::::::|::::::| 12 MOTION DEBLUR RETURN...
- Page 17 Operating Instructions 2-3. SENS-UP (default: OFF) : A brighter video can be obtained by increasing the exposure time at night with SENS-UP. SENS-UP is the maximum integrations of frame by DSS (Digital Slow Shutter) in low light. • AUTO: SENS-UP is enabled or disabled automatically by the scene brightness. Higher SENS-UP can get brighter video but the slower frame rates will cause motion blur and more white pixels.
- Page 18 Operating Instructions 3-2. SHARPNESS (default: 10) : Adjusts the sharpness of video. 3-3. COLOR GAIN : Adjusts the color level of video. (default: 10) 3-4. GAMMA : Adjusts the gamma of video. (default: 0.5) 4. SPECIAL SPECIAL MIRROR/FLIP PRIVACY MOTION PIXEL DEFECT TITLE SET DISPLAY...
- Page 19 Operating Instructions 4-3. MOTION (default: OFF) : MOTION can detect the changes in the motion window and displays the results in blocks and/or a text message. • SENSITIVITY : Adjusts the detection sensitivity for motion. Higher value increases the sensitivity to detect small motion easier. Too low of sensitivity will cause erratic detection.
- Page 20 Operating Instructions choose a character and selects it. The selected characters are added and displayed on the top left Corner and the cursor moves right automatically for next input. 4-6. DISPLAY : Enables or disables the OSD display. • ID : ON enables camera ID display defined by SYSTEM>COMM. SETUP>CAM ID.
- Page 21 Operating Instructions UNLIKE the conventional zoom which can zoom in/out the center area of image only, the flexible zoom location and area, SMART MOTION ZOOM differentiates its usefulness from others. That is, a conventional camera installed in the corner of the ceiling can zoom the center of the floor in a room and result in losing the image of a door on the side wall.
- Page 22 Operating Instructions POINTING ZOOM This camera has a very useful and powerful feature, POINTING ZOOM, which can zoom in/out any area. POINTING ZOOM enlarges the area defined by a yellow window to a full size image when motion is detected in the black window. POINTING ZOOM window can be re-sized by adjusting D-ZOOM RATIO and moved by H-POINTER and V-POINTER.
- Page 23 Operating Instructions *Example of Smart Motion and Pointing Zoom Features...
- Page 24 Operating Instructions 5. SYSTEM SYSTEM TV SYSTEM EU(PAL) RESOLUTION 1080P COMM. SETUP LANGUAGE FACTORY DEFAULT RETUTN 5-1. TV SYSTEM (default: US or EU) : Selects HDTV standards for US(60HZ) or EU(50HZ). By this selection, 2nd analog video output switches to NTSC or PAL accordingly. 5-2.
- Page 25 Operating Instructions Setting for RS-485 Communication with PTZ Controller NEAR...
- Page 26 Detailed Specifications VTD-HOCRAZ39 VTD-HOCRAZ922 1/2.9” Sony® CMOS Sensor 2.1 MegaPixel (1080p / 720p) Resolution More than 50 dB (AGC Off) 1x HD-SDI (BNC) / 1x SD CVBS (BNC) Video Output 2 High Power IR LEDs IR Illuminators 850nm IR Color Temp. 80’...
- Page 27 OTHeR PRODuCTS FROM VITeK On Cue HD-SDI Video Recorders VT-HDOC Series On Cue Series 4, 8, & 16 Channel HD-SDI Video Recorders • 4, 8, or 16 Channel HD-SDI Inputs (Universal) with Full1080p, 720P, 960H & D1 Camera Support • Simple plug and play, point-to-point connection from camera to DVR •...
- Page 28 VITEK products carry a three (3) year limited warranty. VITEK warrants to the purchaser that products manufactured by VITEK are free of any rightful claim of infringement or the like, and when used in the manner intended, will be free of defects in materials and workmanship for a period of three (3) years, or as otherwise stated above, from the date of purchase by the end user.
Need help?
Do you have a question about the VTC-HOCRAZ39 and is the answer not in the manual?
Questions and answers