
Related Manuals for Kanguru BioAES


Summary of Contents for Kanguru BioAES
- Page 1 Kanguru BioAES™ User Manual User Manual v1.0 Copyright Kanguru Solutions - 2008 Kanguru BioAES – User Guide...
-
Page 2: Table Of Contents
9.2.2. Setting up a password ............... 10 9.2.3. Fingerprint Registration ............. 12 10. Working with Kanguru BioLock Software ..........15 10.1. Encrypting files and folders ..............17 10.2. Security settings ................... 19 10.2.1. Password Settings ..............20 10.2.2. Fingerprint Settings ..............20 11. -
Page 3: Notices And Warranty Information
Business Machines Corporation. All other brand or product names are trademarks of their respective companies or organizations. Kanguru Solutions will not be held responsible for any illegal use of this product nor any losses incurred while using this product. The user himself is responsible for the copyright laws, and is fully responsible for any illegal actions taken. -
Page 4: Introduction
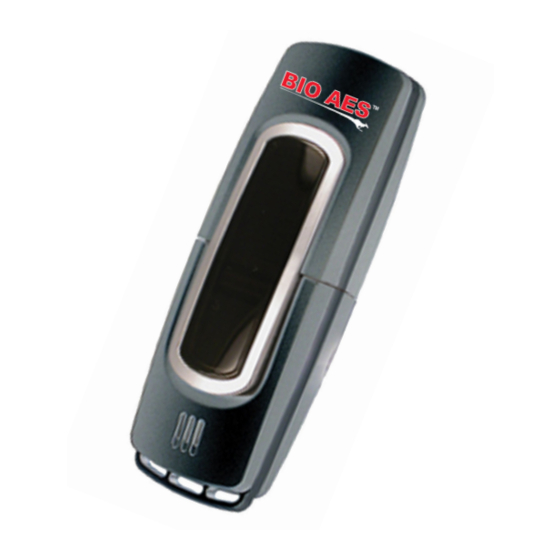
The Kanguru BioAES is a compact biometric 256-bit AES encrypted USB flash drive. Two-factor authentication makes it one of the most secure ways to transport your data. The Kanguru BioAES uses a biometric sensor that will recognize up to 10 fingerprints or thumbprints and only after an authorized fingerprint is confirmed and... -
Page 5: Features
The Kanguru BioAES, although sophisticated in design and technology, is very easy to use. The Bio AES comes with a user friendly setup wizard that walks you through the password setup and fingerprint scanning process. As an added benefit, all saved passwords, fingerprints, as well as the security program itself are stored directly on the drive. -
Page 6: Specifications
5. Specifications General Model Number AES-SB-MD Series Interface USB 2.0 Capacities thru 16G Reading Speed 10MB/sec Writing Speed 5MB/sec Memory Type Solid State Portable Storage (NAND Flash Memory) Encryption 256 Bit AES Fingerprint Capacity Store up to 10 fingerprints Fingerprint Sensor Capacitive Slide Sensor Sensor Resolution 500 DPI... -
Page 7: Package Contents
Dimensions 85mm x 27mm x 13mm Power Operating Current <120mA Kanguru Solutions defines a megabyte (MB) as 1,000,000 bytes and a gigabyte (GB) as 1,000,000,000 bytes 6. Package Contents • Kanguru BioAES USB storage device • USB Extension Cable • Neck Strap •... -
Page 8: System Requirements
To start the Kanguru BioLock manually, you can start the ‘BioLockLauncher.exe’ file from your Kanguru BioAES device’s CD-ROM partition by double clicking on the file. Alternatively, you can simply double click on the CD-ROM partition icon in My... -
Page 9: Getting Started
Manually opening the BioLockLauncher.exe application is only required if the application does not auto run. To start using your Kanguru BioAES, plug in the device to an available USB port and open My Computer or Windows Explorer. Open the Kanguru BioAES’s ‘CD-ROM drive partition’ with the drive letter (E: drive as pictured below) depending on your computer. - Page 10 When you connect your BioAES, a CD-ROM partition and a removable disk partition should appear in My Computer. The removable disk is the Defender’s secure partition. If the removable disk does not appear when you connect your BioAES, please contact Technical Support.
-
Page 11: Setup Wizard
9.2.1. Setup Wizard When plug in your Bio AES initially, you will be greeted by the Setup Wizard. With the help of the Setup Wizard you will set up a password and fingerprint(s) to secure your data. To begin, just follow the simple instructions and you’ll be encrypting your data within minutes. - Page 12 After you have entered your password in both areas, press <Apply>, then click the <Next> button to continue. If your passwords do not match or there is any other issue with the password which you have entered in the Set Password section, an explanation will be visible in the Password Info Section below.
-
Page 13: Fingerprint Registration
9.2.3. Fingerprint Registration In order to use your Kanguru BioAES you must register at least one fingerprint. To do this, select the finger that you want to use by selecting a gray fingertip with your mouse cursor. Also you can use the number keys to select a finger instead of your mouse. - Page 14 (orientation) at least 3 times. The Kanguru BioAES should be lying on a flat surface (connected via the supplied USB extension cable) so you can swipe your finger aligned to the fingerprint sensor.
- Page 15 After you have successfully registered a fingerprint(s) click <Next>. Now the Kanguru BioAES will set up your security parameters. Once the security parameters are set, you will be guided to the final setup screen. Click <Finish> to complete and close the Setup Wizard. You can cancel setup at any time.
-
Page 16: Working With Kanguru Biolock Software
10. Working with Kanguru BioLock Software After completing the Setup Wizard the Kanguru BioLock application will start. For security reasons, you will first be asked to enter your password and then swipe an enrolled finger. To continue, first enter your password and press Login, then swipe an enrolled finger over the sensor. - Page 17 Using the Restore to factory default function will format and wipe all data off the device! All data on the device will be lost! Please use with caution. To cancel logon to the secure part of the Kanguru BioAES, simply press the <Cancel> button. Reinserting your Kanguru BioAES or manually running...
-
Page 18: Encrypting Files And Folders
10.1. Encrypting files and folders A key feature of the Kanguru BioAES is Drag & Drop functionality, allowing you to simply drag files that you wish encrypt with high level 256bit AES onto the BioLock interface window. Kanguru BioLock automatically encrypts these files, ensuring that your data stays safe and private. - Page 19 You will notice that the files you have copied via Windows Explorer have disappeared from the drive. This is because Kanguru BioLock automatically encrypted and moved your files into encrypted folders. You can now find these files using the BioLock interface.
-
Page 20: Security Settings
Paste are also allowed. In the toolbar area of Kanguru BioLock you can find additional icons that you can also use to copy and encrypt your files. This toolbar is shown below. Note: These files are saved on the private partition of your biometric portable storage device and they are only accessible when the Kanguru BioLock interface is running. -
Page 21: Password Settings
In order to enroll the fingerprint correctly, you will be required to slide the finger top across the Kanguru BioAES sensor a minimum of 3 times. If you have trouble, please press the See fingerprint enrollment tutorial button to view a quick tutorial on how to enroll a fingerprint. -
Page 22: Safely Remove Hardware
11. Safely remove hardware Before you unplug your Kanguru BioAES from the USB port of your computer, you should use the “Safely Remove Hardware” option from the system tray, otherwise you risk corrupting the data on your Kanguru BioAES Drive.
Need help?
Do you have a question about the BioAES and is the answer not in the manual?
Questions and answers