Table of Contents
Advertisement
Quick Links
USER'S MANUAL
For 3.5" USB2.0, USB2.0/Firewire Combo, and USB2.0/eSATA
Combo Models
FCC COMPLIANCE STATEMENTS
This equipment has been tested and found to comply with the limits for a Class B digital device, pursuant to Part 15 of the
FCC Rules. These limits are designed to provide reasonable protection against harmful interference in a residential installation.
This equipment generates, uses and can radiate radio frequency energy and, if not installed and used in accordance with the
instructions, there is no guarantee that interference will not occur in a particular installation. If this equipment does cause
harmful interference to equipment off and on, the user is encouraged to try to correct the interference by one or more of the
following measures:
Reorient or relocate the receiving antenna.
Increase the Distance between the equipment and receiver.
Connect the equipment into an outlet on a circuit different from that to which the receiver is connected.
Consult the dealer or an experienced radio/TV technician for help.
Advertisement
Table of Contents

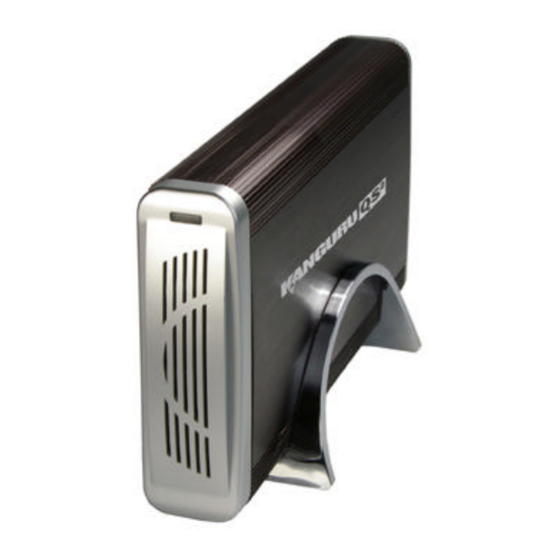
Summary of Contents for Kanguru QS2
-
Page 1: User's Manual
USER’S MANUAL For 3.5” USB2.0, USB2.0/Firewire Combo, and USB2.0/eSATA Combo Models FCC COMPLIANCE STATEMENTS This equipment has been tested and found to comply with the limits for a Class B digital device, pursuant to Part 15 of the FCC Rules. These limits are designed to provide reasonable protection against harmful interference in a residential installation. This equipment generates, uses and can radiate radio frequency energy and, if not installed and used in accordance with the instructions, there is no guarantee that interference will not occur in a particular installation. -
Page 2: Customer Service
Kanguru Solutions guarantees that every Kanguru QS2 will be free from defects in workmanship and materials for 1 year from the date of purchase. The Hard Drive installed in the QS2 is covered for 3 years. This warranty does not apply if, in the judgment of Kanguru Solutions, the product fails due to damage from handling, accident, abuse, misuse, or if it has been used in a manner not conforming to the product’s instructions, has been modified in anyway, or the... -
Page 3: Table Of Contents
USB 2.0/F : ......................8 IREWIRE SATA: ..........................9 Windows 98 / ME ......................9 Windows 2000 / XP......................9 BOOTING FROM THE QS2 VIA ESATA .................9 BIOS S : ........................9 ETTINGS Embedded Serial ATA Controller: ..................9 Add-on Serial ATA Controller Card:................10 2000/XP QS2: ............ -
Page 4: Introduction
Introduction: Thank you for p urchasing the Kanguru QS2 hard drive from Kanguru Solutions! The Kanguru QS2 features the latest in external hard drive technology with cutting edge SATA connectivity for the fastest throughput. The QS2 can take on your most demanding data transfer tasks with ease! Video streaming, photo... -
Page 5: System Requirements
System Requirements: Hardware: Notebook or desktop computer 256MB RAM Pentium II processor or equivalent 1 - USB or USB2.0 port 1 - eSATA port (Q2S models only) 1 – Firewire port (Q2F models only) 1 Available wall outlet for power Operating system: Win98/ME/2000/XP/Vista Mac OS 8.6 or Later... -
Page 6: Driver Installation
3.) Insert the Kanguru Drivers & Manuals CD into your CD-ROM drive. 4.) Select the folder which corresponds to your drive: QS2 3.5 USB2.0 or QS2 3.5 USB2.0+eSATA Combo or QS2 3.5 USB2.0+FW Combo 5.) Open the Win98 Driver folder within the folder specified in the previous step. -
Page 7: Windows Me / 2000 / Xp
Mac Hard Drive to avoid this delay. Firewire: There are no drivers needed for the Firewire Kanguru QS2 drives in any of the operating systems. The drives are compatible in Win 98SE, ME, 2000, XP and Vista, as well as Mac 8.6 and above. -
Page 8: Esata
(eSATA) devices. If your Serial ATA controller does not support plug & play, please contact the manufacturer of your controller to obtain and update and/or fix. Notice: The Kanguru QS2 hard drive icon may take up to 10 minutes to initially appear on your desktop. Disconnecting the QS2 Hard Drive: USB 2.0/Firewire:... -
Page 9: Sata
Do not unplug the QS2 from your computer while copying files to or from the drive or while applications or files stored on the drive are in use. Doing so may result in data loss or damage to the drive. -
Page 10: Add-On Serial Ata Controller Card
BIOS may not allow the SATA controller to be designated as a boot device at the BIOS level. In such cases, you may be able to boot the QS2 if there is no bootable EIDE drive installed in the system. -
Page 11: Formatting
Formatting Notice: Formatting the drive will erase all data contained on the drive 1. To format the QS2, plug the drive into your computer, then open My Computer and right click on the drive letter associated with the QS2 and choose the Format option 2. -
Page 12: Usage Notes
6. Wait for the scan to complete and then check the My Computer screen again to see if the Kanguru QS2 has been recognized by the computer. If this does not find the Kanguru QS2 via eSATA connection, the computer may need to be restarted. -
Page 13: Tech Support
Tech Support If you experience any problems installing your Kanguru QS2 or have any technical questions regarding any of our products, please call our tech support department. Our tech support is free and available Monday thru Friday, 9am to 5pm EST.


Need help?
Do you have a question about the QS2 and is the answer not in the manual?
Questions and answers