Table of Contents
Advertisement
Quick Links
Advertisement
Table of Contents

Related Manuals for Kanguru USB


Summary of Contents for Kanguru USB
- Page 1 USER’S GUIDE Copyright 2005, All Rights Reserved.
-
Page 2: Limited Warranty
Machines Corporation. All other brand or product names are trademarks of their respective companies or organizations. Kanguru Solutions will not be held responsible for any illegal use of this product nor any losses incurred while using this product. The user himself is responsible for the copyright laws, and is fully responsible for any illegal actions taken. -
Page 3: Table Of Contents
Kanguru QuickSilver Kanguru QuickSilver Package Contents:... 4 Features:... 4 Specifications: ... 6 Installing Drivers for Windows 98SE: ... 7 Windows ME / 2000 / XP:... 7 Mac OS: ... 7 Installing Drivers for Windows 98SE/ ME / 2000 / XP:... 8 SATA: ... -
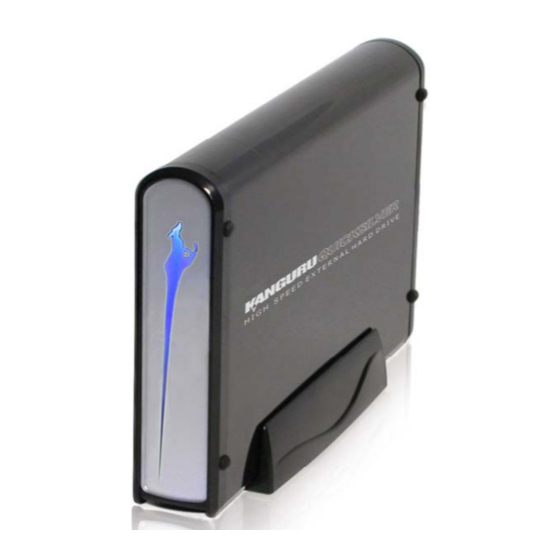
Page 4: Kanguru Quicksilver Package Contents
Video streaming, photo editing and production, large-scale database access, the QuickSilver can do it all! As an added feature it also comes equipped with USB 2.0 for quick and easy connectivity to PC’s and Mac’s without SATA ports. - Page 5 Kanguru QuickSilver - 5 -...
-
Page 6: Specifications
- Mac OS 10.0 or above SATA - Windows 98SE - Windows ME - Windows 2000 - Windows XP Size Weight 3lbs Dimensions 7-3/4" x 5" x 1-1/4" Kanguru Solutions defines a gigabyte (GB) as 1,000,000,000 bytes. - 6 -... -
Page 7: Installing Drivers For Windows 98Se
2. Connect the included AC power supply and USB cable to the Kanguru QuickSilver, power the drive on and plug it into any available USB port on your computer. If this is the first time you’ve plugged the drive in to the computer, the Add New Hardware Wizard dialog box will appear. -
Page 8: Installing Drivers For Windows 98Se/ Me / 2000 / Xp
The following operating systems do not require any driver installation. Your computer’s Serial ATA controller will automatically install a default driver for your Kanguru QuickSilver. After the system has detected the drive and installed the necessary drivers, double-click on My Computer to verify a new drive letter has been added to your system. -
Page 9: Disconnecting The Drive
Kanguru QuickSilver 4. Disconnecting the Drive SATA: Windows 98SE / ME 1. Right-Click on the My Computer Icon and click Properties. 2. Click on the Device Manager Tab. 3. Double-Click on Disk Drives. 4. Left-Click to highlight the device labeled STS312002 6AS SCSI Disk and click on the Remove button. -
Page 10: Usb 2.0
USB 2.0: Windows 98SE users: Windows 98SE does not have a safe hardware removal utility, so you can simply unplug the drive from the USB port to remove it from the operating system. Windows ME/2000/XP users: Click on the green Remove Hardware icon on the right side of the taskbar and select the USB Mass Storage Device to safely remove the drive. -
Page 11: Booting From The Quicksilver Via Sata
Kanguru QuickSilver 5. Booting From the QuickSilver via SATA BIOS Setting: If your computer’s Serial ATA controller supports booting, you may boot from the Kanguru QuickSilver. Embedded Serial ATA Controller You may need to enter the BIOS setup for your motherboard to change the boot sequence so the SATA controller is the first boot device. -
Page 12: Partitioning On Windows 2000 / Xp
The right side of the window will update, showing you a list of all the drives connected to your system. 3. Locate the Kanguru QuickSilver in the bottom half of the Window. In order to partition the drive you will have to delete the current partition by right clicking on the status bar (see below) to the right of the disk and choosing Delete Partition. -
Page 13: Formatting On Windows 98Se / Me / 2000 / Xp
Kanguru QuickSilver Formatting on Windows 98SE / ME / 2000 / XP *** NOTE: Formatting the drive will erase all data on the drive *** 1. To format the QuickSilver, plug the drive into your computer, then open My Computer and right-click on the drive letter associated with the QuickSilver and choose Format. -
Page 14: Troubleshooting
Technical Support department at 508-376- 4245 x2. 2. Is it safe to remove the Kanguru QuickSilver when data is being transferred to it? No, removing the drive while a data transfer is taking place may result in loss of data or damage to the Kanguru QuickSilver. -
Page 15: Tech Support
1 year from the date of purchase. This warranty does not apply if, in the judgment of Kanguru Solutions, the product fails due to damage from handling, accident, abuse, misuse, or if it has been used in a manner not conforming to the product’s instructions, has been modified in any...
Need help?
Do you have a question about the USB and is the answer not in the manual?
Questions and answers