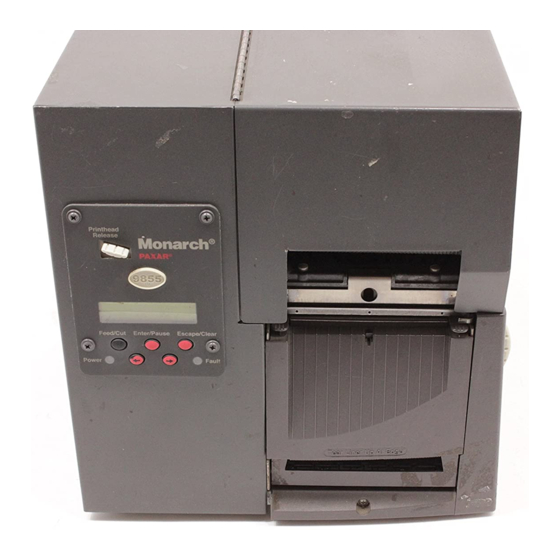
Monarch 9855 Quick Reference
Hide thumbs
Also See for Monarch 9855:
- Operator's handbook manual (134 pages) ,
- Application notes (42 pages) ,
- Specifications (2 pages)

Subscribe to Our Youtube Channel
Related Manuals for Monarch Monarch 9855


Summary of Contents for Monarch Monarch 9855
- Page 1 Monarch ® Quick Quick 9855 ® Printer Reference Reference TC9855QR Rev. AE 3/08 ©2007 Paxar Americas, Inc. a subsidiary of Avery Dennison Corp. All rights reserved.
- Page 2 Any update will be incorporated in a later edition of this manual. ©2003 Paxar Americas, Inc. a subsidiary of Avery Dennison Corp. All rights reserved. No part of this publication may be reproduced, transmitted, stored in a retrieval system, or translated into any language in any form by any means, without the prior written permission of Paxar Americas, Inc.
- Page 3 This Quick Reference contains supply loading and general care and maintenance procedures. For more detailed information, refer to the Operator’s Handbook available on our Web site (www.monarch.com). For information about creating formats or programming the printer, refer to the Packet Reference Manual available on our Web site. Review the printer safety information in the Regulatory Compliance document provided with your printer.
- Page 4 U s i n g t h e C o n t r o l P a n e l The control panel has a two-line LCD display, 2 status lights, and five buttons. The control panel displays error codes/messages, and allows you to setup/configure the printer.
- Page 5 L o a d i n g L a b e l s o r T a g s Open the cover. Unlock the printhead by turning the retaining latch. Lift printhead assembly using the printhead tab until the assembly locks into place.
- Page 6 Adjust the supply holder guides so the sides barely touch the roll. Make sure the supply roll turns freely. If you are using fan-fold supplies, place the supply stack behind the printer, label side facing Supply Holder Guides Push down on the supply lever to unlock the supply guides. Lay the label strip across the supply guide so that a few inches extend past the front of the printer.
- Page 7 Hold the printhead assembly by the printhead tab while pressing down on the printhead release. 10. Close the printhead by pressing down on the thumb well until you hear it click into place. 11. Close the cover. 12. Press Feed/Cut several times to feed at least three labels/tags to properly position the supply and the ribbon.
- Page 8 Loading Labels for the Optional Peel Mode Peel mode must be purchased separately. In peel mode, the printer separates the backing paper from the label. The next label is not printed until the completed one is removed from the printer. Make sure the printer is configured for on-demand mode and the correct supply type.
- Page 9 Peel Low er Tear Opening Edge Backing Paper When removing the backing paper, pull up across the saw-toothed tear edge. Make sure the backing paper tears at the edge. Close the printer's cover. Press Feed/Cut several times to feed at least three labels/tags to properly position the supply and the ribbon.
- Page 10 L o a d i n g R i b b o n Open the cover. Unlock the printhead by turning the retaining latch. Lift printhead assembly using the printhead tab until the assembly locks Deflector into place. Push the deflector tab down. Slide the extra ribbon core on the take-up reel as far as it will go with the "This End Out"...
-
Page 11: Print Mode
14. Close the printhead by pressing down on the thumb well until you hear it click into place. Close the cover. 15. Press Feed/Cut several times to feed at least three labels/tags to properly position the supply and the ribbon. P r i n t i n g Before you print, make sure the printer is connected and ready to receive data. - Page 12 Press the left arrow or the right arrow to select either “Yes” or “No” to print a test label and check the print contrast. Press Enter/Pause. Press Escape/Clear until you see the Main menu. C l e a r i n g J a m s When you are printing and a jam occurs, the Fault light on the printer's front panel blinks.
- Page 13 Clean the platen roller when you see significant adhesive build-up or a label is wrapped around the platen roller. Use a dry, Platen soft-bristle brush, such as a Roller toothbrush, to clean either the standard (black) or linerless (red/orange textured) platen roller. If the brush does not remove all the adhesive ♦...
- Page 14 10. Close the exit cover by pushing firmly on it. Both latches will click into place. 11. Close the cover and printhead assembly. 12. Turn on the printer and press Feed/Cut several times to feed at least three labels/tags to properly position the supply and the ribbon. Resend your format, batch, and check digit packets.
- Page 15 Problem Action Serial bar codes do not Leave printhead unlatched when not in scan. use. Use a print speed of 2.5 ips. Adjust the print contrast. Backing paper is wrapped Carefully remove the backing paper. around platen or peel roller. Make sure the backing paper tears at the saw-toothed tear edge when using backfeed and peel mode.
- Page 16 Reference point off supply. Portion of field off supply or there may be an invalid character in the packet. The printer sensed a calibration of different-sized black marks. Make sure the correct supply type is loaded. Printer has not sensed a supply mark when expected or is out of supplies.
- Page 17 P r i n t e r S p e c i f i c a t i o n s Height: 12.5 inches (318 mm) Width: 12 inches (305 mm) Depth: 13 inches (330 mm) Weight: 21 lb. (9.5 kg) Shipping 25 lb.
- Page 18 S u p p l y S p e c i f i c a t i o n s Linerless and string tag supplies are also available. For more detailed information, the Operator’s Handbook can be downloaded from our Web site.
Need help?
Do you have a question about the Monarch 9855 and is the answer not in the manual?
Questions and answers