Jura IMPRESSA S9 One Touch Classic Manual
Hide thumbs
Also See for IMPRESSA S9 One Touch Classic:
- Manual (72 pages) ,
- Manual for use (72 pages) ,
- Quick reference manual (13 pages)

Related Manuals for Jura IMPRESSA S9 One Touch Classic


Summary of Contents for Jura IMPRESSA S9 One Touch Classic
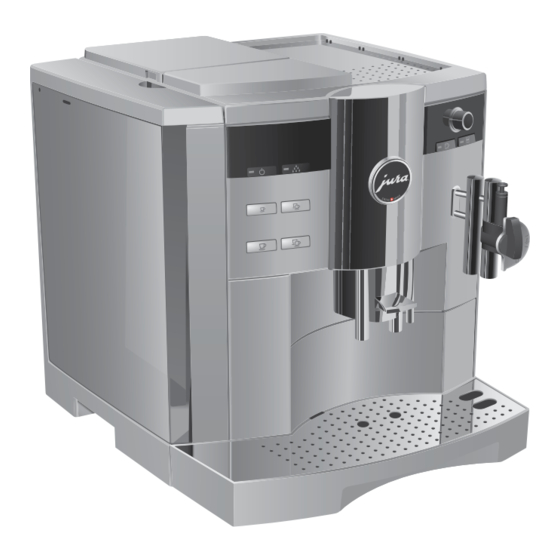
- Page 1 Figure: Your machine may look different to the one shown. The IMPRESSA S9 One Touch Classic Manual For your safety: read and understand manual before use.
-
Page 2: Table Of Contents
Table of contents Your IMPRESSA S9 One Touch Classic IMPORTANT SAFEGUARDS Control elements IMPRESSA S9 One Touch Classic JURA on the Internet .............................11 Preparing and using for the first time Setting up ..............................12 Filling the water tank ...........................12 Bean container filling ...........................12 First-time use .............................. - Page 3 Transport / Emptying the system ......................56 Disposal .................................56 10 Technical data Index JURA contact details / Legal information Symbol description Warnings This is the safety alert symbol. lt is used to alert you to potential personal injury hazards. Obey all safety messages that follow this symbol to avoid possible injury or death.
-
Page 4: Important Safeguards
IMPORTANT SAFEGUARDS Follow the basic safety When using electrical appliances, basic safety precautions shall precautions always be followed, to reduce the risk of fire, electric shock, and/or injury to persons, including the following: Read all instructions. Do not touch hot surfaces. Use handles or knobs. ... - Page 5 Use for any other purpose will be deemed improper. JURA Elektroapparate AG cannot accept any responsibility for the consequences of improper use. People, including children, who do not have the physical, sensory or mental capabilities to use ...
- Page 6 In the event of signs of damage, for example if there is a smell of burning, unplug the machine immediately from outlet and contact JURA customer service. This appliance is for household use. Any servicing other than clean- CAUTION ing and user maintenance shall be performed by an authorized ser- vice representative: Do not immerse base in water or try to disassemble.
- Page 7 Never fill frozen beans into the bean container. If you store beans in the freezer, let them thaw 3 to 4 hours before filling them into the bean container. Never fill anything but fresh, cold and clean water into the ...
-
Page 8: Control Elements
Control elements Control elements J HOT J HOT J HOT Figure: Your machine may look different to the one shown. Bean container cover Fineness of grind switch Bean container with aroma preservation Cup tray cover Cover of filler funnel for pre-ground coffee Water tank with handle Filler funnel for pre-ground coffee Power switch and power cord... - Page 9 Control elements Front left Front right Display ö Selector switch Rotary Switch cover Hot water portion symbol f Rotary switch Hot water symbol On/off button Cappuccino button Maintenance button Milk portion symbol 1 Espresso button Milk symbol 2 Espressi button Latte Macchiato button 1 Coffee button Professional Cappuccino Frother...
-
Page 10: Impressa S9 One Touch Classic
Energy-saving mode (Energy Save Mode, E.S.M. ): The © IMPRESSA S9 One Touch Classic actively assists you in saving energy. With the various stages of the energy-saving mode, you can adjust the energy-saving potential to suit the way you like to enjoy your beverages. The machine can be completely disconnected from the power grid at the main switch –... -
Page 11: Jura On The Internet
10 oz (280 g) bean container is continuously optically monitored. JURA on the Internet Visit us on the Internet. @ At www.jura.com you will find interesting and up-to-date information on your IMPRESSA and on every aspect of coffee. -
Page 12: Preparing And Using For The First Time
2 Preparing and using for the first time 2 Preparing and using for the first time This chapter provides you with the information you need to use your IMPRESSA without any problems. You will prepare your IMPRESSA step-by-step for your first coffee experience. Setting up When setting up your IMPRESSA, please note the following: Set the IMPRESSA down on a horizontal surface that is not... -
Page 13: First-Time Use
2 Preparing and using for the first time First-time use J WARNING If the machine is operated with a defective power cord, there is a danger of potentially fatal electric shock. Never use a machine which is damaged. Never use a machine which has a defective power cord. E The water volume is given as standard in ‘oz’. -
Page 14: Using And Activating Filter
E If you have not been able to use the machine for the first time correctly and fully, contact customer support in your country (see ‘JURA contact details / Legal information’). Using and Your IMPRESSA no longer has to be descaled if you are using activating filter CLEARYL filter cartridges. - Page 15 2 Preparing and using for the first time k T Keep the Rotary Switch pressed until MAINTENANCE appears on the display. g T Turn the Rotary Switch until is displayed. FILTER NO k T Press the Rotary Switch to enter the program item. FILTER NO g T Turn the Rotary Switch until is displayed.
-
Page 16: Determining And Adjusting The Degree Of Water Hardness
2 Preparing and using for the first time Determining and The harder the water is, the more frequently the IMPRESSA needs to adjusting the degree be descaled. It is therefore important to adjust the water hardness. of water hardness The water hardness can be adjusted on a continuous scale between 1 °dH and 30 °dH. -
Page 17: Adjusting Grinder
2 Preparing and using for the first time k T Press the Rotary Switch to confirm the setting. appears briefly on the display. CONFIRMED w HARDNESS 25°dH g T Turn the Rotary Switch until is displayed. EXIT k T Press the Rotary Switch to exit programming mode. is shown on the display. -
Page 18: Switching Off (Standby)
2 Preparing and using for the first time Q T Press the on/off button to switch the IMPRESSA on. appears briefly on the display. WELCOME TO JURA HEATING UP , the maintenance button c lights up. PRESS RINSE T Place a receptacle under the coffee spout. -
Page 19: Familiarizing Yourself With The Control Options
3 Familiarizing yourself with the control options 3 Familiarizing yourself with the control options J WARNING Hot coffee, hot steam and hot water can cause scalding. Scalding is a serious burn. Use extreme care when handling hot liquid or steam. Allow liquid to cool down before drinking. -
Page 20: Preparation At The Touch Of A Button
3 Familiarizing yourself with the control options Preparation at the Prepare your favourite coffee specialty at the touch of a button. touch of a button All coffee specialties are prepared following this model. Example: This is how to prepare one coffee. Precondition: is displayed. -
Page 21: Entering A Permanent Setting For The Amount Of Water For A Cup Size
3 Familiarizing yourself with the control options appears on the display. is then dis- COFFEE READY played. Changing the amount of The pre-set amount of water of all coffee products can be changed water during preparation during the brewing operation by turning the Rotary Switch. Example: Proceed as follows to prepare a cup of coffee. -
Page 22: Permanent Settings In Programming Mode
3 Familiarizing yourself with the control options T Press any button as soon as enough espresso has flowed into the cup. Preparation stops automatically. appears CONFIRMED w briefly on the display. The set amount of water for an espres- so will be permanently stored. is then COFFEE READY displayed. - Page 23 3 Familiarizing yourself with the control options Program item Subitem Explanation T Set the switch-on and switch-off time UNIT ON/OFF individually for each weekday. T Set the number of hours after which the OFF AFTER OFF AFTER -- H – IMPRESSA should switch off automatically.
-
Page 24: Viewing Information And Maintenance Status
3 Familiarizing yourself with the control options g T Turn the Rotary Switch until is displayed. STRONG öööö k T Press the Rotary Switch to confirm the setting. appears briefly on the display. CONFIRMED w AROMA öööö g T Turn the Rotary Switch until is displayed. -
Page 25: Preparation At The Touch Of A Button
4 Preparation at the touch of a button 4 Preparation at the touch of a button J WARNING Hot coffee, hot steam and hot water can cause scalding. Scalding is a serious burn. Use extreme care when handling hot liquid or steam. Allow liquid to cool down before drinking. -
Page 26: Coffee
4 Preparation at the touch of a button E To prepare two espressi place two cups under the coffee spout and press the 2 Espressi button 4. Coffee Example: This is how to prepare one coffee. Precondition: is displayed. COFFEE READY T Place a coffee cup under the coffee spout. -
Page 27: Cappuccino
4 Preparation at the touch of a button Cappuccino Your IMPRESSA prepares a cappuccino at the touch of a button. It is not necessary to move the cup. Precondition: is displayed. COFFEE READY T Take the protective cover off the Professional Cappuccino Frother. -
Page 28: Pre-Ground Coffee
4 Preparation at the touch of a button T Place a glass under the frother. T Turn the selection lever of the frother to the milk foam position p. q T Press the Latte Macchiato button. and the coffee strength are displayed. LATTE MAC. -
Page 29: Hot Milk And Milk Foam
4 Preparation at the touch of a button T Open the cover of the filler funnel for pre-ground coffee. T Open the cover of the Rotary Switch. v T Press the Pre-ground coffee button. FILL PRE-GROUND COFFEE READY T Place one level measuring spoon of pre-ground coffee into the filler funnel. -
Page 30: Hot Water
4 Preparation at the touch of a button To ensure that the frother works perfectly, you should rinse and clean it regularly. The description for this can be found in Chapter 6 ‘Maintenance – Cappuccino frother’. Hot water Hot water can be prepared in two ways: Hot water portion a The pre-set amount of water flows into the cup. -
Page 31: Permanent Settings In Programming Mode
5 Permanent settings in programming mode 5 Permanent settings in programming mode Products With the program item you can enter individual set- PRODUCTS tings for all coffee and milk specialties as well as hot water. J WARNING Hot coffee, hot steam and hot water can cause scalding. Scalding is a serious burn. - Page 32 5 Permanent settings in programming mode E The products which are selected with the selector switch can be individually set to inactive. This means that the respective symbols are not visible and preparation is not possible. Permanent settings in programming mode always follow the same model.
-
Page 33: Energy-Saving Mode (Energy Save Mode, E.s.m. © )
5 Permanent settings in programming mode k T Press the Rotary Switch to enter the program item. PAUSE 30 SEC g T Turn the Rotary Switch until is dis- PAUSE 40 SEC played. k T Press the Rotary Switch to confirm the setting. appears briefly on the display. -
Page 34: Time And Weekday
5 Permanent settings in programming mode SAVE LEVEL 2 Approx. 5 minutes after the last preparation the IMPRESSA switches to the energy-saving temperature and is not ready for use. Before coffee, hot water or milk can be prepared, the machine has to heat up. -
Page 35: Programmable Switch-On And Switch-Off Time
5 Permanent settings in programming mode g T Turn the Rotary Switch until is displayed. TIME 09:50 k T Press the Rotary Switch to confirm the minute setting. appears briefly on the display. CONFIRMED w (Example) WEEKDAY MONDAY k T Press the Rotary Switch to confirm the weekday setting. appears briefly on the display. -
Page 36: Automatic Switch-Off
5 Permanent settings in programming mode g T Turn the Rotary Switch until is dis- UNIT ON 07:00 played. k T Press the Rotary Switch to confirm the hour setting. g T Turn the Rotary Switch until is dis- UNIT ON 07:30 played. -
Page 37: Rinses
5 Permanent settings in programming mode Example: Proceed as follows to change the automatic switch-off time from Precondition: is displayed. COFFEE READY T Open the cover of the Rotary Switch. k T Keep the Rotary Switch pressed until MAINTENANCE appears. g T Turn the Rotary Switch until is dis- OFF AFTER 1 H... -
Page 38: Unit Amount Of Water / Time Format
5 Permanent settings in programming mode g T Turn the Rotary Switch until CAPP RINSE NOW displayed. k T Press the Rotary Switch to confirm the setting. appears briefly on the display. CONFIRMED w CAPP RINSE NOW g T Turn the Rotary Switch until is displayed. -
Page 39: Language
5 Permanent settings in programming mode Language You set the language when you used the machine for the first time. Example: To change the language from ENGLISH DEUTSCH (example), proceed as follows. Precondition: is displayed. COFFEE READY k T Keep the Rotary Switch pressed until MAINTENANCE appears. -
Page 40: Maintenance
6 Maintenance 6 Maintenance J WARNING Use of maintenance products that are harmful to health and dis- charge of liquids during maintenance program. Harmful if swal- lowed. Irritating to eyes and skin. Keep children AWAY. Keep children away from the machine while it is performing a maintenance program. -
Page 41: Rinsing The Machine
6 Maintenance Rinsing the machine When the IMPRESSA is switched on, a prompt to perform a rinse operation appears after heating, or this is automatically started. It can be set in programming mode whether the switch-on rinse needs to be activated manually or whether the machine automati- cally activates the switch-on rinse (see Chapter 5 ‘Permanent set- tings in programming mode –... - Page 42 6 Maintenance c T Press the maintenance button. DURATION 2 MIN. START YES E If you want to change the filter at a later point in time, turn the Rotary Switch until is displayed. Exit the mainte- START NO nance program by pressing the Rotary Switch. The prompt ‘Change filter’...
-
Page 43: Cleaning The Machine
J WARNING Non-recommended (e.g. liquid) cleaning agents may contain sub- stances that could damage the machine or leave residues. Use only original JURA cleaning tablets. These are specially formulated for your machine. J WARNING Harmful and irritating cleaning agent. Harmful if swallowed. Irritat- ing to eyes and skin. - Page 44 , the maintenance button c lights up. RINSE T Open the cover of the filler funnel for pre-ground coffee. T Insert a JURA cleaning tablet into the filler funnel. T Close the cover of the filler funnel. c T Press the maintenance button.
-
Page 45: Descaling The Machine
J WARNING Non-recommended descaling agents (e.g. vinegar) may contain substances that could damage the machine or leave residues. Use only original JURA descaling tablets. These are specially formulated for your machine. J WARNING J WARNING Harmful and irritating descaling agent. - Page 46 SOLVENT IN TANK T Remove the water tank and empty it. T Completely dissolve the contents of one blister (3 JURA des- caling tablets) in a container that holds 20 oz (600 ml) of water. This may take several minutes.
- Page 47 6 Maintenance T Empty the receptacles below the hot water spout and the Connector System © T Empty the drip tray and coffee grounds container and put them back into the machine. RINSE WATER TANK FILL WATER TANK T Remove the water tank and rinse it thoroughly. T Fill the water tank with fresh, cold water and reinsert.
-
Page 48: Rinsing The Cappuccino Frother
6 Maintenance Rinsing the Each time milk has been prepared the IMPRESSA displays a prompt cappuccino frother for Cappuccino rinsing. It can be set in programming mode whether the rinsing prompt is displayed immediately or 10 minutes after preparation (refer to Chapter 5 ‘Permanent settings in programming mode –... -
Page 49: Cleaning The Cappuccino Frother
Do not induce vomiting. Seek medical advice immediately and show label. E The IMPRESSA will not prompt you to clean the frother. E The JURA milk system cleaner is available from specialized dealers. Cleaning the cappuccino Precondition: is displayed. -
Page 50: Disassembling And Rinsing The Professional Cappuccino Frother
6 Maintenance T Place another receptacle under the frother. c T Press the maintenance button. , the frother and pipe are CAPPUCCINO CLEANS cleaned. , the maintenance button c WATER FOR CAPPUCCINO lights up. T Rinse the receptacle thoroughly, fill it with approx. 8.5 oz (250 ml) of fresh water and immerse the milk pipe in the wa- ter. -
Page 51: Cleaning The Bean Container
6 Maintenance Cleaning the Coffee beans may be covered with a slight oil film which remains on bean container the walls of the bean container. These residues may negatively affect the coffee results. For this reason clean the bean container from time to time. -
Page 52: Display Messages
7 Display messages 7 Display messages Message Cause/Result Action The water tank is empty. T Fill the water tank (see FILL WATER TANK You cannot prepare any coffee Chapter 2, ‘Preparing and using products, hot water or milk for the first time – Filling the products. -
Page 53: Change Filter
7 Display messages Message Cause/Result Action After 250 preparations the T Clean the machine (see COFFEE READY IMPRESSA will prompt you Chapter 6, ‘Maintenance – CLEAN NOW to clean it. Cleaning the machine’). The IMPRESSA is prompting T Descale the machine (see COFFEE READY you to descale it. -
Page 54: Troubleshooting
Grinder is making a very There are foreign objects T Contact Customer Support in your loud noise. in the grinder. country (see ‘JURA contact details / Legal information’). The frother does not The cappuccino frother T Rinse and clean the cappuccino... - Page 55 Contact Customer Support in your country (see ‘JURA contact details / Legal information’). E If you have not been able to solve the problem, contact Cus- tomer Support in your country (see ‘JURA contact details / Legal information’ ).
-
Page 56: Transport And Environmentally Neutral Disposal
9 Transport and environmentally neutral disposal 9 Transport and environmentally neutral disposal Transport / Emptying Keep the packaging for your IMPRESSA. It should be used to protect the system the machine during transportation. In order to protect the IMPRESSA from frost during transportation, the system must be emptied. -
Page 57: Technical Data
10 Technical data 10 Technical data Voltage 120 V ~, 60 Hz Power 1250 W Safety test Energy 23 Wh SAVE NO Energy 16 Wh SAVE LEVEL 1 Energy 14 Wh SAVE LEVEL 2 Energy consumption in standby 5.6 Wh mode Pump pressure Static max. -
Page 58: Index
Important safeguards Control options 19 Safety 4 Cover Internet 11 Bean container 8 Filler funnel for pre-ground coffee 8 JURA Customer support 60 Contact details 60 Default settings in programming mode 31 Language 39 Descaling Latte macchiato 27 Machine 45... - Page 59 Index Maintenance 40 Maintenance tips 40 Safety Milk Important safeguards 4 Hot 29 Selector switch 9 Milk portion 29 Settings Milk foam 29 Default settings in programming mode 31 Entering a default setting for the amount of One-off settings before and during prepara- water for a cup size 21 tion 20 One-off settings before and during prepara-...
-
Page 60: Jura Contact Details / Legal Information
Art. J70466/S9 OT/UL-en/201407 JURA contact details / Legal information Headquarters JURA Elektroapparate AG Kaffeeweltstrasse 10 CH-4626 Niederbuchsiten Switzerland USA: JURA Inc. Canada: FAEMA Customer Service Phone 1-800-220-5701 001 (416) 535-1555 E-Mail info@us.jura.com info@juracanada.ca Opening Hours (EST) Mon – Thu 9 am – 9 pm Fri 9 am –...
Need help?
Do you have a question about the IMPRESSA S9 One Touch Classic and is the answer not in the manual?
Questions and answers