
Related Manuals for Rose electronics ORION


Summary of Contents for Rose electronics ORION
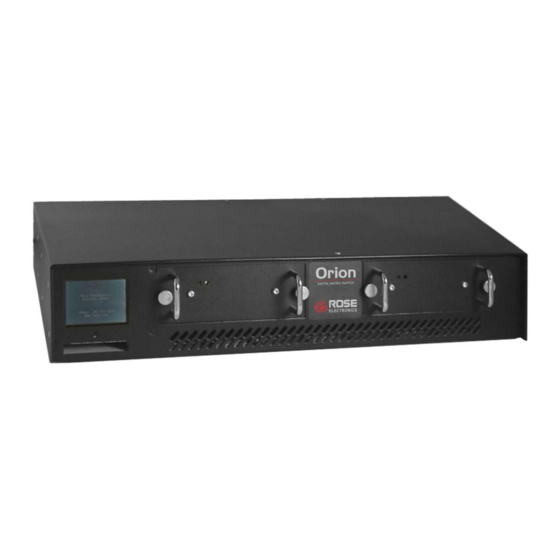
- Page 1 ORION KVM Switch Cross-point Switch 10707 Stancliff Road Phone: (281) 933-7673 Houston, Texas 77099 www.rose.com...
- Page 3 LIMITED WARRANTY Rose Electronics warrants the Orion™ to be in good working order for one year from the date of purchase from Rose Electronics or an authorized dealer. Should this product fail to be in good working order at any time during this one- year warranty period, Rose Electronics will, at its option, repair or replace the Unit as set forth below.
- Page 4 EUROPEAN UNION DECLARATION OF CONFORMITY This is to certify that, when installed and used according to the instructions in this manual, together with the specified cables and the maximum CPU- cable length <3m, the Units: List on page 2 – 5 are shielded against the generation of radio interferences in accordance with the application of Council Directive 89/336/EEC as well as these standards: EN 55022:...
-
Page 5: Table Of Contents
Status Display – Network ............................22 Status Display – Firmware ............................. 22 Diagnostic LEDs (CATx cable / Fiber cable) ......................22 Operating the Orion Unit ............................... 23 HOT Key switching ..............................23 OSD / KVM mode switching ............................23 KVM-List mask switching ............................23 Keyboard Commands ............................ - Page 6 Troubleshooting - Monitor ............................40 Troubleshooting – USB Keyboard / Mouse ....................... 40 Figures Page # Figure 1. Orion Models ..............................5 Figure 2. Typical KVM Switch Configuration ........................6 Figure 3. OSD Main Menu .............................. 7 Figure 4. Login OSD ............................... 8 Figure 5.
-
Page 7: Disclaimer
KVM user stations. CATx or fiber cabling is used to connect the computers and user stations to the Orion unit. Using CATx cabling the distance can be up to 450 feet (140m), using singlemode 9µ... -
Page 8: About This Manual
HID devices (Human Interface Device) such as touch screens, graphics tablets, barcode readers or similar USB devices may be successful – but there is no guarantee for this! The Orion™ KVM standard device is NOT suitable for use with other USB devices such as scanners, web-cams, data sticks etc. -
Page 9: Compatibility
Fiber DDC Information Normally, it is not necessary to make any adjustments to the Orion KVM/ Media device. However, in some circumstances, it may be necessary to redefine the source of DDC information for the CPU. By default, the unit uses its own internal DDC table. -
Page 10: System Overview
Synchronized switching The Orion unit can be set-up to control the switching features of other Orion units. When the master unit is switched to a selected CPU port, all other Orion units configured for synchronization will also switch to that CPU port. The main unit is assigned a unique IP address compatible with the existing network. -
Page 11: Orion Model Description
Models that have mixed CATx and Fiber modules should be used with care. A CATx CONx KVM station can not connect to a fiber CPUx port or a fiber CONx KVM station can not connect to a CATx CPUx port. Remember, connect only CATx to CATx and Fiber to Fiber. Orion Installation and Operations Manual... -
Page 12: Kvm Switch Installation
Up to 16 remote user stations (up to 10 km away using fiber cable) can be connected to the Orion unit via remote receiver units installed at each console. The installation of the local transmitter(s) and remote receivers(s) will vary depending on the needed application. -
Page 13: Powering Up The System
Configuration menus The configuration of the Orion unit is easily done using the On-Screen menus. To display the menu system, enter the key sequence <Shift>+ <Shift>+ <O> (Letter “o”), The “KVM List” Mask is displayed full screen (If the Option “Listview”... -
Page 14: Login Menu
Up to 8 user defined switch configurations plus the default settings can be saved within the unit. Use the up down arrow keys or the mouse to select the configuration scheme to apply and press enter. Figure 6 shows the “Open Configuration” screen. Orion Installation and Operations Manual... -
Page 15: Configure Open Menu
Figure 6. Open configuration file menu From the main menu, select “System” and press enter to display the system menu. From this menu you can set-up the system, access control, switch settings, and mouse settings. Figure 7 shows this menu. Orion Installation and Operations Manual... -
Page 16: Configure System Menu
Baud rate Numerical kBaud Value Y - Allows a second Orion unit to automatically be switched to the same port as Slave Matrix the master unit N – No synchronization Assigned master unit IP address that secondary units will synchronize to. - Page 17 0 sec – No Timeout. ### – Time of inactivity, after which the user at this console is logged Auto Logout out from OSD access automatically. 0 min – Immediate Logout from OSD after closing the OSD. Orion Installation and Operations Manual...
- Page 18 Y – Execute OSD commands with a single click (when using a touch screen to Single Click control the OSD). N – Single click inactive NOTE: Mouse settings are CON Port specific and can be adjusted for each CON Port separately. Orion Installation and Operations Manual...
-
Page 19: Touch Screen Settings
Touch Screen settings The Orion OSD supports touch screens. NOTE: USB HID based Touch Screen protocols are supported. Support of Vendor specific protocols only upon request. To configure the touch screen feature, from the configure System menu, press the <F1> key. The touch screen calibration window will display as shown in figure 8. -
Page 20: Configure User
Configure user To configure the users of the Orion switch, select the option “User” in the “Configuration” menu by using the cursor buttons and press enter. ⇒ The “User” mask will display full screen as shown in figure 9. Figure 9. Configure User menu In this menu, you can setup user names and privileges. -
Page 21: User Matrix Configuration
Both the User Matrix configuration for a user and the Console Matrix configuration must grant access to a CPU port. If the User Matrix grants access to CPU port #2 but the Console Matrix does not grant access to CPU port #2, access is denied. Orion Installation and Operations Manual... -
Page 22: Con Port Configuration
Port, two monitors will remain and the USB-Port remains inactive. If the user at a Single-Head/USB 2.0 Console switches to a Single-Head CPU Port with a subsequent USB 2.0 CPU Port, the USB Port still remains inactive. Orion Installation and Operations Manual... -
Page 23: Figure 11. Con Port Configuration
1280 = OSD with full screen resolution (1280x1024) 1600 = OSD with full screen resolution (1600x1200) 1920 = OSD with full screen resolution (1920x1200) No. of CPU Port connected to this Console (Status) or. VAL2 to be connected by <SAVE> Orion Installation and Operations Manual... -
Page 24: Con Matrix Configuration
Line down <Tab> Next field <Shift> + <Tab> Previous field <SPACE> Release selected CPU-Port for selected CON Port <RETURN> Release selected CPU-Port for selected CON Port, apply and save data <ESC> Back to upper Menu Orion Installation and Operations Manual... -
Page 25: Cpu Port Configuration
0U = USB 2.0 Port 1U = Single-Head Port with USB 2.0 Port 3U = Triple-Head Port with USB 2.0 Port VAL2 No. of CON Port connected to this CPU (Status) or to be connected by <SAVE> Orion Installation and Operations Manual... -
Page 26: Status Information
Status Display – CON ports Using the up / down arrow keys, select CON ports and press <Return>. The Console Port status screen will display as shown in figure 15. Figure 15. Status - CON ports Orion Installation and Operations Manual... -
Page 27: Status Display - Cpu Ports
Key Command Description <Page up> Page up in Input-/Status Masks with several pages <Page down> Page down in Input-/Status Masks with several pages <F1> Switch to the CON Port Status Display <ESC> Return to “Status“ Mask Orion Installation and Operations Manual... -
Page 28: Status Display - Network
LED (Fiber link) Appearance Diagnostics Green blinking Port activated, signal OK Green On Port deactivated, signal OK Link Status (Green/Orange LED) Red blinking Port activated, no signal detected Green On Port activated, module error signal Port deactivated Orion Installation and Operations Manual... -
Page 29: Operating The Orion Unit
OPERATION – KVM MODE Operating the Orion Unit The Orion™ unit can be operated in three different ways: a) Instant Switching: • By means of a standard keyboard connected to a console port and hot keys • By means of a macro keyboard connected to a console port (See Appendix E) b) Via Input Masks: •... -
Page 30: Keyboard Commands
(Only if “Allow Sharing“ active or CPU available) cases he will have full control of <RETURN> Select CPU Port Video and Control the selected CPU port. <F1> Select “KWM-Switch“ Mask <F2> Select “Follow Me“ Mask <ESC> Back to upper Menu Orion Installation and Operations Manual... -
Page 31: Kvm-Switch Mask Switching
Video shared to own console Yellow Yellow CPU Port connected to own console CPU port connected to other console CPU port connected to other console Yellow Video shared to own console Blank CPU Port not available Orion Installation and Operations Manual... -
Page 32: Keyboard Commands
CPU Port CON Port Description Green Available CON port CON Port # connected to PCU Port # or to CON Port # in “Follow-Me” mode Black Black Own CON port connection Black CON Port not available Orion Installation and Operations Manual... -
Page 33: Keyboard Commands (Follow-Me Mode)
<ESC> Back to upper Menu The function can be used to: Showing the contents of your display to other workstations. Display a presentation on a projector Presenting a controlled display to control rooms Orion Installation and Operations Manual... -
Page 34: Cross Point Switch Mode (Con Mask)
KVM transmitter and all user stations (Console stations) connect to a KVM receiver. Receiver and transmitter connect to the Orion using CATx or fiber cables. See figure 2 for an example of the installation. Enter the OSD with key sequence <Shift>+ <Shift>+ <O> (Letter ‚o’) ⇒ The “KVM List” Mask is displayed full screen (If Option “Listview”... -
Page 35: Keyboard Commands
Confirm selected monitor OR keyboard/mouse assignment (for CPU / User Port at cursor position). Attention: Switch command is executed immediately – No plausibility check – Admissibility of configuration under responsibility of the user! <ESC> Return to “Menu” Orion Installation and Operations Manual... -
Page 36: Cross Point Switch Mode (Cpu Mask)
Attention: Switch command is executed immediately <SPACE> Confirm selected monitor OR keyboard/mouse assignment (for CPU /User Port at cursor position). Attention: Switch command is executed immediately <F1> Switch to ‚CON Ports’ Mask <ESC> Return to Select Menu Orion Installation and Operations Manual... -
Page 37: Switching Using A Browser / Web Interface
Similar masks are generated and displayed. Switching using a Serial Interface The Orion™ provides full Crosspoint switching functionality via Serial Interface. Serial switching commands allow switching of video only, K/M only and bidirectional switching. Additional Commands allow loading, saving and defining the complete switch matrix in one step. -
Page 38: Operating Modes - Overview
OPERATING MODES Operating modes - Overview The Orion™ provides full flexibility for configuration of your Switch environment. One part can be configured as Single-Head Ports, another part as Dual-Head- or even Quad-Head Ports. You can also mix configurations of KVM and USB2.0 ports. -
Page 39: Dual-Head Kvm Switch Mode
Dual-Head KVM-Switch To configure the Orion unit to support dual head computers, both the CPU port and CON port OSD must be configured for dual head support. Display the main OSD menu and select the Configuration OSD (Fig 3 & 5). -
Page 40: Quad - Head Kvm Switch Mode
Quad-Head KVM-Switch To configure the Orion unit to support Quad head computers, both the CPU port and CON port OSD must be configured for quad head support. Display the main OSD menu and select the Configuration OSD (Fig 3 & 5). -
Page 41: Single - Head Kvm Switch / Usb 2.0 Mode
From a Single-Head KVM/USB2.0 Port you might also access a Triple-Head KVM/USB2.0 CPU. Operation, however, is limited to the first monitor in this case. If you access a CPU without related USB Port, your USB periphery will not be available. Orion Installation and Operations Manual... -
Page 42: Devices With Serial/Audio Option
‘Line Out’ connection should then be wired to ‘Line In’ (blue) on your sound card. If your microphone is already amplified, follow the second method but DO NOT install the amplification jumper in the Remote Unit. Orion Installation and Operations Manual... -
Page 43: Service Information
Houston, Texas 77099 USA Technical Support If you are experiencing problems, or need assistance in setting up, configuring or operating your Orion unit, consult the appropriate sections of this manual. If, however, you require additional information or assistance, please contact... - Page 44 SAFETY The Orion has been tested for conformance to safety regulations and requirements, and has been certified for international use. Like all electronic equipment, the Orion should be used with care. To protect yourself from possible injury and to minimize the risk of damage to the Unit, read and follow these safety instructions.
- Page 45 Servicing There are no user-serviceable parts inside these products. Only service-trained personnel must perform any servicing, maintenance, or repair. The user may adjust only items mentioned in this manual. Orion Installation and Operations Manual...
-
Page 46: Troubleshooting
Hint: Use a lower resolution or a background which can be compressed better: Please avoid photo-backgrounds or color gradient – single-colored backgrounds are optimal and permit highest possible compression rates and highest frame rates. Orion Installation and Operations Manual... -
Page 47: Appendix A - General Specifications
2 x 3.5mm stereo jack socket (Line/Mic In & Line Out) Microphone Support: A microphone may be connected to the Remote Unit. A pull-up resistor provides bias for condenser microphone. Option to set microphone amplification to +17dB Orion Installation and Operations Manual... -
Page 48: Appendix B - Part Numbers
Audio / Serial Option Transmitters – Singlemode Fiber ORR-DLDFS0D1D Transmitter, Video only, Fiber Singlemode ORR-DLDFSHD1D Transmitter, KVM, DVI, USB HID, Single-head, Fiber Singlemode ORR-DLDFSHD2D Transmitter, KVM, DVI, USB HID, Dual-head, Fiber Singlemode /AUD Audio / Serial Option Orion Installation and Operations Manual... -
Page 49: Appendix C - Ddc / Color Depth Set-Up (Local Unit)
The DDC information of the remote monitors is read automatically, transferred to the Local Unit and stored into the DDC-EPROM. After a successful reprogramming, the Video-OK’ LED at the Local Unit blinks rapidly for approx. 1 second. Orion Installation and Operations Manual... - Page 50 JP1, JP2, JP3 Location JP1, JP2, JP3 Moment to Switch Switching during HSYNC (Default) Higher frame rate but (possibly) horizontal breaks detectable Switching during VSYNC Lower frame rate, no horizontal breaks detectable but (possibly) stepping pictures. Orion Installation and Operations Manual...
-
Page 51: Appendix D - Serial Switching Commands
Appendix D – Serial switching commands Using the serial interface, the whole switch matrix of the Orion™ Switch can be controlled. The functionality corresponds to the Switching in OSD / Crosspoint Mode. Optionally, the Unit echoes all executed switch commands via either the serial interface or the network interface. By means of this echo, the actual switch status of the switch can be monitored at any time and user applications can be realized based on this echo. - Page 52 CON Ports available, requires 16x 0x80! All CPU Ports Output off STX, 0x4E, ETX ACK, ECHO Establish Bidi- STX, 0x4F, ACK, ECHO Connection <CON#>, CON# ⇔ CPU# <CPU#>, ETX Disconnect CON# STX, 0x50, ACK, ECHO <CON#>, ETX Orion Installation and Operations Manual...
- Page 53 Complete Setup) Assignment of Configuration Files to Telegram Configuration Files Config File No Configuration Files Config File No Default.sys 0x80 Config05.sys 0x85 Config01.sys 0x81 Config06.sys 0x86 Config02.sys 0x82 Config07.sys 0x87 Config03.sys 0x83 Config08.sys 0x88 Config04.sys 0x84 Orion Installation and Operations Manual...
-
Page 54: Appendix E - Programming Macros
Save current configuration in Configuration File P1 Logout 1) Number of CON Port (0 = own CON Port). VAL2 2) Number of Configuration File (0 = Default 1) Number of CPU Port to be connected with CON Port P1. VAL2 Orion Installation and Operations Manual... - Page 55 Line up <Cursor down> Line down <Tab> Next field <Shift> + <Tab> Previous field <-> Select next function <+> Select previous function <RETURN> Apply and save macros in current configuration <ESC> Back to upper Menu Orion Installation and Operations Manual...
-
Page 56: Appendix F - Cascading Units
Appendix F – Cascading units The Orion Unit can be cascaded to other Orion units to increase the number of connected computers to a maximum of 1024 connected computers. To cascade the units: 1. Connect the computers DVI video and USB ports to the transmitters configured for your application. -
Page 57: Appendix G - Synchronize Switching
Appendix G – Synchronize Switching The synchronize switching feature of the Orion unit allows you to switch one or more Orion units to the same port automatically. Once configured, the port switching command issued to the Orion master unit will be sent to one or more Orion secondary units. - Page 58 11. Save the information and restart (power cycle) the Secondary Orion Unit With these settings, the “Master” Orion unit will send the port switching command to all connected “Secondary” units. Switching commands can be issued from the OSD or the keyboard.
-
Page 59: Appendix H - Change Initialization Command
1: <SHIFT> + <SHIFT> + <I> simultaneous 2: Double-click < Scroll lock > 3: Double-click <LEFT SHIFT> 4: Double-click < LEFT CTRL> 5: Double-click < LEFT ALT> 6: Double-click <RIGHT SHIFT> 7: Double-click < RIGHT CTRL> 8: Double-click < RIGHT ALT> Orion Installation and Operations Manual...
Need help?
Do you have a question about the ORION and is the answer not in the manual?
Questions and answers